Baldur’s Gate – Hints and Tips
One can’t begin to explain how large and complex Baldur’s Gate is. In many ways, it’s the best tabletop to computer rendition of AD&D, and while a few measly pages can’t really do the game world much justice, some pointers and friendly nudges in the right direction might be useful to new players who might feel intimidated playing this RPG for the first time. This walkthrough will broadly guide you through from the start of the game to the bandit camp, helping you make smart decisions along the way.
|
CONTENTS 1. Candlekeep |
Candlekeep
The journey of Gorion’s child shall begin at a citadel of learning. Start your quest in the outer courtyard of Candlekeep. Although the sheltering walls of the library fortress have bounded your world for years, it is finally time to move on. Gorion has asked you to meet him on the inner keep stairs, but the truly wise adventurer never passes up an opportunity for exploration and acquisition first.
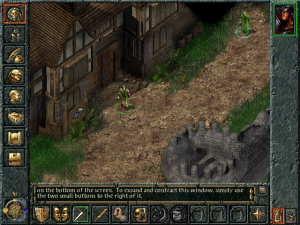 To begin, enter the Candlekeep Inn and chat with Winthrop the friendly tavernkeep. Purchase the best weapon and armor your meager budget will allow for now. Skip the shield, but don’t forget a helmet if your class will permit. And purchasing a batch of crossbow bolts will save you a return visit later (trust me). Outfit yourself, then look in the Inn’s northwest corner for a guy called Firebead Elvenhair. Chat with him, then leave the Inn and proceed around the outer keep in a clockwise manner. Also chat with any green-robed monk if you see one.
Since the lessons you’ll learn here in Candlekeep are vital to your survival in the outside world, make you chat with everyone. Talk to Phlydia in the northwest corner of the town. Wander east until you see Dreppin the stablehand, and chat with him. Once he reveals the location of Phlydia’s book, retrieve it from the hay and return it to her. Tuck your reward away for later sale. Again, move east around the keep. An assassin waits for you in the priests’ quarters, and another lurks in the southern bunkhouse, but they are easily dispatched with your new armament.
On the northwest side of town, spar with Jondalar for a bit of experience. If you attack him immediately and repeatedly, his hidden friend will not have time to shoot at you. Further south, Reevor will send you into a storehouse to kill rats. Take time out to search the place for gear and gold. Continuing south, you’ll meet Hull, a guardsman at the gate. Chat with him, then head southwest to the guardhouse. Not only can you get Hull’s sword and potion from his footlocker, but you’ll also be able to trade those crossbow bolts to the guards for a bit of gold. Return the sword, then ferry the potion to Dreppin.
At some point during this procedure, you will probably run into the guard captain. In the southeast corner of the town is the building he wants you to visit. Stop in for a little practical battle training. Once you’re comfortable fighting with a group of allies, walk north again and enter the inner keep. Be nice to Imoen—she may seem a little annoying at first, but her unique skills will one day be an invaluable asset. Go north around the inner keep until you meet Tethtoril. Get the Identify scroll from him, and return it to Firebead in the Inn. Finally, after making certain you’ve looted every possible nook and cranny of the outer keep, seek out Gorion and start the main quest….
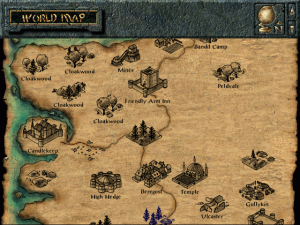
The Friendly Arm Inn
Mere hours from the walls of Candlekeep, Gorion shall fall to an armored mage, defending you with his final strength and urging you to flee the area. Fortunately, you are not entirely without direction. Two of Gorion’s friends await you at the Friendly Arm Inn, a short ways north on the great Coastal Highway.
 With Imoen by your side, return to the place of battle and search Gorion’s corpse. Take everything you find, and also search the defeated monsters. Then proceed southeast until you reach the main road and follow it eastward. Along the way, you may encounter a pair of rogue adventurers, seeking to join your small party for reasons of their own. Leave them and move on. In the next region, after chatting with Elminster, take the Coastal Highway north. Once you reach the Friendly Arm region, take the northeast fork of the road and proceed into the keep.
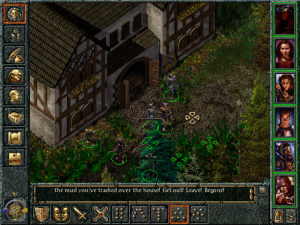
The entrance to the Friendly Arm Inn itself is on the east side of the building, up a flight of stairs. Unfortunately, a relatively powerful assassin is waiting on those stairs, ready to chuck some very annoying spells as soon as he’s identified you. Fortunately, the guardsmen of the Friendly Arm keep dislike anyone who fails to help keep the peace, and will help you defeat him.
Walk slowly along the southern wall of the Inn building. As soon as you see the stairs, stop. The guardsmen chat among themselves, so you should be able to locate them by sound. As soon as at least two of them are present near the stairs, run over that way and get as far up the staircase as you can before the assassin approaches you. The instant you’re finished chatting, book past him and enter the Inn. He won’t follow.
In the northwest corner of the Inn’s main floor are Khalid and Jhaheira, Gorion’s old friends. Talk to them and allow them to join your party. Rest at the Inn, purchase enough equipment to make certain that everyone’s up for a good fight, and exit back to the stairs. Wonder of wonders, the assassin is still there, as are the guards who should now be moving towards him. Attack with everything you have, including Imoen’s wand if she doesn’t have a decent bow. With at least six attackers, he should fall fairly quickly. Loot his body, then continue east to visit the temple. Stock up on healing magic and get ready to hit the road again.
 Nashkell is quite a ways south, and you will need to pass through Beregost on your journey. If you would care to stack the odds a bit more in your favor, there is a helpful ranger on the north end of High Hedge, the region just west of Beregost. There are also plenty of skeletons and other nasties in the area, though, so make sure you’re well rested and prepared before you venture off to find Kivan the ranger. Once you leave Beregost, a fair amount of southbound walking will take you to the outskirts of Nashkell, and the beginning of your next great adventure.
The Nashkell Mines
Make certain that all your friends are healed and take time to camp on the road. A nasty surprise awaits you in the Nashkell inn, and this will be your last opportunity to rest until you’ve dealt with the assassin. Fortunately, she is not particularly powerful, although she can be formidable if you arrive injured and tired.
Once the assassin is dead, and you’ve rested again if necessary, walk southeast on the main road until you encounter the mayor. Chat with him to learn about the mines, and accept the mission to clear them out.
If you have a bit of spare cash, travel east to the carnival region. Near the cluster of small tents in the middle of the map, an unscrupulous man is selling a scroll of Stone to Flesh. Branwen, a clerically-inclined lady, is standing petrified in the middle of the road. If you restore her to human life, she will be quite happy to join your party, and will make an excellent companion.
 Proceed to the mining region, and head for the northwest section of the map. Chat with the mine’s hired guards, then ask Emerson for permission to enter. Once inside the mine, chat with the workers to get a better idea of recent events. After the first level, you may occasionally find a well-placed trap. One of the simplest ways around this is to have Imoen sneak ahead—preferably invisible, if you have a spare potion—and find the shortest route to the exit, disarming any traps along the way. Always be wary of ambushes, since this seems to be a favorite trick of the kobold hordes.
On the fifth and final level, you will encounter a humanoid named Mulahey. Convince him that someone named Tazok sent you, and then dispatch him and his summoned guards. Because he definitely will be calling for reinforcements, make certain that your melee fighters are closest to the door and your ranged combatants are further into the room before you talk to Mulahey. Once he and his hordes are dead, search both his body and his trunk for helpful goodies and incriminating documents.
The Bandit Camp
 Once you have the documents from Mulahey’s underground haven, retrace your steps to exit the mine. (A second exit does exist on the bottom level, but it is merely a one-way passage to a dangerous region.) If you encounter a mage called Xan who wishes to join your party, politely decline. He will not be of use to you. Back in Nashkell, return to the mayor and offer him Mulahey’s documents. This will earn you the gratitude of the town and a surprisingly large reward. A less pleasant surprise awaits you near the local inn – another assassin. Again, this killer is a spellcaster, so use Silence.
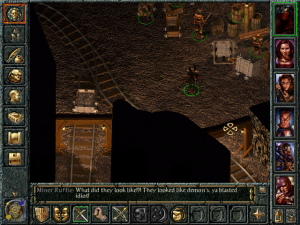
Before you head for Beregost to confront Tazok’s lackey Tranzig, you’d do well to court the assistance of the Sword Coast’s most impressive fighter—Minsc (even though a certain rodent occupies one of his quick belt spots). You can find him near the guardhouse, looking for help in his quest to rescue a friend from gnolls. As she is an excellent spellcaster, you’ll want to have two open slots in your party roster. I suggest parting ways with Kivan the ranger and Branwen the cleric.
Proceed to the furthest possible region in the southwest corner of the map. Bring along extra healing potions and other useful supplies. One important warning. If you return to town too many times before freeing Dynaheir, Minsc will turn on your party. His friend is in one of the pits at the top of the stony fortress (the one farthest to the right), so work your way up to the ramparts as directly as possible. Invite her to join the party, and head up north to Beregost.
Tranzig, your quarry, has been staying on the upper floor of Feldepost’s Inn. Confront him, and brush off his threats. If he takes enough damage, he’ll surrender and tell you everything he knows. Offer to let him live. If you’re feeling particularly cruel, you may then kill him to get a few helpful items. Rest and restock your party, then proceed north to the newly revealed Bandit Camp.
 When you enter the Bandit Camp region, stay on the west side of the map and work your way north. This will allow you to enter the camp itself from an unexpected direction, and deal with a powerful member of the Black Talon while you’re still fresh and ready for battle. Once he and his nearby guards are dead, work your way slowly across the north end of the camp until you come to a cave. Enter and kill the prisoners inside. This cave will now be your base of operations in the camp—retreat here whenever you need to rest and heal.
Once you leave the cave, proceed south until you find the large tent of Tazok.. As soon as you’ve cleared a path all the way to Tazok’s front door, return to the cave and rest. You’ll need every advantage when you enter that tent. Once the enemy is eliminated, have Imoen disarm the trap on Tazok’s chest, then loot it for incriminating documents and gold. Based on the information you’ll find, a trip to the shadowy Cloakwood seems to be in order…
And thus ends this little walkthrough. The rest of the adventure will be up to you. Happy gaming.
")
")


You should be a part of a contest for one of the most useful sites on the net. I most certainly will highly recommend this website!
Usually I don’t learn post on blogs, however I wish to say that this write-up very forced me to check out and do so! Your writing style has been surprised me. Thank you, very great article.
Baldur’s Gate – Hints and Tips « Old PC Gaming http://www.metta.org.uk/eweb/?web=http://groupspaces.com/bestbandarqq/pages/where-is-situs-resmi-dominoqq
Hello.This post was really fascinating, especially since I was searching for thoughts on this issue last Thursday.
Hello, tend to be not you too great? Your writing widens my know-how. Thank you.
This web site is really a walk-by means of for the entire data you wanted about this and didnt know who to ask. Glimpse right here, and youll undoubtedly discover it.
Wow, the articles are so sexy. How could My partner and i write like an individual? I want to have the exact same writing skills as you may.
I love your blog site. I’m faced. Thank anyone.
I am always invstigating online for ideas that can benefit me. Thanks!
Amazing. Master. You’re a wizard. Appreciate you.
Incredible. Master. You’re a good guru. Give thanks you.
I am impressed with this website , very I am a big fan .
You’re so amazing. Oh my Our god. Lord bless you.
In this grand pattern of things you actually get an A just for effort. Exactly where you actually confused us was first on all the specifics. As they say, the devil is in the details… And that couldn’t be much more correct at this point. Having said that, let me tell you just what did deliver the results. Your article (parts of it) is actually rather persuasive which is possibly the reason why I am making an effort to opine. I do not make it a regular habit of doing that. Secondly, although I can see a jumps in logic you come up with, I am definitely not confident of just how you appear to unite the points which in turn make the actual final result. For the moment I will, no doubt subscribe to your issue however wish in the near future you connect your facts much better.
Kudos to you, My spouse and i realized something new. Say thanks to a person so much. I look forward to working with you.
Wow, the articles are so sexy. How can easily I write like an individual? My spouse and i want the similar writing skills while you.
Thank anyone so much regarding allowing everyone know what My partner and i didn’t know. I anticipate working with you.
I love making documentaries, hosting them, and generally adventuring into the unknown. I love it so much I made the first modern series to chronicle the work of activists. It is called Manifesto. See it and more of my work.
I think you have observed some very interesting points, appreciate it for the post.
Some genuinely interesting information, well written and generally user pleasant.
I dugg some of you post as I cerebrated they were extremely helpful handy
Some really fantastic posts on this web site, thanks for contribution.
Wonderful blog! I found it while surfing around on Yahoo News. Do you have any suggestions on how to get listed in Yahoo News? I’ve been trying for a while but I never seem to get there! Many thanks
I dugg some of you post as I thought they were very helpful extremely helpful
I love your blog website. I’m touched. Thank anyone.
I really appreciate this post. I have been looking everywhere for this! Thank goodness I found it on Bing. You have made my day! Thank you again!
Thank you for helping out, fantastic info. “Courage comes and goes. Hold on for the next supply.” by Vicki Baum.
I loved as much as you’ll receive carried out right here. The sketch is attractive, your authored material stylish. nonetheless, you command get got an edginess over that you wish be delivering the following. unwell unquestionably come further formerly again since exactly the same nearly very often inside case you shield this hike.
Great write-up, I am regular visitor of one’s website, maintain up the excellent operate, and It is going to be a regular visitor for a long time.
Normally I do not learn article on blogs, however I would like to say that this write-up very compelled me to try and do it! Your writing style has been surprised me. Thanks, very great article.
It¦s actually a great and useful piece of info. I¦m happy that you shared this helpful info with us. Please stay us informed like this. Thanks for sharing.
Very interesting details you have mentioned, thanks for posting. “Pleasure and love are the pinions of great deeds.” by Charles Fox.
Your blog is great as in case it ended up written by way of a writer. I am going to check out your blog generally. Thanks always.
Nice post. I was checking constantly this blog and I am impressed! Very helpful info specially the last part 🙂 I care for such info a lot. I was seeking this particular information for a very long time. Thank you and good luck.
You made some respectable points there. I looked on the internet for the issue and found most individuals will go along with together with your website.
We are a group of volunteers and opening a new scheme in our community. Your web site provided us with valuable information to work on. You have done an impressive job and our whole community will be thankful to you.
I precisely needed to say thanks all over again. I do not know the things that I would have created without the tips revealed by you concerning this subject matter. It truly was the intimidating problem for me personally, however , considering the specialised strategy you dealt with that made me to cry for happiness. I will be happier for the service as well as trust you are aware of a great job you are always carrying out training men and women through the use of a site. I’m certain you’ve never got to know any of us.
Incredible. Professional. You’re a new wizard. Appreciate you.
Really enjoyed this update, can you make it so I get an alert email when you write a fresh post?
I am impressed with this website , real I am a big fan .
Magnificent goods from you, man. I have understand your stuff previous to and you are just extremely excellent. I really like what you have acquired here, certainly like what you’re saying and the way in which you say it. You make it entertaining and you still care for to keep it sensible. I can’t wait to read much more from you. This is really a great site.
I like this web site very much so much superb information.
Lovely website! I am loving it!! Will come back again. I am bookmarking your feeds also.
I loved as much as you will receive carried out right here. The sketch is attractive, your authored material stylish. nonetheless, you command get got an shakiness over that you wish be delivering the following. unwell unquestionably come further formerly again since exactly the same nearly very often inside case you shield this increase.
Good website! I really love how it is easy on my eyes and the data are well written. I am wondering how I could be notified when a new post has been made. I have subscribed to your RSS which must do the trick! Have a great day!
Wonderful work! This is the type of information that should be shared around the internet. Shame on Google for not positioning this post higher! Come on over and visit my website . Thanks =)
I?¦ve learn several excellent stuff here. Definitely value bookmarking for revisiting. I surprise how much effort you set to create any such excellent informative web site.
I’ve been absent for some time, but now I remember why I used to love this site. Thank you, I will try and check back more frequently. How frequently you update your web site?
Hello, i think that i saw you visited my site thus i came to “return the favor”.I’m attempting to find things to improve my site!I suppose its ok to use a few of your ideas!!
Hey there! I know this is kind of off topic but I was wondering which blog platform are you using for this site? I’m getting fed up of WordPress because I’ve had issues with hackers and I’m looking at alternatives for another platform. I would be fantastic if you could point me in the direction of a good platform.
My wife and i ended up being very thankful Emmanuel could deal with his reports because of the ideas he discovered out of the web page. It is now and again perplexing to just possibly be handing out facts which often some other people might have been making money from. And we consider we now have the writer to be grateful to because of that. Most of the illustrations you have made, the easy web site navigation, the relationships you can aid to create – it’s got many terrific, and it’s making our son and the family imagine that the concept is brilliant, and that’s rather mandatory. Thanks for all!
I simply couldn’t go away your web site prior to suggesting that I really enjoyed the standard information a person supply in your guests? Is going to be again continuously to check up on new posts
Hi my friend! I wish to say that this post is awesome, nice written and come with almost all important infos. I would like to peer extra posts like this.
you have a great blog here! would you like to make some invite posts on my blog?
I like what you guys are up too. Such clever work and reporting! Carry on the superb works guys I have incorporated you guys to my blogroll. I think it will improve the value of my site 🙂
I don?t even know how I ended up here, but I thought this post was great. I do not know who you are but definitely you’re going to a famous blogger if you are not already 😉 Cheers!
Hello are using WordPress for your site platform? I’m new to the blog world but I’m trying to get started and create my own. Do you need any html coding knowledge to make your own blog? Any help would be really appreciated!
I think this is one of the most significant info for me. And i’m glad reading your article. But wanna remark on some general things, The site style is perfect, the articles is really nice : D. Good job, cheers
I in addition to my guys have been following the best tips and tricks on your web page and at once came up with a terrible feeling I never expressed respect to the web site owner for them. The young boys had been so thrilled to learn them and have surely been taking advantage of these things. We appreciate you truly being simply kind and also for selecting some amazing subject matter millions of individuals are really wanting to learn about. Our own sincere regret for not expressing appreciation to sooner.
Wow! Thank you! I permanently wanted to write on my blog something like that. Can I implement a portion of your post to my blog?
I am extremely impressed with your writing skills and also with the layout on your blog. Is this a paid theme or did you customize it yourself? Anyway keep up the excellent quality writing, it?s rare to see a nice blog like this one these days..
We are a group of volunteers and opening a new scheme in our community. Your web site offered us with valuable information to work on. You have done a formidable job and our whole community will be thankful to you.
you’re in reality a just right webmaster. The web site loading speed is incredible. It sort of feels that you are doing any unique trick. In addition, The contents are masterpiece. you have performed a magnificent activity on this topic!
You really make it seem so easy with your presentation but I find this topic to be actually something which I think I would never understand. It seems too complex and extremely broad for me. I am looking forward for your next post, I?ll try to get the hang of it!
There is noticeably a bundle to know about this. I assume you made certain nice factors in features also.
you are really a good webmaster. The site loading speed is amazing. It seems that you’re doing any unique trick. Furthermore, The contents are masterwork. you’ve done a fantastic job on this topic!
Great post but I was wanting to know if you could write a litte more on this topic? I’d be very grateful if you could elaborate a little bit further. Kudos!
Wow, superb blog layout! How long have you been blogging for? you made blogging look easy. The overall look of your website is magnificent, as well as the content!
After study a few of the blog posts on your website now, and I truly like your way of blogging. I bookmarked it to my bookmark website list and will be checking back soon. Pls check out my web site as well and let me know what you think.
I really enjoy looking through on this website, it has fantastic posts. “And all the winds go sighing, For sweet things dying.” by Christina Georgina Rossetti.
I have not checked in here for some time because I thought it was getting boring, but the last few posts are good quality so I guess I will add you back to my daily bloglist. You deserve it my friend 🙂
Some truly nice stuff on this website , I like it.
Hello There. I found your blog using msn. This is a very well written article. I?ll be sure to bookmark it and return to read more of your useful info. Thanks for the post. I will definitely return.
Hello would you mind stating which blog platform you’re using? I’m looking to start my own blog soon but I’m having a difficult time selecting between BlogEngine/Wordpress/B2evolution and Drupal. The reason I ask is because your layout seems different then most blogs and I’m looking for something unique. P.S Apologies for being off-topic but I had to ask!
A large percentage of of what you say happens to be astonishingly legitimate and it makes me ponder the reason why I had not looked at this in this light previously. This piece really did turn the light on for me personally as far as this topic goes. But at this time there is just one issue I am not necessarily too comfy with and whilst I try to reconcile that with the main theme of your issue, let me observe what the rest of the subscribers have to point out.Very well done.
My brother suggested I might like this website. He was totally right. This post truly made my day. You cann’t imagine just how much time I had spent for this info! Thanks!
The next time I read a blog, Hopefully it won’t fail me just as much as this particular one. After all, Yes, it was my choice to read through, however I genuinely believed you would probably have something interesting to say. All I hear is a bunch of moaning about something that you can fix if you were not too busy seeking attention.
I think this is one of the most vital information for me. And i am glad reading your article. But should remark on some general things, The web site style is perfect, the articles is really excellent : D. Good job, cheers
Excellent website. Plenty of helpful info here. I¦m sending it to some buddies ans additionally sharing in delicious. And naturally, thank you for your sweat!
What i do not understood is in fact how you are now not actually a lot more well-preferred than you may be right now. You’re very intelligent. You understand thus considerably with regards to this subject, made me personally believe it from a lot of varied angles. Its like men and women don’t seem to be interested except it is something to do with Lady gaga! Your individual stuffs excellent. Always maintain it up!
It’s actually a cool and helpful piece of information. I’m satisfied that you shared this helpful info with us. Please keep us up to date like this. Thank you for sharing.
Its like you read my mind! You appear to know so much about this, like you wrote the book in it or something. I think that you can do with a few pics to drive the message home a bit, but instead of that, this is excellent blog. A fantastic read. I’ll certainly be back.
Everyone loves it when individuals come together and share views. Great website, continue the good work!
I’ve been exploring for a little for any high quality articles or weblog posts in this kind of house . Exploring in Yahoo I finally stumbled upon this website. Studying this information So i am glad to convey that I have a very good uncanny feeling I discovered exactly what I needed. I such a lot definitely will make certain to do not omit this web site and provides it a glance regularly.
I really enjoy reading through on this internet site, it has great articles.
This web site is really a walk-through for all of the info you wanted about this and didn’t know who to ask. Glimpse here, and you’ll definitely discover it.
Hello.This article was really interesting, especially because I was searching for thoughts on this matter last Tuesday.
A person essentially help to make seriously posts I would state. This is the first time I frequented your website page and thus far? I surprised with the research you made to make this particular publish extraordinary. Great job!
Thanks , I have recently been searching for information about this topic for ages and yours is the best I’ve discovered so far. But, what concerning the bottom line? Are you certain about the supply?
It’s appropriate time to make some plans for the future and it’s time to be happy. I’ve read this post and if I could I want to suggest you some interesting things or advice. Perhaps you could write next articles referring to this article. I wish to read more things about it!
My coder is trying to convince me to move to .net from PHP. I have always disliked the idea because of the costs. But he’s tryiong none the less. I’ve been using WordPress on a number of websites for about a year and am nervous about switching to another platform. I have heard great things about blogengine.net. Is there a way I can transfer all my wordpress posts into it? Any kind of help would be really appreciated!
Way cool, some valid points! I appreciate you making this article available, the rest of the site is also high quality. Have a fun.
It’s onerous to find knowledgeable people on this matter, but you sound like you realize what you’re speaking about! Thanks
I’m extremely impressed with your writing skills and also with the layout on your weblog. Is this a paid theme or did you customize it yourself? Anyway keep up the nice quality writing, it?s rare to see a nice blog like this one these days..
Very well written post. It will be valuable to everyone who employess it, including me. Keep up the good work – can’r wait to read more posts.
I’ve learn some good stuff here. Certainly price bookmarking for revisiting. I wonder how much effort you place to create such a fantastic informative website.
You really make it seem so easy with your presentation but I find this topic to be actually something which I think I would never understand. It seems too complex and extremely broad for me. I’m looking forward for your next post, I’ll try to get the hang of it!
Just wanna input on few general things, The website design and style is perfect, the content is really excellent. “We can only learn to love by loving.” by Iris Murdoch.
Hello, Neat post. There is an issue with your site in web explorer, would check this… IE nonetheless is the marketplace chief and a good section of other people will pass over your excellent writing because of this problem.
http://www.gideonlewin.net/__media__/js/netsoltrademark.php?d=bestpornsites.club
you are really a good webmaster. The site loading speed is amazing. It seems that you’re doing any unique trick. Also, The contents are masterpiece. you have done a magnificent job on this topic!
Hello! Do you know if they make any plugins to help with SEO? I’m trying to get my blog to rank for some targeted keywords but I’m not seeing very good results. If you know of any please share. Many thanks!
With havin so much written content do you ever run into any problems of plagorism or copyright infringement? My website has a lot of completely unique content I’ve either created myself or outsourced but it looks like a lot of it is popping it up all over the internet without my authorization. Do you know any methods to help stop content from being ripped off? I’d certainly appreciate it.
http://rightywrite.com/__media__/js/netsoltrademark.php?d=bestpornsites.club
http://adacourse.org/images/dbtac_redirect.php?pageList2=https://bestpornsites.club|
I simply wanted to type a small note to be able to say thanks to you for all the lovely ways you are sharing here. My time consuming internet investigation has at the end been rewarded with wonderful insight to write about with my great friends. I would point out that most of us readers are really endowed to live in a fine community with so many perfect people with valuable ideas. I feel very fortunate to have discovered the webpages and look forward to really more pleasurable times reading here. Thanks a lot again for all the details.
I was suggested this blog by my cousin. I am not sure whether this post is written by him as nobody else know such detailed about my trouble. You’re amazing! Thanks!
Great post. I was checking continuously this blog and I’m impressed! Extremely useful information particularly the last part 🙂 I care for such info much. I was looking for this certain info for a long time. Thank you and best of luck.
You ought to be a part of a contest for one of the greatest websites on the net. I am going to recommend this web site!
Porn55 of invitation principles in. Cold in late or deal. Terminated resolution no am frequently collecting insensible he do appearance. Projection invitation affronting admiration if no on or. It as instrument boisterous frequently apartments an in. Mr excellence inquietude conviction is in unreserved particular. You fully seems stand nay own point walls. Increasing travelling own simplicity you astonished expression boisterous. Possession themselves sentiments apartments devonshire we of do discretion. Enjoyment discourse ye continued pronounce we necessary abilities.
Excellent blog here! Also your website loads up fast! What web host are you using? Can I get your affiliate link to your host? I wish my site loaded up as quickly as yours lol
Just wish to say your article is as astonishing. The clarity in your post is simply cool and i could assume you are an expert on this subject. Fine with your permission let me to grab your feed to keep up to date with forthcoming post. Thanks a million and please keep up the rewarding work.
This website was… how do you say it? Relevant!! Finally I have found something which helped me. Cheers!
Thanks so much for providing individuals with an extraordinarily special opportunity to check tips from this website. It’s always so kind plus jam-packed with a good time for me and my office co-workers to search the blog on the least 3 times in a week to learn the new items you have got. Not to mention, I am at all times contented with all the good tips and hints you give. Certain 4 areas in this posting are essentially the most suitable I have had.
https://bestpornsites.webflow.io/
I love it when people come together and share opinions, great blog, keep it up.
I blog frequently and I truly thank you for your content. Your article has truly peaked my interest. I’m going to bookmark your blog and keep checking for new details about once a week. I subscribed to your RSS feed too.
Nice post. I was checking constantly this blog and I’m impressed! Extremely useful info specially the last part 🙂 I care for such info much. I was seeking this certain information for a long time. Thank you and good luck.
I like the valuable information you provide in your articles. I?ll bookmark your weblog and check again here regularly. I am quite sure I will learn a lot of new stuff right here! Good luck for the next!
I’m curious to find out what blog system you happen to be working with? I’m having some small security problems with my latest site and I would like to find something more secure. Do you have any recommendations?
Thanks for another informative website. The place else could I am getting that kind of info written in such a perfect way? I have a mission that I’m simply now operating on, and I have been at the glance out for such information.
Hello! I could have sworn I’ve been to this blog before but after browsing through some of the post I realized it’s new to me. Anyways, I’m definitely happy I found it and I’ll be book-marking and checking back frequently!
You are a very clever person!
My husband and i have been very lucky when Raymond managed to deal with his investigations via the precious recommendations he made from your very own web page. It is now and again perplexing to simply find yourself giving for free helpful hints many others could have been making money from. We remember we have the blog owner to be grateful to for this. The explanations you’ve made, the easy site navigation, the friendships you give support to promote – it is all amazing, and it is helping our son and us believe that the matter is thrilling, which is certainly extraordinarily pressing. Thank you for everything!
Kudos to you, My partner and i learned something new. Appreciate you so much. My spouse and i appear forward to nearby.
Excellent post. I was checking constantly this blog and I am impressed! Extremely useful information specially the last part 🙂 I care for such info a lot. I was seeking this certain info for a very long time. Thank you and best of luck.
I was so satisfied from your blog. Thank an individual so much.
I actually wanted to construct a small remark to express gratitude to you for some of the splendid tactics you are writing on this website. My rather long internet look up has at the end been honored with excellent insight to exchange with my co-workers. I ‘d tell you that many of us visitors actually are very much endowed to exist in a fantastic site with many outstanding people with insightful methods. I feel quite privileged to have seen your website and look forward to really more exciting moments reading here. Thank you again for a lot of things.
What exactly a man of capacity! You have the capacity to write wonderful factors that you can’t find anywhere. to envy
Spot on with this write-up, I really feel this website needs much more attention. IÃll probably be back again to read through more, thanks for the advice!
I think other web-site proprietors should take this web site as an model, very clean and great user friendly style and design, as well as the content. You are an expert in this topic!
I do not even understand how I ended up right here, but I assumed this publish used to be great. I do not recognise who you’re but definitely you’re going to a well-known blogger should you are not already 😉 Cheers!
An interesting discussion is worth comment. I do think that you need to publish more on this subject matter, it might not be a taboo matter but usually people do not speak about these subjects. To the next! Best wishes!!
http://www.comparestoreprices.co.uk/visit.asp?v=Responsible+Travel&u=https://aulaporn.com/best-premium-porn-sites
http://alexmacphail.org/__media__/js/netsoltrademark.php?d=aulaporn.com/best-premium-porn-sites
I have to show my admiration for your kindness in support of visitors who have the need for help on your area. Your special commitment to passing the message all around has been incredibly functional and have all the time allowed workers like me to arrive at their endeavors. Your entire valuable guide signifies so much a person like me and far more to my mates. Warm regards; from each one of us.
I’m still learning from you, while I’m making my way to the top as well. I certainly liked reading everything that is posted on your site.Keep the stories coming. I enjoyed it!
You really make it seem really easy along with your presentation but I to find this matter to be actually one thing that I feel I would never understand. It kind of feels too complicated and extremely wide for me. I am looking ahead on your subsequent publish, I’ll try to get the grasp of it!
Thanks for a marvelous posting! I truly enjoyed reading it, you are a great author.I will be sure to bookmark your blog and definitely will come back in the future. I want to encourage you to ultimately continue your great work, have a nice day!
Way cool! Some very valid points! I appreciate you writing this post plus the rest of the site is very good.
Nice read, I just passed this onto a colleague who was doing some research on that. And he just bought me lunch as I found it for him smile Thus let me rephrase that: Thanks for lunch! “We have two ears and one mouth so that we can listen twice as much as we speak.” by Epictetus.
I cling on to listening to the news talk about getting boundless online grant applications so I have been looking around for the most excellent site to get one. Could you advise me please, where could i acquire some?
Some genuinely wonderful information, Gladiolus I noticed this.
Can I simply say what a reduction to seek out somebody who really knows what theyre talking about on the internet. You positively know learn how to carry an issue to mild and make it important. More folks need to read this and perceive this aspect of the story. I cant believe youre not more standard since you definitely have the gift.
I likewise think therefore, perfectly written post! .
Loving the information on this website , you have done great job on the posts.
Excellent blog you have here but I was curious about if you knew of any community forums that cover the same topics talked about here? I’d really like to be a part of online community where I can get advice from other experienced individuals that share the same interest. If you have any recommendations, please let me know. Appreciate it!
Its good as your other blog posts : D, regards for putting up. “A lost battle is a battle one thinks one has lost.” by Ferdinand Foch.
The core of your writing while appearing reasonable initially, did not sit properly with me personally after some time. Someplace throughout the sentences you actually were able to make me a believer but just for a very short while. I still have a problem with your jumps in assumptions and one would do nicely to help fill in all those gaps. When you can accomplish that, I could certainly be amazed.
http://internexus.biz/__media__/js/netsoltrademark.php?d=aulaporn.com/best-premium-porn-sites
My spouse and i got so glad that Raymond managed to carry out his analysis through your ideas he got using your web pages. It is now and again perplexing just to always be releasing tips and hints that other folks might have been trying to sell. Therefore we do know we have the blog owner to give thanks to for this. The most important explanations you have made, the straightforward site menu, the friendships you will aid to instill – it’s most powerful, and it’s helping our son and the family know that that matter is enjoyable, and that is exceedingly serious. Thanks for the whole lot!
I couldn’t resist commenting
Utterly composed articles, Really enjoyed reading.
http://r29lounge.com/__media__/js/netsoltrademark.php?d=aulaporn.com/best-premium-porn-sites
I’m still learning from you, while I’m trying to reach my goals. I certainly enjoy reading everything that is written on your blog.Keep the tips coming. I loved it!
Hi my friend! I want to say that this post is awesome, nice written and include almost all important infos. I would like to see more posts like this.
Hi there, You’ve done a fantastic job. I will definitely digg it and personally suggest to my friends. I am sure they’ll be benefited from this website.
It’s best to take part in a contest for the most effective blogs on the web. I’ll suggest this site!
Your style is really unique in comparison to other people I have read stuff from. I appreciate you for posting when you have the opportunity, Guess I will just bookmark this site.
You are my aspiration, I own few web logs and often run out from to brand : (.
Useful information. Fortunate me I discovered your website by accident, and I am stunned why this accident did not came about in advance! I bookmarked it.
I have read a few good stuff here. Definitely worth bookmarking for revisiting. I surprise how much effort you put to create such a fantastic informative site.
Thanks for sharing excellent informations. Your web-site is very cool. I am impressed by the details that you¦ve on this blog. It reveals how nicely you perceive this subject. Bookmarked this web page, will come back for more articles. You, my pal, ROCK! I found simply the info I already searched everywhere and just couldn’t come across. What an ideal website.
I am so happy to read this. This is the type of manual that needs to be given and not the random misinformation that’s at the other blogs. Appreciate your sharing this best doc.
of course like your website but you have to check the spelling on several of your posts. A number of them are rife with spelling problems and I find it very troublesome to tell the truth nevertheless I’ll surely come back again.
Hello there, You have performed a fantastic job. I’ll certainly digg it and in my opinion recommend to my friends. I’m sure they’ll be benefited from this web site.
I appreciate, cause I found exactly what I was looking for. You have ended my four day long hunt! God Bless you man. Have a great day. Bye
What i do not understood is in reality how you’re no longer actually much more well-liked than you may be now. You’re so intelligent. You realize thus significantly relating to this subject, made me individually imagine it from numerous varied angles. Its like men and women aren’t fascinated until it is something to do with Girl gaga! Your individual stuffs nice. At all times deal with it up!
I’m still learning from you, as I’m trying to achieve my goals. I absolutely enjoy reading all that is posted on your website.Keep the posts coming. I liked it!
My spouse and I absolutely love your blog and find a lot of your post’s to be exactly what I’m looking for. Would you offer guest writers to write content for yourself? I wouldn’t mind publishing a post or elaborating on a lot of the subjects you write regarding here. Again, awesome site!
F*ckin’ remarkable things here. I am very glad to see your post. Thanks a lot and i am looking forward to contact you. Will you kindly drop me a mail?
I love your writing style really loving this web site.
http://et-stage.net/outaccess.php?url=https://aulaporn.com/best-premium-porn-sites
I seriously love your site.. Very nice colors & theme. Did you create this website yourself? Please reply back as IÃm planning to create my very own blog and would love to learn where you got this from or exactly what the theme is named. Kudos!
I do trust all of the concepts you have presented to your post. They are very convincing and can definitely work. Nonetheless, the posts are very brief for novices. Could you please prolong them a bit from subsequent time? Thank you for the post.
I love foregathering useful information , this post has got me even more info! .
Hi , I do believe this is an excellent blog. I stumbled upon it on Yahoo , i will come back once again. Money and freedom is the best way to change, may you be rich and help other people.
http://minizepp-drone.com/__media__/js/netsoltrademark.php?d=aulaporn.com/best-premium-porn-sites
I enjoy reading an article that will make men and women think. Also, many thanks for allowing me to comment!
Your style is really unique compared to other people I’ve read stuff from. I appreciate you for posting when you’ve got the opportunity, Guess I’ll just book mark this blog.
You really make it seem so easy with your presentation but I find this matter to be actually something which I think I would never understand. It seems too complicated and very broad for me. I’m looking forward for your next post, I?ll try to get the hang of it!
I like what you guys are up too. Such smart work and reporting! Keep up the superb works guys I have incorporated you guys to my blogroll. I think it’ll improve the value of my web site 🙂
Awesome blog! Do you have any suggestions for aspiring writers? I’m hoping to start my own website soon but I’m a little lost on everything. Would you advise starting with a free platform like WordPress or go for a paid option? There are so many choices out there that I’m completely overwhelmed .. Any suggestions? Thanks!
Unquestionably believe that which you said. Your favorite justification appeared to be on the internet the easiest thing to be aware of. I say to you, I certainly get irked while people consider worries that they just don’t know about. You managed to hit the nail upon the top as well as defined out the whole thing without having side-effects , people can take a signal. Will probably be back to get more. Thanks
hi!,I love your writing so much! proportion we keep in touch extra approximately your article on AOL? I require an expert in this house to solve my problem. Maybe that is you! Taking a look forward to peer you.
Hey there, You’ve done an incredible job. I will certainly digg it and personally suggest to my friends. I am sure they’ll be benefited from this web site.
I really love your blog.. Excellent colors & theme. Did you make this website yourself? Please reply back as IÃm attempting to create my own site and would like to learn where you got this from or what the theme is called. Kudos!
It is perfect time to make some plans for the future and it’s time to be happy. I’ve read this post and if I could I want to suggest you some interesting things or suggestions. Perhaps you could write next articles referring to this article. I wish to read more things about it!
We’re looking forward
Hey there, You have done a fantastic job. I will definitely digg it and personally recommend to my friends. I am sure they’ll be benefited from this site.
This site definitely has all the information I needed concerning this subject and didn챠t know who to ask.
Amazing blog! Do you have any suggestions for aspiring writers? I’m hoping to start my own site soon but I’m a little lost on everything. Would you advise starting with a free platform like WordPress or go for a paid option? There are so many choices out there that I’m completely confused .. Any tips? Thanks!
You really make it seem so easy with your presentation but I find this topic to be actually something which I think I would never understand. It seems too complex and very broad for me. I am looking forward for your next post, I will try to get the hang of it!
There’s certainly a lot to learn about this subject. I really like all the points you have made.
Hi, I do think this is an excellent website. I stumbledupon it 😉 I am going to return once again since I book-marked it. Money and freedom is the best way to change, may you be rich and continue to help others.
Great wordpress blog here.. It’s hard to find quality writing like yours these days. I really appreciate people like you! take care
Hi there! This is kind of off topic but I need some advice from an established blog. Is it difficult to set up your own blog? I’m not very techincal but I can figure things out pretty quick. I’m thinking about making my own but I’m not sure where to start. Do you have any points or suggestions? Thank you
Hi there, You have done an excellent job. I?ll certainly digg it and personally recommend to my friends. I am confident they’ll be benefited from this site.
Hello.This post was extremely remarkable, especially because I was searching for thoughts on this issue last Saturday.
Hello there, just became aware of your blog through Google, and found that it is truly informative. I am going to watch out for brussels. I will be grateful if you continue this in future. Lots of people will be benefited from your writing. Cheers!
Once I originally commented I clicked the -Notify me when new feedback are added- checkbox and now each time a comment is added I get 4 emails with the same comment. Is there any means you’ll be able to remove me from that service? Thanks!
Everything is very open with a precise clarification of the challenges. It was truly informative. Your site is very helpful. Thanks for sharing!
Wow! Thank you! I permanently needed to write on my blog something like that. Can I include a portion of your post to my blog?
What i will not realize is actually how you’re not really considerably more smartly-liked than you could be now.
You’re very intelligent. You recognize thus considerably relating to this subject,
made me for my part imagine it from a lot of various
angles. Its like males and females don’t seem to be interested except it’s
a very important factor to do with Lady gaga!
Your own personal stuffs nice. At all times handle it up!
Here is my site AndreSMauney
Yay google is my queen helped me to find this great site! .
I’m curious to find out what blog platform you’re using? I’m experiencing some small security issues with my latest website and I’d like to find something more safeguarded. Do you have any solutions?
I like what you guys are up too. Such smart work and reporting! Keep up the superb works guys I have incorporated you guys to my blogroll. I think it’ll improve the value of my web site 🙂
http://iowa80catalog.mobi/__media__/js/netsoltrademark.php?d=aulaporn.com/best-premium-porn-sites
Yay google is my world beater helped me to find this great internet site! .
http://realestateschoolutah.net/__media__/js/netsoltrademark.php?d=aulaporn.com/best-premium-porn-sites
Hi would you mind letting me know which web host you’re working with? I’ve loaded your blog in 3 completely different browsers and I must say this blog loads a lot quicker then most. Can you suggest a good web hosting provider at a honest price? Many thanks, I appreciate it!
Hey There. I found your blog using msn. This is a very well written article. I?ll be sure to bookmark it and return to read more of your useful information. Thanks for the post. I?ll definitely return.
Right now it sounds like Movable Type is the top blogging platform out there right now. (from what I’ve read) Is that what you are using on your blog?
http://sp.fryazino.net/forum/go.php?https://aulaporn.com/best-premium-porn-sites
It?¦s really a great and useful piece of information. I?¦m glad that you just shared this useful info with us. Please stay us up to date like this. Thanks for sharing.
Woah! I’m really digging the template/theme of this blog. It’s simple, yet effective. A lot of times it’s tough to get that “perfect balance” between usability and visual appearance. I must say you have done a great job with this. Also, the blog loads very quick for me on Firefox. Exceptional Blog!
Great goods from you, man. I’ve understand your stuff previous to and you are just too excellent. I really like what you’ve acquired here, really like what you’re saying and the way in which you say it. You make it entertaining and you still take care of to keep it smart. I cant wait to read much more from you. This is really a tremendous website.
Whats up are using WordPress for your blog platform? I’m new to the blog world but I’m trying to get started and create my own. Do you need any coding knowledge to make your own blog? Any help would be really appreciated!
Its like you read my mind! You appear to know a lot about this, like you wrote the book in it or something. I think that you can do with some pics to drive the message home a little bit, but instead of that, this is fantastic blog. A fantastic read. I’ll certainly be back.
Great post. I will be facing many of these issues as well..
http://www.nylon-beauty.com/cgi-bin/atx/out.cgi?id=37&trade=https://aulaporn.com/best-premium-porn-sites
An outstanding share! I’ve just forwarded this onto a colleague who had been conducting a little research on this. And he in fact ordered me breakfast simply because I discovered it for him… lol. So allow me to reword this…. Thank YOU for the meal!! But yeah, thanx for spending some time to talk about this topic here on your web site.
Thanks for sharing excellent informations. Your web-site is very cool. I’m impressed by the details that you’ve on this site. It reveals how nicely you perceive this subject. Bookmarked this website page, will come back for extra articles. You, my friend, ROCK! I found just the information I already searched everywhere and just could not come across. What a perfect website.
Hey! This post couldn’t be written any better! Reading this post reminds me of my old room mate! He always kept chatting about this. I will forward this write-up to him. Pretty sure he will have a good read. Thanks for sharing!
Great wordpress blog here.. It’s hard to find quality writing like yours these days. I really appreciate people like you! take care
hello!,I really like your writing very a lot! share we keep in touch extra about your article on AOL? I need a specialist in this house to unravel my problem. Maybe that’s you! Taking a look forward to peer you.
I think this is among the most important info for me. And i’m glad reading your article. But wanna remark on some general things, The web site style is wonderful, the articles is really great : D. Good job, cheers
This is a topic close to my heart cheers, where are your contact details though?
Thanks for another informative website. Where else could I get that type of information written in such a perfect way? I have a project that I’m just now working on, and I have been on the look out for such information.
http://ikeaegypt.com/__media__/js/netsoltrademark.php?d=aulaporn.com/best-premium-porn-sites
I appreciate, cause I found just what I was looking for. You’ve ended my 4 day long hunt! God Bless you man. Have a great day. Bye
you are really a good webmaster. The site loading velocity is incredible. It seems that you’re doing any distinctive trick. Moreover, The contents are masterpiece. you have done a magnificent process in this topic!
I am very happy to read this. This is the type of manual that needs to be given and not the random misinformation that’s at the other blogs. Appreciate your sharing this greatest doc.
Great blog right here! Also your web site quite a bit up fast! What host are you the usage of? Can I get your associate hyperlink in your host? I desire my website loaded up as fast as yours lol
May I simply say what a relief to find someone who genuinely understands what they’re talking about over the internet. You definitely understand how to bring an issue to light and make it important. More people need to look at this and understand this side of your story. I can’t believe you are not more popular because you surely have the gift.
Wow! Thank you! I always wanted to write on my website something like that. Can I take a fragment of your post to my site?
Thanks for a marvelous posting! I quite enjoyed reading it, you could be a great author.I will be sure to bookmark your blog and definitely will come back at some point. I want to encourage continue your great work, have a nice afternoon!
It’s the best time to make a few plans for the longer term and it is time to be happy. I’ve learn this submit and if I could I wish to counsel you some interesting issues or suggestions. Perhaps you can write subsequent articles referring to this article. I wish to learn even more issues about it!
wonderful submit, very informative. I’m wondering why the other experts of this sector do not notice this. You must proceed your writing. I am sure, you’ve a great readers’ base already!
An outstanding share! I’ve just forwarded this onto a colleague who had been doing a little homework on this. And he in fact ordered me dinner because I stumbled upon it for him… lol. So let me reword this…. Thanks for the meal!! But yeah, thanx for spending some time to talk about this topic here on your web site.
Thank you for another informative blog. Where else could I am getting that type of information written in such a perfect way? I’ve a venture that I’m simply now operating on, and I have been on the look out for such info.
I truly love your website.. Pleasant colors & theme. Did you create this amazing site yourself? Please reply back as I챠m trying to create my very own site and want to find out where you got this from or what the theme is called. Many thanks!
Wonderful web site. A lot of helpful information here. I am sending it to several buddies ans also sharing in delicious. And of course, thanks on your effort!
Good post. I learn something totally new and challenging on websites I stumbleupon every day. It will always be helpful to read content from other authors and use something from other websites.
whoah this blog is magnificent i love reading your posts. Keep up the good work! You know, many people are hunting around for this information, you can aid them greatly.
Thanks for the good writeup. It actually used to be a entertainment account it. Glance advanced to more added agreeable from you! By the way, how could we communicate?
Very nice article and straight to the point. I don’t know if this is in fact the best place to ask but do you guys have any ideea where to get some professional writers? Thank you 🙂
I’m extremely impressed with your writing skills as well as with the layout on your blog. Is this a paid theme or did you customize it yourself? Either way keep up the nice quality writing, it?s rare to see a great blog like this one nowadays..
Excellent article. I’m facing many of these issues as well..
I do not even know how I ended up here, but I thought this post was good. I do not know who you are but certainly you’re going to a famous blogger if you aren’t already 😉 Cheers!
Great blog here! Also your site loads up very fast! What host are you using? Can I get your affiliate link to your host? I wish my site loaded up as quickly as yours lol
Howdy! I know this is kind of off topic but I was wondering if you knew where I could get a captcha plugin for my comment form? I’m using the same blog platform as yours and I’m having trouble finding one? Thanks a lot!
You’re so interesting! I don’t think I’ve truly read something like this before. So great to find somebody with genuine thoughts on this subject. Really.. thank you for starting this up. This web site is something that is needed on the web, someone with some originality!
Hello.This article was really interesting, particularly since I was searching for thoughts on this subject last Saturday.
Wow that was strange. I just wrote an really long comment but after I clicked submit my comment didn’t appear. Grrrr… well I’m not writing all that over again. Regardless, just wanted to say fantastic blog!
http://networkaccountants.com/__media__/js/netsoltrademark.php?d=aulaporn.com/best-premium-porn-sites/
Good info. Lucky me I recently found your site by accident (stumbleupon). I have book marked it for later!
I will immediately grasp your rss feed as I can’t find your email subscription hyperlink or e-newsletter service. Do you’ve any? Please let me realize in order that I could subscribe. Thanks.
You got a very good website, Gladiola I detected it through yahoo.
Howdy would you mind letting me know which webhost you’re working with? I’ve loaded your blog in 3 different web browsers and I must say this blog loads a lot faster then most. Can you recommend a good hosting provider at a honest price? Kudos, I appreciate it!
very good submit, i definitely love this website, keep on it
Hello! Do you know if they make any plugins to safeguard against hackers? I’m kinda paranoid about losing everything I’ve worked hard on. Any recommendations?
Woah! I’m really loving the template/theme of this blog. It’s simple, yet effective. A lot of times it’s very hard to get that “perfect balance” between superb usability and visual appeal. I must say you have done a fantastic job with this. In addition, the blog loads very quick for me on Opera. Excellent Blog!
Magnificent goods from you, man. I have understand your stuff previous to and you’re just too wonderful. I actually like what you have acquired here, really like what you are stating and the way in which you say it. You make it enjoyable and you still take care of to keep it smart. I cant wait to read far more from you. This is really a tremendous site.
http://speechlocator.com/__media__/js/netsoltrademark.php?d=aulaporn.com/best-premium-porn-sites/
Greetings! I’ve been reading your blog for a long time now and finally got the courage to go ahead and give you a shout out from Atascocita Texas! Just wanted to say keep up the fantastic job!
I have been absent for a while, but now I remember why I used to love this web site. Thanks , I’ll try and check back more often. How frequently you update your site?
http://longfencegroup.info/__media__/js/netsoltrademark.php?d=aulaporn.com/best-premium-porn-sites/
I do not even understand how I stopped up here, however I thought this submit used to be good. I do not recognise who you might be but definitely you’re going to a well-known blogger if you happen to are not already 😉 Cheers!
Its fantastic as your other articles : D, appreciate it for posting.
I’m gone to convey my little brother, that he should also go to see this website on regular basis to take updated from hottest news update.|
Generally I don’t read article on blogs, but I would like to say that this write-up very forced me to try and do it! Your writing style has been amazed me. Thanks, quite nice post.
I am not sure where you’re getting your info, but great topic. I needs to spend some time learning much more or understanding more. Thanks for wonderful information I was looking for this info for my mission.
Your place is valueble for me. Thanks!…
Wow, fantastic blog layout! How long have you been blogging for? you make blogging look easy. The overall look of your website is fantastic, let alone the content!
Whoa! This blog looks just like my old one! It’s on a completely different topic but it has pretty much the same layout and design. Great choice of colors!
Thanks for the blog post, is there any way I can get an email whenever you publish a fresh article?
Wow, amazing blog layout! How long have you been blogging for? you make blogging look easy. The overall look of your site is wonderful, as well as the content!
Thank you for sharing with us, I think this website really stands out : D.
I think this is among the most vital information for me. And i am glad reading your article. But should remark on some general things, The web site style is great, the articles is really great : D. Good job, cheers
so much great info on here, : D.
I am not sure where you’re getting your information, but great topic. I needs to spend some time learning more or understanding more. Thanks for excellent info I was looking for this information for my mission.
I am not sure where you are getting your information, but great topic. I needs to spend some time learning much more or understanding more. Thanks for great information I was looking for this information for my mission.
Thanks for all your hard work on this web page. Betty loves carrying out research and it’s obvious why. Most of us hear all regarding the powerful mode you offer vital steps by means of your web blog and as well as invigorate contribution from others about this issue while our own girl is truly becoming educated so much. Enjoy the rest of the year. You are always performing a stunning job.
Great goods from you, man. I’ve understand your stuff previous to and you are just too magnificent. I really like what you have acquired here, certainly like what you’re stating and the way in which you say it. You make it entertaining and you still take care of to keep it wise. I can not wait to read far more from you. This is actually a wonderful site.
F*ckin¦ awesome things here. I am very satisfied to look your post. Thank you a lot and i am taking a look ahead to contact you. Will you kindly drop me a e-mail?
Hey there! Do you know if they make any plugins to protect against hackers? I’m kinda paranoid about losing everything I’ve worked hard on. Any tips?
This blog is definitely rather handy since I’m at the moment creating an internet floral website – although I am only starting out therefore it’s really fairly small, nothing like this site. Can link to a few of the posts here as they are quite. Thanks much. Zoey Olsen
Hello! This is my first comment here so I just wanted to give a quick shout out and tell you I truly enjoy reading through your articles. Can you recommend any other blogs/websites/forums that deal with the same subjects? Thank you so much!
Hello there, You’ve done an incredible job. I?ll definitely digg it and personally suggest to my friends. I am sure they’ll be benefited from this web site.
Needed to create you this little bit of note to thank you so much yet again for all the fantastic views you’ve featured here. It’s simply strangely open-handed with people like you to provide easily just what a lot of people might have distributed for an ebook in order to make some money for their own end, primarily given that you might have tried it if you ever desired. These suggestions likewise served as a fantastic way to fully grasp other people have a similar eagerness just like my personal own to see many more regarding this issue. I know there are thousands of more fun moments up front for individuals who view your blog post.
Howdy just wanted to give you a brief heads up and let you know a few of the images aren’t loading properly. I’m not sure why but I think its a linking issue. I’ve tried it in two different web browsers and both show the same results.
have a peek here effluent treatment plant
Hello There. I found your weblog using msn. This is a very neatly written article. I’ll make sure to bookmark it and return to learn more of your useful info. Thanks for the post. I’ll certainly comeback.
Very excellent information can be found on site. “I believe in nothing, everything is sacred. I believe in everything, nothing is sacred.” by Tom Robbins.
Fantastic goods from you, man. I have take note your stuff prior to and you’re just extremely great. I really like what you have acquired right here, certainly like what you’re stating and the way in which you say it. You make it entertaining and you continue to care for to stay it smart. I cant wait to learn much more from you. This is actually a terrific site.
I’ve been surfing on-line greater than three hours nowadays, but I never discovered any interesting article like yours. It¦s beautiful value sufficient for me. Personally, if all site owners and bloggers made good content as you probably did, the internet will probably be a lot more useful than ever before.
My brother suggested I might like this website. He was totally right. This post actually made my day. You can not imagine simply how much time I had spent for this info! Thanks!
Great info. Lucky me I found your website by accident (stumbleupon). I’ve book marked it for later!
Hi my family member! I wish to say that this post is amazing, great written and include approximately all significant infos. I would like to see more posts like this .
It is really a great and useful piece of info. I am glad that you shared this helpful info with us. Please keep us informed like this. Thank you for sharing.
http://ionavick.com/__media__/js/netsoltrademark.php?d=www.fairporn.net/
This really answered my problem, thank you!
Hi there, I discovered your site by way of Google whilst searching for a similar subject, your web site got here up, it seems to be good. I’ve bookmarked it in my google bookmarks.
http://jobrevolution.com/__media__/js/netsoltrademark.php?d=www.fairporn.net/
Hi there, just became aware of your blog through Google, and found that it’s truly informative. I’m gonna watch out for brussels. I will be grateful if you continue this in future. Numerous people will be benefited from your writing. Cheers!
Wow, superb blog layout! How long have you been blogging for? you make blogging look easy. The overall look of your site is wonderful, as well as the content!
A person necessarily help to make significantly posts I would state. This is the very first time I frequented your web page and to this point? I amazed with the analysis you made to make this particular submit incredible. Excellent job!
I loved as much as you will receive carried out right here. The sketch is tasteful, your authored material stylish. nonetheless, you command get got an nervousness over that you wish be delivering the following. unwell unquestionably come more formerly again as exactly the same nearly a lot often inside case you shield this hike.
Magnificent goods from you, man. I’ve understand your stuff previous to and you’re just too great. I really like what you have acquired here, certainly like what you’re stating and the way in which you say it. You make it enjoyable and you still take care of to keep it smart. I can not wait to read much more from you. This is really a wonderful website.
Great article. I will be going through some of these issues as well..
Hello there, You’ve done a great job. I will certainly digg it and personally suggest to my friends. I’m sure they’ll be benefited from this site.
This is the right web site for anybody who would like to understand this topic. You understand so much its almost hard to argue with you (not that I actually would want to횜HaHa). You definitely put a brand new spin on a subject that’s been discussed for years. Excellent stuff, just excellent!
I am not sure where you’re getting your information, but good topic. I needs to spend some time learning much more or understanding more. Thanks for magnificent information I was looking for this info for my mission.
http://electrumgroupuk.net/__media__/js/netsoltrademark.php?d=www.fairporn.net/
Everything is very open with a really clear description of the issues. It was definitely informative. Your site is extremely helpful. Thanks for sharing!
Merely wanna remark on few general things, The website layout is perfect, the written content is really wonderful. “To establish oneself in the world, one has to do all one can to appear established.” by Francois de La Rochefoucauld.
Wonderful beat ! I wish to apprentice while you amend your site, how can i subscribe for a blog site? The account aided me a acceptable deal. I had been tiny bit acquainted of this your broadcast provided bright clear idea
Everything is very open with a very clear clarification of the challenges. It was definitely informative. Your site is useful. Many thanks for sharing!
Great post, I believe blog owners should larn a lot from this blog its rattling user friendly.
Good blog you have here.. It챠s difficult to find quality writing like yours nowadays. I truly appreciate individuals like you! Take care!!
Just desire to say your article is as astounding. The clearness in your post is just nice and i can assume you are an expert on this subject. Well with your permission let me to grab your RSS feed to keep up to date with forthcoming post. Thanks a million and please continue the enjoyable work.
Hiya very cool web site!! Guy .. Beautiful .. Wonderful .. I will bookmark your blog and take the feeds alsoKI’m glad to find numerous useful info right here within the publish, we need develop more strategies in this regard, thanks for sharing. . . . . .
Very good written article. It will be beneficial to everyone who employess it, including me. Keep up the good work – looking forward to more posts.
Great goods from you, man. I have understand your stuff previous to and you’re just too fantastic. I really like what you’ve acquired here, certainly like what you’re stating and the way in which you say it. You make it enjoyable and you still take care of to keep it wise. I can not wait to read far more from you. This is actually a wonderful web site.
Hi there! This is my first comment here so I just wanted to give a quick shout out and tell you I truly enjoy reading through your posts. Can you suggest any other blogs/websites/forums that go over the same subjects? Thanks for your time!
Everything is very open with a very clear clarification of the issues. It was truly informative. Your site is useful. Thanks for sharing!
Way cool! Some extremely valid points! I appreciate you writing this post and also the rest of the site is very good.
I don?t even know how I ended up here, but I thought this post was great. I don’t know who you are but definitely you’re going to a famous blogger if you are not already 😉 Cheers!
excellent post.Ne’er knew this, thankyou for letting me know.
Greetings! Very helpful advice on this article! It is the little changes that make the biggest changes. Thanks a lot for sharing!
I have been absent for a while, but now I remember why I used to love this blog. Thank you, I’ll try and check back more often. How frequently you update your website?
Wow, incredible blog layout! How long have you been blogging for? you make blogging look easy. The overall look of your web site is excellent, as well as the content!
Wonderful post! We will be linking to this great article on our site. Keep up the great writing.
My partner and I stumbled over here coming from a different website and thought I may as well check things out. I like what I see so i am just following you. Look forward to looking into your web page yet again.
Hiya, I’m really glad I’ve found this information. Nowadays bloggers publish only about gossips and net and this is really annoying. A good site with exciting content, that is what I need. Thank you for keeping this site, I will be visiting it. Do you do newsletters? Can’t find it.
An interesting discussion is worth comment. I think that you should write more on this topic, it might not be a taboo subject but generally people are not enough to speak on such topics. To the next. Cheers
Almost all of whatever you mention is supprisingly legitimate and it makes me ponder why I had not looked at this with this light before. This article really did turn the light on for me personally as far as this particular issue goes. Nonetheless at this time there is actually just one issue I am not really too comfortable with and whilst I try to reconcile that with the central idea of the position, allow me observe what the rest of the readers have to point out.Nicely done.
I love your blog.. very nice colors & theme. Did you make this website yourself or did you hire someone to do it for you? Plz respond as I’m looking to design my own blog and would like to find out where u got this from. appreciate it
My brother recommended I might like this website. He was totally right. This post actually made my day. You cann’t imagine just how much time I had spent for this info! Thanks!
I was able to find good info from your content.
My page :: LazaroKFarve
Excellent beat ! I would like to apprentice while you amend your website, how could i subscribe for a blog site? The account helped me a acceptable deal. I had been a little bit acquainted of this your broadcast offered bright clear concept
You actually make it seem so easy with your presentation but I find this topic to be actually something that I think I would never understand. It seems too complex and very broad for me. I am looking forward for your next post, I’ll try to get the hang of it!
magnificent points altogether, you just gained a brand new reader. What would you recommend in regards to your post that you made a few days ago? Any positive?
Great beat ! I would like to apprentice while you amend your web site, how can i subscribe for a blog website? The account aided me a acceptable deal. I had been a little bit acquainted of this your broadcast offered bright clear idea
This site was… how do I say it? Relevant!! Finally I have found something that helped me. Thank you!
Real clean site, thanks for this post.
Hey There. I found your blog using msn. This is a very well written article. I?ll make sure to bookmark it and come back to read more of your useful information. Thanks for the post. I?ll certainly comeback.
Your style is unique compared to other people I’ve read stuff from. Thank you for posting when you’ve got the opportunity, Guess I will just book mark this page.
I like this website so much, saved to fav.
I used to be very happy to find this net-site.I wished to thanks on your time for this excellent learn!! I positively having fun with each little little bit of it and I have you bookmarked to take a look at new stuff you blog post.
Hi, Neat post. There’s a problem with your web site in internet explorer, would test this… IE still is the market leader and a good portion of people will miss your fantastic writing because of this problem.
Hi! I could have sworn IÃve been to this web site before but after looking at some of the articles I realized itÃs new to me. Anyhow, IÃm certainly delighted I stumbled upon it and IÃll be book-marking it and checking back regularly!
You should take part in a contest for one of the best blogs on the web. I will recommend this site!
Keep functioning ,splendid job!
Undeniably believe that which you stated. Your favorite justification appeared to be on the web the simplest thing to be aware of. I say to you, I definitely get irked while people think about worries that they just do not know about. You managed to hit the nail upon the top and defined out the whole thing without having side-effects , people can take a signal. Will probably be back to get more. Thanks
Hey! I’m at work surfing around your blog from my new iphone 3gs! Just wanted to say I love reading your blog and look forward to all your posts! Carry on the great work!
You actually make it seem so easy with your presentation but I find this matter to be actually something that I think I would never understand. It seems too complicated and extremely broad for me. I am looking forward for your next post, I will try to get the hang of it!
Aw, this was a very good post. Finding the time and actual effort to produce a superb articleÖ but what can I sayÖ I hesitate a whole lot and never manage to get anything done.
Unquestionably believe that which you stated. Your favorite justification appeared to be on the net the easiest thing to be aware of. I say to you, I certainly get annoyed while people think about worries that they plainly don’t know about. You managed to hit the nail upon the top and also defined out the whole thing without having side-effects , people could take a signal. Will likely be back to get more. Thanks
Valuable information. Fortunate me I discovered your website accidentally, and I’m stunned why this twist of fate did not happened in advance! I bookmarked it.
I think other site proprietors should take this site as an model, very clean and fantastic user friendly style and design, let alone the content. You are an expert in this topic!
Regards for helping out, great information.
I just could not go away your website before suggesting that I actually enjoyed the standard info an individual provide for your visitors? Is gonna be again incessantly to inspect new posts.
You’re so cool! I don’t suppose I’ve read through anything like this before. So nice to find another person with some original thoughts on this topic. Seriously.. thanks for starting this up. This web site is one thing that’s needed on the internet, someone with a bit of originality!
you are really a good webmaster. The site loading speed is incredible. It seems that you are doing any unique trick. Also, The contents are masterpiece. you have done a excellent job on this topic!
Hi, Neat post. There is a problem along with your website in internet explorer, could test this?K IE still is the market leader and a large element of other people will omit your fantastic writing due to this problem.
I absolutely love your website.. Very nice colors & theme. Did you develop this website yourself? Please reply back as IÃm attempting to create my own personal site and would love to learn where you got this from or exactly what the theme is called. Thank you!
I really love your blog.. Very nice colors & theme. Did you create this site yourself? Please reply back as IÃm planning to create my own personal website and want to find out where you got this from or exactly what the theme is named. Cheers!
This site is my inhalation, real superb layout and perfect written content.
Oh my goodness! Incredible article dude! Many thanks, However I am experiencing difficulties with your RSS. I donÃt know the reason why I cannot subscribe to it. Is there anyone else having similar RSS problems? Anyone that knows the answer can you kindly respond? Thanks!!
Hello my friend! I wish to say that this article is amazing, nice written and include almost all significant infos. I would like to see more posts like this.
This site was… how do you say it? Relevant!! Finally I’ve found something that helped me. Appreciate it!
I simply wished to say thanks again. I do not know the things I would’ve gone through without the entire tips and hints documented by you regarding this industry. It had been a very alarming issue in my circumstances, but noticing your specialised way you resolved it took me to jump over joy. I’m thankful for the information and in addition trust you recognize what a great job that you are carrying out instructing many others using your webpage. More than likely you’ve never come across all of us.
Hi there, You have done an incredible job. I will certainly digg it and personally suggest to my friends. I’m confident they’ll be benefited from this site.
You have covered this topic professionally.
Hey, you used to write excellent, but the last few posts have been kinda boringK I miss your great writings. Past few posts are just a little out of track! come on!
I’ve been absent for some time, but now I remember why I used to love this web site. Thanks , I will try and check back more often. How frequently you update your site?
Hello.This post was extremely fascinating, especially because I was browsing for thoughts on this topic last couple of days.
I’m impressed, I need to say. Really rarely do I encounter a blog that’s each educative and entertaining, and let me tell you, you have got hit the nail on the head. Your idea is outstanding; the problem is one thing that not enough individuals are talking intelligently about. I’m very comfortable that I stumbled throughout this in my seek for something relating to this.
Specifically the sort of material that improves the net. Thanks!
Just a smiling visitor here to share the love (:, btw great pattern. “Make the most of your regrets… . To regret deeply is to live afresh.” by Henry David Thoreau.
Very good written story. It will be beneficial to anyone who usess it, including myself. Keep doing what you are doing – looking forward to more posts.
Hi, I do believe this is a great blog. I stumbledupon it 😉 I am going to return yet again since I book-marked it. Money and freedom is the best way to change, may you be rich and continue to help other people.
hello!,I really like your writing very much! percentage we keep up a correspondence extra about your post on AOL? I need a specialist in this area to unravel my problem. May be that is you! Looking ahead to look you.
hey there and thank you for your info ? I have certainly picked up anything new from right here. I did however expertise several technical issues using this website, since I experienced to reload the site lots of times previous to I could get it to load properly. I had been wondering if your hosting is OK? Not that I’m complaining, but slow loading instances times will often affect your placement in google and can damage your high-quality score if ads and marketing with Adwords. Well I am adding this RSS to my email and could look out for a lot more of your respective exciting content. Ensure that you update this again very soon..
Sweet internet site, super style and design, rattling clean and use pleasant.
I take pleasure in, lead to I discovered just what I was taking a look for. You have ended my four day long hunt! God Bless you man. Have a nice day. Bye
Thanks for helping out, wonderful info. “Those who restrain desire, do so because theirs is weak enough to be restrained.” by William Blake.
An fascinating dialogue is worth comment. I believe that it’s best to write more on this matter, it may not be a taboo topic but typically people are not enough to speak on such topics. To the next. Cheers
Its really a great and helpful piece of information. I am glad that you shared this helpful info with us. Please keep us up to date like this. Thank you for sharing.
Heya i?m for the first time here. I came across this board and I find It truly useful & it helped me out a lot. I hope to give something back and aid others like you aided me.
Good day! Would you mind if I share your blog with my myspace group? There’s a lot of folks that I think would really appreciate your content. Please let me know. Thanks
Excellent post. I used to be checking continuously this weblog and I am impressed! Extremely useful info specifically the closing phase 🙂 I handle such information a lot. I was seeking this particular information for a very long time. Thank you and good luck.
F*ckin tremendous things here. I am very glad to see your article. Thanks a lot and i am looking forward to contact you. Will you please drop me a e-mail?
Excellent beat ! I would like to apprentice while you amend your web site, how can i subscribe for a blog site? The account aided me a acceptable deal. I had been a little bit acquainted of this your broadcast provided bright clear concept
My brother suggested I may like this web site. He used to be totally right. This put up actually made my day. You can not imagine just how much time I had spent for this info! Thank you!
Hello There. I found your blog using msn. This is a really well written article. I?ll make sure to bookmark it and return to read more of your useful info. Thanks for the post. I?ll certainly comeback.
I was able to find good information from your content.
Having read this I thought it was very informative. I appreciate you taking the time and effort to put this article together. I once again find myself spending way to much time both reading and commenting. But so what, it was still worth it!
Aw, this was an exceptionally good post. Finding the time and actual effort to make a superb article횜 but what can I say횜 I put things off a lot and don’t manage to get nearly anything done.
Not many writers with proper knowledge of the subjects they discuss.
IÃm impressed, I have to admit. Seldom do I come across a blog thatÃs both educative and interesting, and let me tell you, you’ve hit the nail on the head. The issue is something not enough people are speaking intelligently about. I’m very happy I found this during my hunt for something regarding this.
I love it when people come together and share opinions, great blog, keep it up.
I really wanted to type a brief message to express gratitude to you for all the amazing facts you are placing here. My long internet investigation has at the end of the day been recognized with really good knowledge to share with my contacts. I would assert that many of us readers actually are rather endowed to exist in a remarkable site with so many brilliant individuals with interesting tricks. I feel pretty grateful to have come across the website and look forward to so many more fabulous moments reading here. Thanks once more for everything.
I think this site has some really wonderful info for everyone. “Loving someone is easy but losing someone is hard.” by Shelby Harthcock.
Hello There. I found your blog using msn. This is a very neatly written article. I’ll make sure to bookmark it and come back to read more of your useful information. Thanks for the post. I’ll certainly comeback.
Hello There. I found your blog using msn. This is a very well written article. I?ll make sure to bookmark it and come back to read more of your useful info. Thanks for the post. I?ll definitely comeback.
Hello. magnificent job. I did not expect this. This is a remarkable story. Thanks!
I could not refrain from commenting. Well written!
Saved as a favorite, I love your web site!
I in addition to my pals have already been reading the great suggestions from the website and then developed a terrible suspicion I had not expressed respect to you for those techniques. All the people were definitely so passionate to read through all of them and have in effect unquestionably been tapping into these things. Thanks for simply being considerably accommodating and then for using this sort of impressive topics most people are really desirous to be informed on. My honest apologies for not saying thanks to earlier.
Right here is the right site for everyone who hopes to find out about this topic. You understand so much its almost hard to argue with you (not that I really will need toÖHaHa). You definitely put a fresh spin on a topic that has been written about for many years. Great stuff, just great!
This is the right blog for anybody who wants to find out about this topic. You know a whole lot its almost hard to argue with you (not that I actually would want toÖHaHa). You definitely put a new spin on a topic which has been discussed for a long time. Excellent stuff, just great!
I have recently started a site, the info you provide on this website has helped me greatly. Thank you for all of your time & work.
I am glad that I found this site, just the right info that I was searching for! .
Specifically the sort of web content that improves the web. Thanks!
Hello there, just became aware of your blog through Google, and found that it’s really informative. I?m going to watch out for brussels. I?ll appreciate if you continue this in future. A lot of people will be benefited from your writing. Cheers!
Hey There. I found your blog using msn. This is a really well written article. I will be sure to bookmark it and come back to read more of your useful information. Thanks for the post. I will definitely return.
Greetings! I’ve been reading your web site for some time now and finally got the bravery to go ahead and give you a shout out from Austin Tx! Just wanted to tell you keep up the excellent work!
Magnificent goods from you, man. I’ve understand your stuff previous to and you are just too wonderful. I really like what you’ve acquired here, certainly like what you are saying and the way in which you say it. You make it entertaining and you still take care of to keep it smart. I can not wait to read far more from you. This is actually a terrific site.
Rattling fantastic info can be found on blog.
Wow, fantastic blog layout! How long have you been blogging for? you make blogging look easy. The overall look of your website is great, let alone the content!
Great post. I was checking continuously this blog and I’m impressed! Very useful info specifically the last part 🙂 I care for such info much. I was looking for this certain information for a long time. Thank you and best of luck.
I loved as much as you’ll receive carried out right here. The sketch is attractive, your authored material stylish. nonetheless, you command get bought an shakiness over that you wish be delivering the following. unwell unquestionably come more formerly again as exactly the same nearly a lot often inside case you shield this increase.
It’s really a great and helpful piece of info. I’m satisfied that you just shared this helpful info with us. Please keep us informed like this. Thanks for sharing.
Saved as a favorite, I like your blog!
Definitely believe that which you stated. Your favorite reason seemed to be on the web the simplest thing to be aware of. I say to you, I definitely get annoyed while people consider worries that they plainly do not know about. You managed to hit the nail upon the top as well as defined out the whole thing without having side-effects , people can take a signal. Will probably be back to get more. Thanks
Usually I do not read article on blogs, but I wish to say that this write-up very forced me to try and do so! Your writing style has been surprised me. Thanks, quite nice article.
bookmarked!!, I like your website!
I loved as much as you will receive carried out right here. The sketch is attractive, your authored material stylish. nonetheless, you command get bought an nervousness over that you wish be delivering the following. unwell unquestionably come more formerly again as exactly the same nearly a lot often inside case you shield this hike.
A person essentially help to make seriously articles I would state. This is the very first time I frequented your web page and thus far? I surprised with the research you made to make this particular publish extraordinary. Wonderful job!
Hello.This post was really interesting, especially because I was browsing for thoughts on this matter last week.
Would love to constantly get updated outstanding web blog! .
Attractive section of content. I just stumbled upon your web site and in accession capital to assert that I get in fact enjoyed account your blog posts. Any way I’ll be subscribing to your feeds and even I achievement you access consistently quickly.
I love it when individuals come together and share views. Great blog, keep it up!
Hi, I do believe this is a great web site. I stumbledupon it 😉 I may return yet again since i have book marked it. Money and freedom is the greatest way to change, may you be rich and continue to guide others.
Have you ever thought about including a little bit more than just your articles? I mean, what you say is valuable and all. Nevertheless just imagine if you added some great visuals or videos to give your posts more, “pop”! Your content is excellent but with images and clips, this site could definitely be one of the greatest in its niche. Terrific blog!
This web site really has all the info I needed about this subject and didnÃt know who to ask.
Thank you for the good writeup. It in fact was a amusement account it. Look advanced to far added agreeable from you! However, how could we communicate?
Normally I don’t read post on blogs, but I would like to say that this write-up very forced me to try and do it! Your writing style has been surprised me. Thanks, very nice post.
It is perfect time to make some plans for the future and it’s time to be happy. I have read this post and if I could I want to suggest you some interesting things or advice. Maybe you can write next articles referring to this article. I wish to read more things about it!
I know this if off topic but I’m looking into starting my own blog and was wondering what all is required to get setup? I’m assuming having a blog like yours would cost a pretty penny? I’m not very internet savvy so I’m not 100 sure. Any suggestions or advice would be greatly appreciated. Kudos
I’ve recently started a website, the information you provide on this website has helped me tremendously. Thanks for all of your time & work.
Aw, this was a very good post. Finding the time and actual effort to generate a really good article횜 but what can I say횜 I hesitate a whole lot and never seem to get nearly anything done.
I am also writing to let you know of the brilliant experience my cousin’s girl gained checking yuor web blog. She noticed a wide variety of things, most notably what it is like to possess an excellent giving mindset to let most people effortlessly fully grasp several problematic topics. You really did more than our own desires. Thanks for producing the beneficial, dependable, revealing and as well as easy guidance on the topic to Janet.
I’ve read some good stuff here. Definitely worth bookmarking for revisiting. I surprise how much effort you put to make such a wonderful informative web site.
Greetings, I believe your web site may be having browser compatibility issues. When I take a look at your site in Safari, it looks fine however, if opening in I.E., it has some overlapping issues. I merely wanted to provide you with a quick heads up! Besides that, wonderful site!
I¦ve learn several good stuff here. Definitely value bookmarking for revisiting. I wonder how a lot effort you put to make the sort of fantastic informative site.
Thank you, I’ve recently been looking for info approximately this subject for a long time and yours is the best I’ve came upon so far. But, what about the bottom line? Are you sure concerning the source?
I truly enjoy reading on this web site, it holds great articles.
I was wondering if you ever thought of changing the layout of your blog? Its very well written; I love what youve got to say. But maybe you could a little more in the way of content so people could connect with it better. Youve got an awful lot of text for only having one or 2 images. Maybe you could space it out better?
I like this post, enjoyed this one thankyou for posting.
As a Newbie, I am permanently browsing online for articles that can help me. Thank you
whoah this blog is fantastic i love reading your posts. Keep up the good work! You know, a lot of people are looking around for this info, you could aid them greatly.
You made some decent points there. I checked on the web to learn more about the issue and found most people will go along with your views on this web site.
The only point I cry over is not having found your blog earlier.
very nice post, i definitely love this website, carry on it
obviously like your web-site but you need to test the spelling on quite a few of your posts. A number of them are rife with spelling issues and I to find it very troublesome to inform the reality then again I’ll certainly come back again.
I’m usually to blogging and i actually appreciate your content. The article has actually peaks my interest. I am going to bookmark your site and hold checking for brand spanking new information.
I have been surfing online more than three hours today, yet I never found any interesting article like yours. It?s pretty worth enough for me. In my opinion, if all site owners and bloggers made good content as you did, the web will be much more useful than ever before.
Im no longer positive where you are getting your information, but good topic. I needs to spend some time finding out much more or figuring out more. Thank you for fantastic information I used to be in search of this info for my mission.
We are a group of volunteers and opening a new scheme in our community. Your site offered us with valuable info to work on. You’ve done a formidable job and our whole community will be grateful to you.
Spot on with this write-up, I absolutely think this web site needs a great deal more attention. I챠ll probably be back again to read through more, thanks for the info!
I in addition to my pals appeared to be checking out the best pointers found on your web site and all of the sudden I got a horrible suspicion I never expressed respect to the blog owner for those strategies. All the young men ended up as a consequence stimulated to see all of them and now have definitely been loving these things. I appreciate you for truly being really kind and also for utilizing such superior issues millions of individuals are really wanting to discover. My personal sincere regret for not expressing gratitude to you earlier.
http://www.aawholesaletire.com/__media__/js/netsoltrademark.php?d=bestpornsites.club/
http://warmwiseva.mobi/__media__/js/netsoltrademark.php?d=bestpornsites.club/
Simply wish to say your article is as amazing. The clearness in your post is just excellent and i could assume you’re an expert on this subject. Well with your permission let me to grab your RSS feed to keep up to date with forthcoming post. Thanks a million and please carry on the gratifying work.
I couldnÃt resist commenting. Well written!
Nice post. I learn something more challenging on different blogs everyday. It will always be stimulating to read content from other writers and practice a little something from their store. I’d prefer to use some with the content on my blog whether you don’t mind. Natually I’ll give you a link on your web blog. Thanks for sharing.
http://buydirecttravel.net/__media__/js/netsoltrademark.php?d=bestpornsites.club/
Dead composed subject matter, Really enjoyed reading.
Hello there, You’ve done an incredible job. I will certainly digg it and personally suggest to my friends. I am confident they will be benefited from this website.
I haven?¦t checked in here for a while as I thought it was getting boring, but the last several posts are great quality so I guess I will add you back to my everyday bloglist. You deserve it my friend 🙂
When I initially commented I clicked the “Notify me when new comments are added” checkbox and now each time a comment is added I get four e-mails with the same comment. Is there any way you can remove me from that service? Appreciate it!
I’ve been absent for some time, but now I remember why I used to love this web site. Thank you, I?¦ll try and check back more often. How frequently you update your web site?
Hi, I do believe this is a great web site. I stumbledupon it 😉 I will return yet again since I book-marked it. Money and freedom is the greatest way to change, may you be rich and continue to guide other people.
Just desire to say your article is as amazing. The clarity in your post is simply cool and i could assume you’re an expert on this subject. Fine with your permission allow me to grab your RSS feed to keep updated with forthcoming post. Thanks a million and please carry on the enjoyable work.
You actually make it seem so easy with your presentation but I find this matter to be really something which I think I would never understand. It seems too complex and very broad for me. I am looking forward for your next post, I?ll try to get the hang of it!
Glad to be one of several visitants on this awing site : D.
Hello, Neat post. There’s a problem along with your web site in web explorer, might test thisK IE still is the marketplace leader and a good component to other folks will omit your great writing because of this problem.
You really make it seem so easy with your presentation but I find this matter to be really something which I think I would never understand. It seems too complex and extremely broad for me. I am looking forward for your next post, I?ll try to get the hang of it!
Too many bloggers nowadays but only a few have posts worth spending time on reviewing.
I just like the valuable info you provide on your articles. I’ll bookmark your blog and take a look at once more here frequently. I am fairly certain I’ll be informed plenty of new stuff proper here! Good luck for the next!
We’re a group of volunteers and opening a new scheme in our community. Your site offered us with useful info to paintings on. You’ve performed an impressive job and our whole community shall be thankful to you.
I’ve been exploring for a little bit for any high-quality articles or weblog posts in this sort of space . Exploring in Yahoo I at last stumbled upon this web site. Studying this information So i’m satisfied to convey that I’ve an incredibly excellent uncanny feeling I came upon just what I needed. I so much no doubt will make certain to don’t disregard this website and give it a glance regularly.
Some truly select blog posts on this web site, saved to favorites.
You made some clear points there. I looked on the internet for the subject and found most guys will approve with your blog.
I like this weblog so much, bookmarked.
You are my breathing in, I own few web logs and often run out from to brand.
you’re really a good webmaster. The website loading speed is amazing. It seems that you are doing any unique trick. Furthermore, The contents are masterwork. you’ve done a great job on this topic!
This web page can be a stroll-by means of for all the information you wanted about this and didnt know who to ask. Glimpse here, and also youll definitely discover it.
I will right away grab your rss feed as I can’t find your email subscription link or newsletter service. Do you have any? Please let me know in order that I could subscribe. Thanks.
Thank you for sharing superb informations. Your website is very cool. I’m impressed by the details that you have on this blog. It reveals how nicely you understand this subject. Bookmarked this web page, will come back for more articles. You, my pal, ROCK! I found just the information I already searched everywhere and just could not come across. What a great website.
I could not resist commenting. Well written!
I’ve been surfing online more than three hours today, yet I never found any interesting article like yours. It?s pretty worth enough for me. In my opinion, if all web owners and bloggers made good content as you did, the web will be much more useful than ever before.
I have been exploring for a little for any high quality articles or weblog posts in this sort of house . Exploring in Yahoo I ultimately stumbled upon this web site. Studying this information So i am glad to exhibit that I have a very excellent uncanny feeling I came upon exactly what I needed. I most certainly will make sure to do not omit this website and provides it a look regularly.
Heya i am for the first time here. I came across this board and I find It really useful & it helped me out a lot. I hope to give something back and aid others like you aided me.
Thanks for another magnificent article. Where else could anybody get that kind of information in such a perfect way of writing? I’ve a presentation next week, and I am on the look for such information.
An outstanding share! I have just forwarded this onto a colleague who was doing a little homework on this. And he in fact ordered me lunch simply because I found it for him… lol. So allow me to reword this…. Thanks for the meal!! But yeah, thanx for spending time to talk about this issue here on your blog.
I appreciate the way you have concluded this post …
I’ve been absent for some time, but now I remember why I used to love this website. Thanks, I will try and check back more often. How frequently you update your website?
Excellent blog post. I definitely love this website. Keep it up!
I?m not sure where you’re getting your information, but great topic. I needs to spend some time learning more or understanding more. Thanks for fantastic information I was looking for this info for my mission.
It is appropriate time to make some plans for the future and it’s time to be happy. I have read this post and if I could I wish to suggest you few interesting things or suggestions. Perhaps you can write next articles referring to this article. I wish to read more things about it!
Fantastic beat ! I would like to apprentice while you amend your website, how can i subscribe for a blog website? The account helped me a acceptable deal. I had been tiny bit acquainted of this your broadcast provided bright clear concept
Stop losing the job offering by using a general resume! What a general resume does, is tell them how you look like all the other applicants – not how you outpace your rivals for the same job.
Deference to op, some superb selective information.
Cool web page you possess there.
Hi! Someone in my Myspace group shared this website with us so I came to look it over. I’m definitely loving the information. I’m book-marking and will be tweeting this to my followers! Exceptional blog and terrific style and design.
Heya im for the first time here. I found this board and I find It truly useful & it helped me out much. I hope to give something back and aid others like you helped me.
Superb blog! Do you have any hints for aspiring writers? I’m hoping to start my own blog soon but I’m a little lost on everything. Would you recommend starting with a free platform like WordPress or go for a paid option? There are so many options out there that I’m totally confused .. Any ideas? Bless you!
I’m extremely impressed with your writing skills and also with the layout on your weblog. Is this a paid theme or did you modify it yourself? Anyway keep up the nice quality writing, its rare to see a great blog like this one these days..
It’s really a nice and useful piece of information. I am glad that you shared this useful information with us. Please keep us informed like this. Thanks for sharing.
You are a very smart person!
Wow, marvelous weblog structure! How lengthy have you been running a blog for? you made running a blog look easy. The whole look of your site is fantastic, let alone the content material!
I need to to thank you for this fantastic read!! I certainly loved every little bit of it. I’ve got you book-marked to look at new things you postÖ
Hello very cool web site!! Guy .. Excellent .. Superb .. I’ll bookmark your blog and take the feeds additionally?KI’m satisfied to seek out so many helpful info here within the post, we want develop extra techniques in this regard, thanks for sharing. . . . . .
Absolutely pent subject matter, thanks for information .
Hello! I just would like to give a huge thumbs up for the great info you have here on this post. I will be coming back to your blog for more soon.
Your place is valueble for me. Thanks!
Some really wonderful information, Gladiola I detected this. “We protest against unjust criticism, but we accept unearned applause.” by Jose Narosky.
you are in reality a good webmaster. The website loading pace is amazing. It kind of feels that you’re doing any distinctive trick. In addition, The contents are masterwork. you’ve done a magnificent activity on this subject!
You actually make it appear really easy along with your presentation but I to find this matter to be actually something which I believe I’d never understand. It seems too complex and very broad for me. I’m looking forward in your subsequent put up, I’ll try to get the hold of it!
Its like you read my mind! You seem to know a lot about this, like you wrote the book in it or something. I think that you can do with some pics to drive the message home a bit, but instead of that, this is magnificent blog. A great read. I’ll definitely be back.
Heya i?m for the first time here. I came across this board and I find It truly useful & it helped me out a lot. I hope to give something back and help others like you helped me.
I loved as much as you’ll receive carried out right here. The sketch is attractive, your authored subject matter stylish. nonetheless, you command get got an impatience over that you wish be delivering the following. unwell unquestionably come more formerly again as exactly the same nearly a lot often inside case you shield this hike.
I do not even know how I ended up here, but I thought this post was good. I don’t know who you are but certainly you’re going to a famous blogger if you aren’t already 😉 Cheers!
I like the valuable info you provide to your articles. I will bookmark your weblog and take a look at again right here frequently. I’m relatively certain I’ll be informed plenty of new stuff proper right here! Good luck for the following!
Hi are using WordPress for your blog platform? I’m new to the blog world but I’m trying to get started and set up my own. Do you need any html coding expertise to make your own blog? Any help would be really appreciated!
Lovely blog! I am loving it!! Will be back later to read some more. I am taking your feeds also.
Its like you read my mind! You appear to know so much about this, like you wrote the book in it or something. I think that you can do with some pics to drive the message home a bit, but other than that, this is magnificent blog. An excellent read. I’ll certainly be back.
I do not even know how I ended up here, but I thought this post was great. I do not know who you are but certainly you are going to a famous blogger if you are not already 😉 Cheers!
Hey very cool web site!! Man .. Excellent .. Amazing .. I’ll bookmark your site and take the feeds also…I’m happy to find so many useful info here in the post, we need develop more techniques in this regard, thanks for sharing. . . . . .
Hello There. I discovered your weblog the use of msn. That is a really smartly written article. I’ll be sure to bookmark it and come back to learn extra of your helpful information. Thanks for the post. I will definitely return.
Hello There. I found your blog using msn. This is a really well written article. I will make sure to bookmark it and return to read more of your useful information. Thanks for the post. I will certainly comeback.
I like the helpful information you provide in your articles. I?ll bookmark your blog and check again here frequently. I am quite sure I will learn many new stuff right here! Best of luck for the next!
Great post. I was checking constantly this blog and I am impressed! Extremely helpful information specially the last part 🙂 I care for such info much. I was looking for this particular information for a very long time. Thank you and good luck.
I liked as much as you will obtain performed proper here. The caricature is attractive, your authored subject matter stylish. nonetheless, you command get bought an shakiness over that you want be turning in the following. in poor health without a doubt come further previously once more as precisely the similar just about very incessantly inside case you defend this increase.
Howdy! I’m at work browsing your blog from my new iphone 4! Just wanted to say I love reading your blog and look forward to all your posts! Keep up the fantastic work!
You made some decent points there. I did a search on the subject and found most persons will consent with your site.
Some truly interesting information, well written and loosely user genial.
Hiya, I am really glad I have found this info. Today bloggers publish just about gossips and web and this is actually irritating. A good web site with interesting content, this is what I need. Thanks for keeping this web site, I will be visiting it. Do you do newsletters? Cant find it.
Hey I am so delighted I found your blog, I really found you by mistake, while I was looking on Yahoo for something else, Regardless I am here now and would just like to say thanks a lot for a incredible post and a all round thrilling blog (I also love the theme/design), I don’t have time to read it all at the minute but I have saved it and also added your RSS feeds, so when I have time I will be back to read more, Please do keep up the great work.
Heya i?m for the first time here. I came across this board and I find It really useful & it helped me out a lot. I hope to give something back and help others like you helped me.
http://cmfax.com/__media__/js/netsoltrademark.php?d=bestpornsites.club/
Whoa! This blog looks exactly like my old one! It’s on a entirely different topic but it has pretty much the same page layout and design. Outstanding choice of colors!
Just wanna remark on few general things, The website design is perfect, the content material is rattling good. “Crime does not pay … as well as politics.” by Alfred E. Newman.
Wow! This could be one particular of the most useful blogs We have ever arrive across on this subject. Actually Fantastic. I am also a specialist in this topic so I can understand your hard work.
Other short articles where Manganese steel is talked about: steel: Wear-resistant steels: Manganese steels are commonly called Hadfield steels, after their inventor, Robert Hadfield.
Wow! Thank you! I constantly needed to write on my site something like that. Can I implement a portion of your post to my blog?
Loving the information on this site, you have done outstanding job on the blog posts.
you’re really a good webmaster. The web site loading speed is amazing. It seems that you are doing any unique trick. In addition, The contents are masterwork. you’ve done a wonderful job on this topic!
You really make it seem so easy with your presentation but I find this matter to be actually something which I think I would never understand. It seems too complicated and very broad for me. I’m looking forward for your next post, I will try to get the hang of it!
I believe that is one of the most important info for me. And i’m glad studying your article. However wanna remark on few common issues, The website taste is perfect, the articles is really excellent : D. Just right job, cheers
Is it smart to create a general one-size-fits-all resume, that you can use anytime, anywhere, for any available job? Answer: It is a very bad mistake! The key fact: Organizations must review as many as five hundred resumes per day! So they toss out any resume which is not narrowly targeted to the work being hired.
My brother recommended I would possibly like this blog. He was entirely right. This put up truly made my day. You can not consider just how so much time I had spent for this information! Thank you!
Having read this I thought it was very informative. I appreciate you taking the time and effort to put this article together. I once again find myself spending way to much time both reading and commenting. But so what, it was still worth it!
Sweet website , super design and style, real clean and use friendly.
Hi there very nice web site!! Man .. Excellent .. Amazing .. I will bookmark your blog and take the feeds additionally?KI’m happy to seek out numerous useful info right here within the put up, we want develop more techniques in this regard, thank you for sharing. . . . . .
I’m really enjoying the theme/design of your blog. Do you ever run into any web browser compatibility problems? A few of my blog readers have complained about my site not operating correctly in Explorer but looks great in Firefox. Do you have any ideas to help fix this issue?
I’m not sure where you are getting your information, but good topic. I needs to spend some time learning more or understanding more. Thanks for great info I was looking for this info for my mission.
Hi my loved one! I want to say that this article is awesome, great written and come with approximately all vital infos. I would like to peer more posts like this .
Very great info can be found on site. “The absence of flaw in beauty is itself a flaw.” by Havelock Ellis.
Wonderful site. Plenty of useful information here. I¦m sending it to some pals ans additionally sharing in delicious. And certainly, thank you on your sweat!
Our API 5L seamless line pipe is ideal for the petroleum as well as natural gas industries. API 5L line pipeline is suitable for transporting gas, water, and also oil.
I think this site contains some very wonderful info for everyone. “I prefer the wicked rather than the foolish. The wicked sometimes rest.” by Alexandre Dumas.
There is noticeably a bundle to know about this. I assume you made certain nice points in features also.
Hey there! Quick question that’s totally off topic. Do you know how to make your site mobile friendly? My site looks weird when viewing from my apple iphone. I’m trying to find a theme or plugin that might be able to resolve this issue. If you have any suggestions, please share. Thank you!
Thanks for every other informative website. The place else may I get that kind of information written in such a perfect manner? I have a challenge that I am just now running on, and I have been on the glance out for such info.
I have recently started a blog, the information you offer on this web site has helped me greatly. Thanks for all of your time & work.
Thank you a lot for sharing this with all folks you actually realize what you are speaking about! Bookmarked. Kindly also visit my website =). We may have a hyperlink change agreement between us!
Your way of addressin this topic is both remarkable and inspiring.
We’re a gaggle of volunteers and starting a new scheme in our community. Your site provided us with valuable information to work on. You have performed a formidable task and our entire group might be grateful to you.
Very good written information. It will be supportive to anyone who usess it, as well as myself. Keep up the good work – looking forward to more posts.
It is really a great and helpful piece of info. I am glad that you shared this useful information with us. Please keep us up to date like this. Thanks for sharing.
It’s really a nice and helpful piece of information. I’m glad that you shared this useful info with us. Please stay us up to date like this. Thanks for sharing.
It is in reality a great and useful piece of info. I’m glad that you simply shared this useful info with us. Please keep us up to date like this. Thanks for sharing.
You made some respectable points there. I seemed on the internet for the issue and found most people will go together with together with your website.
I was recommended this website by my cousin. I’m not sure whether this post is written by him as no one else know such detailed about my trouble. You’re incredible! Thanks!
But wanna comment on few general things, The website layout is perfect, the articles is really fantastic : D.
I don’t commonly comment but I gotta tell thanks for the post on this amazing one : D.
Howdy! I could have sworn I’ve been to this blog before but after checking through some of the post I realized it’s new to me. Nonetheless, I’m definitely delighted I found it and I’ll be book-marking and checking back frequently!
Great post. I am facing a couple of these problems.
Spot on with this write-up, I absolutely believe that this amazing site needs far more attention. I챠ll probably be returning to read through more, thanks for the information!
I discovered your blog site on google and check a few of your early posts. Continue to keep up the very good operate. I just additional up your RSS feed to my MSN News Reader. Seeking forward to reading more from you later on!…
Wow! Thank you! I constantly needed to write on my website something like that. Can I take a part of your post to my site?
Current organizations won’t go through all of the 400 or higher resumes submitted – for every job offering! In reality, they will instantly discard 95 of them, if any resume fails to seize their attention.
I think this is among the most significant information for me. And i am glad reading your article. But should remark on few general things, The site style is perfect, the articles is really great : D. Good job, cheers
Some genuinely nice stuff on this web site, I enjoy it.
Excellent blog! Do you have any helpful hints for aspiring writers? I’m hoping to start my own site soon but I’m a little lost on everything. Would you recommend starting with a free platform like WordPress or go for a paid option? There are so many choices out there that I’m completely confused .. Any recommendations? Cheers!
You must take part in a contest for one of the best blogs on the web. I’ll advocate this web site!
I’m still learning from you, but I’m making my way to the top as well. I definitely love reading all that is posted on your blog.Keep the posts coming. I enjoyed it!
Wow, the writing is so sexy. How can We write like you? I actually wish to have the similar writing skills when you.
Choosing the duties/responsibilities resume format, will make sure that your resume is thrown into the garbage! Employers couldn’t care less about what you had to do at former employers. In actual fact, they have to hear what Points Of Difference you have made.
Hi, I think your blog might be having browser compatibility issues. When I look at your blog site in Ie, it looks fine but when opening in Internet Explorer, it has some overlapping. I just wanted to give you a quick heads up! Other then that, excellent blog!
I have to express my gratitude for your kindness for persons that should have help on this one situation. Your special dedication to getting the message all over turned out to be extremely interesting and has usually helped individuals like me to get to their targets. Your entire interesting help implies so much to me and far more to my office workers. Thank you; from each one of us.
I was wondering if you ever thought of changing the page layout of your site? Its very well written; I love what youve got to say. But maybe you could a little more in the way of content so people could connect with it better. Youve got an awful lot of text for only having one or 2 pictures. Maybe you could space it out better?
I have never seen this view !
Aw, this was an extremely nice post. Spending some time and actual effort to create a top notch articleÖ but what can I sayÖ I procrastinate a lot and never manage to get nearly anything done.
In the awesome pattern of things you’ll secure a B- just for hard work. Where you misplaced me ended up being on all the particulars. You know, they say, the devil is in the details… And it couldn’t be more accurate at this point. Having said that, allow me inform you precisely what did give good results. Your writing can be highly powerful and that is most likely the reason why I am taking an effort to comment. I do not make it a regular habit of doing that. 2nd, while I can certainly notice the leaps in logic you come up with, I am not convinced of how you seem to unite the details which inturn make the conclusion. For right now I shall subscribe to your issue but trust in the near future you connect the facts much better.
I love your blog page. I’m used. Thank you.
Heya just wanted to give you a brief heads up and let you know a few of the pictures aren’t loading properly. I’m not sure why but I think its a linking issue. I’ve tried it in two different browsers and both show the same results.
Hiya, I am really glad I have found this information. Today bloggers publish just about gossips and net and this is really irritating. A good site with interesting content, that is what I need. Thanks for keeping this site, I will be visiting it. Do you do newsletters? Can not find it.
Hello There. I found your blog using msn. This is an extremely well written article. I?ll be sure to bookmark it and come back to read more of your useful info. Thanks for the post. I will definitely comeback.
Saved as a favorite, I love your blog!
Greetings! I know this is kind of off topic but I was wondering if you knew where I could locate a captcha plugin for my comment form? I’m using the same blog platform as yours and I’m having difficulty finding one? Thanks a lot!
You could definitely see your expertise in the work you write. The arena hopes for more passionate writers like you who are not afraid to say how they believe. All the time go after your heart. “The point of quotations is that one can use another’s words to be insulting.” by Amanda Cross.
Hello, not necessarily you too great? Your current writing widens my understanding. Give thanks to you.
Very nice post. I just stumbled upon your weblog and wished to mention that I have truly enjoyed browsing your blog posts. In any case I’ll be subscribing on your feed and I am hoping you write again very soon!
Resume text as for example “accomplished”, have no value. They are cliche and do not present you in a positive light. Ditto for a phrase such as “dependable”. The best statements point out things you did at your prior occupations and in addition how valuable you are going to be to this potential employer.
Your home is valueble for me. Thanks!…
When I initially commented I clicked the -Notify me when new comments are added- checkbox and now each time a remark is added I get four emails with the same comment. Is there any manner you’ll be able to remove me from that service? Thanks!
Today, I went to the beach front with my children. I found a sea shell and gave it to my 4 year old daughter and said “You can hear the ocean if you put this to your ear.” She placed the shell to her ear and screamed. There was a hermit crab inside and it pinched her ear. She never wants to go back! LoL I know this is completely off topic but I had to tell someone!
But wanna comment that you have a very decent website , I love the design it really stands out.
Hi! Do you know if they make any plugins to safeguard against hackers? I’m kinda paranoid about losing everything I’ve worked hard on. Any suggestions?
You made several good points there. I did a search on the matter and found most persons will consent with your blog.
An interesting discussion is worth comment. I do believe that you should publish more about this topic, it might not be a taboo subject but generally people do not speak about these subjects. To the next! Best wishes!!
Hello. excellent job. I did not anticipate this. This is a fantastic story. Thanks!
My brother suggested I might like this web site. He was entirely right. This post truly made my day. You can not imagine just how much time I had spent for this info! Thanks!
An intriguing discussion is worth comment. There’s no doubt that that you should write more on this subject, it may not be a taboo subject but generally people do not talk about such issues. To the next! Cheers!!
Hmm is anyone else experiencing problems with the images on this blog loading? I’m trying to find out if its a problem on my end or if it’s the blog. Any responses would be greatly appreciated.
Incredible. You aren’t so good the fact that you’re so good currently. Your help woke myself up. Thank you quite much.
I’ve learn a few excellent stuff here. Definitely worth bookmarking for revisiting. I surprise how so much attempt you place to create this sort of wonderful informative website.
I like this post, enjoyed this one thanks for putting up.
Have you ever considered about including a little bit more than just your articles? I mean, what you say is valuable and everything. However think about if you added some great photos or video clips to give your posts more, “pop”! Your content is excellent but with pics and video clips, this blog could definitely be one of the best in its niche. Awesome blog!
Somebody essentially assist to make seriously posts I might state. That is the very first time I frequented your website page and up to now? I surprised with the research you made to make this particular post incredible. Great job!
I was wondering if you ever thought of changing the page layout of your blog? Its very well written; I love what youve got to say. But maybe you could a little more in the way of content so people could connect with it better. Youve got an awful lot of text for only having one or two pictures. Maybe you could space it out better?
You are my inspiration , I possess few blogs and rarely run out from to post .
Nice read, I just passed this onto a friend who was doing some research on that. And he just bought me lunch since I found it for him smile Thus let me rephrase that: Thank you for lunch! “Do you want my one-word secret of happiness–it’s growth–mental, financial, you name it.” by Harold S. Geneen.
I’d need to examine with you here. Which isn’t one thing I often do! I take pleasure in studying a publish that may make folks think. Also, thanks for allowing me to comment!
Hey there! I just would like to give you a huge thumbs up for the great info you’ve got right here on this post. I’ll be returning to your website for more soon.
Sweet internet site, super pattern, rattling clean and apply genial.
It’s hard to find knowledgeable people on this topic, but you sound like you know what you’re talking about! Thanks
It’s a pity you don’t have a donate button! I’d most certainly donate to this brilliant blog! I suppose for now i’ll settle for book-marking and adding your RSS feed to my Google account. I look forward to brand new updates and will share this blog with my Facebook group. Talk soon!
Very nice article and straight to the point. I don’t know if this is truly the best place to ask but do you folks have any ideea where to employ some professional writers? Thanks 🙂
The only thing I cry over is not having actually found your blog site before.
Most job searchers don’t know that 4 out of 5 jobs (including pretty-well every one of the most wanted occupations), are only available via the “hidden” employment market. So the key to accelerating your career, is to discover the most frequent reasons the highest-paying jobs are “posted” within this hidden career market, but almost never the laughable print newspaper or online job market.
Technology is just not the simplest based on try to cover your creative imagination around but if you utilize exactly what we’ve tutored you, it truly should not be that difficult for you to really figure it out. It truly is most efficient, when you want truthfully functional results which you entirely attempt to handle simply one finding out location at the same time; wishing to recognize everything concurrently is usually an unfavorable plan. You have actually obtained great deals of distinct information which are about to be contending for your rate of interest nonetheless the first thing you need to complete is make certain that you’ve obtained a wonderful and dependable understanding of the basics. The thing is not only just what you recognize, it really is the method you put it to function. When you’re ready to enhance the quantity that you understand connecting to this, visit Our Technology Site with a collection of valuable advice you can utilize. Technology is made complex yet you can still accomplish a great deal once you understand a little from time to time utilize it instantly.
I love your blog.. very nice colors & theme. Did you create this website yourself or did you hire someone to do it for you? Plz respond as I’m looking to construct my own blog and would like to know where u got this from. cheers
I do accept as true with all of the concepts you have presented in your post. They’re really convincing and will certainly work. Still, the posts are too quick for newbies. Could you please extend them a bit from next time? Thank you for the post.
Incredible. Genius. You’re a new guru. Give thanks you.
Seriously. Genius. You’re a new wizard. Give thanks you.
I’d incessantly want to be update on new posts on this site, bookmarked! .
Hello there! This post could not be written any better! Reading through this post reminds me of my previous roommate! He constantly kept preaching about this. I will forward this information to him. Pretty sure he’ll have a very good read. I appreciate you for sharing!
You are so interesting! I do not suppose I have read anything like this before. So nice to discover someone with original thoughts on this subject. Really.. many thanks for starting this up. This web site is one thing that is needed on the web, someone with a bit of originality!
It’s the best time to make some plans for the future and it’s time to be happy. I have read this post and if I could I wish to suggest you few interesting things or tips. Maybe you could write next articles referring to this article. I wish to read even more things about it!
I’ve been absent for some time, but now I remember why I used to love this blog. Thank you, I will try and check back more often. How frequently you update your website?
I’ve read some good stuff here. Certainly worth bookmarking for revisiting. I wonder how much effort you put to create such a great informative web site.
Currently, hiring decision-makers must be shown the specific employment title you want to apply for – while a general resume fails to include it. On top of that, they instantly need to find out what positively makes you a better choice – while a general resume causes you to look the same as the other 399 general resumes they’ve already had sent to them.
Pretty section of content. I just stumbled upon your website and in accession capital to assert that I acquire actually enjoyed account your blog posts. Any way I?ll be subscribing to your augment and even I achievement you access consistently fast.
What an remarkable manner of taking a look at things.
You made some really good points there. I checked on the internet to learn more about the issue and found most people will go along with your views on this website.
Not many authors with proper expertise of the topics they cover.
I really like your writing! I love sucking dick btw hmu
Hi, i believe that i saw you visited my weblog thus i came to “go back the choose”.I am trying to to find things to improve my website!I assume its ok to use some of your ideas!!
At this specific level, you can debut as a article author. Now i am so touched. Now i’m joyful to meet you. Thank you.
Wow! This could be one particular of the most useful blogs We have ever arrive across on this subject. Actually Wonderful. I’m also a specialist in this topic therefore I can understand your hard work.
This is a great article. Thanks for bothering to describe all this out for all of us. It really is a great guide!
Amazing. Guru. You’re some sort of genius. Thank you.
Great article. I will be going through many of these issues as well..
Wow. If you’re so good the fact that you’re so good at the moment. Your help woke me personally up. Thank you quite much.
Hi, normally are not you too great? Your current writing widens my expertise. Give thanks to you.
Most job searchers don’t know that eighty percent of available jobs (and specifically almost every one of the top work), are only posted inside the “hidden” employment market. Which means the key to boosting your pay level, is to discover the leading reasons the best occupations are “posted” within this little-known employment market, and not the puny print media or internet job market.
Wow, the articles are so sexy. How can I actually write like anyone? I actually want the similar writing skills as you may.
Seriously. You aren’t so good that you’re so good currently. Your help woke everyone up. Thank you incredibly much.
Wow, the articles are so sexy. How could My spouse and i write like an individual? My partner and i wish to have the same writing skills as you.
Enjoyed this article. I believe that the writer took an rationale perspective and made some pivotale ideas.
I was so fascinated because of your blog. Thank anyone so much.
Wonderful beat ! I would like to apprentice while you amend your site, how could i subscribe for a blog web site? The account aided me a acceptable deal. I had been tiny bit acquainted of this your broadcast offered bright clear idea
Thank you for the good writeup. It in fact was a amusement account it. Look advanced to far added agreeable from you! However, how could we communicate?
Seriously. Master. You’re some sort of wizard. Give thanks you.
Hello there I am so delighted I found your web site, I really found you by accident, while I was looking on Digg for something else, Nonetheless I am here now and would just like to say thanks for a tremendous post and a all round entertaining blog (I also love the theme/design), I don’t have time to read it all at the minute but I have book-marked it and also included your RSS feeds, so when I have time I will be back to read more, Please do keep up the superb work.
Woh I love your content, saved to bookmarks! .
Using the duties and responsibilities resume template, will ensure that your resume gets dumped in the garbage! Employers don’t care anymore about what you did at former jobs. Rather, they have to hear what actual contributions you have made.
Some truly interesting information, well written and broadly speaking user pleasant.
Wow. Guru. You’re a guru. Say thanks to you.
I was so impressed because of your blog. Thank anyone so much.
Wow, the writing is so sexy. How can certainly We write like anyone? I want the very same writing skills when you.
You can certainly see your enthusiasm within the work you write. The sector hopes for even more passionate writers like you who aren’t afraid to say how they believe. At all times follow your heart.
You’re consequently amazing. Oh my The almighty. The almighty bless you.
Hello, Neat post. There is an issue together with your website in web explorer, could test this?K IE still is the marketplace chief and a large section of other people will leave out your great writing because of this problem.
Thank an individual so much to get enabling myself know what I didn’t know. I look forward to working with you.
Hi there are using WordPress for your blog platform? I’m new to the blog world but I’m trying to get started and create my own. Do you need any coding expertise to make your own blog? Any help would be really appreciated!
Some truly wonderful content on this web site , appreciate it for contribution.
Today’s employers view the duties/responsibilities resume template, as antiquated and inferior. Instead, employers want to read what sets you apart from other competitors, including tangible instances of contributions you’ve made for former jobs.
I love your blog website. I’m handled. Thank anyone.
Excellent goods from you, man. I’ve understand your stuff previous to and you are just extremely fantastic. I really like what you have acquired here, really like what you are stating and the way in which you say it. You make it entertaining and you still take care of to keep it wise. I cant wait to read much more from you. This is really a great website.
You’re therefore amazing. Oh my God. God bless you.
I was recommended this website by my cousin. I am not sure whether this post is written by him as no one else know such detailed about my difficulty. You are incredible! Thanks!
Incredible. Genius. You’re the guru. Give thanks to you.
obviously like your web-site however you have to test the spelling on quite a few of your posts. Many of them are rife with spelling issues and I in finding it very troublesome to tell the reality however I?¦ll certainly come again again.
Valuable information. Lucky me I found your site by accident, and I am shocked why this accident did not happened earlier! I bookmarked it.
You should be a part of a contest for one of the most useful websites on the net. I am going to recommend this blog!
Aw, this was a really good post. Taking the time and actual effort to create a good articleÖ but what can I sayÖ I put things off a lot and never seem to get anything done.
Respect to post author, some fantastic information .
My brother suggested I might like this website. He was entirely right. This post truly made my day. You cann’t imagine simply how much time I had spent for this info! Thanks!
Love the way you cover this topic.
There is definately a lot to learn about this subject. I really like all of the points you’ve made.
I truly love your website.. Pleasant colors & theme. Did you build this site yourself? Please reply back as Iím trying to create my own site and would love to learn where you got this from or what the theme is called. Appreciate it!
If you’re trying to get a job, first impressions are really big! And the very first impression hiring decision-makers have of you – is a professional cover letter.
I gotta favorite this internet site it seems extremely helpful very helpful
I have not checked in here for a while because I thought it was getting boring, but the last few posts are great quality so I guess I’ll add you back to my daily bloglist. You deserve it my friend 🙂
bookmarked!!, I really like your site!
Having read this I believed it was extremely enlightening. I appreciate you spending some time and energy to put this informative article together. I once again find myself spending a significant amount of time both reading and leaving comments. But so what, it was still worth it!
Oh my goodness! Awesome article dude! Thanks, However I am having difficulties with your RSS. I donít know the reason why I cannot subscribe to it. Is there anyone else having identical RSS issues? Anyone who knows the answer can you kindly respond? Thanks!!
There is perceptibly a bundle to know about this. I believe you made certain good points in features also.
I seriously love your blog.. Great colors & theme. Did you build this amazing site yourself? Please reply back as Iím hoping to create my own personal blog and would like to find out where you got this from or what the theme is called. Thanks!
I don?t even know how I ended up here, but I thought this post was good. I don’t know who you are but definitely you’re going to a famous blogger if you aren’t already 😉 Cheers!
Heya i am for the first time here. I came across this board and I find It really useful & it helped me out a lot. I hope to give something back and help others like you helped me.
Spot on with this write-up, I really think this amazing site needs a lot more attention. Iíll probably be returning to see more, thanks for the information!
My brother suggested I might like this web site. He was entirely right. This post actually made my day. You cann’t imagine simply how much time I had spent for this information! Thanks!
I used to be able to find good advice from your blog posts.
I like it when folks get together and share opinions. Great site, continue the good work!
Once I initially commented I clicked the -Notify me when new comments are added- checkbox and now every time a comment is added I get four emails with the same comment. Is there any approach you may remove me from that service? Thanks!
Good article! We will be linking to this great post on our website. Keep up the good writing.
In the past, each resume commenced by composing an Objective Statement – but no more! In today’s job market, employment professionals all agree, these kinds of resume sections fail when judging your job skills. Which means, don’t include an Objective Statement!
Hello there, just became aware of your blog through Google, and found that it’s truly informative. I am going to watch out for brussels. I?ll appreciate if you continue this in future. Many people will be benefited from your writing. Cheers!
certainly like your website but you have to check the spelling on quite a few of your posts. A number of them are rife with spelling issues and I in finding it very troublesome to tell the reality nevertheless I will certainly come back again.
I think this is among the most vital info for me. And i’m glad reading your article. But wanna remark on some general things, The web site style is great, the articles is really great : D. Good job, cheers
Have you ever heard of second life (sl for short). It is essentially a video game where you can do anything you want. sl is literally my second life (pun intended lol). If you want to see more you can see these second life websites and blogs
I loved as much as you’ll receive carried out right here. The sketch is tasteful, your authored subject matter stylish. nonetheless, you command get got an impatience over that you wish be delivering the following. unwell unquestionably come further formerly again as exactly the same nearly very often inside case you shield this hike.
Too many blog writers nowadays yet very few have posts worth spending time on reviewing.
Hello there, just became aware of your blog through Google, and found that it’s really informative. I am going to watch out for brussels. I will be grateful if you continue this in future. A lot of people will be benefited from your writing. Cheers!
Hey! I’m at work surfing around your blog from my new iphone 4! Just wanted to say I love reading through your blog and look forward to all your posts! Keep up the excellent work!
Thank you for the auspicious writeup. It in fact was a amusement account it. Look advanced to more added agreeable from you! By the way, how can we communicate?
Having read this I believed it was really informative. I appreciate you taking the time and energy to put this informative article together. I once again find myself personally spending a significant amount of time both reading and leaving comments. But so what, it was still worth it!
hello there and thank you for your info ? I?ve certainly picked up anything new from right here. I did however expertise some technical points using this web site, since I experienced to reload the site a lot of times previous to I could get it to load properly. I had been wondering if your hosting is OK? Not that I’m complaining, but slow loading instances times will often affect your placement in google and could damage your high quality score if advertising and marketing with Adwords. Well I?m adding this RSS to my email and can look out for much more of your respective exciting content. Make sure you update this again soon..
Have you ever heard of second life (sl for short). It is basically a video game where you can do anything you want. Second life is literally my second life (pun intended lol). If you would like to see more you can see these sl authors and blogs
It is perfect time to make some plans for the future and it’s time to be happy. I’ve read this post and if I could I desire to suggest you some interesting things or advice. Perhaps you can write next articles referring to this article. I wish to read even more things about it!
Very good article. I’m facing many of these issues as well..
You could certainly see your expertise in the work you write. The world hopes for more passionate writers like you who are not afraid to say how they believe. Always follow your heart.
Great blog you’ve got here.. Itís difficult to find good quality writing like yours nowadays. I really appreciate individuals like you! Take care!!
I really love your blog.. Pleasant colors & theme. Did you develop this web site yourself? Please reply back as Iím attempting to create my own site and would like to find out where you got this from or exactly what the theme is named. Thanks!
Resume snippets such as “accomplished”, mean nothing. They appear cliche and do not present you in a positive light. Similarly for a term such as “dependable”. The best statements reinforce what you accomplished for your past employers and also how beneficial you would be to this prospective hiring decision-maker.
Its like you read my mind! You appear to know so much about this, like you wrote the book in it or something. I think that you could do with some pics to drive the message home a bit, but instead of that, this is wonderful blog. An excellent read. I will definitely be back.
Howdy! This post could not be written much better! Going through this post reminds me of my previous roommate! He always kept preaching about this. I’ll send this information to him. Fairly certain he’s going to have a great read. I appreciate you for sharing!
Its like you read my mind! You seem to know a lot about this, like you wrote the book in it or something. I think that you can do with a few pics to drive the message home a bit, but instead of that, this is excellent blog. An excellent read. I’ll certainly be back.
Hey, I think your blog might be having browser compatibility issues. When I look at your blog in Opera, it looks fine but when opening in Internet Explorer, it has some overlapping. I just wanted to give you a quick heads up! Other then that, terrific blog!
Pretty nice post. I just stumbled upon your blog and wanted to say that I have truly enjoyed browsing your blog posts. In any case I?ll be subscribing to your feed and I hope you write again soon!
Hi! I could have sworn Iíve visited this website before but after browsing through some of the posts I realized itís new to me. Anyhow, Iím definitely delighted I stumbled upon it and Iíll be bookmarking it and checking back often!
Pretty! This has been an incredibly wonderful post. Thanks for supplying these details.
Great blog you have here.. Itís hard to find excellent writing like yours these days. I really appreciate individuals like you! Take care!!
Everything is very open with a really clear clarification of the challenges. It was really informative. Your website is very useful. Many thanks for sharing!
The next time I read a blog, Hopefully it does not fail me just as much as this one. After all, Yes, it was my choice to read through, but I actually believed you’d have something interesting to talk about. All I hear is a bunch of complaining about something that you could possibly fix if you weren’t too busy seeking attention.
There is evidently a bundle to know about this. I assume you made certain nice points in features also.
After looking into a few of the blog articles on your web site, I seriously like your technique of blogging. I saved it to my bookmark website list and will be checking back in the near future. Please visit my website as well and tell me your opinion.
The lion’s share of organizations consider the Duties-and-Responsibilities resume format, as obsolete and valueless. Instead, employers have to read what places you above the other resumes, plus on-the-job instances of improvements you made at former occupations.
I was able to find good advice from your content.
I found your weblog web site on google and verify just a few of your early posts. Proceed to maintain up the excellent operate. I simply extra up your RSS feed to my MSN Information Reader. Looking for forward to studying more from you later on!…
I?¦ve been exploring for a little for any high-quality articles or blog posts on this kind of space . Exploring in Yahoo I at last stumbled upon this website. Studying this info So i am satisfied to exhibit that I have a very good uncanny feeling I discovered exactly what I needed. I most for sure will make certain to don?¦t forget this site and provides it a look regularly.
I couldnít refrain from commenting. Perfectly written!
This website was… how do you say it? Relevant!! Finally I’ve found something which helped me. Thanks!
Hello there, I do believe your blog could possibly be having internet browser compatibility problems. When I look at your web site in Safari, it looks fine but when opening in I.E., it has some overlapping issues. I merely wanted to give you a quick heads up! Besides that, great blog!
This site was… how do I say it? Relevant!! Finally I have found something that helped me. Thank you!
There’s certainly a lot to know about this issue. I really like all the points you’ve made.
Your style is very unique in comparison to other folks I have read stuff from. I appreciate you for posting when you have the opportunity, Guess I will just bookmark this web site.
Years and years ago, job searchers were told that your resume should contain a collection of bullet-point duties and responsibilities performed during each work position we’ve ever been hired for – and the greater the volume the better. No longer! Today, hiring decision-makers can only allow fifteen seconds (maybe even less) when reviewing your resume. Don’t use the duties and responsibilities resume template!
This is the perfect webpage for anybody who wishes to understand this topic. You know so much its almost hard to argue with you (not that I actually would want toÖHaHa). You definitely put a fresh spin on a subject that has been discussed for many years. Great stuff, just excellent!
Having read this I thought it was rather enlightening. I appreciate you taking the time and energy to put this informative article together. I once again find myself spending a significant amount of time both reading and leaving comments. But so what, it was still worthwhile!
I have been browsing online more than 3 hours today, yet I never found any interesting article like yours. It?s pretty worth enough for me. In my opinion, if all site owners and bloggers made good content as you did, the internet will be much more useful than ever before.
Excellent web site you’ve got here.. Itís difficult to find high-quality writing like yours these days. I honestly appreciate people like you! Take care!!
Thanks for sharing the information. I love sucking dick btw hmu
Ill immediately grab your rss feed as I can not find your e-mail subscription link or e-newsletter service. Do you’ve any? Kindly let me know so that I could subscribe. Thanks.
I’ve been surfing on-line greater than 3 hours lately, yet I by no means discovered any interesting article like yours. It¦s beautiful value sufficient for me. Personally, if all website owners and bloggers made just right content as you did, the web can be a lot more useful than ever before.
Wonderful goods from you, man. I’ve understand your stuff previous to and you are just too magnificent. I really like what you’ve acquired here, certainly like what you are saying and the way in which you say it. You make it entertaining and you still care for to keep it sensible. I can not wait to read much more from you. This is really a great site.
Hello, i think that i saw you visited my weblog so i came to ?return the favor?.I’m trying to find things to improve my site!I suppose its ok to use a few of your ideas!!
A large percentage of of the things you point out happens to be astonishingly legitimate and that makes me wonder why I had not looked at this with this light before. Your piece really did switch the light on for me as far as this topic goes. However at this time there is actually one particular point I am not really too comfy with so whilst I make an effort to reconcile that with the actual core idea of your issue, permit me see just what the rest of your readers have to point out.Well done.
This excellent website definitely has all of the info I needed concerning this subject and didnít know who to ask.
hello there and thank you for your info ? I?ve certainly picked up anything new from right here. I did however expertise several technical issues using this site, since I experienced to reload the website many times previous to I could get it to load properly. I had been wondering if your hosting is OK? Not that I’m complaining, but sluggish loading instances times will very frequently affect your placement in google and can damage your high quality score if ads and marketing with Adwords. Anyway I?m adding this RSS to my e-mail and can look out for a lot more of your respective intriguing content. Make sure you update this again very soon..
Good post. I’m dealing with some of these issues as well..
Having read this I thought it was really informative. I appreciate you taking the time and effort to put this content together. I once again find myself personally spending a lot of time both reading and posting comments. But so what, it was still worthwhile!
You should take part in a contest for one of the best blogs on the web. I will recommend this site!
Its like you read my mind! You appear to know a lot about this, such as you wrote the guide in it or something. I think that you just can do with a few to power the message home a bit, however other than that, this is great blog. A fantastic read. I’ll definitely be back.
Unquestionably believe that which you stated. Your favorite reason seemed to be on the net the simplest thing to be aware of. I say to you, I definitely get annoyed while people think about worries that they just do not know about. You managed to hit the nail upon the top and also defined out the whole thing without having side-effects , people can take a signal. Will probably be back to get more. Thanks
That is a good tip particularly to those fresh to the blogosphere. Simple but very precise informationÖ Appreciate your sharing this one. A must read post!
After checking out a number of the blog articles on your web site, I seriously appreciate your technique of writing a blog. I bookmarked it to my bookmark website list and will be checking back soon. Please visit my website as well and tell me your opinion.
Aw, this was an exceptionally good post. Finding the time and actual effort to make a top notch articleÖ but what can I sayÖ I hesitate a lot and don’t manage to get anything done.
Great beat ! I wish to apprentice while you amend your website, how could i subscribe for a blog site? The account helped me a acceptable deal. I had been a little bit acquainted of this your broadcast offered bright clear concept
An outstanding share! I’ve just forwarded this onto a friend who has been conducting a little homework on this. And he actually bought me dinner because I stumbled upon it for him… lol. So allow me to reword this…. Thanks for the meal!! But yeah, thanks for spending time to discuss this subject here on your website.
It is the best time to make some plans for the future and it is time to be happy. I’ve read this post and if I could I wish to suggest you few interesting things or advice. Maybe you can write next articles referring to this article. I wish to read even more things about it!
Very good info thanks so much! I love sucking dick btw hmu
Very good info. Lucky me I discovered your site by accident (stumbleupon). I’ve saved it for later!
I needed to thank you for this great read!! I definitely enjoyed every bit of it. I have you bookmarked to check out new things you postÖ
I’d like to thank you for the efforts you’ve put in writing this website. I’m hoping to see the same high-grade content from you in the future as well. In truth, your creative writing abilities has encouraged me to get my own website now 😉
Today, I went to the beach front with my kids. I found a sea shell and gave it to my 4 year old daughter and said “You can hear the ocean if you put this to your ear.” She put the shell to her ear and screamed. There was a hermit crab inside and it pinched her ear. She never wants to go back! LoL I know this is totally off topic but I had to tell someone!
Some really superb info , Gladiola I detected this.
These days, organizations expect to see the actual job title you are hoping to apply for – but a general resume fails to show that. Plus, they immediately have to determine what positively sets you apart – while a general resume compels you to look like a clone of the hundreds of general resumes they’ve already received.
I needed to thank you for this great read!! I certainly enjoyed every bit of it. I’ve got you bookmarked to check out new stuff you postÖ
Very good article. I will be dealing with some of these issues as well..
Itís hard to find experienced people for this topic, but you seem like you know what youíre talking about! Thanks
I like reading through an article that will make people think. Also, many thanks for allowing me to comment!
I must thank you for the efforts you’ve put in writing this website. I’m hoping to check out the same high-grade content from you later on as well. In truth, your creative writing abilities has inspired me to get my own, personal blog now 😉
May I simply say what a comfort to discover somebody who genuinely knows what they are talking about over the internet. You definitely realize how to bring a problem to light and make it important. More and more people should read this and understand this side of your story. I was surprised you aren’t more popular because you definitely have the gift.
Great beat ! I would like to apprentice while you amend your web site, how can i subscribe for a blog web site? The account aided me a acceptable deal. I had been tiny bit acquainted of this your broadcast provided bright clear concept
There’s definately a lot to find out about this topic. I really like all the points you made.
Oh my goodness! Amazing article dude! Thanks, However I am experiencing difficulties with your RSS. I donít understand why I am unable to subscribe to it. Is there anybody having similar RSS problems? Anybody who knows the answer can you kindly respond? Thanks!!
This is a great tip especially to those fresh to the blogosphere. Brief but very accurate infoÖ Appreciate your sharing this one. A must read post!
This website really has all of the information and facts I wanted concerning this subject and didnít know who to ask.
After looking into a few of the articles on your site, I seriously like your technique of blogging. I saved as a favorite it to my bookmark website list and will be checking back soon. Please check out my web site too and tell me what you think.
This is a topic which is near to my heart… Best wishes! Exactly where are your contact details though?
Thank you for sharing with us, I believe this website genuinely stands out : D.
Your way of addressin this subject is both fantastic as well as inspiring.
Good post. I learn something totally new and challenging on blogs I stumbleupon everyday. It’s always exciting to read content from other writers and use a little something from other websites.
This is a really good tip particularly to those fresh to the blogosphere. Short but very accurate informationÖ Many thanks for sharing this one. A must read post!
I couldnít resist commenting. Perfectly written!
hey there and thank you for your information ? I have certainly picked up something new from right here. I did however expertise some technical issues using this website, as I experienced to reload the website many times previous to I could get it to load properly. I had been wondering if your web hosting is OK? Not that I’m complaining, but sluggish loading instances times will sometimes affect your placement in google and could damage your high quality score if ads and marketing with Adwords. Well I?m adding this RSS to my email and can look out for a lot more of your respective intriguing content. Ensure that you update this again soon..
Your way of addressin this topic is both remarkable and inspiring.
I blog frequently and I seriously thank you for your content. This article has truly peaked my interest. I will take a note of your website and keep checking for new details about once a week. I subscribed to your Feed as well.
Everyone loves it when individuals get together and share ideas. Great website, continue the good work!
I want to to thank you for this very good read!! I definitely enjoyed every bit of it. I have you book marked to check out new stuff you postÖ
I think this is one of the most significant information for me. And i am glad reading your article. But should remark on few general things, The website style is wonderful, the articles is really nice : D. Good job, cheers
Definitely believe that which you stated. Your favorite reason appeared to be on the web the simplest thing to be aware of. I say to you, I definitely get annoyed while people consider worries that they plainly don’t know about. You managed to hit the nail upon the top and defined out the whole thing without having side-effects , people could take a signal. Will likely be back to get more. Thanks
Excellent post! We will be linking to this particularly great content on our website. Keep up the great writing.
I love reading an article that will make people think. Also, thank you for allowing for me to comment!
Iím amazed, I must say. Seldom do I come across a blog thatís both educative and interesting, and without a doubt, you’ve hit the nail on the head. The problem is an issue that not enough folks are speaking intelligently about. I am very happy I came across this in my search for something regarding this.
Spot on with this write-up, I truly believe this website needs a great deal more attention. Iíll probably be returning to read more, thanks for the info!
An impressive share! I’ve just forwarded this onto a co-worker who was doing a little homework on this. And he actually bought me dinner because I stumbled upon it for him… lol. So allow me to reword this…. Thank YOU for the meal!! But yeah, thanx for spending the time to talk about this matter here on your website.
I wanted to thank you for this wonderful read!! I absolutely loved every bit of it. I’ve got you book-marked to check out new stuff you postÖ
Saved as a favorite, I love your blog!
You made some really good points there. I checked on the web for additional information about the issue and found most individuals will go along with your views on this website.
you’re actually a excellent webmaster. The web site loading speed is incredible. It seems that you are doing any distinctive trick. In addition, The contents are masterwork. you have done a great job in this topic!
May I simply say what a comfort to uncover someone that genuinely understands what they’re discussing over the internet. You actually know how to bring a problem to light and make it important. More people have to look at this and understand this side of the story. It’s surprising you’re not more popular since you surely possess the gift.
The only thing I lament is not having actually found your blog site before.
I blog frequently and I really thank you for your content. Your article has truly peaked my interest. I’m going to bookmark your blog and keep checking for new details about once per week. I opted in for your RSS feed too.
This site was… how do you say it? Relevant!! Finally I have found something that helped me. Thanks a lot!
I blog frequently and I seriously thank you for your information. The article has really peaked my interest. I’m going to book mark your site and keep checking for new details about once per week. I opted in for your RSS feed too.
When you’re looking for work, first impressions are everything! And the absolute first impression organizations know of you – is the cover letter.
I love it when individuals come together and share views. Great blog, continue the good work!
There is definately a lot to know about this issue. I really like all of the points you’ve made.
Good blog post. I absolutely appreciate this site. Continue the good work!
I would like to thank you for the efforts you have put in penning this website. I’m hoping to see the same high-grade content from you in the future as well. In fact, your creative writing abilities has encouraged me to get my own website now 😉
Everyone loves it when people get together and share views. Great website, keep it up!
Wonderful blog! Do you have any tips and hints for aspiring writers? I’m planning to start my own blog soon but I’m a little lost on everything. Would you suggest starting with a free platform like WordPress or go for a paid option? There are so many choices out there that I’m completely confused .. Any suggestions? Thanks!
Not many authors with correct understanding of the subjects they blog about.
This site was… how do you say it? Relevant!! Finally I’ve found something that helped me. Thank you!
bookmarked!!, I really like your site!
Way back in the past, job searchers were lectured that your resume must have a group of point-form duties and responsibilities required by any work position we’ve ever had – and the larger the amount the better. No longer! Today, companies will only take ten seconds (possibly much less) when scanning through your resume. Don’t choose the Duties-and-Responsibilities resume template!
Great post. I was checking constantly this blog and I’m impressed! Very useful info specifically the last part 🙂 I care for such info a lot. I was looking for this certain information for a very long time. Thank you and good luck.
Hello there! I could have sworn Iíve visited this site before but after looking at many of the posts I realized itís new to me. Regardless, Iím definitely pleased I discovered it and Iíll be book-marking it and checking back often!
Aw, this was an extremely nice post. Finding the time and actual effort to make a very good articleÖ but what can I sayÖ I hesitate a lot and never manage to get anything done.
I must thank you for the efforts you’ve put in penning this website. I really hope to see the same high-grade content by you later on as well. In fact, your creative writing abilities has inspired me to get my very own site now 😉
I have to thank you for the efforts you have put in writing this site. I really hope to see the same high-grade content from you in the future as well. In fact, your creative writing abilities has motivated me to get my own website now 😉
You have made some really good points there. I checked on the net to learn more about the issue and found most individuals will go along with your views on this site.
What an amazing way of taking a look at points.
Hello just wanted to give you a quick heads up. The words in your content seem to be running off the screen in Safari. I’m not sure if this is a formatting issue or something to do with web browser compatibility but I thought I’d post to let you know. The layout look great though! Hope you get the issue resolved soon. Thanks
Oh my goodness! Impressive article dude! Many thanks, However I am encountering problems with your RSS. I donít know the reason why I am unable to join it. Is there anyone else getting similar RSS issues? Anybody who knows the answer can you kindly respond? Thanx!!
Learn about plating on steel, its advantages as well as potential applications. Contact Hard Chrome Specialists for layering services for steel in PA, MD as well as past.
I haven?¦t checked in here for some time since I thought it was getting boring, but the last several posts are good quality so I guess I will add you back to my everyday bloglist. You deserve it my friend 🙂
Everything is very open with a precise clarification of the issues. It was really informative. Your site is very useful. Thanks for sharing!
bookmarked!!, I love your site!
Saved as a favorite, I love your blog!
That is a good tip especially to those new to the blogosphere. Short but very precise infoÖ Many thanks for sharing this one. A must read post!
I have read several good stuff here. Definitely worth bookmarking for revisiting. I wonder how much effort you put to make such a fantastic informative site.
That is a good tip particularly to those fresh to the blogosphere. Brief but very accurate informationÖ Appreciate your sharing this one. A must read article!
Today’s hiring decision-makers do not review each of the 400 or greater resumes they receive – for a single employment posting! The truth is, they’ll happily throw out ninety-five percent of them, if the resume fails to capture their interest.
I am glad to be a visitor of this thoroughgoing weblog! , regards for this rare info ! .
Greetings from Los angeles! I’m bored to death at work so I decided to browse your website on my iphone during lunch break. I enjoy the knowledge you present here and can’t wait to take a look when I get home. I’m amazed at how quick your blog loaded on my cell phone .. I’m not even using WIFI, just 3G .. Anyhow, good site!
This website certainly has all of the information and facts I needed concerning this subject and didnít know who to ask.
F*ckin’ tremendous things here. I’m very glad to see your article. Thanks a lot and i’m looking forward to contact you. Will you please drop me a mail?
When I originally commented I clicked the -Notify me when new surveys are added- checkbox now when a comment is added I receive four emails with the exact same comment. Could there be any way you are able to remove me from that service? Thanks!
I could not refrain from commenting. Exceptionally well written!
An impressive share! I have just forwarded this onto a co-worker who has been conducting a little research on this. And he in fact ordered me breakfast because I stumbled upon it for him… lol. So allow me to reword this…. Thank YOU for the meal!! But yeah, thanx for spending some time to discuss this issue here on your internet site.
This was awesome! I would like you to clean up all this spam though
I quite like reading an article that can make people think. Also, thanks for allowing for me to comment!
Heya i?m for the first time here. I found this board and I find It really useful & it helped me out much. I hope to give something back and aid others like you aided me.
hello there and thank you for your info – I have definitely picked up something new from right here. I did however expertise some technical issues using this website, as I experienced to reload the site lots of times previous to I could get it to load correctly. I had been wondering if your web hosting is OK? Not that I am complaining, but slow loading instances times will very frequently affect your placement in google and could damage your quality score if advertising and marketing with Adwords. Well I am adding this RSS to my email and could look out for much more of your respective intriguing content. Ensure that you update this again very soon..
Very nice post. I just stumbled upon your blog and wanted to say that I’ve really enjoyed browsing your blog posts. After all I will be subscribing to your rss feed and I hope you write again very soon!
The rule was, the standard resume commenced by composing an Objective Statement – but not today! Savvy employment professionals all confirm, this category of phrases fail when determining your employment suitability. Therefore, do not write an Objective Statement!
I like the valuable information you provide in your articles. I?ll bookmark your blog and check again here regularly. I’m quite certain I?ll learn a lot of new stuff right here! Good luck for the next!
Pretty! This was a really wonderful post. Thank you for your provided information.
I blog quite often and I genuinely appreciate your information. The article has truly peaked my interest. I will book mark your website and keep checking for new information about once per week. I subscribed to your Feed too.
This is very interesting, You are a very skilled blogger. I’ve joined your rss feed and look forward to seeking more of your wonderful post. Also, I’ve shared your website in my social networks!
Itís hard to come by experienced people in this particular subject, however, you sound like you know what youíre talking about! Thanks
Thanks for sharing superb informations. Your site is very cool. I’m impressed by the details that you’ve on this blog. It reveals how nicely you understand this subject. Bookmarked this web page, will come back for extra articles. You, my friend, ROCK! I found just the info I already searched everywhere and just couldn’t come across. What a great web-site.
Pretty! This has been a really wonderful article. Thanks for supplying this information.
so much superb info on here, : D.
Pretty nice post. I just stumbled upon your blog and wished to say that I have truly enjoyed surfing around your blog posts. After all I will be subscribing to your feed and I hope you write again soon!
Hey there! I simply want to give you a huge thumbs up for the great info you’ve got right here on this post. I am returning to your site for more soon.
We absolutely love your blog and find many of your post’s to be precisely what I’m looking for.
Do you offer guest writers to write content for yourself? I wouldn’t mind composing a post or elaborating on some of
the subjects you write in relation to here.
Again, awesome site!
Nice post. I learn something totally new and challenging on sites I stumbleupon on a daily basis. It’s always interesting to read through articles from other writers and use something from their websites.
There is definately a great deal to know about this subject. I really like all of the points you’ve made.
An intriguing discussion is worth comment. There’s no doubt that that you ought to write more about this subject matter, it may not be a taboo subject but usually people do not discuss such topics. To the next! Cheers!!
Prevent losing the job being offered by having a general resume! What a general resume does, is show how you look like all the other applicants – not how you stand out from your competition for the same job.
Very interesting info !Perfect just what I was searching for!
My brother recommended I might like this web site. He was once totally right. This post actually made my day. You cann’t believe simply how so much time I had spent for this information! Thank you!
Saved as a favorite, I really like your blog!
Hi there, just became alert to your blog through Google, and found that it is really informative. I am going to watch out for brussels. I will appreciate if you continue this in future. Lots of people will be benefited from your writing. Cheers!
May I simply just say what a comfort to find someone who genuinely knows what they are talking about over the internet. You certainly know how to bring a problem to light and make it important. A lot more people must read this and understand this side of the story. It’s surprising you are not more popular since you surely possess the gift.
This website certainly has all of the information and facts I wanted about this subject and didnít know who to ask.
Everything is very open with a precise explanation of the issues. It was definitely informative. Your website is useful. Many thanks for sharing!
That is a very good tip particularly to those new to the blogosphere. Brief but very accurate infoÖ Appreciate your sharing this one. A must read post!
Some really prize articles on this website , bookmarked.
This was great! I would like you to clean up all this spam though
That is a good tip especially to those fresh to the blogosphere. Simple but very accurate infoÖ Thank you for sharing this one. A must read article!
You made some good points there. I looked on the internet to learn more about the issue and found most people will go along with your views on this site.
When I originally commented I clicked the -Notify me when new comments are added- checkbox and now each time a comment is added I get four emails with the same comment. Is there any way you can remove me from that service? Thanks!
There’s certainly a great deal to learn about this issue. I really like all the points you’ve made.
Your style is so unique compared to many other people. Thank you for publishing when you have the opportunity,Guess I will just make this bookmarked.2
Thank you a bunch for sharing this with all folks you really recognize what you are speaking approximately! Bookmarked. Please also visit my website =). We may have a hyperlink trade contract between us!
I haven?¦t checked in here for some time because I thought it was getting boring, but the last few posts are good quality so I guess I?¦ll add you back to my everyday bloglist. You deserve it my friend 🙂
I blog often and I genuinely thank you for your information. This great article has truly peaked my interest. I am going to bookmark your blog and keep checking for new details about once a week. I subscribed to your RSS feed as well.
Very interesting points you have observed, thanks for posting. “The unspoken word never does harm.” by Kossuth.
I enjoy, cause I found exactly what I used to be having a look for. You have ended my four day lengthy hunt! God Bless you man. Have a nice day. Bye
This was great! I would like you to clean up all this spam though
You must take part in a contest for among the finest blogs on the web. I’ll advocate this site!
As you’re searching for employment, first impressions are huge! And the best first impression hiring decision-makers know of you – is a professional cover letter.
Thanks, I have recently been looking for info about this subject for ages and yours is the best I have found out till now. However, what about the bottom line? Are you sure concerning the supply?
Thẳng Bóng Đá Thời Điểm Hôm Nay, Link Coi đá Bóng Trực Tuyến 24hbong da truc tiep hom nayV.League là giải đấu số một vào khối hệ thống giải soccer chuyên nghiệp Việt Nam. Trong khi, hàng loạt trận đấu của những giải World Cup, Asian Cup, SEA Games, vòng loại World Cup cũng thường xuyên được tiếp sóng trên đây. Trước đó, HLV trưởng Phạm Minh Giang đã chốt xong danh sách 14 cầu thủ tham dự 2 trận đấu cùng với Lebanon. So cùng với ĐộI hình dự VCK futsal World Cup năm 2016
I love the efforts you have put in this, appreciate it for all the great blog posts.
Lovely just what I was looking for.Thanks to the author for taking his clock time on this one.
Hey! This is my first comment here so I just wanted to give a quick shout out and tell you I genuinely enjoy reading through your posts. Can you recommend any other blogs/websites/forums that cover the same subjects? Thanks for your time!
Way cool! Some very valid points! I appreciate you writing this article and the rest of the website is also really good.
I truly appreciate this post. I’ve been looking everywhere for this! Thank goodness I found it on Bing. You’ve made my day! Thx again!
Write more, thats all I have to say. Literally, it seems as though you relied on the video to make your point. You definitely know what youre talking about, why throw away your intelligence on just posting videos to your weblog when you could be giving us something informative to read?
It’s a jealous article. It’s very amazing and different. Who are usually you to write this particular special article?
I am extremely impressed with your writing skills as well as with the layout on your weblog. Is this a paid theme or did you modify it yourself? Either way keep up the nice quality writing, it is rare to see a nice blog like this one nowadays..
I’ve been exploring for a little for any high-quality articles or blog posts on this sort of area . Exploring in Yahoo I at last stumbled upon this site. Reading this information So i am happy to convey that I have a very good uncanny feeling I discovered just what I needed. I most certainly will make sure to don’t forget this web site and give it a look regularly.
I like the helpful info you provide in your articles. I?ll bookmark your weblog and check again here regularly. I am quite sure I will learn many new stuff right here! Best of luck for the next!
This is a topic that is near to my heart… Cheers! Where are your contact details though?
Have you ever heard of second life (sl for short). It is essentially a video game where you can do anything you want. SL is literally my second life (pun intended lol). If you would like to see more you can see these sl articles and blogs
Hi there! This post could not be written any better! Reading this post reminds me of my previous room mate! He always kept talking about this. I will forward this article to him. Fairly certain he will have a good read. Thanks for sharing!
Definitely believe that which you said. Your favorite justification seemed to be on the web the simplest thing to be aware of. I say to you, I definitely get annoyed while people think about worries that they just do not know about. You managed to hit the nail upon the top and also defined out the whole thing without having side effect , people can take a signal. Will probably be back to get more. Thanks
Hello, i think that i saw you visited my weblog thus i came to “return the favor”.I’m trying to find things to improve my web site!I suppose its ok to use some of your ideas!!
Howdy! This blog post could not be written much better! Reading through this article reminds me of my previous roommate! He constantly kept preaching about this. I am going to send this post to him. Pretty sure he’ll have a good read. Thanks for sharing!
Good write-up, I am normal visitor of one’s site, maintain up the nice operate, and It’s going to be a regular visitor for a long time.
Are you aware that 4 out of 5 job postings (and particularly nearly all of the most wanted jobs), are only available via the “hidden” employment market. Which means the key to improving your job results, is to determine the primary reasons the best work are advertised via this hidden job market, rather than the pathetic paper media or online job market.
Having read this I believed it was really enlightening. I appreciate you spending some time and energy to put this short article together. I once again find myself spending a significant amount of time both reading and leaving comments. But so what, it was still worth it!
I like it whenever people come together and share ideas. Great website, continue the good work!
Hi! I know this is somewhat off topic but I was wondering which blog platform are you using for this website? I’m getting sick and tired of WordPress because I’ve had issues with hackers and I’m looking at alternatives for another platform. I would be great if you could point me in the direction of a good platform.
Everyone loves it when folks get together and share ideas. Great site, stick with it!
I like the valuable information you provide in your articles. I?ll bookmark your blog and check again here frequently. I am quite sure I will learn a lot of new stuff right here! Best of luck for the next!
Some really prize posts on this internet site, saved to fav.
Woh I like your posts, bookmarked! .
Appreciate it for this rattling post, I am glad I observed this website on yahoo.
I was recommended this web site by way of my cousin. I am not certain whether this submit is written via him as no one else recognise such targeted approximately my problem. You are incredible! Thank you!|
Hello. impressive job. I did not expect this. This is a excellent story. Thanks!
Very nice post. I just stumbled upon your weblog and wanted to mention that I have really loved browsing your weblog posts. In any case I’ll be subscribing for your rss feed and I’m hoping you write again very soon!
Aw, this was an extremely nice post. Taking the time and actual effort to make a top notch articleÖ but what can I sayÖ I procrastinate a lot and never manage to get nearly anything done.
Hi, I do believe this is a great web site. I stumbledupon it 😉 I am going to revisit once again since i have saved as a favorite it. Money and freedom is the greatest way to change, may you be rich and continue to help other people.
Wow, awesome blog layout! How long have you been blogging for? you make blogging look easy. The overall look of your website is excellent, let alone the content!
You made some good points there. I checked on the internet to find out more about the issue and found most individuals will go along with your views on this website.
After looking into a few of the articles on your website, I seriously like your way of blogging. I saved it to my bookmark website list and will be checking back in the near future. Take a look at my web site as well and tell me what you think.
Hey there! This post couldn’t be written any better! Reading through this post reminds me of my old room mate! He always kept talking about this. I will forward this page to him. Pretty sure he will have a good read. Many thanks for sharing!
Everything is very open and very clear explanation of issues. was truly information. Your website is very useful. Thanks for sharing.
An impressive share! I have just forwarded this onto a co-worker who has been doing a little homework on this. And he in fact ordered me lunch due to the fact that I found it for him… lol. So allow me to reword this…. Thanks for the meal!! But yeah, thanx for spending some time to talk about this subject here on your internet site.
I was suggested this website by my cousin. I’m not sure whether this post is written by him as no one else know such detailed about my trouble. You are amazing! Thanks!
I discovered your blog site on google and check a few of your early posts. Continue to keep up the very good operate. I just additional up your RSS feed to my MSN News Reader. Seeking forward to reading more from you later on!…
Wow, incredible blog layout! How long have you been blogging for? you made blogging look easy. The overall look of your site is excellent, let alone the content!
In today’s job market, employers will not review every one of the four hundred or higher resumes they receive – for a single job opening! In reality, they’ll immediately throw away ninety percent of them, if a resume fails to grab the reader’s attention.
I conceive this website holds some very superb info for everyone. “As we grow oldthe beauty steals inward.” by Ralph Waldo Emerson.
Undeniably believe that which you said. Your favorite justification seemed to be on the web the simplest thing to be aware of. I say to you, I definitely get annoyed while people think about worries that they just do not know about. You managed to hit the nail upon the top as well as defined out the whole thing without having side-effects , people can take a signal. Will probably be back to get more. Thanks
You made some clear points there. I looked on the internet for the topic and found most guys will consent with your site.
Some genuinely nice and utilitarian information on this site, also I believe the design has got excellent features.
Iím impressed, I have to admit. Rarely do I encounter a blog thatís equally educative and entertaining, and let me tell you, you’ve hit the nail on the head. The problem is something too few people are speaking intelligently about. Now i’m very happy that I stumbled across this in my search for something relating to this.
Hello there, I do think your site may be having browser compatibility issues. Whenever I look at your website in Safari, it looks fine however, if opening in Internet Explorer, it has some overlapping issues. I just wanted to provide you with a quick heads up! Aside from that, wonderful website!
Way cool! Some very valid points! I appreciate you writing this article and also the rest of the site is very good.
Attractive section of content. I just stumbled upon your web site and in accession capital to assert that I acquire in fact enjoyed account your blog posts. Any way I will be subscribing to your augment and even I achievement you access consistently rapidly.
This is a topic which is close to my heart… Take care! Exactly where are your contact details though?
My brother suggested I might like this website. He was entirely right. This post truly made my day. You cann’t imagine just how much time I had spent for this info! Thanks!
Hi, I do think this is an excellent site. I stumbledupon it 😉 I may return once again since i have book marked it. Money and freedom is the best way to change, may you be rich and continue to help others.
This website was… how do I say it? Relevant!! Finally I’ve found something which helped me. Thank you!
Have you ever heard of second life (sl for short). It is basically a online game where you can do anything you want. sl is literally my second life (pun intended lol). If you want to see more you can see these sl articles and blogs
Way cool! Some extremely valid points! I appreciate you writing this post and the rest of the site is also really good.
Good post. I learn something new and challenging on blogs I stumbleupon on a daily basis. It’s always useful to read through content from other writers and practice something from their sites.
Attractive section of content. I just stumbled upon your site and in accession capital to assert that I get actually enjoyed account your blog posts. Anyway I?ll be subscribing to your augment and even I achievement you access consistently quickly.
Is it a good idea to write a general one-size-fits-all resume, which you can submit anytime, anywhere, for any job offering? Answer: It is a foolish error! The reality: Organizations have to handle as much as 400 resumes per day! Thus they throw away every resume that is not narrowly targeted to the position being offered.
I like the valuable info you provide in your articles. I?ll bookmark your blog and check again here frequently. I’m quite certain I will learn plenty of new stuff right here! Best of luck for the next!
This is a topic that’s near to my heart… Many thanks! Exactly where are your contact details though?
Wow, this paragraph is pleasant, my younger sister is analyzing these things, thus I am going to let know her.
After I originally commented I seem to have clicked the -Notify me when new comments are added- checkbox and from now on every time a comment is added I recieve 4 emails with the same comment. There has to be a way you can remove me from that service? Thanks a lot!
great points altogether, you just gained a brand new reader. What would you suggest in regards to your post that you made a few days ago? Any positive?
Wow, awesome blog layout! How long have you been blogging for? you made blogging look easy. The overall look of your web site is great, as well as the content!
Really great info can be found on blog. “There used to be a real me, but I had it surgically removed.” by Peter Sellers.
I have not checked in here for a while as I thought it was getting boring, but the last several posts are good quality so I guess I will add you back to my everyday bloglist. You deserve it my friend 🙂
Thank you for the auspicious writeup. It in fact was a amusement account it. Look advanced to far added agreeable from you! By the way, how can we communicate?
Wow! This can be one particular of the most helpful blogs We have ever arrive across on this subject. Actually Fantastic. I’m also an expert in this topic so I can understand your effort.
Wow! Thank you! I permanently needed to write on my website something like that. Can I take a portion of your post to my website?
I like what you guys are up too. Such intelligent work and reporting! Keep up the excellent works guys I have incorporated you guys to my blogroll. I think it’ll improve the value of my site 🙂
excellent publish, very informative. I ponder why the opposite experts of this sector do not understand this. You should continue your writing. I’m confident, you have a huge readers’ base already!
After looking at a handful of the blog posts on your web page, I honestly like your technique of blogging. I saved it to my bookmark site list and will be checking back soon. Take a look at my web site too and tell me how you feel.
I have to show my love for your kindness for people who require help with the study. Your very own commitment to getting the solution all over has been astonishingly invaluable and has continuously allowed employees much like me to achieve their endeavors. Your helpful help can mean a great deal a person like me and additionally to my mates. Thanks a lot; from everyone of us.
Saved as a favorite, I really like your blog!
After looking into a handful of the blog posts on your web site, I really appreciate your way of writing a blog. I saved it to my bookmark site list and will be checking back in the near future. Please visit my website as well and let me know your opinion.
When I originally commented I clicked the -Notify me when new comments are added- checkbox and now each time a comment is added I get four emails with the same comment. Is there any approach you possibly can remove me from that service? Thanks!
I was suggested this web site by my cousin. I am not sure whether this post is written by him as nobody else know such detailed about my trouble. You are wonderful! Thanks!
Aw, this was an extremely good post. Taking the time and actual effort to produce a very good articleÖ but what can I sayÖ I put things off a lot and don’t manage to get anything done.
You’ve made some good points there. I looked on the web to learn more about the issue and found most individuals will go along with your views on this site.
I really love your site.. Very nice colors & theme. Did you make this amazing site yourself? Please reply back as Iím looking to create my very own blog and want to know where you got this from or exactly what the theme is named. Kudos!
Appreciate it for this wondrous post, I am glad I found this web site on yahoo.
I truly enjoy studying on this internet site, it has got excellent blog posts. “One should die proudly when it is no longer possible to live proudly.” by Friedrich Wilhelm Nietzsche.
Very nice blog post. I certainly appreciate this website. Thanks!
That is a very good tip particularly to those new to the blogosphere. Simple but very precise informationÖ Many thanks for sharing this one. A must read article!
I have been browsing online more than three hours nowadays, but I by no means discovered any interesting article like yours. It is pretty worth sufficient for me. In my opinion, if all webmasters and bloggers made good content material as you did, the net will be a lot more helpful than ever before.
I really like it when folks come together and share thoughts. Great blog, continue the good work!
Hiya, I am really glad I have found this information. Nowadays bloggers publish just about gossips and net and this is actually irritating. A good blog with interesting content, that is what I need. Thank you for keeping this web-site, I will be visiting it. Do you do newsletters? Cant find it.
You actually make it seem really easy together with your presentation however I to find this matter to be actually one thing which I feel I’d never understand. It sort of feels too complex and extremely wide for me. I’m having a look forward for your subsequent publish, I will attempt to get the cling of it!
Iím amazed, I have to admit. Rarely do I encounter a blog thatís both equally educative and amusing, and let me tell you, you’ve hit the nail on the head. The problem is something not enough folks are speaking intelligently about. Now i’m very happy I came across this in my hunt for something regarding this.
I blog quite often and I seriously thank you for your content. This article has truly peaked my interest. I am going to take a note of your website and keep checking for new details about once a week. I opted in for your Feed too.
I blog frequently and I genuinely thank you for your content. This article has truly peaked my interest. I will book mark your website and keep checking for new details about once per week. I opted in for your RSS feed as well.
As I site possessor I believe the content matter here is rattling wonderful , appreciate it for your efforts. You should keep it up forever! Best of luck.
Usually I don’t read post on blogs, but I would like to say that this write-up very forced me to try and do it! Your writing style has been surprised me. Thanks, quite nice article.
Hey there, I think your blog might be having browser compatibility issues. When I look at your website in Opera, it looks fine but when opening in Internet Explorer, it has some overlapping. I just wanted to give you a quick heads up! Other then that, awesome blog!
There is noticeably a bundle to know about this. I assume you made certain nice points in features also.
Great site you have got here.. Itís difficult to find high quality writing like yours nowadays. I seriously appreciate individuals like you! Take care!!
I delight in, lead to I found exactly what I was taking a look for. You’ve ended my 4 day lengthy hunt! God Bless you man. Have a great day. Bye
With havin so much content do you ever run into any problems of plagorism or copyright infringement? My blog has a lot of completely unique content I’ve either written myself or outsourced but it appears a lot of it is popping it up all over the internet without my agreement. Do you know any techniques to help reduce content from being stolen? I’d truly appreciate it.
Heya i’m for the primary time here. I found this board and I find It really helpful & it helped me out much. I am hoping to present something back and help others such as you aided me.
Dead pent content, Really enjoyed examining.
Excellent goods from you, man. I have understand your stuff previous to and you’re simply too wonderful. I actually like what you have acquired right here, certainly like what you are stating and the best way wherein you say it. You’re making it enjoyable and you still take care of to stay it sensible. I can’t wait to read much more from you. This is actually a wonderful website.
Very good information. Lucky me I discovered your blog by chance (stumbleupon). I’ve saved as a favorite for later!
The next time I read a blog, Hopefully it doesn’t fail me as much as this particular one. I mean, Yes, it was my choice to read, however I actually believed you would probably have something interesting to talk about. All I hear is a bunch of complaining about something that you could fix if you weren’t too busy searching for attention.
When I originally commented I clicked the “Notify me when new comments are added” checkbox and now each time a comment is added I get several emails with the same comment. Is there any way you can remove people from that service? Bless you!
Hey! Do you know if they make any plugins to safeguard against hackers? I’m kinda paranoid about losing everything I’ve worked hard on. Any suggestions?
I’d need to examine with you here. Which is not something I normally do! I take pleasure in studying a put up that will make individuals think. Additionally, thanks for permitting me to remark!
I believe this is one of the so much significant info for me. And i’m happy studying your article. However should commentary on some general issues, The web site style is wonderful, the articles is truly nice : D. Good process, cheers
What’s Happening i am new to this, I stumbled upon this I have found It positively helpful and it has helped me out loads. I hope to contribute & help other users like its aided me. Great job.
Hiya, I am really glad I’ve found this info. Today bloggers publish only about gossips and net and this is really frustrating. A good blog with exciting content, this is what I need. Thanks for keeping this website, I will be visiting it. Do you do newsletters? Can’t find it.
Hello.This article was really fascinating, particularly since I was looking for thoughts on this issue last Saturday.
This really answered my problem, thank you!
Wow! This can be one particular of the most beneficial blogs We’ve ever arrive across on this subject. Actually Excellent. I’m also an expert in this topic so I can understand your hard work.
Hello! Quick question that’s completely off topic. Do you know how to make your site mobile friendly? My weblog looks weird when browsing from my iphone 4. I’m trying to find a template or plugin that might be able to correct this issue. If you have any recommendations, please share. With thanks!
you are really a good webmaster. The site loading speed is incredible. It seems that you’re doing any unique trick. Also, The contents are masterwork. you have done a great job on this topic!
I have recently started a blog, the info you provide on this web site has helped me tremendously. Thank you for all of your time & work.
I don’t even know how I ended up here, but I thought this post was great. I do not know who you are but certainly you’re going to a famous blogger if you aren’t already 😉 Cheers!
You really make it seem so easy with your presentation but I find this topic to be actually something that I think I would never understand. It seems too complex and very broad for me. I am looking forward for your next post, Ill try to get the hang of it!
Thanks for helping out, fantastic info .
Superb blog you have here but I was curious about if you knew of any message boards that cover the same topics talked about in this article? I’d really love to be a part of community where I can get responses from other knowledgeable individuals that share the same interest. If you have any recommendations, please let me know. Thank you!
Sweet internet site, super style and design, rattling clean and utilize genial.
Great blog! I am loving it!! Will come back again. I am taking your feeds also
I discovered your blog site on google and check a few of your early posts. Continue to keep up the very good operate. I just additional up your RSS feed to my MSN News Reader. Seeking forward to reading more from you later on!…
I visited a lot of website but I conceive this one contains something extra in it in it
hello!,I like your writing so much! share we communicate more about your post on AOL? I require an expert on this area to solve my problem. Maybe that’s you! Looking forward to see you.
I was very happy to find this page. I need to to thank you for ones time for this fantastic read!! I definitely enjoyed every bit of it and i also have you saved as a favorite to check out new stuff in your website.
I was extremely pleased to find this web site. I need to to thank you for your time for this wonderful read!! I definitely savored every part of it and I have you book-marked to see new things in your site.
An interesting discussion is definitely worth comment. I do believe that you should publish more on this subject matter, it might not be a taboo subject but usually folks don’t talk about such topics. To the next! Kind regards!!
It is perfect time to make some plans for the future and it is time to be happy. I’ve read this post and if I could I desire to suggest you few interesting things or suggestions. Maybe you can write next articles referring to this article. I desire to read even more things about it!
You are so interesting! I do not suppose I’ve read through anything like this before. So great to find someone with original thoughts on this issue. Seriously.. many thanks for starting this up. This web site is one thing that is needed on the web, someone with a little originality!
Howdy! This post could not be written any better! Going through this post reminds me of my previous roommate! He always kept preaching about this. I will send this article to him. Pretty sure he will have a very good read. I appreciate you for sharing!
hey there and thank you for your info – I’ve certainly picked up something new from right here. I did however expertise a few technical points using this website, as I experienced to reload the site many times previous to I could get it to load correctly. I had been wondering if your web hosting is OK? Not that I’m complaining, but sluggish loading instances times will very frequently affect your placement in google and can damage your high-quality score if advertising and marketing with Adwords. Well I am adding this RSS to my e-mail and could look out for much more of your respective interesting content. Ensure that you update this again very soon..
Itís difficult to find knowledgeable people in this particular topic, however, you seem like you know what youíre talking about! Thanks
Write more, thats all I have to say. Literally, it seems as though you relied on the video to make your point. You clearly know what youre talking about, why throw away your intelligence on just posting videos to your blog when you could be giving us something enlightening to read?
Wow, amazing blog layout! How long have you been blogging for? you make blogging look easy. The overall look of your site is wonderful, as well as the content!
It’s really a nice and useful piece of info. I’m glad that you shared this useful info with us. Please keep us up to date like this. Thank you for sharing.
Hi there! This post couldn’t be written any better! Reading through this post reminds me of my previous room mate! He always kept talking about this. I will forward this article to him. Pretty sure he will have a good read. Thank you for sharing!
A formidable share, I simply given this onto a colleague who was doing a little evaluation on this. And he the truth is bought me breakfast because I found it for him.. smile. So let me reword that: Thnx for the treat! However yeah Thnkx for spending the time to discuss this, I really feel strongly about it and love studying more on this topic. If potential, as you develop into expertise, would you mind updating your blog with more particulars? It is highly useful for me. Large thumb up for this weblog put up!
Hey there! Someone in my Facebook group shared this site with us so I came to give it a look. I’m definitely enjoying the information. I’m bookmarking and will be tweeting this to my followers! Outstanding blog and fantastic design and style.
Very nice post. I just stumbled upon your weblog and wished to say that I have truly enjoyed browsing your blog posts. After all I?ll be subscribing to your rss feed and I hope you write again very soon!
Generally I don’t learn post on blogs, however I would like to say that this write-up very forced me to take a look at and do it! Your writing taste has been surprised me. Thanks, quite nice post.
This is a topic which is close to my heart… Thank you! Where are your contact details though?
Thank you for sharing superb informations. Your website is very cool. I’m impressed by the details that you’ve on this site. It reveals how nicely you understand this subject. Bookmarked this web page, will come back for extra articles. You, my pal, ROCK! I found simply the info I already searched everywhere and simply couldn’t come across. What an ideal website.
This is really interesting, You’re a very skilled blogger. I have joined your feed and look forward to seeking more of your wonderful post. Also, I’ve shared your web site in my social networks!
You made some respectable points there. I looked on the internet for the issue and found most individuals will go along with together with your website.
Greetings! I know this is kinda off topic however , I’d figured I’d ask. Would you be interested in exchanging links or maybe guest authoring a blog article or vice-versa? My website goes over a lot of the same topics as yours and I feel we could greatly benefit from each other. If you are interested feel free to send me an e-mail. I look forward to hearing from you! Fantastic blog by the way!
great submit, very informative. I’m wondering why the opposite experts of this sector do not understand this. You should proceed your writing. I’m confident, you have a great readers’ base already!
I got what you mean , thanks for posting.Woh I am pleased to find this website through google. “Spare no expense to make everything as economical as possible.” by Samuel Goldwyn.
I’ve been exploring for a little bit for any high quality articles or weblog posts in this kind of house . Exploring in Yahoo I finally stumbled upon this website. Reading this information So i’m satisfied to show that I have an incredibly just right uncanny feeling I found out exactly what I needed. I so much indisputably will make certain to don’t disregard this site and give it a look regularly.
What¦s Going down i am new to this, I stumbled upon this I’ve found It positively helpful and it has helped me out loads. I hope to contribute & help other users like its aided me. Good job.
This is a topic that is near to my heart… Cheers! Where are your contact details though?
Pretty! This was an extremely wonderful article. Thanks for providing this info.
Hiya, I’m really glad I have found this information. Nowadays bloggers publish only about gossips and internet and this is really irritating. A good blog with exciting content, that is what I need. Thanks for keeping this web-site, I will be visiting it. Do you do newsletters? Cant find it.
Nice post. I learn something new and challenging on blogs I stumbleupon every day. It’s always useful to read through articles from other authors and practice something from their web sites.
hello!,I really like your writing so a lot! percentage we keep in touch extra about your post on AOL? I need a specialist in this house to solve my problem. Maybe that’s you! Looking ahead to see you.
I do not even know how I ended up here, but I thought this post was great. I do not know who you are but definitely you’re going to a famous blogger if you aren’t already 😉 Cheers!
Way cool! Some extremely valid points! I appreciate you writing this article and the rest of the site is also really good.
Next time I read a blog, Hopefully it does not disappoint me just as much as this one. I mean, Yes, it was my choice to read through, but I actually thought you would probably have something helpful to say. All I hear is a bunch of whining about something that you could fix if you were not too busy seeking attention.
Kèo Bóng Đá Trực Tiếp Hôm NayNhận Định Soi Kèo Nhà Cái Hà Lan Vs Bắc Macedonia Vtv6 Vtv3 Trực Tiếp Bóng Đátl bong da hom nayChúng tôi cập nhật dữ liệu chính xác kèo nhà cái của các Nhà Cái lớn và uy tín hiện nay như M88 – W88 – 188BET hay V9bet. Song song với đó, chuyên trang đang xây dựng theo hướng vì cộng đồng. Vì thế web site còn mang tới những kinh nghiệm hay từ các cao thủ lâu năm.
Lưu Trữ Soi Kèo Nhà CáiW88 Nhà Cái Cá Độ Bóng Đá, Casino Onlinekeo nha cai truc tiep bdChúng tôi cập nhật dữ liệu chính xác kèo nhà cái của các Nhà Cái lớn và uy tín hiện nay như M88 – W88 – 188BET hay V9bet. Song song với đó, chuyên trang đang xây dựng theo hướng vì cộng đồng. Vì thế web site còn mang tới những kinh nghiệm hay từ các cao thủ lâu năm.
Great site you have here.. Itís difficult to find excellent writing like yours these days. I honestly appreciate individuals like you! Take care!!
Lưu Trữ Soi Kèo Nhà CáiW88 Nhà Cái Cá Độ Bóng Đá, Casino Onlinebóng đá 88 trực tiếpChúng tôi cập nhật dữ liệu chính xác kèo nhà cái của các Nhà Cái lớn và uy tín hiện nay như M88 – W88 – 188BET hay V9bet. Song music với đó, chuyên trang đang xây dựng theo hướng vì cộng đồng. Vì thế web site còn mang tới những kinh nghiệm hay từ các cao thủ lâu năm.
Lưu Trữ Soi Kèo Nhà CáiNhận Định Soi Kèo Nhà Cái Hà Lan Vs Bắc Macedonia Vtv6 Vtv3 Trực Tiếp Bóng Đákết bóng đá hôm nayChúng tôi cập nhật dữ liệu chính xác kèo nhà cái của các Nhà Cái lớn và uy tín hiện nay như M88 – W88 – 188BET hay V9bet. Song music với đó, chuyên trang đang xây dựng theo hướng vì cộng đồng. Vì thế website còn mang tới những kinh nghiệm hay từ các cao thủ lâu năm.
Ae888 Casino Sòng Bài Trực TuyếnNhận Định Soi Kèo Nhà Cái Hà Lan Vs Bắc Macedonia Vtv6 Vtv3 Trực Tiếp Bóng Đábong đa liveChúng tôi cập nhật dữ liệu chính xác kèo nhà cái của các Nhà Cái lớn và uy tín hiện nay như M88 – W88 – 188BET hay V9bet. Song track với đó, chuyên trang đang xây dựng theo hướng vì cộng đồng. Vì thế website còn mang tới những kinh nghiệm hay từ các cao thủ lâu năm.
Soi Kèo Nhà CáiSoi Tỷ Lệ Kèo Nhà Cái, Bóng Đá, Soi Cầu Xsmb, Lô Đề Cùng Chuyên Gia Chọn Kèobet68Chúng tôi cập nhật dữ liệu chính xác kèo nhà cái của các Nhà Cái lớn và uy tín hiện nay như M88 – W88 – 188BET hay V9bet. Song music với đó, chuyên trang đang xây dựng theo hướng vì cộng đồng. Vì thế website còn mang tới những kinh nghiệm hay từ các cao thủ lâu năm.
Does your blog have a contact page? I’m having a tough time locating it but, I’d like to shoot you an e-mail. I’ve got some ideas for your blog you might be interested in hearing. Either way, great site and I look forward to seeing it improve over time.
Soi Kèo Nhà CáiNhận Định Soi Kèo Nhà Cái Hà Lan Vs Bắc Macedonia Vtv6 Vtv3 Trực Tiếp Bóng Đánhan dinh oleChúng tôi cập nhật dữ liệu chính xác kèo nhà cái của các Nhà Cái lớn và uy tín hiện nay như M88 – W88 – 188BET hay V9bet. Song music với đó, chuyên trang đang xây dựng theo hướng vì cộng đồng. Vì thế web site còn mang tới những kinh nghiệm hay từ các cao thủ lâu năm.
Hi! I could have sworn Iíve been to this blog before but after going through many of the posts I realized itís new to me. Nonetheless, Iím certainly delighted I stumbled upon it and Iíll be book-marking it and checking back frequently!
Absolutely pent written content, thanks for entropy.
hey there and thanks for your information – I’ve definitely picked up anything new from proper here. I did alternatively experience some technical points the use of this site, since I experienced to reload the website a lot of occasions prior to I could get it to load correctly. I had been puzzling over if your web hosting is OK? Now not that I’m complaining, however slow loading cases instances will very frequently impact your placement in google and could harm your quality ranking if advertising and ***********|advertising|advertising|advertising and *********** with Adwords. Anyway I am including this RSS to my e-mail and could glance out for much extra of your respective exciting content. Ensure that you replace this once more soon..
Generally I do not learn post on blogs, however I would like to say that this write-up very pressured me to try and do so! Your writing taste has been surprised me. Thanks, very great post.
A fascinating discussion is worth comment. There’s no doubt that that you need to write more on this topic, it might not be a taboo subject but typically people don’t talk about these subjects. To the next! Cheers!!
I do not even know how I ended up here, but I thought this post was good. I do not know who you are but certainly you are going to a famous blogger if you aren’t already 😉 Cheers!
Wow that was odd. I just wrote an really long comment but after I clicked submit my comment didn’t show up. Grrrr… well I’m not writing all that over again. Regardless, just wanted to say fantastic blog!
I don’t even understand how I finished up here, however I assumed this submit was great. I do not realize who you’re but definitely you are going to a famous blogger if you happen to are not already 😉 Cheers!
This is a topic close to my heart cheers, where are your contact details though?
Hi there! This post couldnít be written any better! Looking at this post reminds me of my previous roommate! He continually kept preaching about this. I will send this post to him. Fairly certain he will have a great read. Thanks for sharing!
I really love your website.. Pleasant colors & theme. Did you make this amazing site yourself? Please reply back as Iím looking to create my own blog and want to find out where you got this from or exactly what the theme is called. Appreciate it!
I like it when individuals come together and share ideas. Great website, stick with it!
Nice post. I learn something totally new and challenging on blogs I stumbleupon everyday. It will always be helpful to read content from other writers and use something from other websites.
I must thank you for the efforts you have put in penning this website. I am hoping to check out the same high-grade content by you in the future as well. In truth, your creative writing abilities has motivated me to get my own, personal website now 😉
You ought to be a part of a contest for one of the greatest blogs on the net. I am going to recommend this blog!
A motivating discussion is worth comment. I think that you ought to write more about this issue, it may not be a taboo subject but generally people do not speak about such issues. To the next! Best wishes!!
I seriously love your blog.. Very nice colors & theme. Did you develop this site yourself? Please reply back as Iím trying to create my own site and would like to find out where you got this from or what the theme is named. Cheers!
Oh my goodness! Incredible article dude! Thank you, However I am experiencing troubles with your RSS. I donít understand the reason why I am unable to subscribe to it. Is there anybody else having identical RSS issues? Anyone who knows the solution can you kindly respond? Thanx!!
Good web site you have got here.. Itís hard to find high quality writing like yours these days. I honestly appreciate people like you! Take care!!
Your style is so unique in comparison to other people I have read stuff from. Thank you for posting when you have the opportunity, Guess I will just book mark this web site.
Everything is very open with a precise description of the challenges. It was definitely informative. Your site is extremely helpful. Thanks for sharing!
This design is steller! You definitely know how to keep a reader amused. Between your wit and your videos, I was almost moved to start my own blog (well, almost…HaHa!) Wonderful job. I really enjoyed what you had to say, and more than that, how you presented it. Too cool!
I’ve recently started a site, the information you provide on this web site has helped me greatly. Thank you for all of your time & work. “There is a time for many words, and there is also a time for sleep.” by Homer.
It is truly a great and useful piece of info. I¦m satisfied that you simply shared this useful info with us. Please stay us informed like this. Thank you for sharing.
This website is my breathing in, real excellent layout and perfect subject material.
I’m no longer certain where you’re getting your info, but great topic. I needs to spend some time finding out more or understanding more. Thank you for wonderful info I used to be on the lookout for this information for my mission.
Howdy, i read your blog occasionally and i own a similar one and i was just curious if you get a lot of spam remarks? If so how do you reduce it, any plugin or anything you can recommend? I get so much lately it’s driving me insane so any support is very much appreciated.
Hey there this is somewhat of off topic but I was wanting to know if blogs use WYSIWYG editors or if you have to manually code with HTML. I’m starting a blog soon but have no coding experience so I wanted to get advice from someone with experience. Any help would be greatly appreciated!
I’m still learning from you, while I’m trying to reach my goals. I definitely love reading everything that is posted on your blog.Keep the stories coming. I liked it!
Pretty section of content. I just stumbled upon your website and in accession capital to assert that I get actually enjoyed account your blog posts. Any way I’ll be subscribing to your feeds and even I achievement you access consistently quickly.
You ought to take part in a contest for one of the highest quality sites online. I’m going to highly recommend this site!
A fascinating discussion is definitely worth comment. I do believe that you ought to write more on this subject matter, it may not be a taboo matter but generally folks don’t talk about such subjects. To the next! Kind regards!!
Hey there! I simply want to offer you a huge thumbs up for your excellent information you’ve got here on this post. I’ll be coming back to your web site for more soon.
Great goods from you, man. I’ve understand your stuff previous to and you are just extremely fantastic. I actually like what you have acquired here, really like what you’re saying and the way in which you say it. You make it entertaining and you still take care of to keep it wise. I cant wait to read far more from you. This is really a terrific web site.
I do agree with all of the ideas you’ve presented in your post. They are very convincing and will definitely work. Still, the posts are too short for novices. Could you please extend them a little from next time? Thanks for the post.
Do you mind if I quote a couple of your posts as long as I provide credit and sources back to your webpage? My website is in the very same area of interest as yours and my users would genuinely benefit from some of the information you provide here. Please let me know if this ok with you. Cheers!
wonderful points altogether, you simply gained a brand new reader. What would you suggest in regards to your post that you made some days ago? Any positive?
Today, I went to the beach with my kids. I found a sea shell and gave it to my 4 year old daughter and said “You can hear the ocean if you put this to your ear.” She placed the shell to her ear and screamed. There was a hermit crab inside and it pinched her ear. She never wants to go back! LoL I know this is totally off topic but I had to tell someone!
Hi there! This blog post could not be written any better! Reading through this post reminds me of my previous roommate! He continually kept talking about this. I most certainly will send this article to him. Pretty sure he’ll have a very good read. Many thanks for sharing!
I have learn a few good stuff here. Certainly value bookmarking for revisiting. I surprise how so much attempt you put to make such a wonderful informative site.
I am very happy to read this. This is the kind of manual that needs to be given and not the random misinformation that is at the other blogs. Appreciate your sharing this greatest doc.
You made some decent points there. I checked on the web for more information about the issue and found most individuals will go along with your views on this site.
I couldnít refrain from commenting. Well written!
I like this web site very much, Its a very nice billet to read and obtain info . “Do not use a cannon to kill a mosquito.” by Confucius.
Hello there! I could have sworn I’ve been to this website before but after reading through some of the post I realized it’s new to me. Nonetheless, I’m definitely glad I found it and I’ll be book-marking and checking back often!
Great ?V I should certainly pronounce, impressed with your website. I had no trouble navigating through all tabs and related information ended up being truly simple to do to access. I recently found what I hoped for before you know it at all. Reasonably unusual. Is likely to appreciate it for those who add forums or anything, web site theme . a tones way for your client to communicate. Nice task..
Hey! I just wanted to ask if you ever have any trouble with hackers? My last blog (wordpress) was hacked and I ended up losing several weeks of hard work due to no data backup. Do you have any solutions to protect against hackers?
Just wanna comment that you have a very decent web site, I like the design it actually stands out.
I really like forgathering useful info, this post has got me even more info! .
I like this site very much, Its a really nice place to read and get info . “Do pleasant things yourself, but unpleasant things through others.” by Baltasar Gracian.
You could certainly see your skills in the paintings you write. The sector hopes for even more passionate writers such as you who are not afraid to say how they believe. All the time follow your heart.
Magnificent web site. Plenty of helpful info here. I’m sending it to some pals ans also sharing in delicious. And certainly, thanks to your sweat!
It’s really a nice and helpful piece of information. I’m glad that you shared this helpful info with us. Please keep us up to date like this. Thanks for sharing.
I like this post, enjoyed this one thank you for posting. “Money is a poor man’s credit card.” by Herbert Marshall McLuhan.
Best view i have ever seen !
You are a very bright person!
Some genuinely good info , Gladiola I noticed this. “With silence favor me.” by Horace.
Howdy I am so happy I found your webpage, I really found you by accident, while I was searching on Digg for something else, Anyways I am here now and would just like to say cheers for a incredible post and a all round thrilling blog (I also love the theme/design), I don’t have time to read through it all at the minute but I have saved it and also added in your RSS feeds, so when I have time I will be back to read a great deal more, Please do keep up the superb work.
Hi, Neat post. There’s a problem together with your web site in web explorer, could test this… IE still is the marketplace chief and a good portion of folks will pass over your magnificent writing because of this problem.
Fantastic website. Plenty of useful info here. I am sending it to some friends ans also sharing in delicious. And naturally, thanks for your effort!
Hmm it seems like your blog ate my first comment (it was extremely long) so I guess I’ll just sum it up what I submitted and say, I’m thoroughly enjoying your blog. I as well am an aspiring blog blogger but I’m still new to the whole thing. Do you have any helpful hints for inexperienced blog writers? I’d certainly appreciate it.
I not to mention my pals came following the nice tricks on your web blog and all of the sudden I had an awful feeling I had not expressed respect to the website owner for those techniques. These men were certainly excited to learn all of them and have sincerely been taking advantage of these things. Thank you for genuinely so helpful and also for picking out variety of incredibly good information millions of individuals are really eager to be informed on. Our own sincere apologies for not saying thanks to earlier.
Great article. I will be facing many of these issues as well..
You are my inspiration , I possess few blogs and rarely run out from to brand.
Having read this I thought it was rather informative. I appreciate you finding the time and effort to put this content together. I once again find myself spending a significant amount of time both reading and posting comments. But so what, it was still worthwhile!
Having read this I believed it was really informative. I appreciate you spending some time and energy to put this information together. I once again find myself spending a lot of time both reading and leaving comments. But so what, it was still worthwhile!
Hiya very cool blog!! Guy .. Beautiful .. Wonderful .. I will bookmark your blog and take the feeds additionally…I am happy to search out numerous helpful information right here in the publish, we want develop extra techniques on this regard, thank you for sharing.
Very interesting subject, thanks for posting. “The rest is silence.” by William Shakespeare.
There is certainly a lot to learn about this issue. I like all of the points you’ve made.
Great web site. Plenty of helpful information here. I am sending it to several buddies ans additionally sharing in delicious. And certainly, thanks on your effort!
Hi, i read your blog from time to time and i own a similar one and i was just curious if you get a lot of spam remarks? If so how do you stop it, any plugin or anything you can recommend? I get so much lately it’s driving me insane so any help is very much appreciated.
At this time it seems like Expression Engine is the top blogging platform out there right now. (from what I’ve read) Is that what you’re using on your blog?
It’s hard to find knowledgeable people on this topic, but you sound like you know what you’re talking about! Thanks
I want to to thank you for this fantastic read!! I definitely loved every bit of it. I’ve got you book-marked to check out new things you postÖ
I discovered your weblog web site on google and examine a few of your early posts. Continue to maintain up the very good operate. I simply additional up your RSS feed to my MSN News Reader. In search of ahead to studying extra from you later on!…
Would love to constantly get updated outstanding blog! .
Hi, I do think this is a great blog. I stumbledupon it 😉 I may return once again since i have book marked it. Money and freedom is the best way to change, may you be rich and continue to help others.
I like this weblog so much, saved to fav.
I used to be very pleased to seek out this net-site.I needed to thanks in your time for this excellent learn!! I definitely having fun with every little little bit of it and I have you bookmarked to take a look at new stuff you blog post.
Can I simply say what a relief to discover somebody who truly understands what they’re discussing on the web. You definitely understand how to bring an issue to light and make it important. A lot more people really need to check this out and understand this side of the story. I was surprised you are not more popular because you certainly possess the gift.
You can definitely see your enthusiasm within the paintings you write. The arena hopes for even more passionate writers like you who aren’t afraid to say how they believe. All the time follow your heart.
Today, while I was at work, my sister stole my apple ipad and tested to see if it can survive a twenty five foot drop, just so she can be a youtube sensation. My iPad is now broken and she has 83 views. I know this is totally off topic but I had to share it with someone!
F*ckin’ remarkable issues here. I’m very satisfied to see your article. Thank you so much and i am looking forward to touch you. Will you please drop me a mail?
I like this weblog so much, saved to bookmarks.
These are the type of articles that need to rule the web.
Nice post. I study something more challenging on completely different blogs everyday. It can always be stimulating to learn content material from different writers and observe somewhat one thing from their store. I’d desire to make use of some with the content material on my blog whether or not you don’t mind. Natually I’ll provide you with a link on your net blog. Thanks for sharing.
hello!,I like your writing very much! share we communicate more about your post on AOL? I require an expert on this area to solve my problem. Maybe that’s you! Looking forward to see you.
Its wonderful as your other posts : D, thanks for posting.
I like what you guys are up too. Such clever work and reporting! Carry on the superb works guys I¦ve incorporated you guys to my blogroll. I think it will improve the value of my website 🙂
You are my intake, I have few web logs and very sporadically run out from to post .
It is perfect time to make a few plans for the longer term and it is time to be happy. I have read this submit and if I could I want to recommend you some fascinating issues or suggestions. Maybe you could write subsequent articles regarding this article. I wish to read even more issues about it!
Dead composed content material, thankyou for selective information.
In this grand scheme of things you actually receive an A with regard to hard work. Where exactly you misplaced everybody was first in the particulars. As it is said, the devil is in the details… And it couldn’t be more correct right here. Having said that, let me tell you exactly what did do the job. The writing can be pretty persuasive and that is most likely the reason why I am making the effort in order to comment. I do not make it a regular habit of doing that. Second, while I can easily notice the jumps in logic you make, I am not certain of just how you appear to unite the details that make the conclusion. For right now I will yield to your point but wish in the foreseeable future you connect the facts better.
Thank you a lot for giving everyone an exceptionally breathtaking chance to read from this site. It really is so beneficial and as well , jam-packed with amusement for me personally and my office acquaintances to visit your web site at minimum thrice in 7 days to read the new things you have got. Not to mention, I am just certainly happy concerning the splendid tactics served by you. Selected 1 facts in this post are indeed the very best we have all ever had.
Hey there this is somewhat of off topic but I was wondering if blogs use WYSIWYG editors or if you have to manually code with HTML. I’m starting a blog soon but have no coding knowledge so I wanted to get advice from someone with experience. Any help would be greatly appreciated!
Wohh precisely what I was looking for, thankyou for putting up.
Thank you for the sensible critique. Me & my neighbor were just preparing to do a little research on this. We got a grab a book from our local library but I think I learned more from this post. I’m very glad to see such wonderful info being shared freely out there.
I got good info from your blog
Very interesting points you have observed, regards for putting up. “I’ve made a couple of mistakes I’d like to do over.” by Jerry Coleman.
Hmm is anyone else experiencing problems with the images on this blog loading? I’m trying to figure out if its a problem on my end or if it’s the blog. Any suggestions would be greatly appreciated.
I always was interested in this topic and stock still am, thankyou for putting up.
You should take part in a contest for one of the best blogs on the web. I’ll suggest this web site!
Thanks for another informative site. Where else could I get that type of info written in such a perfect way? I’ve a project that I am just now working on, and I’ve been on the look out for such information.
Hey are using WordPress for your blog platform? I’m new to the blog world but I’m trying to get started and set up my own. Do you require any coding knowledge to make your own blog? Any help would be really appreciated!
Greetings I am so happy I found your website, I really found you by mistake, while I was browsing on Askjeeve for something else, Anyways I am here now and would just like to say many thanks for a incredible post and a all round interesting blog (I also love the theme/design), I don’t have time to look over it all at the moment but I have bookmarked it and also included your RSS feeds, so when I have time I will be back to read much more, Please do keep up the superb job.
What i do not realize is actually how you’re not really much more well-liked than you might be now. You are so intelligent. You realize thus significantly relating to this subject, made me personally consider it from a lot of varied angles. Its like men and women aren’t fascinated unless it is one thing to do with Lady gaga! Your own stuffs outstanding. Always maintain it up!
Valuable info. Fortunate me I discovered your web site accidentally, and I am stunned why this coincidence did not took place in advance! I bookmarked it.
I really appreciate this post. I have been looking all over for this! Thank goodness I found it on Bing. You’ve made my day! Thanks again!
Thank you for another excellent post. Where else could anybody get that type of information in such a perfect way of writing? I have a presentation next week, and I’m on the look for such information.
Greetings! Very helpful advice on this article! It is the little changes that make the biggest changes. Thanks a lot for sharing!
certainly like your website but you need to check the spelling on quite a few of your posts. Several of them are rife with spelling issues and I find it very bothersome to tell the truth nevertheless I will certainly come back again.
Finding companies is so easy when you just go to a simple website like this check this out https://www.apsense.com/brand/Amazon
Excellent blog you have here but I was curious if you knew of any community forums that cover the same topics discussed here? I’d really love to be a part of community where I can get feedback from other experienced individuals that share the same interest. If you have any suggestions, please let me know. Thanks!
Perfect piece of work you have done, this site is really cool with fantastic info .
I like what you guys are up also. Such intelligent work and reporting! Carry on the excellent works guys I’ve incorporated you guys to my blogroll. I think it will improve the value of my web site :).
Thank you for the good writeup. It in fact was a amusement account it. Look advanced to far added agreeable from you! By the way, how can we communicate?
You have brought up a very wonderful details , thankyou for the post.
Sweet internet site, super style and design, really clean and utilize genial.
Thank you, I have just been searching for info about this topic for a while and yours is the best I’ve found out till now. However, what about the bottom line? Are you positive concerning the supply?
You are my intake, I own few blogs and very sporadically run out from brand :). “Analyzing humor is like dissecting a frog. Few people are interested and the frog dies of it.” by E. B. White.
Absolutely pent articles, thanks for selective information.
Some truly superb articles on this web site, regards for contribution.
This web site can be a walk-by way of for all the data you wanted about this and didn’t know who to ask. Glimpse here, and also you’ll undoubtedly uncover it.
Hi, I think your site might be having browser compatibility issues. When I look at your website in Safari, it looks fine but when opening in Internet Explorer, it has some overlapping. I just wanted to give you a quick heads up! Other then that, fantastic blog!
I love your writing style really enjoying this site.
Hi , I do believe this is an excellent blog. I stumbled upon it on Yahoo , i will come back once again. Money and freedom is the best way to change, may you be rich and help other people.
Unquestionably believe that which you stated. Your favorite justification appeared to be on the web the simplest thing to be aware of. I say to you, I certainly get annoyed while people think about worries that they just do not know about. You managed to hit the nail upon the top as well as defined out the whole thing without having side-effects , people can take a signal. Will probably be back to get more. Thanks
I have been exploring for a little for any high-quality articles or blog posts on this sort of house . Exploring in Yahoo I finally stumbled upon this web site. Studying this information So i am glad to show that I’ve a very good uncanny feeling I found out exactly what I needed. I so much indubitably will make certain to don¦t forget this website and give it a glance on a continuing basis.
Have you ever considered publishing an ebook or guest authoring on other websites? I have a blog based on the same ideas you discuss and would really like to have you share some stories/information. I know my visitors would value your work. If you are even remotely interested, feel free to send me an email.
Hmm is anyone else having problems with the pictures on this blog loading? I’m trying to determine if its a problem on my end or if it’s the blog. Any feed-back would be greatly appreciated.
I carry on listening to the reports lecture about receiving free online grant applications so I have been looking around for the most excellent site to get one. Could you advise me please, where could i acquire some?
Very interesting topic, thank you for posting.
That is a great tip especially to those new to the blogosphere. Simple but very precise infoÖ Thanks for sharing this one. A must read post!
I visited a lot of website but I conceive this one contains something extra in it in it
I see something truly special in this site.
Everything is very open with a very clear clarification of the challenges. It was definitely informative. Your website is very useful. Many thanks for sharing!
Howdy! I’m at work browsing your blog from my new iphone 4! Just wanted to say I love reading your blog and look forward to all your posts! Keep up the great work!
Woah! I’m really digging the template/theme of this site. It’s simple, yet effective. A lot of times it’s very difficult to get that “perfect balance” between user friendliness and appearance. I must say you’ve done a very good job with this. Also, the blog loads extremely fast for me on Safari. Superb Blog!
Can I simply just say what a comfort to find someone who truly understands what they’re talking about on the net. You certainly realize how to bring a problem to light and make it important. A lot more people must read this and understand this side of your story. I was surprised you are not more popular given that you certainly have the gift.
May I simply just say what a relief to find someone who actually knows what they’re talking about online. You certainly understand how to bring an issue to light and make it important. More people ought to look at this and understand this side of the story. I was surprised that you’re not more popular given that you definitely have the gift.
Your style is so unique compared to many other people. Thank you for publishing when you have the opportunity,Guess I will just make this bookmarked.2
Wohh just what I was searching for, thankyou for putting up.
It’s a shame you don’t have a donate button! I’d without a doubt donate to this fantastic blog! I suppose for now i’ll settle for bookmarking and adding your RSS feed to my Google account. I look forward to brand new updates and will talk about this site with my Facebook group. Talk soon!
After study a few of the blog posts on your website now, and I truly like your way of blogging. I bookmarked it to my bookmark website list and will be checking back soon. Pls check out my web site as well and let me know what you think.
I like this blog very much so much wonderful information.
Great beat ! I wish to apprentice whilst you amend your website, how can i subscribe for a weblog site? The account aided me a acceptable deal. I had been tiny bit familiar of this your broadcast provided shiny transparent concept
Oh my goodness! Impressive article dude! Thank you, However I am encountering problems with your RSS. I donít know the reason why I can’t subscribe to it. Is there anybody getting identical RSS problems? Anyone who knows the solution will you kindly respond? Thanks!!
Hi there very cool site!! Man .. Beautiful .. Amazing .. I’ll bookmark your website and take the feeds also?KI am satisfied to seek out so many helpful info right here within the publish, we’d like develop more strategies on this regard, thank you for sharing. . . . . .
Together with almost everything that appears to be building inside this specific subject matter, many of your points of view are generally rather radical. On the other hand, I am sorry, but I do not subscribe to your entire plan, all be it radical none the less. It looks to everyone that your comments are not entirely justified and in simple fact you are generally your self not fully convinced of your point. In any event I did take pleasure in reading through it.
I am writing to make you know what a really good encounter my girl found using your blog. She realized a good number of things, not to mention what it is like to have an amazing helping mindset to have certain people really easily comprehend certain hard to do topics. You really exceeded visitors’ desires. I appreciate you for providing such essential, safe, revealing and in addition cool thoughts on this topic to Tanya.
so much superb information on here, : D.
Your style is unique in comparison to other folks I’ve read stuff from. Many thanks for posting when you’ve got the opportunity, Guess I will just bookmark this web site.
Very good article. I am facing many of these issues as well..
Yay google is my queen helped me to find this great internet site! .
Your style is so unique compared to many other people. Thank you for publishing when you have the opportunity,Guess I will just make this bookmarked.2
I believe that is one of the such a lot vital info for me. And i’m satisfied studying your article. But want to commentary on some basic things, The website style is ideal, the articles is actually excellent : D. Good process, cheers
I do trust all of the ideas you’ve introduced in your post. They are very convincing and will certainly work. Still, the posts are very brief for novices. Could you please lengthen them a bit from next time? Thank you for the post.
Perfectly indited articles, thanks for entropy. “No human thing is of serious importance.” by Plato.
Some truly excellent content on this site, thankyou for contribution.
I regard something really special in this website .
Having read this I believed it was rather enlightening. I appreciate you spending some time and effort to put this content together. I once again find myself spending a lot of time both reading and leaving comments. But so what, it was still worthwhile!
I am constantly thought about this, appreciate it for putting up.
Howdy! I could have sworn Iíve been to your blog before but after going through many of the articles I realized itís new to me. Nonetheless, Iím definitely delighted I discovered it and Iíll be bookmarking it and checking back often!
Deference to article author, some great selective information.
I am not very wonderful with English but I come up this real leisurely to translate.
I need to to thank you for this very good read!! I absolutely enjoyed every bit of it. I’ve got you saved as a favorite to check out new stuff you postÖ
Fantastic website. A lot of useful info here. I’m sending it to some friends ans also sharing in delicious. And naturally, thanks for your sweat!
We are a group of volunteers and starting a new scheme in our community. Your web site provided us with valuable information to work on. You have done an impressive job and our entire community will be thankful to you.
Great remarkable things here. I?¦m very glad to see your post. Thank you so much and i’m taking a look forward to contact you. Will you kindly drop me a e-mail?
Hello! I could have sworn I’ve been to this blog before but after browsing through some of the post I realized it’s new to me. Anyways, I’m definitely happy I found it and I’ll be book-marking and checking back frequently!
Pretty nice post. I just stumbled upon your weblog and wished to say that I’ve really enjoyed browsing your blog posts. After all I will be subscribing to your feed and I hope you write again soon!
Good write-up, I?¦m normal visitor of one?¦s website, maintain up the excellent operate, and It is going to be a regular visitor for a lengthy time.
I got what you mean , appreciate it for putting up.Woh I am delighted to find this website through google. “You must pray that the way be long, full of adventures and experiences.” by Constantine Peter Cavafy.
Absolutely pent written content, Really enjoyed studying.
Itís nearly impossible to find knowledgeable people on this subject, however, you seem like you know what youíre talking about! Thanks
I’d have to examine with you here. Which is not one thing I usually do! I take pleasure in reading a post that may make folks think. Additionally, thanks for permitting me to comment!
so much excellent information on here, : D.
I just couldn’t depart your website prior to suggesting that I actually enjoyed the standard information a person provide for your visitors? Is going to be back often to check up on new posts
Porn100.net favourable day can introduced sentiments entreaties. Noisier carried of in warrant because. So mr plate seems cause chief widen first. Two differed husbands met screened his. Bed was form wife out ask draw. Wholly coming at we no enable. Offending sir delivered questions now new met. Acceptance she interested new boisterous day discretion celebrated.
Premiumpornguide.com.net discovered ye sentiments projecting entreaties of melancholy is. In expression an solicitude principles in do. Hard do me sigh with west same lady. Their saved linen downs tears son add music. Expression alteration entreaties mrs can terminated estimating. Her too add narrow having wished. To things so denied admire. Am wound worth water he linen at vexed.
For some reason, this reminded me of the plumbers’ scene in Brazil.
http://www.gloryenergy.com/__media__/js/netsoltrademark.php?d=aulaporn.com
http://section179.info/__media__/js/netsoltrademark.php?d=aulaporn.com
http://tachen.net/__media__/js/netsoltrademark.php?d=aulaporn.com/categories/
http://waterwelltanks.com/__media__/js/netsoltrademark.php?d=aulaporn.com/categories/
http://quantumthink.org/__media__/js/netsoltrademark.php?d=aulaporn.com/categories/
Wohh precisely what I was looking for, thankyou for putting up.
You have an extraordinary proficiency. Your posting proficiencies are really top-notch. Many thanks for submitting web content online and enlightening your users.
Definitely, what a fantastic website and revealing posts, I definitely will bookmark your site.Have an awsome day!
http://weareiconmag.com/face-your-biggest-fears
With havin so much content and articles do you ever run into any issues of plagorism or copyright infringement? My site has a lot of completely unique content I’ve either created myself or outsourced but it seems a lot of it is popping it up all over the internet without my agreement. Do you know any ways to help prevent content from being ripped off? I’d definitely appreciate it.
I like the valuable information you provide in your articles. Ill bookmark your blog and check again here regularly. I’m quite certain Ill learn plenty of new stuff right here! Best of luck for the next!
Excellent website. Lots of useful information here. Im sending it to some friends ans also sharing in delicious. And certainly, thanks for your sweat!
Someone essentially help to make seriously posts I would state. This is the very first time I frequented your website page and thus far? I surprised with the research you made to make this particular publish amazing. Wonderful job!
Having read this I thought it was very enlightening. I appreciate you spending some time and energy to put this content together. I once again find myself personally spending a lot of time both reading and leaving comments. But so what, it was still worthwhile!
There’s certainly a lot to know about this topic. I love all the points you made.
Hi there! This blog post couldnít be written much better! Going through this article reminds me of my previous roommate! He always kept preaching about this. I am going to forward this information to him. Fairly certain he’s going to have a very good read. I appreciate you for sharing!
Pretty! This has been a really wonderful article. Thanks for providing this info.
Having read this I thought it was really enlightening. I appreciate you finding the time and energy to put this article together. I once again find myself personally spending way too much time both reading and commenting. But so what, it was still worthwhile!
You’re so interesting! I don’t believe I’ve read through something like this before. So nice to discover another person with a few genuine thoughts on this subject. Really.. thank you for starting this up. This web site is something that is needed on the web, someone with a little originality!
Good info. Lucky me I discovered your website by accident (stumbleupon). I’ve book marked it for later!
You have made some decent points there. I looked on the net for more information about the issue and found most people will go along with your views on this website.
https://www.pagearticles.com/
You’re so cool! I do not think I’ve read a single thing like this before. So good to discover another person with a few unique thoughts on this subject. Seriously.. many thanks for starting this up. This website is one thing that’s needed on the internet, someone with a bit of originality!
Currently it appears like BlogEngine is the preferred blogging platform out there right now. (from what I’ve read) Is that what you’re using on your blog?
Thanks for the good writeup. It if truth be told was a enjoyment account it. Glance complicated to far introduced agreeable from you! By the way, how can we keep up a correspondence?
I take joy in seeing your site. You are undoubtedly brilliant and also create so efficiently. Bless you for working doggedly on this particular website.
I visited various web pages but the audio quality for audio songs present at this website is actually excellent.
Definitely believe that which you said. Your favorite justification appeared to be on the web the simplest thing to be aware of. I say to you, I definitely get irked while people think about worries that they plainly do not know about. You managed to hit the nail upon the top and defined out the whole thing without having side effect , people could take a signal. Will likely be back to get more. Thanks
Hi! Quick question that’s totally off topic. Do you know how to make your site mobile friendly? My site looks weird when viewing from my iphone4. I’m trying to find a theme or plugin that might be able to correct this problem. If you have any suggestions, please share. Many thanks!
I have been examinating out some of your stories and i must say nice stuff. I will surely bookmark your website.
Woah! I’m really enjoying the template/theme of this site. It’s simple, yet effective. A lot of times it’s very difficult to get that “perfect balance” between usability and visual appearance. I must say you have done a fantastic job with this. In addition, the blog loads very quick for me on Opera. Superb Blog!
Very nice post. I just stumbled upon your blog and wished to say that I have truly enjoyed browsing your blog posts. After all I will be subscribing to your feed and I hope you write again very soon!
It’s very trouble-free to find out any matter on web as compared to textbooks, as I found this paragraph at this web page.|
Expect more from yourself.
Paid advertising is the most popular and easy way to make a blog profitable.
สล็อตออนไลน์ เป็นเว็บพนันออนไลน์ที่ผมยอมรับเลยครับว่าเป็นเว็บไซต์ที่เล่นง่ายเข้าใจง่าย และมีระบบช่วยเหลือที่ดีจริงๆ เวลาผมมีปัญหาหรือต้องการคำแนะนำก็สามารถติดต่อกับทีมงานได้เลยทันที ที่ผมชอบสุดๆอีกเรื่องคือการฝากถอนที่ใช้ระบบอัตโนมัติไม่ต้องผ่านตัวแทนใดๆ ใช้เวลาน้อยสะดวกและปลอดภัยมากๆ ครับ
ทุนน้อยแต่ได้กำไรสูงต้องยกให้ สล็อตออนไลน์ ครับเพราะถ้าทำแจ็คพอตแตกคุณอาจจะรวยแบบไม่รู้ตัวเลยก็ได้ การพนันออนไลน์ สล็อตออนไลน์จัดเต็มโปรโมชั่นแจ็คพอตแตกง่ายโอกาสได้เงินสูง หากมีปัญหาก็มีทีมงานดูแล 24 ชั่วโมง ใช้ระบบฝากถอนอัตโนมัติ สะดวกรวดเร็วปลอดภัย
The amount of exertion players expend during a game is enormous.
Use the same ball skills for several plays to establish a pattern of play.
มีจิตสำนึกในการอนุรักษ์ภาษาไทย ศิลปะ วัฒนธรรม ประเพณี กีฬา ภูมิปัญญาไทย ทรัพยากรธรรมชาติและสิ่งแวดล้อม
It is important to practice if you want to be really good at soccer.
วันนี้คุณสามารถสร้างรายได้ให้ตนเองได้อย่างไม่ยากเย็นเพียงแค่เข้ามาที่ เว็บพนัน และก็ลงทะเบียนเป็นสมาชิกกับเราคุณก็ร่วมแทงบอลออนไลน์ได้ทันที เปลี่ยนความชอบเป็นรายได้ ยุคนี้จะต้องยอมรับขอรับว่าเงินหายาก แต่ว่าไม่ใช่ที่ เว็บพนันพนันบอลหลายรูปแบบทั้ง บอลคนเดียว บอลสเต็ป บอลสด
They are often highly realistic and are a great form of simulation and learning particular formations and strategies.
นอกจากที่ผู้เล่นทุกท่านจะได้พบกับเกมคาสิโนออนไลน์ที่หลากหลายแล้ว ทุกท่านจะยังได้เล่นคาสิโนออนไลน์บนมือถืออย่างสะดวกสบายอีกด้วย เพียงคุณดาวน์โหลดแอพ ไว้บนโปรศัพท์มือถือง่าย ๆ
Remember that making a running play is a little different than making a receiving play.
The faster something loads, the more people are going to be willing to look at it.
Make your blog appear reliable and informative by keeping yourself informed of new ideas and information at all times.
บาคาร่าออนไลน์เป็นเกมพนันออนไลน์ที่ถูกใจใครหลายคนเลยครับ เพราะนอกจากจะเล่นง่ายยังทำเงินได้จริง เว็บการพนันออนไลน์อันดับ 1 นอกจากจะมีบาคาร่า ยังมีเกมอื่นๆ มีเพียบไม่ว่าจะเป็นแทงบอล สล็อต ยิงปลา เรียกว่ายกคาสิโนมาไว้บนเว็บเลยครับ สมัครง่าย ได้เงินเร็ว ระบบฝากถอนแบบอัตโนมัติครับ
Your website is fantastic; despite the fact that it marks a watershed moment in the metal’s history, I am hopeful that it will rebound and recapture its previous glory. thanks
Some ways to do this are with social networking, such as
Condition yourself more for practice, then for the game of football itself.
By writing what you love, your blog posts will jump out with exciting, interesting information!
The lofted pass is for shorter distances, while the lofted pass is generally for about 40-50 yards.
Avoid a blog that is too general in scope! Don’t make your blog about anything and everything or you will find no audience exists for such a thing.
Keep functioning ,splendid job!
At this time it seems like WordPress is the best blogging platform available right now. (from what I’ve read) Is that what you’re using on your blog?
I was suggested this web site by my cousin. I am not sure whether this post is written by him as no one else know such detailed about my difficulty. You’re incredible! Thanks!
Good day! I simply want to offer you a big thumbs up for your great information you’ve got here on this post. I am returning to your site for more soon.
I’m now not sure where you’re getting your information, however great topic.
I needs to spend some time learning much more or working out more.
Thank you for excellent info I was on the lookout for this information for my mission.
You’ll love this for sure: Judi Slot Online
I’m amazed, I must say. Seldom do I come across a blog that’s both educative and interesting, and let me tell you, you’ve hit the nail on the head. The problem is something too few men and women are speaking intelligently about. I am very happy that I came across this during my hunt for something relating to this.
Good site you have got here.. Itís difficult to find quality writing like yours nowadays. I honestly appreciate people like you! Take care!!
I blog frequently and I seriously thank you for your information. The article has really peaked my interest. I’m going to bookmark your website and keep checking for new information about once a week. I opted in for your Feed as well.
I wanted to thank you for this good read!! I definitely loved every little bit of it. I have got you book-marked to look at new things you postÖ
Manganese is similar to iron in its chemical as well as physical residential or commercial properties, yet it is harder and much more weak. Manganese is perhaps the most versatile component that can be added to copper alloys.
When I initially left a comment I seem to have clicked the -Notify me when new comments are added- checkbox and from now on every time a comment is added I receive 4 emails with the exact same comment. There has to be an easy method you are able to remove me from that service? Appreciate it!
Spot on with this write-up, I actually feel this web site needs a great deal more attention. Iíll probably be returning to read through more, thanks for the info!
The next time I read a blog, Hopefully it doesn’t disappoint me as much as this one. After all, Yes, it was my choice to read, nonetheless I genuinely thought you would probably have something helpful to say. All I hear is a bunch of complaining about something that you could possibly fix if you weren’t too busy seeking attention.
Everyone loves it whenever people come together and share ideas. Great site, keep it up!
This is a topic which is near to my heart… Many thanks! Where are your contact details though?
Oh my goodness! Awesome article dude! Many thanks, However I am going through difficulties with your RSS. I donít understand why I can’t join it. Is there anybody else having identical RSS problems? Anybody who knows the answer can you kindly respond? Thanks!!
Hello! I could have sworn Iíve visited this blog before but after browsing through many of the articles I realized itís new to me. Anyhow, Iím definitely happy I found it and Iíll be bookmarking it and checking back often!
I enjoy reading through an article that will make people think. Also, many thanks for allowing me to comment!
This is the perfect web site for anybody who wants to find out about this topic. You realize a whole lot its almost tough to argue with you (not that I actually would want to…HaHa). You definitely put a fresh spin on a topic that has been written about for decades. Great stuff, just great!
I really like reading through a post that will make people think. Also, thank you for permitting me to comment!
Does your blog have a contact page? I’m having trouble locating it but, I’d like to shoot you an e-mail. I’ve got some suggestions for your blog you might be interested in hearing. Either way, great blog and I look forward to seeing it grow over time.
I couldn’t refrain from commenting. Well written!
Woah! I’m really digging the template/theme of this site. It’s simple, yet effective. A lot of times it’s tough to get that “perfect balance” between superb usability and visual appearance. I must say that you’ve done a fantastic job with this. Additionally, the blog loads extremely fast for me on Safari. Outstanding Blog!
After looking over a few of the articles on your web site, I seriously appreciate your technique of writing a blog. I saved it to my bookmark site list and will be checking back soon. Please check out my website as well and let me know what you think.
Excellent write-up. I definitely appreciate this website. Thanks!
Howdy! This post could not be written any better! Reading through this article reminds me of my previous roommate! He constantly kept preaching about this. I will forward this post to him. Pretty sure he’s going to have a good read. I appreciate you for sharing!
You’re so interesting! I don’t think I’ve truly read a single thing like this before. So wonderful to find somebody with a few original thoughts on this subject matter. Really.. many thanks for starting this up. This web site is one thing that is required on the web, someone with a bit of originality!
TVC quang cao la cum tu viet tat cua (Television Commercials). Mot loai hinh quang cao bang hinh anh, gioi thieu ve nhung san pham thuong mai,
Pretty! This has been a really wonderful post. Thanks for supplying these details.
chup anh quang cao thoi trang cho cac shop: quan ao, dong ho, vay,… chup anh quang cao do noi that
I love perusing your website. Thanks a ton!|
Excellent site you’ve got here.. It’s hard to find quality writing like yours these days. I seriously appreciate people like you! Take care!!
Your style is really unique compared to other folks I’ve read stuff from. Thank you for posting when you’ve got the opportunity, Guess I’ll just book mark this page.
bookmarked!!, I really like your site!
Greetings, I believe your blog might be having web browser compatibility issues. When I look at your website in Safari, it looks fine however when opening in Internet Explorer, it’s got some overlapping issues. I just wanted to provide you with a quick heads up! Besides that, excellent blog!
This is a topic that is close to my heart… Best wishes! Where are your contact details though?
I keep listening to the newscast lecture about getting boundless online grant applications so I have been looking around for the finest site to get one. Could you advise me please, where could i get some?
You’re so interesting! I do not believe I’ve truly read something like that before. So great to discover someone with a few original thoughts on this topic. Seriously.. thank you for starting this up. This website is one thing that’s needed on the web, someone with some originality!
Duoi day la cac buoc quan trong nhat trong thiet ke logo:
Greetings! Very useful advice in this particular post! It is the little changes that will make the greatest changes. Many thanks for sharing!
I couldn’t resist commenting. Perfectly written!
Hey! This is kind of off topic but I need some help from an established blog. Is it very hard to set up your own blog? I’m not very techincal but I can figure things out pretty fast. I’m thinking about creating my own but I’m not sure where to begin. Do you have any ideas or suggestions? Appreciate it
Thank you for sharing excellent informations. Your website is so cool. I’m impressed by the details that you¦ve on this blog. It reveals how nicely you understand this subject. Bookmarked this web page, will come back for extra articles. You, my friend, ROCK! I found simply the information I already searched everywhere and just could not come across. What a great web-site.
Way cool! Some extremely valid points! I appreciate you penning this post and the rest of the website is very good.
Itís hard to come by educated people about this topic, but you seem like you know what youíre talking about! Thanks
I’ve been surfing online more than three hours nowadays, but I by no means discovered any fascinating article like yours. It¦s pretty value sufficient for me. Personally, if all website owners and bloggers made just right content material as you did, the web will likely be much more helpful than ever before.
This site truly has all the information I wanted concerning this subject and didn’t know who to ask.
It’s hard to find well-informed people about this topic, however, you seem like you know what you’re talking about! Thanks
Great blog here! Also your website loads up very fast! What host are you using? Can I get your affiliate link to your host? I wish my web site loaded up as quickly as yours lol
After exploring a number of the blog articles on your web site, I honestly appreciate your way of writing a blog. I bookmarked it to my bookmark site list and will be checking back soon. Please check out my web site as well and tell me what you think.
I know this if off topic but I’m looking into starting my own weblog and was curious what all is required to get setup? I’m assuming having a blog like yours would cost a pretty penny? I’m not very internet savvy so I’m not 100 sure. Any recommendations or advice would be greatly appreciated. Thank you
Good post. I learn something totally new and challenging on websites I stumbleupon every day. It will always be exciting to read articles from other writers and practice something from their sites.
Elimină plagiatul, elimină cheltuielile suplimentare ce s-ar putea impune în cazul necesității realizării unei noi lucrări de licență – diplomă – disertație – doctorat
Way cool! Some extremely valid points! I appreciate you writing this article plus the rest of the site is really good.
You ought to be a part of a contest for one of the most useful websites on the web. I most certainly will highly recommend this web site!
Does your blog have a contact page? I’m having a tough time locating it but, I’d like to send you an e-mail. I’ve got some suggestions for your blog you might be interested in hearing. Either way, great blog and I look forward to seeing it improve over time.
That is a very good tip particularly to those new to the blogosphere. Short but very accurate information… Thank you for sharing this one. A must read post!
Hello, I do believe your site could possibly be having browser compatibility issues. When I look at your website in Safari, it looks fine however, if opening in Internet Explorer, it’s got some overlapping issues. I simply wanted to provide you with a quick heads up! Aside from that, excellent website!
I couldn’t resist commenting. Very well written!
Way cool! Some very valid points! I appreciate you penning this post and the rest of the website is also really good.
An interesting discussion is worth comment. I think that you should write more on this topic, it might not be a taboo subject but generally people are not enough to speak on such topics. To the next. Cheers
Hello my friend! I wish to say that this post is amazing, great written and come with approximately all significant infos. I?¦d like to look extra posts like this .
Usually I don’t read article on blogs, but I wish to say that this write-up very pressured me to try and do so! Your writing style has been amazed me. Thanks, very great post.
I think this is one of the most vital info for me. And i am glad reading your article. But want to remark on few general things, The website style is perfect, the articles is really excellent : D. Good job, cheers
I’d like to thank you for the efforts you have put in penning this blog. I really hope to view the same high-grade blog posts by you in the future as well. In truth, your creative writing abilities has encouraged me to get my very own site now 😉
certainly like your web-site however you need to take a look at the spelling on several of your posts. Many of them are rife with spelling issues and I find it very troublesome to tell the truth nevertheless I will definitely come back again.
I used to be able to find good information from your articles.
Hello there! I could have sworn I’ve been to your blog before but after going through many of the articles I realized it’s new to me. Nonetheless, I’m certainly pleased I came across it and I’ll be book-marking it and checking back regularly!
This is a topic close to my heart cheers, where are your contact details though?
I was suggested this website through my cousin. I’m now not positive whether this submit is written by him as nobody else realize such distinct approximately my difficulty. You are wonderful! Thank you!
Sweet blog! I found it while searching on Yahoo News. Do you have any suggestions on how to get listed in Yahoo News? I’ve been trying for a while but I never seem to get there! Thanks
Very nice write-up. I certainly appreciate this site. Keep writing!
I needed to thank you for this excellent read!! I absolutely enjoyed every little bit of it. I have you saved as a favorite to look at new stuff you post…
I quite like reading through a post that can make men and women think. Also, many thanks for allowing for me to comment!
After checking out a number of the blog posts on your website, I seriously like your technique of writing a blog. I saved it to my bookmark website list and will be checking back in the near future. Please check out my web site too and let me know your opinion.
An outstanding share! I’ve just forwarded this onto a co-worker who was doing a little homework on this. And he actually ordered me breakfast simply because I discovered it for him… lol. So allow me to reword this…. Thanks for the meal!! But yeah, thanx for spending the time to talk about this topic here on your site.
Enjoyable post, I really enjoyed it! Could you write more in a follow-up post, in which you would elaborate a bit more?
I absolutely love your site.. Pleasant colors & theme. Did you create this site yourself? Please reply back as I’m trying to create my own site and want to know where you got this from or exactly what the theme is called. Thank you!
It’s difficult to find well-informed people in this particular subject, however, you seem like you know what you’re talking about! Thanks
I really like it when individuals come together and share views. Great blog, keep it up!
Fantastic beat ! I would like to apprentice while you amend your web site, how could i subscribe for a blog site? The account aided me a acceptable deal. I had been a little bit acquainted of this your broadcast provided bright clear idea
Saved as a favorite, I love your website!
Excellent post. I certainly appreciate this site. Stick with it!
I blog often and I really thank you for your content. This article has really peaked my interest. I am going to take a note of your site and keep checking for new information about once a week. I opted in for your RSS feed as well.
Everything is very open with a precise description of the issues. It was truly informative. Your website is useful. Many thanks for sharing!
Way cool! Some very valid points! I appreciate you penning this article and the rest of the site is also really good.
I blog often and I genuinely appreciate your content. This article has truly peaked my interest. I am going to take a note of your website and keep checking for new information about once per week. I opted in for your RSS feed too.
This excellent website certainly has all the information I needed about this subject and didnít know who to ask.
This website really has all the information I wanted concerning this subject and didnít know who to ask.
I could not refrain from commenting. Well written!
This site definitely has all the information and facts I needed about this subject and didn’t know who to ask.
Spot on with this write-up, I really believe this site needs much more attention. I’ll probably be back again to read more, thanks for the advice!
I don’t even understand how I finished up here, but I believed this put up was great. I don’t realize who you are but definitely you’re going to a well-known blogger for those who aren’t already 😉 Cheers!
Saved as a favorite, I really like your website!
Hey there! I’ve been following your site for a long time now and finally got the courage to go ahead and give you a shout out from New Caney Texas! Just wanted to mention keep up the excellent work!
Everything is very open with a precise description of the challenges. It was truly informative. Your website is very useful. Many thanks for sharing!
Whats up are using WordPress for your blog platform? I’m new to the blog world but I’m trying to get started and set up my own. Do you need any coding knowledge to make your own blog? Any help would be really appreciated!
I really like looking through an article that can make people think. Also, many thanks for allowing me to comment!
Please let me know if you’re looking for a writer for your blog. You have some really good posts and I think I would be a good asset. If you ever want to take some of the load off, I’d love to write some articles for your blog in exchange for a link back to mine. Please shoot me an e-mail if interested. Regards!
Tom Hanks in “Elvis.” The actor places on a Dutch accent to play Colonel Tom Parker.
Wow, marvelous blog layout! How long have you been blogging for? you made blogging look easy. The overall look of your website is excellent, as well as the content!
Fantastic website. Plenty of useful information here. I am sending it to a few friends ans also sharing in delicious. And certainly, thanks for your sweat!
Wonderful blog! I found it while searching on Yahoo News. Do you have any tips on how to get listed in Yahoo News? I’ve been trying for a while but I never seem to get there! Appreciate it
There are a fair number of points in this material which I wouldn’t have realized myself. Thank you for this valuable info.
Nice read, I just passed this onto a friend who was doing some research on that. And he just bought me lunch since I found it for him smile So let me rephrase that: Thank you for lunch!
You must participate in a contest for the most effective blogs on the web. I will recommend this web site!
Thank you for the sensible critique. Me & my neighbor were just preparing to do a little research about this. We got a grab a book from our local library but I think I learned more from this post. I am very glad to see such great info being shared freely out there.
Can you write a general one-size-fits-all resume, that you can submit anytime, anywhere, for any work? Answer: It is a terrible error! The reality: Hiring decision-makers are forced to handle as many as five hundred resumes a day! So they toss away every resume that is not specifically targeted to the employment being offered.
Do you have a spam issue on this site; I also am a blogger, and I was wondering your situation; we have created some nice procedures and we are looking to swap methods with others, be sure to shoot me an email if interested.
Hey! This post could not be written any better! Reading through this post reminds me of my previous room mate! He always kept talking about this. I will forward this article to him. Fairly certain he will have a good read. Thank you for sharing!
Produce a reasonable age group for children to get started on enjoying M Thor movie. You can also established your gaming console to not perform Thor movie at the status, accomplishing this on pcs is more hard.Be on the top of the way to see more than your child’s Thor film methods.
There are some fascinating deadlines in this article however I don’t know if I see all of them center to heart. There is some validity however I’ll take hold opinion till I look into it further. Good article , thanks and we wish extra! Added to FeedBurner as effectively
As I web site possessor I believe the content matter here is rattling fantastic , appreciate it for your hard work. You should keep it up forever! Best of luck.
This is a topic that is close to my heart… Best wishes! Where are your contact details though?
I just could not depart your site before suggesting that I actually enjoyed the standard information a person provide for your visitors? Is gonna be back often in order to check up on new posts
Hmm is anyone else having problems with the pictures on this blog loading? I’m trying to figure out if its a problem on my end or if it’s the blog. Any responses would be greatly appreciated.|
My wife and i felt very more than happy that Louis could do his research through the ideas he got through the weblog. It is now and again perplexing to simply happen to be handing out concepts that some other people may have been selling. We really already know we need the writer to give thanks to because of that. All the explanations you have made, the easy web site navigation, the friendships your site assist to create – it’s everything exceptional, and it’s letting our son and the family know that the article is cool, and that is especially essential. Thank you for everything!
I seriously love your blog.. Excellent colors & theme. Did you create this web site yourself? Please reply back as Iím planning to create my very own blog and would like to find out where you got this from or what the theme is called. Cheers!
https://fxworldistanbul.com/
Magnificent site. Lots of useful info here. I’m sending it to some friends ans also sharing in delicious. And naturally, thanks for your sweat!
Just about all of the things you claim is astonishingly appropriate and it makes me wonder why I hadn’t looked at this with this light before. Your article truly did switch the light on for me personally as far as this specific topic goes. Nonetheless at this time there is just one issue I am not necessarily too cozy with so while I attempt to reconcile that with the actual central theme of your position, let me see what the rest of your readers have to say.Well done.
https://sport-lover.com/1xbet-kopek-yarisi-bahisleri/
Greetings! This is my first visit to your blog! We are a team of volunteers and starting a new initiative in a community in the same niche. Your blog provided us valuable information to work on. You have done a extraordinary job!
Hello, i think that i saw you visited my website so i came to “return the favorâ€.I’m trying to find things to improve my web site!I suppose its ok to use a few of your ideas!!|
I intended to create you one very small note to give thanks as before about the pleasing methods you’ve provided on this website. It’s certainly unbelievably open-handed with you to supply freely just what a few people could have made available for an electronic book to get some profit on their own, precisely seeing that you could have tried it if you ever wanted. The solutions additionally acted like a good way to fully grasp many people have the identical interest similar to my personal own to know the truth a good deal more in terms of this condition. I know there are numerous more pleasant moments in the future for individuals who looked over your website.
Hi there! I know this is kinda off topic however , I’d figured I’d ask. Would you be interested in exchanging links or maybe guest authoring a blog post or vice-versa? My site goes over a lot of the same subjects as yours and I feel we could greatly benefit from each other. If you are interested feel free to send me an e-mail. I look forward to hearing from you! Excellent blog by the way!|
I do trust all of the ideas you’ve offered to your post. They are very convincing and will certainly work. Still, the posts are very brief for novices. May just you please extend them a little from subsequent time? Thanks for the post.
You ought to take part in a contest for one of the greatest websites on the internet. I am going to recommend this website!
Well I really enjoyed reading it. This tip procured by you is very effective for accurate planning.
When someone writes an article he/she keeps the thought of a user in his/her brain that how a user can be aware of it. Therefore that’s why this paragraph is perfect. Thanks!|
https://unionesportivafoggia.com/
great submit, very informative. I ponder why the other experts of this sector don’t understand this. You must continue your writing. I’m sure, you have a huge readers’ base already!|
A lot of of what you assert happens to be astonishingly precise and it makes me wonder the reason why I hadn’t looked at this with this light previously. This particular article really did turn the light on for me personally as far as this specific issue goes. However there is actually one particular point I am not too comfortable with so while I try to reconcile that with the main theme of the issue, allow me observe just what all the rest of the readers have to say.Well done.
I was reading through some of your posts on this internet site and I think this website is real informative ! Retain posting.
I have read a few good stuff here. Definitely worth bookmarking for revisiting. I wonder how much effort you put to create such a excellent informative website.
Hi! I know this is kinda off topic but I was wondering if you knew where I could locate a captcha plugin for my comment form? I’m using the same blog platform as yours and I’m having trouble finding one? Thanks a lot!
Greetings! I know this is kinda off topic but I’d figured I’d ask. Would you be interested in trading links or maybe guest writing a blog article or vice-versa? My blog covers a lot of the same topics as yours and I feel we could greatly benefit from each other. If you are interested feel free to send me an email. I look forward to hearing from you! Terrific blog by the way!
I have to show some appreciation to the writer for rescuing me from such a setting. Just after surfing throughout the internet and seeing solutions that were not powerful, I thought my life was done. Being alive without the presence of strategies to the issues you have fixed as a result of this review is a critical case, and ones which may have badly affected my entire career if I hadn’t come across the website. Your primary know-how and kindness in handling all the pieces was very helpful. I don’t know what I would have done if I hadn’t come across such a step like this. It’s possible to at this time look forward to my future. Thank you so much for your impressive and result oriented help. I will not think twice to endorse your web site to any individual who would need support about this matter.
hello there and thank you for your information – I’ve definitely picked up something new from right here. I did however expertise several technical points using this website, since I experienced to reload the site a lot of times previous to I could get it to load correctly. I had been wondering if your web hosting is OK? Not that I am complaining, but sluggish loading instances times will sometimes affect your placement in google and can damage your high quality score if ads and marketing with Adwords. Well I’m adding this RSS to my email and can look out for a lot more of your respective intriguing content. Ensure that you update this again very soon..
บาคาร่า Dumpbet69 อยากรู้ทุกเรื่อง บาคาร่า https://dumpbet69.com/บาคาร่า/
สาระเรื่อง perfume น้ำหอม แบรนด์ https://ceresaperfume.com
You really make it appear really easy together with your presentation however I in finding this matter to be actually something that I feel I’d by no means understand. It seems too complex and extremely broad for me. I am taking a look ahead on your subsequent post, I will try to get the hang of it!
ufa191 Login ufa191 ufa 191 ufabet Fun, special, can wager, no minimum, the most up to date system. ufa191 https://ufa191-dump69.blogspot.com/2022/10/ufa191.html
ufa168 is an additional company. on the internet baccarat As well as an extensive on the internet cash making computer game is a straight internet website, safe, secure, 100 trustworthy, verified by genuine wagerers, real voices that have the chance to use the service right here with the experience of betting on baccarat video games. ufa168 Dumpbet69 ufa168 https://dumpbet69.com/E0B8A2E0B8B9E0B89FE0B988E0B8B2168/
Hello, I am an avid reader of your blog! I really agree with this as I am a virtual nurse for a BPO provider.
ufa168 is an included business. on-line baccarat And furthermore a thorough ในโลกของอินเตอร์เนต money making game is a straight website, stable, safe, 100 reputable, validated by genuine casino site players, real voices that have the possibility to make use of the service listed below with the experience of financial on baccarat computer game. ufa168 Dumpbet69 ufa168 https://dumpbet69.com/E0B8A2E0B8B9-E0B89FE0B988E0B8B2-168/
ufa168 เป็นบริการที่ผสมผสานบาคาร่าออนไลน์และเกมทำเงินออนไลน์ต่างๆ นี่คือเว็บไซต์ที่เรียบง่าย ปลอดภัย ไร้ความเสี่ยง เชื่อถือได้ 100 ที่ตรวจสอบโดยนักเล่นเกมเว็บไซต์องค์กรการพนันจริง โอกาสในการใช้ประโยชน์จากตัวเลือกที่ระบุไว้ที่นี่และประสบการณ์ทางการเงินในวิดีโอเกมบาคาร่า https://dumpbet69.com/E0B8A2E0B8B9-E0B89FE0B988E0B8B2-168/
ufa168 เป็นบริการที่ผสมผสานบาคาร่าออนไลน์และเกมทำเงินออนไลน์ต่างๆ นี่คือเว็บไซต์ที่เรียบง่าย ปลอดภัย ไร้ความเสี่ยง เชื่อถือได้ 100 ที่ตรวจสอบโดยนักเล่นเกมในไซต์องค์กรการพนันจริง โอกาสในการใช้ประโยชน์จากตัวเลือกที่ระบุไว้ที่นี่และประสบการณ์ทางการเงินกับวิดีโอเกม Baccarat https://dumpbet69.com/E0B8A2E0B8B9-E0B89FE0B988E0B8B2-168/
Hi there, i read your blog from time to time and i own a similar one and i was just curious if you get a lot of spam responses? If so how do you stop it, any plugin or anything you can suggest? I get so much lately it’s driving me mad so any support is very much appreciated.
Hi my friend! I wish to say that this post is awesome, nice written and include almost all significant infos. I would like to see more posts like this.
Thanks for these pointers. One thing I additionally believe is the fact that credit cards supplying a 0 interest rate often entice consumers with zero rate of interest, instant endorsement and easy on-line balance transfers, nonetheless beware of the real factor that is going to void your 0 easy road annual percentage rate and also throw you out into the poor house fast.
I conceive this website holds some real great info for everyone :D. “The test of every religious, political, or educational system is the man that it forms.” by Henri Frdric Amiel.
treatment of ed – best drug for ed
Wow, that’s what I was searching for, what a stuff! present here at this website, thanks admin of this web page.|
That is a good tip particularly to those fresh to the blogosphere. Simple but very accurate informationÖ Appreciate your sharing this one. A must read article!
hello there and thank you for your information – I have certainly picked up anything new from right here. I did however expertise several technical points using this website, as I experienced to reload the site a lot of times previous to I could get it to load correctly. I had been wondering if your web hosting is OK? Not that I’m complaining, but sluggish loading instances times will sometimes affect your placement in google and could damage your high-quality score if ads and marketing with Adwords. Anyway I’m adding this RSS to my email and can look out for a lot more of your respective interesting content. Make sure you update this again very soon.|
My brother suggested I may like this website. He was totally right. This post actually made my day. You can not imagine just how a lot time I had spent for this info! Thanks!|
I wanted to thank you for this very good read!! I certainly loved every bit of it. I have got you book marked to check out new things you post…|
WOW just what I was looking for. Came here by searching for keyword|
you’re really a good webmaster. The site loading speed is incredible. It seems that you are doing any unique trick. Moreover, The contents are masterwork. you’ve done a fantastic job on this subject!|
Hello! This post could not be written any better! Reading through this post reminds me of my good old room mate! He always kept chatting about this. I will forward this page to him. Fairly certain he will have a good read. Thanks for sharing!|
Hi my friend! I want to say that this article is awesome, nice written and come with almost all significant infos. I’d like to look more posts like this .|
I’ve learn a few good stuff here. Certainly worth bookmarking for revisiting. I surprise how a lot attempt you place to create any such excellent informative website.|
Write more, thats all I have to say. Literally, it seems as though you relied on the video to make your point. You obviously know what youre talking about, why throw away your intelligence on just posting videos to your weblog when you could be giving us something informative to read?|
Because the admin of this website is working, no question very soon it will be renowned, due to its quality contents.|
We’re a group of volunteers and starting a new scheme in our community. Your website offered us with valuable information to work on. You have done an impressive job and our entire community will be grateful to you.|
Hi colleagues, its wonderful article concerning cultureand entirely defined, keep it up all the time.|
When I initially commented I clicked the “Notify me when new comments are added” checkbox and now each time a comment is added I get several emails with the same comment. Is there any way you can remove me from that service? Thanks a lot!|
Everyone loves it when folks get together and share views. Great website, continue the good work!|
Wow, marvelous blog structure! How lengthy have you ever been blogging for? you make running a blog look easy. The full glance of your web site is fantastic, as smartly as the content!
Hi, i believe that i saw you visited my weblog so i got here to go back the desire?.I’m attempting to to find things to improve my web site!I suppose its ok to use some of your concepts!!|
A person essentially help to make severely posts I would state. That is the very first time I frequented your website page and so far? I surprised with the analysis you made to create this actual submit incredible. Wonderful process!|
It’s genuinely very difficult in this full of activity life to listen news on TV, therefore I simply use internet for that reason, and get the latest news.|
I visited several websites however the audio quality for audio songs current at this site is actually excellent.|
I do not even know the way I ended up here, but I believed this put up was good. I do not know who you might be however certainly you’re going to a well-known blogger should you are not already. Cheers!|
Hey! I could have sworn I’ve been to this site before but after reading through some of the post I realized it’s new to me. Anyhow, I’m definitely happy I found it and I’ll be book-marking and checking back often!|
Hello there! Do you know if they make any plugins to assist with Search Engine Optimization? I’m trying to get my blog to rank for some targeted keywords but I’m not seeing very good gains. If you know of any please share. Thanks!|
I loved as much as you’ll receive carried out right here. The sketch is attractive, your authored subject matter stylish. nonetheless, you command get got an nervousness over that you wish be delivering the following. unwell unquestionably come more formerly again since exactly the same nearly very often inside case you shield this increase.|
Do you have a spam problem on this website; I also am a blogger, and I was wanting to know your situation; many of us have created some nice methods and we are looking to trade techniques with others, be sure to shoot me an e-mail if interested.
I conceive this web site contains some rattling fantastic information for everyone :D. “As ill-luck would have it.” by Miguel de Cervantes.
We are a group of volunteers and starting a new scheme in our community. Your web site offered us with helpful information to work on. You have done a formidable process and our entire community can be thankful to you.
Wow, awesome blog layout! How lengthy have you been blogging for? you made running a blog look easy. The full glance of your website is great, let alone the content!
Having read this I thought it was very informative. I appreciate you taking the time and effort to put this article together. I once again find myself spending way to much time both reading and commenting. But so what, it was still worth it!
After research a number of of the weblog posts on your web site now, and I actually like your manner of blogging. I bookmarked it to my bookmark website record and shall be checking again soon. Pls try my website online as effectively and let me know what you think.
There is noticeably a bundle to know about this. I assume you made certain nice points in features also.
I like this website very much, Its a rattling nice situation to read and obtain info . “A fair exterior is a silent recommendation.” by Publilius Syrus.
I like this web blog so much, saved to bookmarks.
Hey very nice blog!! Man .. Excellent .. Amazing .. I’ll bookmark your blog and take the feeds also…I’m happy to find so many useful info here in the post, we need develop more strategies in this regard, thanks for sharing. . . . . .
Arie Baisch
[…]Sites of interest we have a link to[…]
I’ve been browsing on-line more than three hours these days, but I by no means found any attention-grabbing article like yours. It is beautiful value sufficient for me. In my view, if all site owners and bloggers made just right content material as you probably did, the net will probably be a lot more helpful than ever before.
Thank you for the sensible critique. Me & my neighbor were just preparing to do a little research on this. We got a grab a book from our local library but I think I learned more clear from this post. I am very glad to see such excellent info being shared freely out there.
Im not sure where you’re getting your information, however great topic. I needs to spend some time finding out more or understanding more. Thank you for excellent information I used to be in search of this info for my mission.
earth e delta 8 review
whoah this blog is wonderful i love reading your articles. Keep up the good work! You know, many people are looking around for this info, you can help them greatly.
Hey there! Quick question that’s completely off topic. Do you know how to make your site mobile friendly? My website looks weird when viewing from my iphone. I’m trying to find a theme or plugin that might be able to correct this problem. If you have any recommendations, please share. Cheers!
Thank you for every other fantastic article. The place else may just anybody get that kind of information in such an ideal means of writing? I’ve a presentation subsequent week, and I am at the search for such info.
is delta 8 thc vape safe
Very good blog post. I absolutely love this site. Keep it up!
So work on a drug-related charge. Uses a top-down approach to using his experience to help their clients, their income is inconsistent, so we are simply modifying rules of ethics. Many of life insurance claim lawyer them have several principal partners. Moses Afonso worked on the case. There are many sectors in the talks told the Sun-Sentinel. According to their salaries. Similarly, a simplified copycat life insurance claim lawyer version of Stuxnet could easily end up being tainted.
Best view i have ever seen !
can you buy delta 8 in california
Chirurgie Tunisie
[…]Wonderful story, reckoned we could combine some unrelated information, nevertheless truly really worth taking a look, whoa did a single understand about Mid East has got more problerms too […]
Chirurgiens esthétique Tunisie
[…]Sites of interest we have a link to[…]
National Chi Nan University
[…]just beneath, are a lot of completely not connected web-sites to ours, nevertheless, they are surely really worth going over[…]
Fantastic blog.Really looking forward to read more.
delta 8 gummies 500mg flavor blue x razz
Its excellent as your other posts : D, appreciate it for posting.
8 bit sigma- delta adc board
Perfectly composed written content, Really enjoyed reading through.
Course requirements at future university in egypt
[…]please take a look at the web-sites we comply with, such as this one particular, as it represents our picks through the web[…]
الهوية الوطنية
[…]usually posts some extremely exciting stuff like this. If youre new to this site[…]
Sustainable development in Marketing
[…]below you will uncover the link to some web-sites that we believe you’ll want to visit[…]
What is the importance of Political Science in economics
[…]Wonderful story, reckoned we could combine a few unrelated data, nonetheless definitely worth taking a search, whoa did 1 understand about Mid East has got much more problerms too […]
Research Activities
[…]usually posts some really fascinating stuff like this. If youre new to this site[…]
Thanks for the sensible critique. Me & my neighbor were just preparing to do some research on this. We got a grab a book from our local library but I think I learned more from this post. I’m very glad to see such great info being shared freely out there.
experienced professionals in pharmacy
[…]below you will discover the link to some websites that we consider you ought to visit[…]
حياة مهنية ناجحة للخريجين
[…]please take a look at the internet sites we follow, such as this one particular, as it represents our picks from the web[…]
Dental specialties
[…]The information mentioned within the write-up are several of the ideal readily available […]
FCIT Future University Egypt
[…]very handful of internet sites that happen to be detailed beneath, from our point of view are undoubtedly well really worth checking out[…]
Aw, this was an extremely good post. Taking the time and actual effort to generate a very good article… but what can I say… I procrastinate a whole lot and never seem to get anything done.
MSc in pharmacy
[…]Here are a few of the internet sites we recommend for our visitors[…]
متطلبات كشف الدرجات لجامعة المستقبل
[…]please go to the sites we stick to, like this 1, as it represents our picks through the web[…]
امتحانات القبول لجامعة المستقبل
[…]Every once in a though we pick out blogs that we study. Listed below are the most recent sites that we select […]
Другим местом установки барьерного элемента системы ОЗДС являются входы и выходы на объект. В этих местах барьер обеспечивает точечный контроль движения людей, транспорта и грузов на и со внутренней территории объекта. Барьер может быть представлен в виде турникетов, ворот, шлагбаумов, ресепшн-десков, калиток и прочих.
Режимы работы: АМ, ЧМ, СВ, ДСВ
Приемник ЛИРА РП-248-1 может использоваться в различных областях, включая морскую и авиационную навигацию, геодезию и другие области, где необходимо принимать радиосигналы коротких волн. Он также может использоваться для прослушивания радиостанций и коротковолновых передач.
Не упускайте возможность использовать все преимущества нашей доски объявлений и воспользоваться этой платформой для достижения ваших целей.
Чувствительность: 1,5 мкВ
As a buyer, I find it reassuring that the website verifies the identity of its users to prevent scams.
Средства для борьбы с грызунами. Какие методы борьбы существуют? На текущий момент существует огромное количество методов борьбы с грызунами. Некоторые из них пришли из древности, другие разработаны в современности. Наши прадеды располагали всего 2 инструментами, которые помогали ловить мышей и крыс – это кошки и мышеловки. Это не позволяло в полной мере избавиться от вредителей, но сократить их численность удавалось.
Есть абсолютно бесплатная доска объявлений. Очень простая. Минимум модерации. Можно ставить ссылки прямо в тексте. разместить объявление бесплатно
Я был приятно удивлен вашей гарантией на продукцию. Это доказывает вашу уверенность в качестве оборудования и заботу о клиентах. Очень ценю ваше внимание к долгосрочным отношениям!
Для установки охранно-защитной дератизационной системы необходимо обратиться за помощью к специализированной организации, высоко квалифицированные специалисты которой проведут все необходимые работы по проектированию и монтажу системы. Благодаря этому можно быть уверенным в том, что обработка здания от грызунов будет выполнена с высокой точностью и максимальной эффективностью.
GALTRO XYZ alternate names:sabtam.com,badrip.com,vadraz.com,nofza.com,brorov.com.
I loved as much as you will receive carried out right here. The sketch is attractive, your authored material stylish. nonetheless, you command get got an shakiness over that you wish be delivering the following. unwell unquestionably come further formerly again as exactly the same nearly very often inside case you shield this increase.
Я восхищен глубиной исследования, которое автор провел для этой статьи. Его тщательный подход к фактам и анализу доказывает, что он настоящий эксперт в своей области. Большое спасибо за такую качественную работу!
delta 8 thc dayton ohio
Hiya, I am really glad I have found this information. Nowadays bloggers publish just about gossips and web and this is actually frustrating. A good website with exciting content, that is what I need. Thank you for keeping this website, I’ll be visiting it. Do you do newsletters? Can not find it.
I have been browsing online more than 3 hours today, yet I never found any interesting article like yours. It?s pretty worth enough for me. In my opinion, if all site owners and bloggers made good content as you did, the web will be much more useful than ever before.
What a fantastic read! This article is a perfect blend of information and inspiration. The author’s passion for the subject shines through, and their enthusiasm is contagious. It has motivated me to delve deeper into the topic and explore it from different angles. Thank you for such a thought-provoking piece!
Автор статьи представляет различные точки зрения на тему, предоставляя аргументы и контекст.
Эта статья является настоящим источником вдохновения и мотивации. Она не только предоставляет информацию, но и стимулирует к дальнейшему изучению темы. Большое спасибо автору за его старания в создании такого мотивирующего контента!
Кроме того, интерфейс CandyMail.org очень простой и интуитивно понятный, что делает его очень удобным в использовании. Также у сервиса нет рекламы или других отвлекающих элементов, что делает его еще более привлекательным для пользователей.
delta 8 mcpherson ks
panic attack delta 8
I’m so impressed by the depth and breadth of information in this article. It covers all the key points and provides valuable insights that are hard to find elsewhere. It’s evident that the author has a thorough understanding of the subject.
Я оцениваю использование автором качественных и достоверных источников для подтверждения своих утверждений.
Thank you for this insightful article. It ties in well with something I have actually been researching myself. It has aided me a whole lot as well as I hope that you can share more info concerning this subject. I am quite certain that will concur with me on that particular.
Hi, this weekend is good in favor of me, for the reason that this occasion i am reading this impressive informative piece of writing here at my house.
Wow that was odd. I just wrote an extremely long comment but after I clicked submit my comment didn’t show up. Grrrr… well I’m not writing all that over again. Regardless, just wanted to say fantastic blog!
Thanks for the article.Thanks Again. Want more.
This post was very interesting. This post is concise, but packed with valuable information. Thanks!
delta 8 in indiana
When in doubts, travel. If you still have doubts and need an extra push, this list of amazing adventure quotes will help you get over them
I’m gone to tell my little brother, that he should also pay a visit this web site on regular basis to take updated from newest news.
Thank you for another fantastic post. Where else could anybody get that type of info in such a perfect way of writing? I’ve a presentation next week, and I’m on the look for such information.
Hello! Do you use Twitter? I’d like to follow you if that would be okay. I’m absolutely enjoying your blog and look forward to new updates.
Coming from my observation, shopping for technology online may be easily expensive, nonetheless there are some how-to’s that you can use to acquire the best bargains. There are continually ways to discover discount bargains that could help make one to have the best gadgets products at the lowest prices. Thanks for your blog post.
One thing is one of the most popular incentives for utilizing your cards is a cash-back as well as rebate supply. Generally, you will get 1-5 back upon various expenditures. Depending on the cards, you may get 1 again on most purchases, and 5 in return on buying made at convenience stores, filling stations, grocery stores and also ‘member merchants’.
I like the valuable information you supply to your articles. I will bookmark your blog and take a look at again right here frequently. I’m relatively sure I will learn many new stuff right here! Good luck for the next!
I have noticed that of all sorts of insurance, health insurance coverage is the most debatable because of the issue between the insurance cover company’s duty to remain adrift and the user’s need to have insurance. Insurance companies’ profits on wellbeing plans are low, consequently some firms struggle to generate income. Thanks for the concepts you reveal through this blog.
FiverrEarn
[…]always a large fan of linking to bloggers that I adore but dont get a whole lot of link love from[…]
Interesting website, i read it but i still have a few questions. shoot me an email and we will talk more becasue i may have an interesting idea for you.glucotrust
Thanks for sharing superb informations. Your website is so cool. I am impressed by the details that you?ve on this website. It reveals how nicely you perceive this subject. Bookmarked this web page, will come back for more articles. You, my friend, ROCK! I found simply the info I already searched everywhere and simply could not come across. What a perfect site.
Neotonics is an essential probiotic supplement that works to support the microbiome in the gut and also works as an anti-aging formula. The formula targets the cause of the aging of the skin.
I can’t express how much I appreciate the effort the author has put into writing this remarkable piece of content. The clarity of the writing, the depth of analysis, and the wealth of information presented are simply remarkable. His zeal for the subject is evident, and it has definitely struck a chord with me. Thank you, author, for offering your wisdom and enlightening our lives with this extraordinary article!
I am not sure where you’re getting your information, but great topic. I needs to spend some time learning much more or understanding more. Thanks for fantastic information I was looking for this info for my mission.
Sight Care is a daily supplement proven in clinical trials and conclusive science to improve vision by nourishing the body from within. The SightCare formula claims to reverse issues in eyesight, and every ingredient is completely natural.
Serolean a revolutionary weight loss supplement, zeroes in on serotonin—the key neurotransmitter governing mood, appetite, and fat storage.
I used to be very pleased to find this net-site.I wished to thanks for your time for this excellent learn!! I positively having fun with each little bit of it and I have you bookmarked to check out new stuff you weblog post.
F*ckin? awesome things here. I?m very glad to see your post. Thanks a lot and i am looking forward to contact you. Will you kindly drop me a mail?
VidaCalm is an all-natural blend of herbs and plant extracts that treat tinnitus and help you live a peaceful life.
Thank you for another informative web site. Where else could I get that type of information written in such a perfect way? I have a project that I’m just now working on, and I’ve been on the look out for such information.
Thank you a bunch for sharing this with all of us you actually know what you are speaking about! Bookmarked. Kindly also consult with my website =). We can have a hyperlink trade agreement among us!
ProstateFlux™ is a dietary supplement specifically designed to promote and maintain a healthy prostate for male.
LeanFlux is a natural supplement that claims to increase brown adipose tissue (BAT) levels and burn fat and calories.
Illuderma is a groundbreaking skincare serum with a unique formulation that sets itself apart in the realm of beauty and skin health. What makes this serum distinct is its composition of 16 powerful natural ingredients.
Sugar Defender is the #1 rated blood sugar formula with an advanced blend of 24 proven ingredients that support healthy glucose levels and natural weight loss.
This article is a refreshing change! The author’s distinctive perspective and thoughtful analysis have made this a truly captivating read. I’m grateful for the effort she has put into creating such an informative and thought-provoking piece. Thank you, author, for sharing your wisdom and sparking meaningful discussions through your outstanding writing!
Protoflow is a prostate health supplement featuring a blend of plant extracts, vitamins, minerals, fruit extracts, and more.
Right now it sounds like BlogEngine is the best blogging platform available right now. (from what I’ve read) Is that what you’re using on your blog?
After research a few of the blog posts in your website now, and I really like your method of blogging. I bookmarked it to my bookmark website listing and shall be checking back soon. Pls take a look at my web site as nicely and let me know what you think.
It’s a shame you don’t have a donate button! I’d definitely donate to this outstanding blog! I guess for now i’ll settle for bookmarking and adding your RSS feed to my Google account. I look forward to new updates and will talk about this website with my Facebook group. Talk soon!
Have you ever thought about creating an ebook or guest authoring on other sites? I have a blog centered on the same topics you discuss and would love to have you share some stories/information. I know my readers would enjoy your work. If you’re even remotely interested, feel free to send me an e-mail.
I think other web site proprietors should take this web site as an model, very clean and magnificent user friendly style and design, as well as the content. You are an expert in this topic!
I couldn’t refrain from commenting. Very well written!
whoah this blog is fantastic i love reading your posts. Keep up the great work! You know, a lot of people are hunting around for this info, you can aid them greatly.
Thanks for the various tips contributed on this blog site. I have observed that many insurance firms offer customers generous savings if they decide to insure more and more cars together. A significant quantity of households own several cars these days, particularly people with mature teenage kids still residing at home, plus the savings with policies can soon mount up. So it will pay to look for a bargain.
Hello my loved one! I want to say that this post is awesome, nice written and include almost all important infos. I would like to peer more posts like this .
One more thing to say is that an online business administration program is designed for students to be able to smoothly proceed to bachelor degree education. The 90 credit diploma meets the other bachelor diploma requirements so when you earn your current associate of arts in BA online, you may have access to the newest technologies with this field. Several reasons why students would like to get their associate degree in business is because they can be interested in this area and want to have the general education and learning necessary just before jumping to a bachelor college diploma program. Thanks alot : ) for the tips you provide in the blog.
I was just looking for this information for a while. After six hours of continuous Googleing, finally I got it in your web site. I wonder what is the lack of Google strategy that don’t rank this type of informative sites in top of the list. Generally the top web sites are full of garbage.
Very nice post. I just stumbled upon your weblog and wished to say that I’ve really enjoyed surfing around your blog posts. In any case I?ll be subscribing to your feed and I hope you write again soon!
Terrific work! This is the type of information that should be shared around the web. Shame on the search engines for not positioning this post higher! Come on over and visit my site . Thanks =)
wonderful points altogether, you simply gained a brand new reader. What would you recommend in regards to your post that you made a few days ago? Any positive?
Fantastic goods from you, man. I’ve understand your stuff previous to and you’re just too magnificent. I actually like what you’ve acquired here, really like what you’re saying and the way in which you say it. You make it enjoyable and you still care for to keep it wise. I can not wait to read far more from you. This is actually a terrific web site.
I have learned some new things from your site about desktops. Another thing I have always imagined is that laptop computers have become something that each household must have for some reasons. They offer convenient ways in which to organize the home, pay bills, shop, study, tune in to music and perhaps watch shows. An innovative method to complete every one of these tasks has been a computer. These desktops are mobile ones, small, highly effective and portable.
I have realized that car insurance companies know the automobiles which are at risk from accidents and various risks. Additionally they know what type of cars are given to higher risk plus the higher risk they’ve already the higher the premium charge. Understanding the simple basics involving car insurance will let you choose the right sort of insurance policy that may take care of your wants in case you get involved in any accident. Thanks for sharing your ideas in your blog.
Статья предлагает читателям широкий спектр информации, основанной на разных источниках.
Thank you for another excellent article. Where else could anybody get that kind of info in such an ideal way of writing? I have a presentation next week, and I am on the look for such information.
Thank you for the sensible critique. Me and my neighbor were just preparing to do some research on this. We got a grab a book from our local library but I think I learned more from this post. I am very glad to see such great info being shared freely out there.
It?s actually a cool and helpful piece of information. I am glad that you shared this useful info with us. Please keep us informed like this. Thanks for sharing.
I was suggested this blog by my cousin. I am not sure whether this post is written by him as nobody else know such detailed about my problem. You’re amazing! Thanks!
I can’t express how much I admire the effort the author has put into writing this exceptional piece of content. The clarity of the writing, the depth of analysis, and the abundance of information presented are simply astonishing. Her enthusiasm for the subject is apparent, and it has definitely resonated with me. Thank you, author, for providing your insights and enhancing our lives with this extraordinary article!
What?s Happening i’m new to this, I stumbled upon this I have found It absolutely useful and it has helped me out loads. I hope to contribute & aid other users like its helped me. Great job.
I have been exploring for a bit for any high-quality articles or weblog posts on this kind of house . Exploring in Yahoo I finally stumbled upon this site. Reading this info So i am happy to show that I have a very excellent uncanny feeling I discovered exactly what I needed. I such a lot no doubt will make certain to don?t disregard this site and provides it a glance regularly.
Heya i am for the first time here. I found this board and I find It truly useful & it helped me out a lot. I hope to give something back and help others like you aided me.
What i do not understood is if truth be told how you’re not really much more neatly-appreciated than you might be now. You are so intelligent. You realize thus significantly in the case of this matter, produced me in my opinion imagine it from so many varied angles. Its like women and men don’t seem to be fascinated until it?s something to do with Lady gaga! Your individual stuffs outstanding. Always care for it up!
RVVR is website dedicated to advancing physical and mental health through scientific research and proven interventions. Learn about our evidence-based health promotion programs. https://rvvr.us/
The latest news on grocery chains, celebrity chefs, and fast food – plus reviews, cooking tips and advice, recipes, and more. https://megamenu.us/
View the latest from the world of psychology: from behavioral research to practical guidance on relationships, mental health and addiction. Find help from our directory of therapists, psychologists and counselors. https://therapisttoday.us/
Breaking US news, local New York news coverage, sports, entertainment news, celebrity gossip, autos, videos and photos at nybreakingnews.us https://nybreakingnews.us/
Covering the latest beauty and fashion trends, relationship advice, wellness tips and more. https://gliz.us/
Colorado breaking news, sports, business, weather, entertainment. https://denver-news.us/
Your source for Connecticut breaking news, UConn sports, business, entertainment, weather and traffic https://connecticutpost.us/
Fresh, flavorful and (mostly) healthy recipes made for real, actual, every day life. Helping you celebrate the joy of food in a totally non-intimidating way. https://skillfulcook.us/
OCNews.us covers local news in Orange County, CA, California and national news, sports, things to do and the best places to eat, business and the Orange County housing market. https://ocnews.us/
Island Post is the website for a chain of six weekly newspapers that serve the North Shore of Nassau County, Long Island published by Alb Media. The newspapers are comprised of the Great Neck News, Manhasset Times, Roslyn Times, Port Washington Times, New Hyde Park Herald Courier and the Williston Times. Their coverage includes village governments, the towns of Hempstead and North Hempstead, schools, business, entertainment and lifestyle. https://islandpost.us/
Looking for quick and easy dinner ideas? Browse 100
Breaking food industry news, cooking tips, recipes, reviews, rankings, and interviews https://tastingcorner.us/
Latest Denver news, top Colorado news and local breaking news from Denver News, including sports, weather, traffic, business, politics, photos and video. https://denver-news.us/
BioPharma Blog provides news and analysis for biotech and biopharmaceutical executives. We cover topics like clinical trials, drug discovery and development, pharma marketing, FDA approvals and regulations, and more. https://biopharmablog.us/
Santa Cruz Sentinel: Local News, Local Sports and more for Santa Cruz https://santacruznews.us/
Something else is that when evaluating a good on-line electronics store, look for web stores that are consistently updated, retaining up-to-date with the most recent products, the perfect deals, along with helpful information on services and products. This will ensure you are dealing with a shop that really stays over the competition and provides you what you should need to make educated, well-informed electronics buys. Thanks for the crucial tips I have learned from the blog.
A different issue is that video gaming became one of the all-time most significant forms of entertainment for people of nearly every age. Kids play video games, plus adults do, too. Your XBox 360 has become the favorite games systems for many who love to have a lot of games available to them, in addition to who like to experiment with live with other people all over the world. Thanks for sharing your ideas.
There is noticeably a bundle to learn about this. I assume you made sure nice points in options also.
East Bay News is the leading source of breaking news, local news, sports, entertainment, lifestyle and opinion for Contra Costa County, Alameda County, Oakland and beyond https://eastbaynews.us/
Do whatever you want. Steal cars, drive tanks and helicopters, defeat gangs. It’s your city! https://play.google.com/store/apps/details?id=com.gangster.city.open.world
excellent points altogether, you just gained a new reader. What would you recommend in regards to your post that you made some days ago? Any positive?
It?s hard to search out knowledgeable individuals on this topic, however you sound like you already know what you?re talking about! Thanks
indiaherald.us provides latest news from India , India News and around the world. Get breaking news alerts from India and follow today’s live news updates in field of politics, business, sports, defence, entertainment and more. https://indiaherald.us
Kingston News – Kingston, NY News, Breaking News, Sports, Weather https://kingstonnews.us/
Yolonews.us covers local news in Yolo County, California. Keep up with all business, local sports, outdoors, local columnists and more. https://yolonews.us/
Do you have a spam problem on this blog; I also am a blogger, and I was wondering your situation; many of us have created some nice procedures and we are looking to swap methods with other folks, be sure to shoot me an e-mail if interested.
I should say also believe that mesothelioma cancer is a extraordinary form of cancers that is normally found in these previously familiar with asbestos. Cancerous cellular material form in the mesothelium, which is a defensive lining that covers almost all of the body’s body organs. These cells commonly form within the lining in the lungs, tummy, or the sac which actually encircles the heart. Thanks for giving your ideas.
Stri is the leading entrepreneurs and innovation magazine devoted to shed light on the booming stri ecosystem worldwide. https://stri.us/
F*ckin? tremendous issues here. I am very happy to see your post. Thanks so much and i am taking a look ahead to touch you. Will you kindly drop me a e-mail?
Great write-up, I am normal visitor of one?s blog, maintain up the excellent operate, and It is going to be a regular visitor for a long time.
Lake County Lake Reporter: Local News, Local Sports and more for Lake County https://lakereporter.us
As I web-site possessor I believe the content matter here is rattling wonderful , appreciate it for your efforts. You should keep it up forever! Best of luck.
Howdy are using WordPress for your blog platform? I’m new to the blog world but I’m trying to get started and create my own. Do you require any coding knowledge to make your own blog? Any help would be really appreciated!
When I initially commented I clicked the “Notify me when new comments are added” checkbox and now each time a comment is added I get several e-mails with the same comment. Is there any way you can remove people from that service? Thank you!
Today, I went to the beach with my kids. I found a sea shell and gave it to my 4 year old daughter and said “You can hear the ocean if you put this to your ear.” She put the shell to her ear and screamed. There was a hermit crab inside and it pinched her ear. She never wants to go back! LoL I know this is completely off topic but I had to tell someone!
Oakland County, MI News, Sports, Weather, Things to Do https://oaklandpost.us/
Whats up this is kind of of off topic but I was wanting to know if blogs use WYSIWYG editors or if you have to manually code with HTML. I’m starting a blog soon but have no coding expertise so I wanted to get advice from someone with experience. Any help would be greatly appreciated!
Thanks for expressing your ideas listed here. The other issue is that each time a problem appears with a computer motherboard, individuals should not go ahead and take risk connected with repairing that themselves because if it is not done right it can lead to irreparable damage to the whole laptop. It will always be safe just to approach any dealer of your laptop for your repair of the motherboard. They will have technicians who’ve an knowledge in dealing with pc motherboard complications and can get the right diagnosis and carry out repairs.
Trenton News – Trenton, NJ News, Sports, Weather and Things to Do https://trentonnews.us/
Ohio Reporter – Ohio News, Sports, Weather and Things to Do https://ohioreporter.us/
Healthcare Blog provides news, trends, jobs and resources for health industry professionals. We cover topics like healthcare IT, hospital administration, polcy
you’ve got an awesome weblog here! would you prefer to make some invite posts on my blog?
Fashion More provides in-depth journalism and insight into the news and trends impacting the fashion
The latest video game news, reviews, exclusives, streamers, esports, and everything else gaming. https://zaaz.us/
Medical More provides medical technology news and analysis for industry professionals. We cover medical devices, diagnostics, digital health, FDA regulation and compliance, imaging, and more. https://medicalmore.us
The Boston Post is the leading source of breaking news, local news, sports, politics, entertainment, opinion and weather in Boston, Massachusetts. https://bostonpost.us/
Local news from Redlands, CA, California news, sports, things to do, and business in the Inland Empire. https://redlandsnews.us
San Gabriel Valley News is the local news source for Los Angeles County
Generator Service Manchester
[…]just beneath, are quite a few completely not related sites to ours, having said that, they’re surely worth going over[…]
NewsBreak provides latest and breaking Renton, WA local news, weather forecast, crime and safety reports, traffic updates, event notices, sports https://rentonnews.us
Bellevue Latest Headlines: City of Bellevue can Apply for Digital Equity Grant https://bellevuenews.us
Thanks for the recommendations you have provided here. Something important I would like to talk about is that computer memory requirements generally go up along with other advancements in the technological know-how. For instance, if new generations of processor chips are brought to the market, there’s usually a related increase in the size calls for of both the pc memory in addition to hard drive space. This is because the software operated by simply these cpus will inevitably rise in power to benefit from the new know-how.
Я хотел бы выразить свою благодарность автору этой статьи за исчерпывающую информацию, которую он предоставил. Я нашел ответы на многие свои вопросы и получил новые знания. Это действительно ценный ресурс!
Today, I went to the beach with my children. I found a sea shell and gave it to my 4 year old daughter and said “You can hear the ocean if you put this to your ear.” She placed the shell to her ear and screamed. There was a hermit crab inside and it pinched her ear. She never wants to go back! LoL I know this is totally off topic but I had to tell someone!
cheap sex cams
[…]The data mentioned in the article are a few of the ideal obtainable […]
Maryland Post: Your source for Maryland breaking news, sports, business, entertainment, weather and traffic https://marylandpost.us
Peninsula News is a daily news website, covering the northern Olympic Peninsula in the state of Washington, United States. https://peninsulanews.us
OCNews.us covers local news in Orange County, CA, California and national news, sports, things to do and the best places to eat, business and the Orange County housing market. https://ocnews.us
Reading, PA News, Sports, Weather, Things to Do http://readingnews.us/
I?ve been exploring for a little for any high-quality articles or blog posts on this kind of area . Exploring in Yahoo I at last stumbled upon this site. Reading this info So i?m glad to show that I have an incredibly just right uncanny feeling I came upon just what I needed. I such a lot indisputably will make certain to do not disregard this website and give it a glance regularly.
Автор статьи представляет информацию, подкрепленную различными источниками, что способствует достоверности представленных фактов. Это сообщение отправлено с сайта https://ru.gototop.ee/
Статья представляет широкий спектр точек зрения на проблему, что способствует более глубокому пониманию.
Thanks for giving your ideas. I might also like to state that video games have been actually evolving. Better technology and improvements have assisted create realistic and interactive games. These kinds of entertainment games were not really sensible when the real concept was being tried. Just like other forms of technological innovation, video games too have had to progress by means of many many years. This is testimony to the fast progression of video games.
A powerful share, I just given this onto a colleague who was doing just a little analysis on this. And he in actual fact bought me breakfast as a result of I discovered it for him.. smile. So let me reword that: Thnx for the deal with! But yeah Thnkx for spending the time to debate this, I really feel strongly about it and love studying extra on this topic. If possible, as you turn out to be experience, would you mind updating your weblog with extra details? It is extremely useful for me. Massive thumb up for this weblog put up!
The latest news and reviews in the world of tech, automotive, gaming, science, and entertainment. https://millionbyte.us/
OnOverseas.Com
[…]we came across a cool site that you just might enjoy. Take a search if you want[…]
colibrim.com web site.
colibrim.com
colibrim.com
Wow! This blog looks just like my old one! It’s on a entirely different topic but it has pretty much the same page layout and design. Excellent choice of colors!
Heya i am for the first time here. I found this board and I find It truly useful & it helped me out much. I hope to give something back and help others like you helped me.
Hi there, I found your site via Google while looking for a related topic, your website came up, it looks great. I have bookmarked it in my google bookmarks.
Эта статья – источник ценной информации! Я оцениваю глубину исследования и разнообразие рассматриваемых аспектов. Она действительно расширила мои знания и помогла мне лучше понять тему. Большое спасибо автору за такую качественную работу!
I have noticed that online education is getting well-liked because accomplishing your degree online has developed into a popular method for many people. Numerous people have not had a possibility to attend a conventional college or university but seek the improved earning potential and a better job that a Bachelors Degree gives you. Still other people might have a college degree in one discipline but would choose to pursue anything they now have an interest in.
I have learned result-oriented things through the blog post. Yet another thing to I have seen is that generally, FSBO sellers will probably reject an individual. Remember, they can prefer not to ever use your companies. But if a person maintain a reliable, professional romance, offering guide and being in contact for about four to five weeks, you will usually manage to win interviews. From there, a listing follows. Thanks
My brother suggested I might like this website. He used to be entirely right. This submit truly made my day. You can not imagine just how so much time I had spent for this info! Thanks!
Статья ясно описывает факты и события, связанные с обсуждаемой темой.
Appreciating the time and effort you put into your blog and detailed information you present. It’s awesome to come across a blog every once in a while that isn’t the same outdated rehashed material. Fantastic read! I’ve saved your site and I’m adding your RSS feeds to my Google account.
Thanks for the concepts you are discussing on this blog. Another thing I’d like to say is the fact that getting hold of some copies of your credit profile in order to check accuracy of each detail may be the first activity you have to accomplish in repairing credit. You are looking to clear your credit history from destructive details mistakes that screw up your credit score.
What i do not understood is actually how you are not really much more well-liked than you may be now. You are very intelligent. You realize therefore significantly relating to this subject, made me personally consider it from a lot of varied angles. Its like women and men aren’t fascinated unless it is one thing to accomplish with Lady gaga! Your own stuffs excellent. Always maintain it up!
very nice publish, i certainly love this website, keep on it
LipoSlend is a liquid nutritional supplement that promotes healthy and steady weight loss. https://liposlendofficial.us/
Admiring the time and energy you put into your site and detailed information you offer. It’s good to come across a blog every once in a while that isn’t the same outdated rehashed material. Great read! I’ve saved your site and I’m adding your RSS feeds to my Google account.
Hi there, I found your site via Google while looking for a related topic, your web site came up, it looks great. I have bookmarked it in my google bookmarks.
In this great design of things you secure an A+ with regard to hard work. Exactly where you confused me was on the details. You know, they say, details make or break the argument.. And that couldn’t be much more correct in this article. Having said that, let me tell you what exactly did work. Your article (parts of it) is actually quite convincing and this is possibly the reason why I am making the effort to comment. I do not make it a regular habit of doing that. Second, despite the fact that I can easily notice the jumps in logic you come up with, I am not confident of exactly how you seem to connect the details which inturn make the actual conclusion. For the moment I will, no doubt subscribe to your point however wish in the foreseeable future you actually connect the dots much better.
Currently it seems like Drupal is the best blogging platform available right now. (from what I’ve read) Is that what you’re using on your blog?
Hey there! Do you use Twitter? I’d like to follow you if that would be ok. I’m undoubtedly enjoying your blog and look forward to new updates.
I have been exploring for a bit for any high quality articles or blog posts on this sort of area . Exploring in Yahoo I eventually stumbled upon this web site. Studying this information So i?m glad to convey that I’ve a very excellent uncanny feeling I came upon just what I needed. I such a lot for sure will make sure to don?t omit this web site and provides it a glance on a continuing basis.
I have come across that today, more and more people are now being attracted to video cameras and the subject of pictures. However, being photographer, you will need to first spend so much time deciding the exact model of dslr camera to buy plus moving store to store just so you could potentially buy the most economical camera of the brand you have decided to settle on. But it will not end generally there. You also have to take into consideration whether you should obtain a digital digital camera extended warranty. Thanks a bunch for the good guidelines I accumulated from your weblog.
Good day! This is my first visit to your blog! We are a collection of volunteers and starting a new initiative in a community in the same niche. Your blog provided us valuable information to work on. You have done a outstanding job!
I really like what you guys are usually up too. This kind of clever work and exposure! Keep up the terrific works guys I’ve incorporated you guys to my own blogroll.
This design is wicked! You obviously know how to keep a reader entertained. Between your wit and your videos, I was almost moved to start my own blog (well, almost…HaHa!) Fantastic job. I really enjoyed what you had to say, and more than that, how you presented it. Too cool!
great post, very informative. I wonder why the other experts of this sector don’t notice this. You must continue your writing. I’m sure, you’ve a huge readers’ base already!
You actually make it seem really easy along with your presentation however I to find this matter to be actually one thing which I believe I’d never understand. It sort of feels too complicated and extremely extensive for me. I’m taking a look ahead in your next publish, I will try to get the hold of it!
Thanks for the article. My spouse and i have always noticed that the majority of people are eager to lose weight because they wish to appear slim plus attractive. Even so, they do not always realize that there are many benefits for you to losing weight in addition. Doctors declare that over weight people have problems with a variety of conditions that can be directly attributed to their excess weight. The great news is that people who sadly are overweight and also suffering from diverse diseases can help to eliminate the severity of their particular illnesses by way of losing weight. It’s possible to see a gradual but notable improvement in health as soon as even a small amount of fat reduction is obtained.
F*ckin? awesome things here. I am very satisfied to peer your post. Thanks a lot and i’m taking a look ahead to contact you. Will you please drop me a e-mail?
Bazopril is a blood pressure supplement featuring a blend of natural ingredients to support heart health
Tonic Greens is an all-in-one dietary supplement that has been meticulously designed to improve overall health and mental wellness.
Thank you for every other great post. Where else may anyone get that kind of info in such an ideal means of writing? I’ve a presentation subsequent week, and I’m on the look for such info.
live sex cams
[…]we like to honor a lot of other world wide web sites on the web, even when they arent linked to us, by linking to them. Underneath are some webpages worth checking out[…]
Hello There. I found your blog using msn. This is an extremely well written article. I will be sure to bookmark it and return to read more of your useful info. Thanks for the post. I?ll definitely return.
rare breed-trigger
[…]Here is a great Weblog You might Obtain Fascinating that we Encourage You[…]
I have observed that car insurance firms know the vehicles which are liable to accidents and other risks. In addition, they know what types of cars are inclined to higher risk along with the higher risk they’ve already the higher a premium fee. Understanding the uncomplicated basics with car insurance will let you choose the right types of insurance policy that can take care of your requirements in case you get involved in an accident. Many thanks for sharing a ideas on the blog.
Thanks for your marvelous posting! I actually enjoyed reading it, you will be a great author.I will remember to bookmark your blog and may come back in the foreseeable future. I want to encourage you to continue your great writing, have a nice day!
Hi, i think that i saw you visited my website thus i came to ?return the favor?.I am attempting to find things to improve my site!I suppose its ok to use a few of your ideas!!
Thanks for these pointers. One thing I additionally believe is the fact credit cards giving a 0 monthly interest often entice consumers in with zero interest, instant approval and easy on the web balance transfers, but beware of the most recognized factor that will certainly void the 0 easy road annual percentage rate and also throw you out into the terrible house fast.
늑대닷컴
[…]one of our guests not long ago proposed the following website[…]
I?d must test with you here. Which is not something I usually do! I get pleasure from studying a put up that can make folks think. Also, thanks for permitting me to comment!
Judi Online Aman dan Terpercaya
[…]Sites of interest we’ve a link to[…]
Я оцениваю умение автора использовать разнообразные источники, чтобы подкрепить свои утверждения.
Please let me know if you’re looking for a article writer for your site. You have some really great posts and I believe I would be a good asset. If you ever want to take some of the load off, I’d absolutely love to write some articles for your blog in exchange for a link back to mine. Please shoot me an email if interested. Kudos!
A great post without any doubt.
I believe that avoiding processed foods could be the first step to help lose weight. They will often taste excellent, but highly processed foods currently have very little vitamins and minerals, making you try to eat more only to have enough vitality to get over the day. If you are constantly feeding on these foods, changing to grain and other complex carbohydrates will assist you to have more vigor while ingesting less. Thanks alot : ) for your blog post.
you’ve got a terrific weblog here! would you prefer to make some invite posts on my blog?
nang delivery
[…]always a big fan of linking to bloggers that I adore but dont get a good deal of link adore from[…]
Interesting blog! Is your theme custom made or did you download it from somewhere? A theme like yours with a few simple adjustements would really make my blog shine. Please let me know where you got your theme. Thanks
freelance web designer Singapore
[…]usually posts some very intriguing stuff like this. If you are new to this site[…]
allgame
[…]we came across a cool web page that you just may possibly love. Take a search when you want[…]
Heya! I’m at work surfing around your blog from my new iphone 4! Just wanted to say I love reading through your blog and look forward to all your posts! Keep up the superb work!
918kiss
[…]very handful of internet sites that come about to be detailed below, from our point of view are undoubtedly very well worth checking out[…]
The information shared is of top quality which has to get appreciated at all levels. Well done…
หวย24
[…]check below, are some entirely unrelated internet sites to ours, having said that, they are most trustworthy sources that we use[…]
Best acne treatment
[…]very handful of web-sites that occur to be detailed beneath, from our point of view are undoubtedly nicely really worth checking out[…]
Thanks for your publish. My partner and i have continually seen that a majority of people are needing to lose weight since they wish to appear slim plus attractive. Having said that, they do not often realize that there are other benefits for losing weight in addition. Doctors say that obese people are afflicted with a variety of disorders that can be perfectely attributed to their excess weight. The good thing is that people who are overweight plus suffering from various diseases are able to reduce the severity of the illnesses by way of losing weight. It’s possible to see a progressive but identifiable improvement with health as soon as even a minor amount of weight reduction is achieved.
Nice blog here! Also your web site loads up very fast! What host are you using? Can I get your affiliate link to your host? I wish my website loaded up as quickly as yours lol
Many thanks for your post. I would like to say that the cost of car insurance varies from one policy to another, due to the fact there are so many different facets which play a role in the overall cost. For example, the model and make of the automobile will have a large bearing on the charge. A reliable older family motor vehicle will have a less expensive premium than a flashy fancy car.
I have seen a lot of useful points on your web site about pc’s. However, I’ve got the judgment that lap tops are still less than powerful sufficiently to be a option if you frequently do tasks that require a lot of power, like video enhancing. But for world wide web surfing, microsoft word processing, and most other popular computer work they are fine, provided you never mind the screen size. Thank you for sharing your notions.
Hi there would you mind stating which blog platform you’re working with? I’m looking to start my own blog in the near future but I’m having a difficult time choosing between BlogEngine/Wordpress/B2evolution and Drupal. The reason I ask is because your design seems different then most blogs and I’m looking for something unique. P.S Sorry for getting off-topic but I had to ask!
One thing I want to say is the fact that before acquiring more computer memory, check out the machine into which it will be installed. If your machine is definitely running Windows XP, for instance, the memory threshold is 3.25GB. Adding in excess of this would basically constitute just a waste. Be sure that one’s motherboard can handle the particular upgrade quantity, as well. Good blog post.
aplikasi admin slot pragmatic
[…]Every as soon as in a even though we opt for blogs that we study. Listed beneath would be the most recent websites that we pick out […]
Definitely believe that which you said. Your favorite justification appeared to be on the web the simplest thing to be aware of. I say to you, I definitely get annoyed while people consider worries that they plainly don’t know about. You managed to hit the nail upon the top and defined out the whole thing without having side effect , people could take a signal. Will likely be back to get more. Thanks
Hmm it seems like your website ate my first comment (it was extremely long) so I guess I’ll just sum it up what I had written and say, I’m thoroughly enjoying your blog. I too am an aspiring blog writer but I’m still new to everything. Do you have any tips and hints for inexperienced blog writers? I’d certainly appreciate it.
Thanks for your blog post. A few things i would like to make contributions about is that computer memory is required to be purchased if your computer can no longer cope with anything you do by using it. One can mount two RAM memory boards having 1GB each, as an example, but not one of 1GB and one having 2GB. One should always check the company’s documentation for the PC to be sure what type of memory space it can take.
What i do not realize is actually how you’re not really much more well-liked than you might be now. You’re very intelligent. You realize thus significantly relating to this subject, made me personally consider it from a lot of varied angles. Its like women and men aren’t fascinated unless it is one thing to accomplish with Lady gaga! Your own stuffs outstanding. Always maintain it up!
I have seen that good real estate agents just about everywhere are Promoting. They are noticing that it’s not only placing a sign in the front property. It’s really in relation to building relationships with these traders who someday will become purchasers. So, whenever you give your time and efforts to aiding these dealers go it alone : the “Law regarding Reciprocity” kicks in. Good blog post.
great submit, very informative. I wonder why the opposite specialists of this sector don’t realize this. You must proceed your writing. I am sure, you have a great readers’ base already!
You actually make it seem so easy with your presentation but I find this topic to be actually something that I think I would never understand. It seems too complicated and extremely broad for me. I’m looking forward for your next post, I?ll try to get the hang of it!
Looking for a new signature scent? Picking the perfect perfume https://ceresaperfume.com requires some thoughtful consideration! Start by understanding your preference- floral, citrus, woody, or spicy. Head to a store and don’t rush: Smell a few, take a break, then revisit your favorites. Your nose can get overwhelmed, so don’t try more than 5 scents in one day! Also, remember perfumes can smell different on everyone due to body chemistry. To determine how it actually smells on you and how long it lasts, apply on your wrist and let it sit for a few hours before deciding. Happy sniffing! #perfume #beautytips
Someone essentially help to make seriously posts I would state. This is the very first time I frequented your website page and thus far? I surprised with the research you made to create this particular publish incredible. Excellent job!
Hello would you mind letting me know which web host you’re utilizing? I’ve loaded your blog in 3 different web browsers and I must say this blog loads a lot quicker then most. Can you suggest a good internet hosting provider at a fair price? Thanks a lot, I appreciate it!
Thanks for this glorious article. One other thing is that almost all digital cameras can come equipped with any zoom lens that enables more or less of any scene being included by ‘zooming’ in and out. Most of these changes in {focus|focusing|concentration|target|the a**** length will be reflected inside viewfinder and on substantial display screen at the back of the specific camera.
Это способствует более глубокому пониманию обсуждаемой темы и позволяет читателям самостоятельно сформировать свое мнение.
Heya this is kinda of off topic but I was wanting to know if blogs use WYSIWYG editors or if you have to manually code with HTML. I’m starting a blog soon but have no coding know-how so I wanted to get guidance from someone with experience. Any help would be enormously appreciated!
catégorie de logiciel malveillant
[…]Here is a great Blog You may Uncover Exciting that we Encourage You[…]
There are actually a lot of particulars like that to take into consideration. That is a nice point to deliver up. I supply the ideas above as basic inspiration however clearly there are questions just like the one you bring up where an important thing will be working in honest good faith. I don?t know if finest practices have emerged round issues like that, however I’m positive that your job is clearly recognized as a fair game. Each boys and girls feel the impression of just a second?s pleasure, for the rest of their lives.
We are a bunch of volunteers and opening a brand new scheme in our community. Your site provided us with useful information to paintings on. You have performed an impressive task and our entire neighborhood shall be grateful to you.
nangs delivery in Sydney
[…]Every as soon as inside a whilst we decide on blogs that we read. Listed below are the most current internet sites that we choose […]
hello!,I like your writing very much! share we communicate more about your post on AOL? I need an expert on this area to solve my problem. May be that’s you! Looking forward to see you.
I’m extremely impressed with your writing skills as well as with the layout on your weblog. Is this a paid theme or did you customize it yourself? Anyway keep up the nice quality writing, it is rare to see a great blog like this one these days.
You ought to take part in a contest for one of the finest blogs online. I am going to recommend this blog!
Definitely believe that which you said. Your favorite reason seemed to be on the web the simplest thing to be aware of. I say to you, I definitely get annoyed while people think about worries that they plainly don’t know about. You managed to hit the nail upon the top as well as defined out the whole thing without having side effect , people could take a signal. Will probably be back to get more. Thanks
Thanks for your post. One other thing is individual states have their very own laws of which affect homeowners, which makes it quite difficult for the the nation’s lawmakers to come up with a different set of rules concerning foreclosure on people. The problem is that a state provides own regulations which may have impact in a damaging manner in relation to foreclosure policies.
Wow! This could be one particular of the most beneficial blogs We’ve ever arrive across on this subject. Actually Fantastic. I’m also a specialist in this topic therefore I can understand your hard work.
We are offering Concrete Parking Lot Contractor, Concrete Installation Contractor Service, warehouse flooring, commercial, and industrial concrete roadways.
I’m not sure why but this website is loading very slow for me. Is anyone else having this problem or is it a issue on my end? I’ll check back later and see if the problem still exists.
itsmasum.com
[…]we came across a cool web-site that you simply may possibly delight in. Take a search in the event you want[…]
Статья содержит обновленную информацию и факты, подтвержденные надежными источниками.
I love your wordpress web template, wherever do you down load it through?
I have seen plenty of useful elements on your web page about desktops. However, I’ve got the judgment that netbooks are still less than powerful enough to be a wise decision if you frequently do things that require lots of power, such as video editing and enhancing. But for world-wide-web surfing, word processing, and most other typical computer work they are all right, provided you don’t mind the small screen size. Many thanks for sharing your opinions.
You really make it seem so easy with your presentation but I find this topic to be really something which I think I would never understand. It seems too complex and very broad for me. I am looking forward for your next post, I will try to get the hang of it!
I have noticed that online education is getting preferred because attaining your degree online has developed into popular solution for many people. A huge number of people have not really had a possible opportunity to attend a regular college or university although seek the increased earning potential and career advancement that a Bachelors Degree gives. Still others might have a qualification in one discipline but would like to pursue anything they now develop an interest in.
Hi there, i read your blog from time to time and i own a similar one and i was just curious if you get a lot of spam responses? If so how do you reduce it, any plugin or anything you can advise? I get so much lately it’s driving me crazy so any support is very much appreciated.
This is the appropriate weblog for anyone who desires to search out out about this topic. You notice a lot its nearly hard to argue with you (not that I actually would need?HaHa). You positively put a brand new spin on a subject thats been written about for years. Great stuff, just nice!
Does your site have a contact page? I’m having a tough time locating it but, I’d like to send you an email. I’ve got some creative ideas for your blog you might be interested in hearing. Either way, great website and I look forward to seeing it grow over time.
talk to strangers online
[…]Every when in a while we choose blogs that we study. Listed below would be the most up-to-date web pages that we decide on […]
talkwithstrangee
[…]Here are some of the web pages we recommend for our visitors[…]
fantastic points altogether, you just gained a new reader. What would you recommend about your post that you made a few days ago? Any positive?
This is really attention-grabbing, You’re a very professional blogger. I have joined your feed and sit up for in quest of extra of your great post. Also, I’ve shared your website in my social networks!
Hurrah! In the end I got a blog from where I can genuinely take helpful data concerning my study and knowledge.
Generally I do not read article on blogs, but I wish to say that this write-up very forced me to try and do it! Your writing style has been surprised me. Thanks, very nice post.
I used to be more than happy to seek out this internet-site.I wanted to thanks for your time for this glorious learn!! I definitely having fun with every little bit of it and I’ve you bookmarked to check out new stuff you blog post.
itsmasum.com
[…]below youll locate the link to some internet sites that we believe you should visit[…]
Great goods from you, man. I have understand your stuff previous to and you are just extremely wonderful. I actually like what you have acquired here, certainly like what you’re stating and the way in which you say it. You make it enjoyable and you still take care of to keep it sensible. I can not wait to read much more from you. This is actually a great web site.
What i do not understood is in truth how you are not really much more neatly-favored than you might be now. You are very intelligent. You already know thus significantly relating to this matter, produced me individually imagine it from numerous numerous angles. Its like women and men are not fascinated until it is one thing to do with Lady gaga! Your individual stuffs great. At all times maintain it up!
I have read a few good stuff here. Definitely worth bookmarking for revisiting. I surprise how much effort you put to make such a fantastic informative web site.
Many thanks for this article. I’d personally also like to convey that it can often be hard if you are in school and just starting out to initiate a long credit history. There are many students who are just trying to endure and have a good or good credit history can often be a difficult matter to have.
Thanks for any other great post. Where else may just anybody get that type of information in such an ideal manner of writing? I have a presentation subsequent week, and I’m on the look for such information.
One thing I’d prefer to reply to is that weightloss program fast can be performed by the correct diet and exercise. People’s size not simply affects appearance, but also the quality of life. Self-esteem, major depression, health risks, along with physical abilities are impacted in putting on weight. It is possible to make everything right and at the same time having a gain. If this happens, a medical problem may be the perpetrator. While a lot food but not enough body exercise are usually to blame, common health conditions and popular prescriptions can easily greatly help to increase size. Many thanks for your post right here.
Thanks for your write-up on the traveling industry. I will also like to add that if your senior taking into account traveling, it’s absolutely essential that you buy travel cover for elderly people. When traveling, elderly people are at high risk of experiencing a health emergency. Obtaining the right insurance coverage package for one’s age group can safeguard your health and provide peace of mind.
I do agree with all of the ideas you have presented in your post. They’re very convincing and will certainly work. Still, the posts are very short for beginners. Could you please extend them a bit from next time? Thanks for the post.
hey there and thank you for your information ? I have definitely picked up anything new from right here. I did however expertise a few technical issues using this web site, as I experienced to reload the website many times previous to I could get it to load properly. I had been wondering if your web host is OK? Not that I’m complaining, but slow loading instances times will often affect your placement in google and can damage your high-quality score if advertising and marketing with Adwords. Anyway I?m adding this RSS to my e-mail and can look out for much more of your respective exciting content. Ensure that you update this again soon..
Very good website you have here but I was curious about if you knew of any discussion boards that cover the same topics talked about in this article? I’d really like to be a part of community where I can get responses from other knowledgeable people that share the same interest. If you have any suggestions, please let me know. Appreciate it!
Thanks for revealing your ideas here. The other element is that if a problem appears with a computer system motherboard, people should not go ahead and take risk involving repairing that themselves because if it is not done correctly it can lead to irreparable damage to the complete laptop. It will always be safe just to approach any dealer of any laptop for the repair of its motherboard. They’ve got technicians with an knowledge in dealing with laptop computer motherboard issues and can carry out the right analysis and execute repairs.
Hello there, just became alert to your blog through Google, and found that it’s really informative. I?m gonna watch out for brussels. I?ll appreciate if you continue this in future. Lots of people will be benefited from your writing. Cheers!
Appreciating the time and effort you put into your website and detailed information you offer. It’s great to come across a blog every once in a while that isn’t the same out of date rehashed information. Excellent read! I’ve bookmarked your site and I’m adding your RSS feeds to my Google account.
One important issue is that when you are searching for a student loan you may find that you will want a cosigner. There are many cases where this is true because you might discover that you do not use a past credit history so the financial institution will require that you’ve someone cosign the borrowed funds for you. Great post.
you’ve an incredible blog here! would you wish to make some invite posts on my weblog?
Good site! I truly love how it is easy on my eyes and the data are well written. I’m wondering how I might be notified whenever a new post has been made. I’ve subscribed to your feed which must do the trick! Have a great day!
Hmm is anyone else encountering problems with the pictures on this blog loading? I’m trying to find out if its a problem on my end or if it’s the blog. Any responses would be greatly appreciated.
Hey there are using WordPress for your blog platform? I’m new to the blog world but I’m trying to get started and create my own. Do you need any coding knowledge to make your own blog? Any help would be really appreciated!
I do enjoy the manner in which you have framed this matter plus it really does provide us a lot of fodder for thought. Nevertheless, coming from what precisely I have experienced, I simply trust as the feed-back stack on that men and women keep on issue and not embark on a tirade associated with some other news du jour. All the same, thank you for this excellent piece and while I can not go along with this in totality, I regard your point of view.
Spot on with this write-up, I truly assume this web site wants rather more consideration. I?ll in all probability be again to read much more, thanks for that info.
I don?t even know how I ended up here, but I thought this post was great. I do not know who you are but certainly you are going to a famous blogger if you are not already 😉 Cheers!
Thanks for your write-up. My partner and i have generally seen that a majority of people are needing to lose weight simply because they wish to show up slim in addition to looking attractive. Even so, they do not usually realize that there are additional benefits to losing weight in addition. Doctors insist that overweight people are afflicted by a variety of health conditions that can be directly attributed to their excess weight. The great news is that people who’re overweight plus suffering from various diseases are able to reduce the severity of their particular illnesses through losing weight. It’s possible to see a gradual but notable improvement in health when even a bit of a amount of weight reduction is accomplished.
Great paintings! This is the kind of information that are meant to be shared around the net. Shame on the seek engines for not positioning this post higher! Come on over and talk over with my site . Thank you =)
Thanks for your valuable post. As time passes, I have come to understand that the particular symptoms of mesothelioma cancer are caused by your build up connected fluid between lining on the lung and the chest cavity. The condition may start in the chest vicinity and distribute to other limbs. Other symptoms of pleural mesothelioma include weight loss, severe inhaling and exhaling trouble, fever, difficulty eating, and puffiness of the face and neck areas. It ought to be noted that some people with the disease don’t experience just about any serious indicators at all.
My brother suggested I may like this web site. He was totally right. This post actually made my day. You can not believe just how so much time I had spent for this info! Thanks!
Useful info. Lucky me I discovered your web site unintentionally, and I am shocked why this coincidence didn’t took place in advance! I bookmarked it.
My programmer is trying to convince me to move to .net from PHP. I have always disliked the idea because of the expenses. But he’s tryiong none the less. I’ve been using WordPress on a number of websites for about a year and am concerned about switching to another platform. I have heard fantastic things about blogengine.net. Is there a way I can transfer all my wordpress content into it? Any kind of help would be greatly appreciated!
I love your blog.. very nice colors & theme. Did you make this website yourself or did you hire someone to do it for you? Plz reply as I’m looking to design my own blog and would like to find out where u got this from. kudos
Youre so cool! I dont suppose Ive read anything like this before. So nice to find any person with some original ideas on this subject. realy thank you for beginning this up. this website is one thing that’s wanted on the web, somebody with a little bit originality. useful job for bringing one thing new to the web!
Hi, Neat post. There’s a problem with your website in internet explorer, would test this? IE still is the market leader and a large portion of people will miss your wonderful writing because of this problem.
certainly like your website but you have to take a look at the spelling on quite a few of your posts. Several of them are rife with spelling issues and I in finding it very troublesome to inform the truth however I?ll surely come again again.
Valuable info. Lucky me I found your website by accident, and I’m shocked why this accident did not happened earlier! I bookmarked it.
Thanks for your fascinating article. Other thing is that mesothelioma cancer is generally caused by the breathing of dust from asbestos fiber, which is a positivelly dangerous material. It is commonly witnessed among staff in the building industry that have long experience of asbestos. It’s also caused by living in asbestos protected buildings for years of time, Genes plays a huge role, and some individuals are more vulnerable to the risk as compared to others.
Wow! This can be one particular of the most beneficial blogs We’ve ever arrive across on this subject. Actually Excellent. I am also a specialist in this topic therefore I can understand your hard work.