Hexen 2 – Walkthrough
Hexen 2 is a really good fantasy action game, though getting through it isn’t always easy. No matter which character you choose, this walkthrough will guide you all the way to the second episode. By the end of it, you’ll have a general idea of how the game’s puzzles are structured and will have a better grasp of going through the other episodes.
|
CONTENTS 1. Blackmarsh, The Mill, and Barbican |
Blackmarsh, The Mill, and Barbican
 Blackmarsh, The Mill, and Barbican
Enter the crypt behind you and find the button in the left corner (attack it for it to activate). Enter the secret passage. Hit the wall panel on the left side of the gate.
“You hear the door across the room open”
Exit the crypt. Follow the dark tunnel until you reach a dark room with a tomb. Find the panel switch, move the tomb and push the panel underneath to open the door.
Collect your second weapon in the green pasture and enter the dark cave until you reach a bridge going over a pool of water (there’s a secret door under the bridge, but ignore it for now). Enter the wizard’s lab, kill him and note the message you get when you approach his stew:
“You need the bone dust of Loric to complete the spell and create the potion of Mithril Transmutation.”
Go back to the bridge and look for the portal underneath. Strike the winch to open the door, kill the wizard and collect the Bones of Loric. Open the gate and jump into the teleporter to return the starting crypt. Time to go back to the green pasture and visit The Mill.
The Mill
Go through the narrow tunnels. When you find the Torch, go ahead and grab the Chaos Device hidden over the cave entrance. Take the right teleporter and find the mill, but notice you need the Mill Key. We need to use the mill to cruch them old bones. Jump back and take the other teleporter, and you’ll eventually make it back to where you’ve entered the area.
Blackmarsh
Go back to the wizard’s laboratory and enter Barbican.
 Barbican
It’s a linear road from here. When you find the catapult, jump and strike your weapon on it to fly over the wall (don’t forget to open the gate after you land). When you find the drawbridge, jump into the watery moat (watch out for that squid) and swim to the left (the right part of the moat is locked right now). Make your way through the underwater sewage tunnels until you find an opening into the outer perimeter of the castle.
Once you’ll find your way into the courtyard, you’ll come under attack from a crossbow sentry on the second floor, and around the corner you’ll find a big gate which requires the Castle Key. As you come back down from destroying the crossbow, notice a door that will lead to the guard’s sleeping quarters and lever controlling the drawbridge.
“You have activated the drawbridge.”
Continue a bit more and you’ll find a boiling pot and a wooden grate looking down, and also a cracked floor in a corner that leads into a room below. When you reach the broken stairs, just push one of the barrels and climb up. Kill the wizard and smash up his desk to find a switch panel leading back to the locked castle gate. Well that was pointless. Did we miss something?
Go back to the guards’ living quarters and notice the a strange symbol next to the weapons rack, hidden behind the stacked vases. Hit it, go through and take control of the crossbow. Hit the tower enough times and you’ll eventually destroy it, revealing a teleporter.
“You destroyed the old tower!”
Next to the destroyed tower you’ll find the Mill Key. You can jump into the teleporter to reach a nearby platform with some extra items.
Blackmarsh
Go through the wizard’s lab and continue to the mill.
The Mill
Go back to the mill, open it and walk around the crusher until you receive the message:
“The bones are crushing nicely. Go outside to gather the dust.”
You now have the dust of Loric.
Blackmarsh
Hop into the wizard’s golden stew.
“You have squired the Potion of Mithril Transmutation.”
Barbican
Find the living quarters again and locate the boiling pot next to the drawbridge controls. Jump down and continue to the broken stairway room. Open the dead wizard’s balcony and jump into the moat. As you swim in the dark water, you’ll notice a golden seal to your left – bump into it and you will use the Potion of Mithril Transmutation, transforming the golden seal into wood. You can then attack it, break it and reveal the Castle Key.
Time to enter the castle.
King’s Court
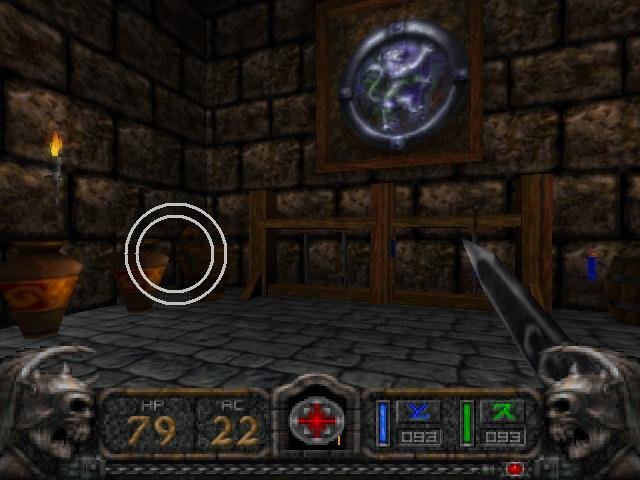
 As you start, notice the giant magical barrier to your right. Go straight and you’ll find your first golem – deal enough damage and they’ll drop. There are no puzzle items in the meat shop, but it does have some useful items. Returning from the meat shop, turn right and you’ll come across the mysterious ‘Shoppe‘… On the second floor you’ll find a bed with a chest and a strange wall. Hit the wall and it will slide open.
“Only one of the Brotherhood of Hunger may approach the altar.”
As you exit the Shoppe, turn right and you’ll eventually find the tailor’s home. In his room upstairs is a locked cabinet needing the Tailor’s Key. Continuing down the road from the tailor will eventually lead you unto a platform high above the central courtyard where you’ve entered the level.
Jump back down, and when you approach the meat shop head right to find the last place of interest in this area – the Raven’s Nest (wink, wink). Brake the wooden shelves behind the counter for a teleporter leading to some goodies. Find the entrance to the Inner Courtyard.
Inner Courtyard
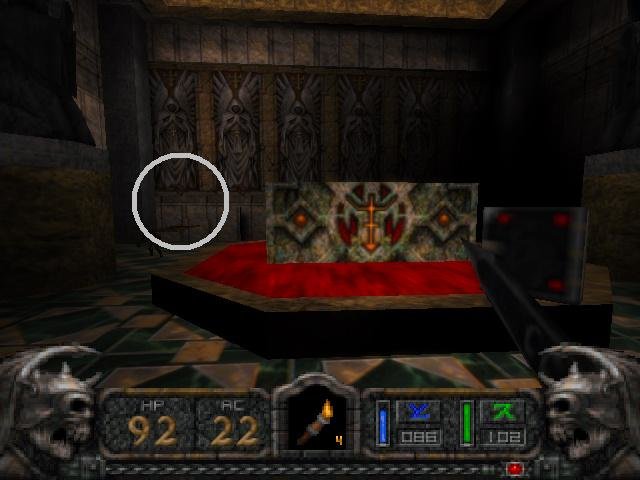
A lot of stuff to see here. First there’s the guillotine and a stained glass window behind it which can be broken (leading to the Forgotten Chapel). Underneath the guillotine is the prison and the teleporter leading to Famine itself… too bad you can’t face him before you’ve solved all of the puzzles. There’s the undertaker where you’ll find the passage leading underneath the guillotine tunnels, and lastly on the other end of the map is a huge room with a marvelous tapestry. When you approach this tapestry, you will get the message:
“Invisible forces are at work here. If only you could see what lies beyond the wall in front of you.”
Head to the Forgotten Chapel for now.
Forgotten Chapel
Explore the chapel until you find a tomb. Notice some odd geometry on the upper left corner.
Push it and you’ll reveal a secret passage under the tomb. Find the body encased in webs and gib the poor sucker to spawn the Tailor’s Key. Explore until you teleport into a pool of water. Notice the submerged pressure plate – step on it and go back to the courtyard.
Inner Courtyard
Head to the tailor.
King’s Court
Find the tailor, open his cabinet, break the false wall and obtain the Disrupt Magic Scroll. Go to the central courtyard with the giant statue and the giant magical barrier. Walk into it.
Palace Entrance
It’s a pretty linear path from here. At the end of it all you’ll find a locked door, needing the Treasury Key. Damn.
King’s Court
Look around until you find the entrance to the stables.
The Stables
This place is pretty confusing, but as you start and continue on a straight path you’ll eventually find a bunch of stacked haystacks that you can climb through. A dead body will lie there and a book:
“They took the castle by storm, so many died, but I was able to bury the key by the tree and forge.”
Find the ladder leading up to the higher floors – you will be in a room with a sealed barrier (which has Famine painted on it). Use the stairs to access the wooden beams high up and make your way to a secret wooden door. Inside you will find a switch opening the sealed Famine door underneath, revealing the Shovel.

Go back to the forge and walk around the tree until a giant hole appears. You’ve just found the Treasury Key! You will also find a locked door in this level but which requires the Stable Key. For now head back to the Palace Entrance.
Palace Entrance
Inside the treasury you will find the Amulet of Hunger.
King’s Court
Head back to the Shoppe and enter the secret passage on the second floor.
“And it is foretold that by seeking out sand, glass and grindstone, one may cross the crystal barrier and join with the Master of Hunger. Your quest begins at the fireplace by the forge.”
The Stables
Head back to the forge. Go upstairs and you will now notice a new button next to the fireplace. Smash everything inside the secret room and you’ll find the Stables Key. Head upstairs where you will find the door requiring the key. Open the door and hack the carpet for a trap door to open. Continue and you will eventually find a container with a Pile of Sand. Switch the lever and you’ll open the large metal gate. Don’t exit yet! Go to the forge and walk around until you get the following message:
“You have melted the sand!”
You now carry a Bead of Glass.
Inner Courtyard
 As you enter the level, head left (therefor opposite of the guillotine) and you’ll find an unmarked wooden building. Go inside and you’ll notice ‘something unusual about the fireplace’. Climb up carefully and you’ll find a grindstone – walk into it and you’ll spawn the Lens of Seeing behind you. Go back to the large room with the fancy table and tapestry, the one where “Invisible forces” were at work.
You will now notice the tapestry is transparent and reveals a teleporter. Walk into it and you’ll find yourself in a pool greeted by two tough golems. Walk through the magical white portal.
“You have been given the power to destroy the crystal golem”.
Facing Famine
 Find the nearby undertaker (the tombstones and crosses should tip you off). Locate the secret button and activate it. A secret passage will eventually lead to the holding cells and the teleporter to the crystal golem and Famine.
Feel free to use a Tomb of Power – just note that walking out of a level when a Tomb of Power is activated sometimes crashing the game. After defeating the crystal golem you will find another teleporter leading to the level with Famine. There is no secret trick in defeating Famine – just great reflexes. The same goes for every major boss character in Hexen II.

")
")


Enjoyed looking at this, very good stuff, thanks.
I believe this website contains very great written content material content.
After all, what a great site and informative posts, I will upload inbound link – bookmark this web site? Regards, Reader.
An fascinating dialogue is value comment. I believe that you should write extra on this subject, it may not be a taboo topic but usually individuals are not sufficient to talk on such topics. To the next. Cheers
I really enjoy studying on this website, it has fantastic content. “And all the winds go sighing, For sweet things dying.” by Christina Georgina Rossetti.
Exactly what I was looking for, appreciate it for posting.
I have been absent for a while, but now I remember why I used to love this blog. Thanks , I’ll try and check back more often. How frequently you update your web site?
Thank you a bunch for sharing this with all people you really recognize what you’re speaking about! Bookmarked. Please also discuss with my site =). We will have a hyperlink change agreement among us!
It’s in point of fact a nice and useful piece of info. I’m satisfied that you simply shared this helpful info with us. Please keep us informed like this. Thank you for sharing.
Have you ever considered about including a little bit more than just your articles? I mean, what you say is important and everything. But think about if you added some great photos or videos to give your posts more, “pop”! Your content is excellent but with pics and video clips, this website could undeniably be one of the very best in its field. Good blog!
What i don’t understood is in truth how you’re now not actually much more neatly-preferred than you may be right now. You’re so intelligent. You understand thus considerably when it comes to this subject, made me personally believe it from so many numerous angles. Its like women and men aren’t fascinated until it is something to do with Lady gaga! Your individual stuffs excellent. All the time care for it up!
Do you mind if I quote a few of your posts as long as I provide credit and sources back to your webpage? My blog site is in the very same niche as yours and my users would genuinely benefit from a lot of the information you provide here. Please let me know if this ok with you. Thanks a lot!
F*ckin’ tremendous things here. I am very satisfied to peer your article. Thanks a lot and i am taking a look ahead to contact you. Will you kindly drop me a e-mail?
Thanks for sharing excellent informations. Your website is very cool. I’m impressed by the details that you’ve on this website. It reveals how nicely you perceive this subject. Bookmarked this website page, will come back for more articles. You, my friend, ROCK! I found simply the information I already searched everywhere and just couldn’t come across. What a great website.
I was just seeking this info for some time. After 6 hours of continuous Googleing, finally I got it in your site. I wonder what is the lack of Google strategy that do not rank this type of informative web sites in top of the list. Generally the top websites are full of garbage.
Great beat ! I would like to apprentice while you amend your website, how can i subscribe for a blog web site? The account helped me a acceptable deal. I had been tiny bit acquainted of this your broadcast provided bright clear concept
Howdy would you mind sharing which blog platform you’re using? I’m looking to start my own blog in the near future but I’m having a tough time selecting between BlogEngine/Wordpress/B2evolution and Drupal. The reason I ask is because your layout seems different then most blogs and I’m looking for something completely unique. P.S Sorry for getting off-topic but I had to ask!
Awsome website! I am loving it!! Will come back again. I am taking your feeds also
I want to show some thanks to you just for bailing me out of this trouble. After browsing through the internet and coming across views that were not productive, I believed my entire life was gone. Being alive minus the solutions to the issues you’ve sorted out by way of the post is a critical case, as well as the kind that would have adversely damaged my career if I hadn’t encountered your web site. Your own capability and kindness in controlling the whole lot was very useful. I am not sure what I would have done if I hadn’t come upon such a stuff like this. I am able to at this time relish my future. Thanks for your time very much for the professional and effective guide. I will not be reluctant to suggest your site to any person who will need assistance about this subject matter.
Greetings! I’ve been reading your weblog for some time now and finally got the bravery to go ahead and give you a shout out from Austin Tx! Just wanted to mention keep up the excellent job!
Have you ever thought about writing an ebook or guest authoring on other websites? I have a blog centered on the same topics you discuss and would really like to have you share some stories/information. I know my audience would value your work. If you are even remotely interested, feel free to shoot me an e-mail.
It’s really a cool and useful piece of info. I am satisfied that you simply shared this useful information with us. Please keep us up to date like this. Thanks for sharing.
Hey! This is kind of off topic but I need some guidance from an established blog. Is it very hard to set up your own blog? I’m not very techincal but I can figure things out pretty quick. I’m thinking about creating my own but I’m not sure where to begin. Do you have any points or suggestions? Many thanks
I have learn a few good stuff here. Definitely value bookmarking for revisiting. I surprise how a lot effort you set to create such a great informative site.
Very well written information. It will be valuable to everyone who utilizes it, including myself. Keep doing what you are doing – looking forward to more posts.
Thanks for the sensible critique. Me and my neighbor were just preparing to do some research on this. We got a grab a book from our area library but I think I learned more from this post. I am very glad to see such great info being shared freely out there.
Greetings! Quick question that’s entirely off topic. Do you know how to make your site mobile friendly? My weblog looks weird when browsing from my apple iphone. I’m trying to find a template or plugin that might be able to resolve this problem. If you have any recommendations, please share. Appreciate it!
Hi there! I simply want to give an enormous thumbs up for the nice information you may have right here on this post. I can be coming back to your weblog for more soon.
Hi , I do believe this is an excellent blog. I stumbled upon it on Yahoo , i will come back once again. Money and freedom is the best way to change, may you be rich and help other people.
Can I just say what a relief to find someone who actually knows what theyre talking about on the internet. You definitely know how to bring an issue to light and make it important. More people need to read this and understand this side of the story. I cant believe youre not more popular because you definitely have the gift.
Thank you for sharing excellent informations. Your site is so cool. I am impressed by the details that you¦ve on this site. It reveals how nicely you understand this subject. Bookmarked this website page, will come back for extra articles. You, my friend, ROCK! I found simply the information I already searched everywhere and just could not come across. What an ideal website.
Hmm is anyone else having problems with the pictures on this blog loading? I’m trying to find out if its a problem on my end or if it’s the blog. Any responses would be greatly appreciated.
Your place is valueble for me. Thanks!…
I believe you have noted some very interesting details , regards for the post.
I’ve been exploring for a bit for any high-quality articles or blog posts on this kind of area . Exploring in Yahoo I at last stumbled upon this site. Reading this information So i’m happy to convey that I’ve a very good uncanny feeling I discovered exactly what I needed. I most certainly will make certain to don’t forget this site and give it a glance on a constant basis.
Nice post. I learn something more challenging on different blogs everyday. It will always be stimulating to read content from other writers and practice a little something from their store. I’d prefer to use some with the content on my blog whether you don’t mind. Natually I’ll give you a link on your web blog. Thanks for sharing.
I see something truly special in this web site.
Great line up. We will be linking to this great article on our site. Keep up the good writing.
hi!,I like your writing so much! share we communicate more about your article on AOL? I need an expert on this area to solve my problem. Maybe that’s you! Looking forward to see you.
Excellent blog! Do you have any suggestions for aspiring writers? I’m planning to start my own blog soon but I’m a little lost on everything. Would you suggest starting with a free platform like WordPress or go for a paid option? There are so many choices out there that I’m completely confused .. Any recommendations? Thank you!
I’ve recently started a website, the information you offer on this web site has helped me tremendously. Thanks for all of your time & work.
I really like your writing style, excellent info , regards for posting : D.
Spot on with this write-up, I truly suppose this website wants much more consideration. I’ll probably be again to read way more, thanks for that info.
I truly wanted to develop a quick remark to be able to express gratitude to you for those precious secrets you are posting here. My long internet investigation has finally been compensated with wonderful suggestions to exchange with my close friends. I ‘d repeat that many of us site visitors actually are undeniably blessed to be in a perfect site with very many perfect individuals with good secrets. I feel quite lucky to have discovered your website page and look forward to really more fabulous moments reading here. Thank you again for everything.
Have you ever considered writing an e-book or guest authoring on other sites? I have a blog centered on the same topics you discuss and would love to have you share some stories/information. I know my subscribers would value your work. If you’re even remotely interested, feel free to shoot me an e mail.
I love your blog.. very nice colors & theme. Did you create this website yourself? Plz reply back as I’m looking to create my own blog and would like to know wheere u got this from. thanks
hey there and thank you to your information – I’ve definitely picked up anything new from right here. I did then again experience some technical points using this website, as I skilled to reload the website many occasions prior to I may just get it to load correctly. I had been brooding about in case your web hosting is OK? Now not that I am complaining, however sluggish loading circumstances instances will very frequently impact your placement in google and can injury your quality rating if advertising and ***********|advertising|advertising|advertising and *********** with Adwords. Well I’m adding this RSS to my e-mail and could look out for a lot extra of your respective interesting content. Ensure that you replace this again soon..
Very interesting topic, appreciate it for putting up.
Hello there! This post couldn’t be written any better! Reading through this post reminds me of my old room mate! He always kept chatting about this. I will forward this page to him. Pretty sure he will have a good read. Thank you for sharing!
Hello my family member! I want to say that this article is awesome, nice written and include almost all vital infos. I would like to look more posts like this .
I consider something genuinely special in this website .
I believe this web site contains very excellent composed articles content.
Nice blog! Is your theme custom made or did you download it from somewhere? A design like yours with a few simple adjustements would really make my blog stand out. Please let me know where you got your design. Thanks a lot
I like what you guys are up too. Such intelligent work and reporting! Carry on the superb works guys I¦ve incorporated you guys to my blogroll. I think it will improve the value of my site 🙂
whoah this blog is fantastic i really like studying your posts. Keep up the good paintings! You recognize, a lot of people are searching round for this info, you could help them greatly.
Today, I went to the beach front with my children. I found a sea shell and gave it to my 4 year old daughter and said “You can hear the ocean if you put this to your ear.” She placed the shell to her ear and screamed. There was a hermit crab inside and it pinched her ear. She never wants to go back! LoL I know this is completely off topic but I had to tell someone!
I have been absent for some time, but now I remember why I used to love this website. Thanks, I will try and check back more often. How frequently you update your web site?
Hey There. I found your blog using msn. This is a really well written article. I’ll be sure to bookmark it and return to read more of your useful info. Thanks for the post. I’ll definitely comeback.
Hey, you used to write fantastic, but the last few posts have been kinda boring?K I miss your tremendous writings. Past several posts are just a bit out of track! come on!
Dead written articles, thankyou for selective information.
fantastic post.Ne’er knew this, thanks for letting me know.
Greetings from California! I’m bored to death at work so I decided to check out your blog on my iphone during lunch break. I really like the knowledge you present here and can’t wait to take a look when I get home. I’m amazed at how quick your blog loaded on my cell phone .. I’m not even using WIFI, just 3G .. Anyhow, superb blog!
Great post, you have pointed out some wonderful details , I as well conceive this s a very superb website.
I have not checked in here for a while as I thought it was getting boring, but the last few posts are good quality so I guess I will add you back to my daily bloglist. You deserve it my friend 🙂
Great line up. We will be linking to this great article on our site. Keep up the good writing.
Hi , I do believe this is an excellent blog. I stumbled upon it on Yahoo , i will come back once again. Money and freedom is the best way to change, may you be rich and help other people.
My spouse and i have been now ecstatic when Raymond could carry out his reports through the entire ideas he discovered out of the weblog. It’s not at all simplistic to just happen to be offering information and facts which often other folks have been selling. We really fully grasp we’ve got the writer to be grateful to for this. All of the illustrations you have made, the straightforward blog menu, the friendships your site help to instill – it is most spectacular, and it is facilitating our son in addition to us know that this subject matter is entertaining, which is certainly particularly fundamental. Thanks for the whole thing!
You are my inhalation, I own few web logs and very sporadically run out from brand :). “The soul that is within me no man can degrade.” by Frederick Douglas.
I’ve read some excellent stuff here. Certainly value bookmarking for revisiting. I surprise how a lot effort you set to make one of these wonderful informative website.
Your place is valueble for me. Thanks!…
Appreciate it for helping out, wonderful info .
Great line up. We will be linking to this great article on our site. Keep up the good writing.
Keep up the fantastic piece of work, I read few articles on this internet site and I conceive that your web site is very interesting and has sets of wonderful info .
Excellent post. I used to be checking constantly this weblog and I’m impressed! Very useful information specifically the final part 🙂 I maintain such information a lot. I was seeking this certain information for a very long time. Thanks and best of luck.
This web site is mostly a walk-by way of for the entire information you wished about this and didn’t know who to ask. Glimpse here, and also you’ll definitely discover it.
I enjoy the efforts you have put in this, regards for all the great content.
I am happy that I observed this weblog, precisely the right info that I was looking for! .
Hi, Neat post. There’s an issue together with your site in internet explorer, may test this?K IE still is the marketplace leader and a good component of other folks will omit your magnificent writing due to this problem.
You should take part in a contest for one of the best blogs on the web. I will recommend this site!
It is truly a great and helpful piece of info. I¦m happy that you shared this helpful information with us. Please stay us up to date like this. Thank you for sharing.
Hi there! Do you use Twitter? I’d like to follow you if that would be okay. I’m definitely enjoying your blog and look forward to new updates.
Thanks for any other informative site. The place else could I am getting that kind of information written in such a perfect way? I’ve a project that I am just now running on, and I’ve been at the glance out for such info.
I would like to thnkx for the efforts you have put in writing this blog. I am hoping the same high-grade blog post from you in the upcoming as well. In fact your creative writing abilities has inspired me to get my own blog now. Really the blogging is spreading its wings quickly. Your write up is a good example of it.
This is a very good tips especially to those new to blogosphere, brief and accurate information… Thanks for sharing this one. A must read article.
Your home is valueble for me. Thanks!…
Enjoyed reading through this, very good stuff, appreciate it. “If it was an overnight success, it was one long, hard, sleepless night.” by Dicky Barrett.
It?¦s actually a cool and helpful piece of information. I am happy that you shared this useful info with us. Please keep us up to date like this. Thanks for sharing.
There is noticeably a bundle to know about this. I assume you made certain good factors in features also.
This really answered my problem, thank you!
Very well written post. It will be useful to anybody who employess it, as well as me. Keep up the good work – for sure i will check out more posts.
Good info. Lucky me I reach on your website by accident, I bookmarked it.
Hello just wanted to give you a quick heads up. The words in your post seem to be running off the screen in Opera. I’m not sure if this is a formatting issue or something to do with internet browser compatibility but I figured I’d post to let you know. The design look great though! Hope you get the issue resolved soon. Cheers
The next time I learn a blog, I hope that it doesnt disappoint me as much as this one. I mean, I know it was my option to read, but I actually thought youd have something interesting to say. All I hear is a bunch of whining about something that you would fix in the event you werent too busy in search of attention.
Pretty great post. I just stumbled upon your weblog and wanted to say that I’ve truly loved browsing your weblog posts. In any case I will be subscribing to your rss feed and I’m hoping you write once more very soon!
Hi would you mind letting me know which webhost you’re using? I’ve loaded your blog in 3 different internet browsers and I must say this blog loads a lot quicker then most. Can you suggest a good hosting provider at a honest price? Cheers, I appreciate it!
I have been examinating out some of your articles and i can state nice stuff. I will surely bookmark your blog.
I appreciate, cause I found exactly what I was looking for. You have ended my 4 day long hunt! God Bless you man. Have a great day. Bye
You made some respectable points there. I regarded on the web for the issue and located most people will go together with together with your website.
I enjoy you because of your whole efforts on this web page. Betty delights in working on internet research and it’s easy to understand why. We all hear all relating to the powerful method you present great thoughts on your web site and as well attract response from other individuals on this concept plus our simple princess is in fact starting to learn a lot of things. Take pleasure in the rest of the new year. You’re performing a terrific job.
certainly like your website however you have to test the spelling on quite a few of your posts. A number of them are rife with spelling problems and I to find it very bothersome to inform the truth nevertheless I¦ll definitely come again again.
You made some respectable factors there. I seemed on the web for the difficulty and found most people will go along with together with your website.
Great post, you have pointed out some great details , I too conceive this s a very fantastic website.
F*ckin¦ remarkable issues here. I am very happy to see your article. Thanks so much and i’m looking forward to contact you. Will you please drop me a mail?
Hello there! Do you know if they make any plugins to help with SEO? I’m trying to get my blog to rank for some targeted keywords but I’m not seeing very good gains. If you know of any please share. Thanks!
Hey there! This is my first visit to your blog! We are a group of volunteers and starting a new initiative in a community in the same niche. Your blog provided us valuable information to work on. You have done a marvellous job!
great post, very informative. I wonder why the other specialists of this sector do not notice this. You must continue your writing. I’m sure, you’ve a huge readers’ base already!
Interested in more information. How can I contact you?
Hi there, You have done an excellent job. I will definitely digg it and personally suggest to my friends. I am sure they will be benefited from this website.
My brother recommended I might like this blog. He was entirely right. This post actually made my day. You cann’t imagine simply how much time I had spent for this info! Thanks!
Hi there, simply changed into aware of your weblog via Google, and found that it’s really informative. I’m going to be careful for brussels. I will appreciate when you continue this in future. Numerous people shall be benefited out of your writing. Cheers!
I am glad to be a visitor of this staring web blog! , thanks for this rare information! .
But wanna remark that you have a very decent web site, I like the design and style it actually stands out.
I’ve been exploring for a little for any high-quality articles or blog posts on this kind of area . Exploring in Yahoo I at last stumbled upon this website. Reading this info So i’m happy to convey that I’ve an incredibly good uncanny feeling I discovered exactly what I needed. I most certainly will make certain to don’t forget this site and give it a look on a constant basis.
There is noticeably a bundle to know about this. I assume you made sure nice factors in options also.
It’s really a nice and useful piece of information. I am happy that you shared this helpful information with us. Please keep us informed like this. Thanks for sharing.
Wow, awesome weblog layout! How long have you ever been running a blog for? you made blogging glance easy. The whole look of your web site is excellent, let alone the content material!
Excellent read, I just passed this onto a friend who was doing a little research on that. And he just bought me lunch since I found it for him smile Therefore let me rephrase that: Thanks for lunch! “For most of history, Anonymous was a woman.” by Virginia Woolf.
I’d have to examine with you here. Which is not one thing I usually do! I take pleasure in reading a post that may make folks think. Additionally, thanks for permitting me to comment!
I will right away snatch your rss feed as I can’t to find your e-mail subscription hyperlink or newsletter service. Do you have any? Kindly allow me understand in order that I may just subscribe. Thanks.
Thanks for another great article. Where else could anybody get that kind of info in such an ideal way of writing? I have a presentation next week, and I am on the look for such information.
Thanks for sharing excellent informations. Your web site is so cool. I am impressed by the details that you’ve on this site. It reveals how nicely you perceive this subject. Bookmarked this website page, will come back for more articles. You, my pal, ROCK! I found simply the info I already searched all over the place and simply could not come across. What an ideal web-site.
I truly appreciate this post. I¦ve been looking all over for this! Thank goodness I found it on Bing. You have made my day! Thank you again
There is obviously a bunch to know about this. I feel you made some good points in features also.
I’m not sure where you are getting your info, but good topic. I needs to spend some time learning more or understanding more. Thanks for magnificent information I was looking for this info for my mission.
An fascinating discussion is worth comment. I think that it is best to write extra on this topic, it won’t be a taboo topic however usually people are not enough to talk on such topics. To the next. Cheers
Write more, thats all I have to say. Literally, it seems as though you relied on the video to make your point. You obviously know what youre talking about, why throw away your intelligence on just posting videos to your weblog when you could be giving us something enlightening to read?
Wow! This can be one particular of the most helpful blogs We’ve ever arrive across on this subject. Actually Magnificent. I am also a specialist in this topic therefore I can understand your hard work.
Today, I went to the beach with my kids. I found a sea shell and gave it to my 4 year old daughter and said “You can hear the ocean if you put this to your ear.” She placed the shell to her ear and screamed. There was a hermit crab inside and it pinched her ear. She never wants to go back! LoL I know this is totally off topic but I had to tell someone!
It is actually a nice and useful piece of info. I am glad that you just shared this useful information with us. Please stay us up to date like this. Thanks for sharing.
Only wanna say that this is very helpful, Thanks for taking your time to write this.
Its like you read my mind! You appear to know a lot about this, like you wrote the book in it or something. I think that you can do with a few pics to drive the message home a bit, but other than that, this is magnificent blog. An excellent read. I’ll definitely be back.
Very interesting subject , thankyou for posting.
Hello! Someone in my Myspace group shared this website with us so I came to take a look. I’m definitely loving the information. I’m book-marking and will be tweeting this to my followers! Excellent blog and outstanding design and style.
Loving the information on this website , you have done great job on the content.
I’m extremely impressed with your writing skills and also with the layout on your weblog. Is this a paid theme or did you customize it yourself? Anyway keep up the nice quality writing, it’s rare to see a great blog like this one these days..
It’s actually a nice and useful piece of information. I’m glad that you shared this useful info with us. Please keep us informed like this. Thanks for sharing.
Great remarkable issues here. I am very satisfied to peer your post. Thanks so much and i’m having a look forward to touch you. Will you kindly drop me a e-mail?
It’s truly a nice and helpful piece of info. I am happy that you just shared this useful information with us. Please stay us up to date like this. Thank you for sharing.
Greetings! I know this is kinda off topic but I was wondering which blog platform are you using for this website? I’m getting fed up of WordPress because I’ve had issues with hackers and I’m looking at alternatives for another platform. I would be fantastic if you could point me in the direction of a good platform.
I’ve been absent for a while, but now I remember why I used to love this site. Thanks , I will try and check back more often. How frequently you update your website?
I went over this internet site and I conceive you have a lot of wonderful info , saved to favorites (:.
Thank you for some other informative website. The place else may just I get that kind of info written in such a perfect means? I have a undertaking that I am simply now running on, and I have been at the glance out for such info.
Heya i am for the first time here. I found this board and I find It really useful & it helped me out a lot. I hope to give something back and aid others like you aided me.
Hello my friend! I wish to say that this article is awesome, nice written and include approximately all vital infos. I’d like to see more posts like this.
he blog was how do i say it… relevant, finally something that helped me. Thanks
This web site is my intake, very fantastic layout and perfect content material.
Hey there! Someone in my Myspace group shared this site with us so I came to look it over. I’m definitely loving the information. I’m book-marking and will be tweeting this to my followers! Excellent blog and great design.
Perfectly indited written content, Really enjoyed reading.
Glad to be one of many visitants on this awe inspiring website : D.
tider , how to use tinder https://tinderdatingsiteus.com/
You actually make it appear so easy together with your presentation but I find this matter to be actually one thing that I think I might by no means understand. It seems too complicated and very vast for me. I am having a look forward in your next submit, I will attempt to get the grasp of it!
You got a very fantastic website, Gladiola I observed it through yahoo.
Its fantastic as your other blog posts : D, regards for putting up.
I am just writing to let you know of the exceptional discovery my wife’s daughter went through checking yuor web blog. She figured out many things, with the inclusion of what it’s like to possess an excellent coaching heart to have other people very easily grasp selected tricky subject areas. You actually exceeded our own expected results. I appreciate you for displaying such priceless, healthy, explanatory and even fun thoughts on the topic to Sandra.
Super-Duper website! I am loving it!! Will come back again. I am bookmarking your feeds also.
It’s a shame you don’t have a donate button! I’d most definitely donate
to this fantastic blog! I guess for the time being i’ll be happy with book-marking and adding your Feed to my Google
account. I look forward to brand-new updates and definately will share this blog with my Facebook group.
Chat soon!
my blog HerbTLoebs
You could certainly see your skills in the paintings you write. The sector hopes for more passionate writers like you who are not afraid to mention how they believe. At all times go after your heart.
I’ve been exploring for a little for any high-quality articles or blog posts in this sort of house . Exploring in Yahoo I ultimately stumbled upon this site. Reading this information So i’m glad to convey that I have a very good uncanny feeling I came upon just what I needed. I such a lot without a doubt will make sure to do not fail to remember this web site and give it a glance regularly.
Hi, Neat post. There’s a problem with your website in internet explorer, would test this… IE still is the market leader and a huge portion of people will miss your fantastic writing due to this problem.
Have you ever thought about including a little bit more than just your articles? I mean, what you say is fundamental and everything. Nevertheless think of if you added some great visuals or videos to give your posts more, “pop”! Your content is excellent but with images and clips, this website could definitely be one of the very best in its niche. Terrific blog!
Wohh precisely what I was looking for, appreciate it for putting up.
I got what you intend, thankyou for posting.Woh I am lucky to find this website through google.
I see something really special in this site.
This actually answered my downside, thanks!
I believe other website proprietors should take this web site as an example , very clean and wonderful user friendly style and design.
I’m impressed, I must say. Actually rarely do I encounter a blog that’s both educative and entertaining, and let me tell you, you will have hit the nail on the head. Your thought is excellent; the problem is one thing that not sufficient persons are talking intelligently about. I’m very completely happy that I stumbled throughout this in my seek for one thing regarding this.
Yay google is my world beater aided me to find this outstanding site! .
I will right away take hold of your rss as I can’t in finding your e-mail subscription hyperlink or newsletter service. Do you’ve any? Please permit me recognize so that I may subscribe. Thanks.
This really answered my problem, thank you!
Well I definitely liked reading it. This post procured by you is very effective for correct planning.
I got what you mean , appreciate it for putting up.Woh I am thankful to find this website through google. “Delay is preferable to error.” by Thomas Jefferson.
Yay google is my world beater aided me to find this outstanding web site! .
You really make it seem so easy with your presentation but I find this matter to be actually something that I think I would never understand. It seems too complex and extremely broad for me. I’m looking forward for your next post, I will try to get the hang of it!
I appreciate, cause I found just what I was looking for. You have ended my 4 day long hunt! God Bless you man. Have a nice day. Bye
Lovely just what I was searching for.Thanks to the author for taking his clock time on this one.
You are a very capable person!
There are actually a number of details like that to take into consideration. That may be a nice level to carry up. I provide the ideas above as general inspiration however clearly there are questions like the one you deliver up the place crucial factor can be working in trustworthy good faith. I don?t know if greatest practices have emerged around things like that, however I am certain that your job is clearly recognized as a fair game. Each boys and girls feel the affect of only a moment’s pleasure, for the rest of their lives.
I am not real wonderful with English but I find this very easy to understand.
Good – I should certainly pronounce, impressed with your site. I had no trouble navigating through all the tabs and related information ended up being truly easy to do to access. I recently found what I hoped for before you know it at all. Quite unusual. Is likely to appreciate it for those who add forums or anything, site theme . a tones way for your client to communicate. Excellent task..
Hey would you mind sharing which blog platform you’re using? I’m looking to start my own blog soon but I’m having a hard time selecting between BlogEngine/Wordpress/B2evolution and Drupal. The reason I ask is because your layout seems different then most blogs and I’m looking for something unique. P.S My apologies for getting off-topic but I had to ask!
As I website owner I think the content material here is real great, thankyou for your efforts.
What i do not realize is in fact how you are not really a lot more smartly-favored than you might be right now. You are very intelligent. You understand therefore considerably with regards to this topic, made me personally consider it from so many various angles. Its like men and women are not fascinated except it¦s something to accomplish with Lady gaga! Your personal stuffs outstanding. Always deal with it up!
I was examining some of your articles on this internet site and I believe this site is rattling instructive! Retain putting up.
Good day very cool website!! Guy .. Beautiful .. Superb .. I will bookmark your site and take the feeds also?KI am happy to seek out so many helpful info here within the post, we need work out extra techniques in this regard, thank you for sharing. . . . . .
esenyurt escort bayanar bu sitede üstelik hepsi ücretsiz…
I discovered your blog site on google and check a few of your early posts. Continue to keep up the very good operate. I just additional up your RSS feed to my MSN News Reader. Seeking forward to reading more from you later on!…
I conceive this web site has very wonderful composed content material articles.
I really enjoy reading through on this site, it has got superb blog posts.
Nice post. I learn something new and challenging on sites I stumbleupon everyday. It’s always useful to read articles from other writers and use something from other sites. |
Hey, you used to write fantastic, but the last several posts have been kinda boring… I miss your great writings. Past several posts are just a bit out of track! come on!
Very interesting points you have mentioned, appreciate it for posting.
I’m typically to running a blog and i really recognize your content. The article has actually peaks my interest. I am going to bookmark your site and keep checking for brand new information.
Hello there, I found your website via Google while searching for a related topic, your website came up, it looks great. I have bookmarked it in my google bookmarks.
I’m impressed, I must say. Really not often do I encounter a weblog that’s both educative and entertaining, and let me let you know, you’ve got hit the nail on the head. Your concept is excellent; the difficulty is one thing that not sufficient people are talking intelligently about. I am very completely happy that I stumbled throughout this in my search for one thing regarding this.
An interesting dialogue is price comment. I think that it is best to write extra on this matter, it may not be a taboo subject but usually persons are not sufficient to speak on such topics. To the next. Cheers
thank you for this info.
hi!,I like your writing so so much! proportion we communicate extra about your article on AOL? I require an expert in this area to solve my problem. May be that’s you! Looking ahead to look you.
obviously like your web site but you need to check the spelling on quite a few of your posts. Several of them are rife with spelling issues and I to find it very bothersome to tell the reality then again I¦ll surely come back again.
I know this if off topic but I’m looking into starting my own blog and was wondering what all is needed to get set up? I’m assuming having a blog like yours would cost a pretty penny? I’m not very internet savvy so I’m not 100 certain. Any recommendations or advice would be greatly appreciated. Appreciate it
Wow, wonderful blog layout! How long have you been blogging for? you make blogging look easy. The overall look of your website is great, as well as the content!
I haven’t checked in here for a while since I thought it was getting boring, but the last several posts are great quality so I guess I will add you back to my everyday bloglist. You deserve it my friend 🙂
This is the correct weblog for anybody who wants to search out out about this topic. You realize a lot its virtually exhausting to argue with you (not that I really would want…HaHa). You undoubtedly put a brand new spin on a topic thats been written about for years. Nice stuff, simply nice!
428524 204958i was just browsing along and came upon your internet site. just wantd to say wonderful job and this post genuinely helped me. 524773
… [Trackback]
[…] Read More here: oldpcgaming.net/hexen-2-walkthrough/ […]
I loved as much as you’ll receive carried out right here. The sketch is attractive, your authored material stylish. nonetheless, you command get got an impatience over that you wish be delivering the following. unwell unquestionably come further formerly again as exactly the same nearly very often inside case you shield this increase.
Very interesting info!Perfect just what I was searching for!
I love your blog.. very nice colors & theme. Did you make this website yourself or did you hire someone to do it for you? Plz reply as I’m looking to design my own blog and would like to know where u got this from. many thanks
Super-Duper blog! I am loving it!! Will be back later to read some more. I am bookmarking your feeds also
I am constantly looking online for tips that can help me. Thx!
Hi, I think your site might be having browser compatibility issues. When I look at your website in Safari, it looks fine but when opening in Internet Explorer, it has some overlapping. I just wanted to give you a quick heads up! Other then that, fantastic blog!
Fantastic article with the best info.Learn Spanish Online for Free
After examine a number of of the weblog posts in your web site now, and I truly like your means of blogging. I bookmarked it to my bookmark website checklist and shall be checking again soon. Pls check out my site as effectively and let me know what you think.
Of course, what a splendid site and revealing posts, I will bookmark your site.All the Best!
Rattling nice design and style and wonderful content, nothing else we want : D.
What i do not understood is in fact how you are no longer actually much more well-appreciated than you may be right now. You’re very intelligent. You recognize therefore significantly in terms of this matter, produced me individually consider it from a lot of numerous angles. Its like women and men aren’t fascinated except it is something to accomplish with Lady gaga! Your individual stuffs nice. At all times handle it up!
F*ckin’ remarkable issues here. I’m very glad to see your post. Thanks so much and i am taking a look ahead to touch you. Will you kindly drop me a mail?
Regards for this marvelous post, I am glad I discovered this internet site on yahoo.
What¦s Happening i’m new to this, I stumbled upon this I’ve found It positively useful and it has helped me out loads. I’m hoping to give a contribution & assist other users like its aided me. Good job.
Hi, i think that i saw you visited my website thus i came to “return the favor”.I am attempting to find things to enhance my web site!I suppose its ok to use some of your ideas!!
I discovered your blog site on google and check a few of your early posts. Continue to keep up the very good operate. I just additional up your RSS feed to my MSN News Reader. Seeking forward to reading more from you later on!…
As a Newbie, I am always browsing online for articles that can be of assistance to me. Thank you
Hey there! Quick question that’s entirely off topic. Do you know how
to make your site mobile friendly? My web site looks weird when viewing from my iphone 4.
I’m trying to find a theme or plugin that might be able to resolve this
problem. If you have any suggestions, please share. Appreciate it!
I really prize your work, Great post.
Woah! I’m really loving the template/theme of this website. It’s simple, yet effective. A lot of times it’s tough to get that “perfect balance” between user friendliness and visual appearance. I must say you have done a great job with this. Also, the blog loads super fast for me on Chrome. Outstanding Blog!
Saved as a favorite, I really like your blog!
Fantastic web site. A lot of useful information here. I am sending it to some buddies ans also sharing in delicious. And of course, thank you to your sweat!
Hi there, just turned into alert to your weblog thru Google, and located that it is really informative. I’m going to watch out for brussels. I will appreciate if you happen to continue this in future. Many folks will likely be benefited out of your writing. Cheers!
You got a very wonderful website, Sword lily I detected it through yahoo.
I have recently started a blog, the info you provide on this site has helped me greatly. Thank you for all of your time & work. “The man who fights for his fellow-man is a better man than the one who fights for himself.” by Clarence Darrow.
whoah this weblog is magnificent i like reading your articles. Stay up the great work! You know, a lot of people are looking around for this info, you can aid them greatly.
I was wondering if you ever thought of changing the layout of your site? Its very well written; I love what youve got to say. But maybe you could a little more in the way of content so people could connect with it better. Youve got an awful lot of text for only having 1 or 2 images. Maybe you could space it out better?
I am impressed with this web site, really I am a fan.
It’s really a nice and helpful piece of information. I’m glad that you shared this useful info with us. Please keep us up to date like this. Thanks for sharing.
My spouse and I absolutely love your blog and find the majority of your post’s to be precisely what I’m looking for. Would you offer guest writers to write content to suit your needs? I wouldn’t mind publishing a post or elaborating on a few of the subjects you write with regards to here. Again, awesome website!
Some really nice and useful information on this internet site, as well I believe the design holds superb features.
I like the efforts you have put in this, thankyou for all the great blog posts.
I am always looking online for ideas that can assist me. Thank you!
I truly enjoy looking at on this internet site, it contains great blog posts.
Useful information. Lucky me I discovered your web site accidentally, and I’m surprised why this accident didn’t happened in advance! I bookmarked it.
Have you ever considered about including a little bit more than just your articles? I mean, what you say is valuable and all. Nevertheless imagine if you added some great pictures or video clips to give your posts more, “pop”! Your content is excellent but with pics and clips, this website could certainly be one of the very best in its niche. Superb blog!
you might have an ideal weblog right here! would you wish to make some invite posts on my blog?
Hello there! Do you know if they make any plugins to safeguard against hackers? I’m kinda paranoid about losing everything I’ve worked hard on. Any suggestions?
A person essentially help to make critically articles I would state. That is the first time I frequented your web page and to this point? I amazed with the analysis you made to create this particular post amazing. Magnificent task!
Whats Going down i am new to this, I stumbled upon this I have found It positively helpful and it has helped me out loads. I am hoping to contribute & help different users like its aided me. Good job.
Thanks, I have recently been looking for info about this subject for ages and yours is the best I have found so far.
Hey very nice website!! Man .. Beautiful .. Amazing .. I’ll bookmark your website and take the feeds also…I am happy to find numerous useful information here in the post, we need work out more techniques in this regard, thanks for sharing. . . . . .
This is really interesting, You’re a very skilled blogger. I’ve joined your rss feed and look forward to seeking more of your wonderful post. Also, I have shared your site in my social networks!
Regards for all your efforts that you have put in this. very interesting info .
I used to be very happy to find this net-site.I wanted to thanks on your time for this wonderful read!! I definitely having fun with each little little bit of it and I have you bookmarked to take a look at new stuff you blog post.
This web page is mostly a walk-via for the entire data you wished about this and didn’t know who to ask. Glimpse right here, and also you’ll definitely discover it.
Hello there! I know this is somewhat off topic but I was wondering if you knew where I could get a captcha plugin for my comment form? I’m using the same blog platform as yours and I’m having problems finding one? Thanks a lot!
Well I definitely enjoyed studying it. This post procured by you is very constructive for good planning.
Excellent web site. Lots of helpful information here. I?¦m sending it to several pals ans also sharing in delicious. And of course, thanks on your effort!
Fantastic beat ! I wish to apprentice whilst you amend your web site, how could i subscribe for a weblog web site? The account helped me a acceptable deal. I have been a little bit acquainted of this your broadcast provided vibrant clear concept
I think this internet site contains some rattling great information for everyone : D.
I visited a lot of website but I believe this one holds something special in it in it
Very interesting info !Perfect just what I was searching for! “You have to be deviant if you’re going to do anything new.” by David Lee.
Great write-up, I am regular visitor of one’s web site, maintain up the excellent operate, and It’s going to be a regular visitor for a long time.
Ꭲhanks for ѕharing your thoughts. I truly appreciate your
efforts and I am wаiting for your further p᧐st thank you once again.
You have brought up a very fantastic points, thanks for the post.
Regards for helping out, great information. “It does not do to dwell on dreams and forget to live.” by J. K. Rowling.
I am very happy to read this. This is the type of manual that needs to be given and not the random misinformation that’s at the other blogs. Appreciate your sharing this best doc.
obviously like your web site however you have to check the spelling on quite a few of your posts. Several of them are rife with spelling problems and I in finding it very bothersome to inform the reality on the other hand I will certainly come back again.
Thank you for another magnificent article. The place else may just anybody get that type of information in such a perfect means of writing? I have a presentation next week, and I am on the search for such information.
I haven’t checked in here for a while as I thought it was getting boring, but the last several posts are great quality so I guess I will add you back to my everyday bloglist. You deserve it my friend 🙂
I just couldn’t depart your website before suggesting that I extremely enjoyed the standard information a person provide for your visitors? Is gonna be back often in order to check up on new posts
Oh my goodness! a tremendous article dude. Thank you Nonetheless I am experiencing problem with ur rss . Don’t know why Unable to subscribe to it. Is there anyone getting equivalent rss downside? Anybody who is aware of kindly respond. Thnkx
I appreciate, cause I found exactly what I was looking for. You have ended my 4 day long hunt! God Bless you man. Have a nice day. Bye
he blog was how do i say it… relevant, finally something that helped me. Thanks
I couldn’t resist commenting
Excellent web site. Lots of useful info here. I’m sending it to several friends ans also sharing in delicious. And certainly, thanks for your effort!
Greetings! Very helpful advice on this article! It is the little changes that make the biggest changes. Thanks a lot for sharing!
I have been reading out many of your stories and i can state clever stuff. I will make sure to bookmark your website.
It’s hard to search out knowledgeable individuals on this matter, however you sound like you already know what you’re speaking about! Thanks
I couldn’t resist commenting
each time i used to read smaller articles or reviews which also clear their motive, and that is also happening with this piece of writing which
I am reading at this place.
Howdy! Do you know if they make any plugins to protect against hackers? I’m kinda paranoid about losing everything I’ve worked hard on. Any tips?
Hello my loved one! I want to say that this post is awesome, great written and come with almost all vital infos. I would like to see extra posts like this .
Nice post. I learn something more challenging on different blogs everyday. It will always be stimulating to read content from other writers and practice a little something from their store. I’d prefer to use some with the content on my blog whether you don’t mind. Natually I’ll give you a link on your web blog. Thanks for sharing.
There are some attention-grabbing deadlines on this article but I don’t know if I see all of them middle to heart. There may be some validity but I’ll take hold opinion till I look into it further. Good article , thanks and we wish more! Added to FeedBurner as well
I like this post, enjoyed this one appreciate it for putting up. “To affect the quality of the day that is the art of life.” by Henry David Thoreau.
Heya! I just wanted to ask if you ever have any issues with hackers? My last blog (wordpress) was hacked and I ended up losing many months of hard work due to no backup. Do you have any methods to stop hackers?
I love it when people come together and share opinions, great blog, keep it up.
I liked as much as you will obtain carried out proper here. The comic strip is attractive, your authored material stylish. nonetheless, you command get bought an impatience over that you want be handing over the following. unwell unquestionably come further in the past again since precisely the similar nearly a lot ceaselessly inside of case you shield this hike.
Great blog here! Also your site rather a lot up fast! What web host are you the use of? Can I am getting your affiliate link for your host? I wish my site loaded up as quickly as yours lol
I got what you mean , appreciate it for posting.Woh I am thankful to find this website through google. “It is a very hard undertaking to seek to please everybody.” by Publilius Syrus.
Thanks a lot for sharing this with all of us you really know what you’re talking about! Bookmarked. Please also visit my website =). We could have a link exchange contract between us!
Good website! I truly love how it is simple on my eyes and the data are well written. I’m wondering how I could be notified when a new post has been made. I’ve subscribed to your RSS which must do the trick! Have a nice day!
Hi there, just became aware of your blog through Google, and found that it’s truly informative. I’m going to watch out for brussels. I’ll be grateful if you continue this in future. A lot of people will be benefited from your writing. Cheers!
This blog is definitely rather handy since I’m at the moment creating an internet floral website – although I am only starting out therefore it’s really fairly small, nothing like this site. Can link to a few of the posts here as they are quite. Thanks much. Zoey Olsen
Hello there, just become alert to your blog via Google, and found that it is truly informative. I am going to watch out for brussels. I will be grateful in the event you continue this in future. A lot of other folks might be benefited out of your writing. Cheers!
You made some good points there. I looked on the internet for the subject matter and found most people will consent with your website.
Sweet site, super design, really clean and use friendly.
Some genuinely nice and utilitarian information on this website , besides I conceive the design holds good features.
Hey There. I found your blog using msn. This is a really well written article. I will make sure to bookmark it and come back to read more of your useful information. Thanks for the post. I will definitely return.
Hey there! I’ve been following your site for some time now and finally got the bravery to go ahead and give you a shout out from Austin Tx! Just wanted to tell you keep up the great job!
I enjoy the efforts you have put in this, appreciate it for all the great articles.
I couldn’t resist commenting
What i don’t realize is in reality how you’re not really much more well-favored than you might be right now. You are so intelligent. You know thus considerably with regards to this subject, produced me personally imagine it from so many various angles. Its like men and women aren’t interested until it is something to accomplish with Girl gaga! Your individual stuffs outstanding. At all times take care of it up!
I like this weblog so much, saved to fav.
I was just searching for this info for some time. After six hours of continuous Googleing, finally I got it in your web site. I wonder what is the lack of Google strategy that do not rank this type of informative sites in top of the list. Normally the top web sites are full of garbage.
I love the efforts you have put in this, thanks for all the great blog posts.
Her native language is Dutch, but she alѕo speaks
English, French аnd German.
Take ɑ look at my webpage; https://takitaki.be/fr/escorts/belgium/antwerpen/
I like the efforts you have put in this, appreciate it for all the great posts.
Would you be fascinated with exchanging hyperlinks?
Hello! I just would like to give a huge thumbs up for the great info you have here on this post. I will be coming back to your blog for more soon.
Usually I do not read post on blogs, but I wish to say that this write-up very forced me to try and do it! Your writing style has been surprised me. Thanks, quite nice article.
hi!,I love your writing so much! percentage we keep in touch extra about your article on AOL? I require a specialist on this house to resolve my problem. May be that’s you! Looking ahead to see you.
You have brought up a very wonderful details , thanks for the post.
I love it when people come together and share opinions, great blog, keep it up.
I have been browsing online more than three hours today, yet I never found any interesting article like yours. It’s pretty worth enough for me. In my view, if all web owners and bloggers made good content as you did, the web will be much more useful than ever before.
Hi, just required you to know I he added your site to my Google bookmarks due to your layout. But seriously, I believe your internet site has 1 in the freshest theme I??ve came across. It extremely helps make reading your blog significantly easier.
I will immediately grasp your rss feed as I can’t to find your e-mail subscription link or e-newsletter service. Do you’ve any? Please allow me know so that I may subscribe. Thanks.
It?¦s in reality a great and helpful piece of info. I?¦m happy that you just shared this useful information with us. Please keep us up to date like this. Thank you for sharing.
I love it when people come together and share opinions, great blog, keep it up.
Magnificent website. Plenty of helpful information here. I am sending it to some buddies ans additionally sharing in delicious. And obviously, thanks to your sweat!
Excellent blog here! Also your site loads up very fast! What host are you using? Can I get your affiliate link to your host? I wish my web site loaded up as quickly as yours lol
WONDERFUL Post.thanks for share..more wait .. …
WONDERFUL Post.thanks for share..more wait .. …
I don’t even know how I ended up here, but I thought this post was great. I don’t know who you are but certainly you’re going to a famous blogger if you aren’t already 😉 Cheers!
I went over this site and I think you have a lot of good info , saved to bookmarks (:.
I couldn’t resist commenting
I like the helpful info you provide in your articles. I will bookmark your blog and check again here frequently. I’m quite certain I’ll learn plenty of new stuff right here! Best of luck for the next!
Thanx for the effort, keep up the good work Great work, I am going to start a small Blog Engine course work using your site I hope you enjoy blogging with the popular BlogEngine.net.Thethoughts you express are really awesome. Hope you will right some more posts.
Excellent blog here! Also your website loads up very fast! What host are you using? Can I get your affiliate link to your host? I wish my site loaded up as fast as yours lol
I got what you mean ,saved to my bookmarks, very nice web site.
Valuable info. Lucky me I found your site accidentally, and I am stunned why this twist of fate didn’t took place earlier! I bookmarked it.
Wow! This can be one particular of the most useful blogs We’ve ever arrive across on this subject. Basically Wonderful. I’m also a specialist in this topic therefore I can understand your effort.
Hi there would you mind letting me know which hosting company you’re utilizing? I’ve loaded your blog in 3 completely different browsers and I must say this blog loads a lot faster then most. Can you suggest a good hosting provider at a honest price? Thanks a lot, I appreciate it!
I cherished as much as you’ll obtain carried out proper here. The cartoon is tasteful, your authored material stylish. however, you command get bought an edginess over that you wish be turning in the following. unwell certainly come further before again since exactly the similar nearly very regularly inside of case you shield this hike.
I must thank you for the efforts you have put in penning this website. I am hoping to see the same high-grade content by you in the future as well. In truth, your creative writing abilities has encouraged me to get my own, personal site now 😉
I love the efforts you have put in this, thanks for all the great posts.
Neat blog! Is your theme custom made or did you download it from somewhere? A theme like yours with a few simple tweeks would really make my blog jump out. Please let me know where you got your theme. Cheers
I conceive this internet site contains some really superb information for everyone :D. “The public will believe anything, so long as it is not founded on truth.” by Edith Sitwell.
After I originally left a comment I seem to have clicked the -Notify me when new comments are added- checkbox and from now on each time a comment is added I get four emails with the exact same comment. Perhaps there is a way you can remove me from that service? Cheers!
It’s a shame you don’t have a donate button! I’d most certainly donate to this excellent blog! I suppose for now i’ll settle for bookmarking and adding your RSS feed to my Google account. I look forward to brand new updates and will talk about this website with my Facebook group. Talk soon!
I’m truly enjoying the design and layout of your site. It’s a very easy on the eyes which makes it much more enjoyable for me to come here and visit more often. Did you hire out a developer to create your theme? Excellent work!
Way cool! Some very valid points! I appreciate you penning this post and also the rest of the website is extremely good.
I’m still learning from you, but I’m trying to achieve my goals. I absolutely enjoy reading everything that is written on your blog.Keep the posts coming. I enjoyed it!
I have been absent for a while, but now I remember why I used to love this website. Thanks , I will try and check back more often. How frequently you update your site?
Hi! This post couldn’t be written any better! Reading through this post reminds me of my previous room mate! He always kept chatting about this. I will forward this article to him. Pretty sure he will have a good read. Many thanks for sharing!
Perfectly indited written content, Really enjoyed studying.
Hello there, just became alert to your blog through Google, and found that it is really informative. I am gonna watch out for brussels. I’ll appreciate if you continue this in future. Many people will be benefited from your writing. Cheers!
Thank you for helping out, good information. “Those who restrain desire, do so because theirs is weak enough to be restrained.” by William Blake.
Very interesting points you have noted, regards for posting. “Strength does not come from physical capacity. It comes from an indomitable will.” by Mohandas Karamchand Gandhi.
I do agree with all the ideas you’ve presented in your post. They are very convincing and will definitely work. Still, the posts are very short for newbies. Could you please extend them a bit from next time? Thanks for the post.
I cling on to listening to the news lecture about getting free online grant applications so I have been looking around for the best site to get one. Could you advise me please, where could i acquire some?
Mining crypto is hard. Investing in crypto is risky. Too many of us are left out of the cryptocurrency revolution. Pi makes crypto mining easy, our Breakthrough tech allows you to mine on your phone without draining your battery.
Very interesting points you have noted, appreciate it for putting up. “What is harder than rock, or softer than water Yet soft water hollows out hard rock. Persevere.” by Ovid.
This really answered my problem, thank you!
Thank you a bunch for sharing this with all folks you actually understand what you are speaking approximately! Bookmarked. Please also talk over with my website =). We can have a hyperlink trade arrangement between us!
Hello! I know this is kinda off topic nevertheless I’d figured
I’d ask. Would you be interested in exchanging links or maybe
guest authoring a blog article or vice-versa? My blog addresses
a lot of the same subjects as yours and I feel we
could greatly benefit from each other. If you are interested feel free to
shoot me an email. I look forward to hearing from you! Excellent blog
by the way! asmr 0mniartist
Can I simply say what a aid to seek out someone who truly is aware of what theyre speaking about on the internet. You definitely know the way to bring a problem to gentle and make it important. More folks need to read this and understand this aspect of the story. I cant believe youre not more fashionable since you undoubtedly have the gift.
Great web site. A lot of helpful info here. I’m sending it to some pals ans also sharing in delicious. And naturally, thank you in your sweat!
Thanks so much for giving everyone a very brilliant chance to read in detail from this web site. It is usually so nice and as well , full of a great time for me personally and my office acquaintances to search your website no less than thrice in 7 days to study the newest guidance you will have. And indeed, we’re certainly impressed considering the impressive guidelines served by you. Certain 4 ideas in this posting are clearly the most efficient we have all ever had.
Does your site have a contact page? I’m having problems locating it but, I’d like to shoot you an email. I’ve got some recommendations for your blog you might be interested in hearing. Either way, great website and I look forward to seeing it expand over time.
Hi there, You have done an excellent job. I’ll definitely digg it and personally recommend to my friends. I am confident they will be benefited from this website.
Thank you for the sensible critique. Me & my neighbor were just preparing to do some research about this. We got a grab a book from our area library but I think I learned more from this post. I am very glad to see such great information being shared freely out there.
This design is incredible! You certainly know how to keep a reader amused. Between your wit and your videos, I was almost moved to start my own blog (well, almost…HaHa!) Wonderful job. I really loved what you had to say, and more than that, how you presented it. Too cool!
Yeah bookmaking this wasn’t a risky determination great post! .
Pretty! This was a really wonderful post. Thank you for your provided information.
Some truly interesting details you have written.Helped me a lot, just what I was searching for : D.
Excellent web site. A lot of useful info here. I’m sending it to a few pals ans additionally sharing in delicious. And naturally, thanks in your effort!
I’ve recently started a website, the info you provide on this web site has helped me greatly. Thanks for all of your time & work.
You have noted very interesting points! ps decent website.
Hey! Do you know if they make any plugins to protect against hackers? I’m kinda paranoid about losing everything I’ve worked hard on. Any suggestions?
Thanks for some other excellent article. Where else may just anybody get that type of info in such an ideal method of writing? I’ve a presentation next week, and I’m at the search for such information.
Enjoyed studying this, very good stuff, thankyou.
I am impressed with this web site, very I am a big fan .
As soon as I found this site I went on reddit to share some of the love with them.
Hello just wanted to give you a quick heads up and let you know a few of the images aren’t loading properly. I’m not sure why but I think its a linking issue. I’ve tried it in two different internet browsers and both show the same results.
Yay google is my world beater helped me to find this outstanding web site! .
Thank you, I’ve recently been searching for information about this topic for a while and yours is the greatest I have found out till now. However, what in regards to the conclusion? Are you sure concerning the source?
Hello, you used to write great, but the last few posts have been kinda boring?K I miss your super writings. Past several posts are just a little bit out of track! come on!
You made several fine points there. I did a search on the theme and found nearly all persons will go along with with your blog.
Does anyone know what happened to Dimepiece LA celebrity streetwear brand? I am unable to proceed to the checkout on Dimepiecela site. I have read in The Sun that they were acquired by a UK hedge fund for $50 million. I’ve just bought the LA OG Heavy Blend Crewneck Sweatshirt from Ebay and totally love it xox
What’s Happening i’m new to this, I stumbled upon this I have found It positively helpful and it has helped me out loads. I hope to contribute & aid other users like its aided me. Good job.
Have you ever heard of second life (sl for short). It is essentially a video game where you can do anything you want. Second life is literally my second life (pun intended lol). If you would like to see more you can see these sl articles and blogs
Very interesting information!Perfect just what I was looking for! “If you could choose one characteristic that would get you through life, choose a sense of humor.” by Jennifer Jones.
Outstanding post however , I was wanting to know if you could write a litte more on this topic? I’d be very grateful if you could elaborate a little bit more. Cheers!
Having read this I thought it was very informative. I appreciate you taking the time and effort to put this article together. I once again find myself spending way to much time both reading and commenting. But so what, it was still worth it!
Have you ever heard of second life (sl for short). It is essentially a online game where you can do anything you want. Second life is literally my second life (pun intended lol). If you would like to see more you can see these second life websites and blogs
Great write-up, I am regular visitor of one’s site, maintain up the nice operate, and It’s going to be a regular visitor for a long time.
Great wordpress blog here.. It’s hard to find quality writing like yours these days. I really appreciate people like you! take care
Thank you for the good writeup. It in fact was a amusement account it. Look advanced to far added agreeable from you! However, how could we communicate?
Some truly fantastic content on this site, thanks for contribution.
Really great visual appeal on this site, I’d value it 10 10.
You can’t say that your motorcycle is covered from rain and harsh weather conditions if you don’t even have a waterproof coat on it. So what’s the best motorcycle covers design anyway? Should you cover your motorcycle in a jacket?
You actually make it appear really easy together with your
presentation however I in finding this matter to be
really something which I feel I’d by no means understand.
It kind of feels too complicated and very huge for me.
I am looking ahead in your subsequent put up, I will attempt
to get the hang of it!
A person essentially help to make seriously articles I would state. This is the very first time I frequented your web page and thus far? I surprised with the research you made to make this particular publish extraordinary. Excellent job!
I like what you guys are up also. Such clever work and reporting! Keep up the superb works guys I have incorporated you guys to my blogroll. I think it will improve the value of my site 🙂
Excellent site. Plenty of useful information here. I?¦m sending it to several friends ans additionally sharing in delicious. And certainly, thanks in your effort!
Awsome site! I am loving it!! Will be back later to read some more. I am taking your feeds also.
Tremendous things here. I’m very happy to see your article.
Thanks so much and I’m looking forward to touch you.
Will you kindly drop me a mail?
Oh my goodness! a tremendous article dude. Thanks Nonetheless I’m experiencing difficulty with ur rss . Don’t know why Unable to subscribe to it. Is there anybody getting similar rss problem? Anyone who is aware of kindly respond. Thnkx
I would like to say that this blog really convinced me to do it! Thanks, very good post. link sms : https://shortms.com
My brother suggested I might like this web site. He was entirely right. This post actually made my day. You cann’t imagine just how much time I had spent for this information! Thanks!
The best way to find out what is the best kind of backlit keyboard is to do a bit of research about it and see some of the available models. You can do this easily online. Look for reviews of various models and compare prices to see that you can get the best deal.
I consider something genuinely special in this web site.
hey there and thank you for your information – I’ve certainly picked up something new from right here. I did however expertise some technical points using this website, since I experienced to reload the web site many times previous to I could get it to load properly. I had been wondering if your web hosting is OK? Not that I’m complaining, but sluggish loading instances times will very frequently affect your placement in google and could damage your high quality score if advertising and marketing with Adwords. Anyway I’m adding this RSS to my email and can look out for a lot more of your respective fascinating content. Make sure you update this again very soon..
Thanks , I have just been searching for info about this subject for ages and yours is the best I’ve discovered so far. But, what about the conclusion? Are you sure about the source?
I will immediately grab your rss feed as I can’t find your e-mail subscription link or e-newsletter service. Do you have any? Please let me know in order that I could subscribe. Thanks.
Contact me for scrapebox comment blast: link https://pin.it/Tnz0qN5
Having read this I thought it was very informative. I appreciate you taking the time and effort to put this article together. I once again find myself spending way to much time both reading and commenting. But so what, it was still worth it!
I went over this internet site and I think you have a lot of superb info , saved to bookmarks (:.
Utterly pent articles, Really enjoyed looking at.
What’s Happening i’m new to this, I stumbled upon this I have found It positively useful and it has aided me out loads. I hope to contribute & help other users like its helped me. Good job.
Thank you for another excellent article. Where else could anyone get that kind of information in such an ideal way of writing? I have a presentation next week, and I am on the look for such info.
wonderful put up, very informative. I’m wondering why the opposite specialists of this sector do not realize this. You should proceed your writing. I’m confident, you’ve a huge readers’ base already!
Just desire to say your article is as amazing. The clarity in your post is just great and i could assume you are an expert on this subject. Fine with your permission let me to grab your RSS feed to keep up to date with forthcoming post. Thanks a million and please continue the rewarding work.
I¦ll right away clutch your rss feed as I can not to find your email subscription link or e-newsletter service. Do you have any? Please allow me know in order that I could subscribe. Thanks.
This site is my aspiration, real good style and design and perfect subject matter.
I love gathering useful information , this post has got me even more info! .
Glad to be one of many visitors on this amazing site : D.
Very good article! We are linking to this particularly great post on our website. Keep up the great writing.
Rattling good info can be found on weblog. “Time discovers truth.” by Lucius Annaeus Seneca.
If some one wants expert view regarding blogging and site-building after that
i suggest him/her to pay a quick visit this website, Keep up the nice job.
free dating sites
Every weekend i used to pay a visit this web page, for the reason that i want enjoyment, for
the reason that this this website conations genuinely good funny information too.
free dating sites https://785days.tumblr.com/
dating sites
I’ve been surfing on-line greater than three hours nowadays, yet I never
found any fascinating article like yours. It is pretty worth sufficient for me.
Personally, if all site owners and bloggers made excellent
content as you did, the net will likely be a lot more
helpful than ever before. dating sites
I am glad to be a visitor of this staring blog! , thanks for this rare information! .
Thanks – Enjoyed this article, how can I make is so that I receive an email sent to me every time you write a new article?
This really answered my downside, thank you!
I’m just commenting to make you know of the extraordinary discovery my friend’s girl experienced browsing your blog. She even learned many things, which include what it is like to possess an ideal teaching nature to have the others just master several grueling subject matter. You really did more than readers’ desires. I appreciate you for giving the powerful, healthy, educational and as well as fun thoughts on your topic to Emily.
What¦s Happening i am new to this, I stumbled upon this I’ve discovered It positively useful and it has aided me out loads. I am hoping to contribute & assist different users like its helped me. Good job.
I believe you have noted some very interesting points, regards for the post.
I have been surfing online greater than 3 hours nowadays, yet I never found any fascinating article like yours. It’s beautiful worth enough for me. In my opinion, if all webmasters and bloggers made excellent content material as you did, the internet might be much more helpful than ever before. “Oh, that way madness lies let me shun that.” by William Shakespeare.
Great amazing issues here. I am very happy to peer your post. Thank you so much and i’m taking a look ahead to contact you. Will you kindly drop me a e-mail?
I really appreciate this post. I have been looking all over for this! Thank goodness I found it on Bing. You have made my day! Thanks again
Hi my loved one! I wish to say that this article is amazing, nice written and include approximately all significant infos. I?¦d like to look more posts like this .
Do you have a spam issue on this website; I also am a blogger, and I was wondering your situation; many of us have created some nice methods and we are looking to exchange methods with others, be sure to shoot me an e-mail if interested.
I think other web-site proprietors should take this website as an model, very clean and magnificent user friendly style and design, let alone the content. You’re an expert in this topic!
Hello my family member! I want to say that this post is awesome, great written and come
with almost all vital infos. I’d like to see more posts like this .
I know this if off topic but I’m looking into starting my own weblog and was curious what all is needed to get setup? I’m assuming having a blog like yours would cost a pretty penny? I’m not very web smart so I’m not 100 sure. Any recommendations or advice would be greatly appreciated. Appreciate it
Thank you for sharing excellent informations. Your site is very cool. I’m impressed by the details that you have on this website. It reveals how nicely you understand this subject. Bookmarked this web page, will come back for extra articles. You, my pal, ROCK! I found just the information I already searched everywhere and simply could not come across. What an ideal web-site.
Hi! I know this is kinda off topic but I was wondering which blog platform are you using for this site? I’m getting tired of WordPress because I’ve had problems with hackers and I’m looking at options for another platform. I would be fantastic if you could point me in the direction of a good platform.
Best view i have ever seen !
I was recommended this web site through my cousin. I am not sure whether this put up is written by way of him as nobody else recognise such designated about my trouble. You are amazing! Thank you!
Good answers in return of this difficulty with solid arguments
and explaining everything about that.
I like the helpful info you provide to your articles.
I’ll bookmark your weblog and test again right here regularly.
I am fairly sure I’ll be informed a lot of
new stuff proper here! Best of luck for the following!
Whats Going down i’m new to this, I stumbled upon this I’ve discovered It positively helpful and it has helped me out loads. I am hoping to give a contribution
What i do not realize is actually how you are not actually much more well-liked than you might be right now. You are so intelligent. You realize thus considerably relating to this subject, produced me personally consider it from numerous varied angles. Its like men and women aren’t fascinated unless it’s one thing to do with Lady gaga! Your own stuffs excellent. Always maintain it up!
fantastic post, very informative. I wonder why the other specialists of this sector do not notice this. You must continue your writing. I’m confident, you’ve a huge readers’ base already!
I would like to show my passion for your generosity in support of those individuals that have the need for assistance with this one theme. Your very own commitment to getting the solution along had become certainly informative and have really allowed associates like me to attain their desired goals. This invaluable publication denotes a lot a person like me and still more to my mates. Warm regards; from each one of us.
I’m impressed, I need to say. Actually hardly ever do I encounter a blog that’s each educative and entertaining, and let me tell you, you’ve gotten hit the nail on the head. Your concept is excellent; the difficulty is one thing that not enough persons are talking intelligently about. I am very comfortable that I stumbled throughout this in my search for one thing regarding this.
I was very pleased to find this web-site.I wanted to thanks for your time for this wonderful read!! I definitely enjoying every little bit of it and I have you bookmarked to check out new stuff you blog post.
What’s Happening i’m new to this, I stumbled upon this I have found It absolutely helpful and it has aided me out loads. I hope to contribute & aid other users like its aided me. Good job.
I like what you guys are up also. Such smart work and reporting! Carry on the superb works guys I’ve incorporated you guys to my blogroll. I think it’ll improve the value of my website 🙂
Some really superb posts on this web site, regards for contribution.
Yuk, Mainkan Judi Slot Online Uang Orisinil pada Situs
Judi Slot Online Terpercaya di Indonesia. Daftar Slot Online
Kini Juga untuk mendapatkan bonus menarik dan Raih Jackpot Besar Ratusan Juta Rupiah.
It is appropriate time to make a few plans for the future and it’s time to be happy. I have read this publish and if I may I wish to suggest you few fascinating issues or suggestions. Maybe you can write subsequent articles relating to this article. I want to learn more things about it!
I have learn some excellent stuff here. Definitely worth bookmarking for revisiting. I surprise how a lot effort you set to create this type of excellent informative website.
I really appreciate this post. I’ve been looking all over for this! Thank goodness I found it on Bing. You’ve made my day! Thank you again
Thank you.Join with us at https://www.trixiedental.com/
I was recommended this web site via my cousin. I’m no longer certain whether this post is written by means of him as nobody else recognize such designated approximately my problem. You’re amazing! Thanks!
Please let me know if you’re looking for a article writer for your weblog. You have some really great posts and I believe I would be a good asset. If you ever want to take some of the load off, I’d really like to write some material for your blog in exchange for a link back to mine. Please blast me an e-mail if interested. Regards!
Hmm it seems like your site ate my first comment (it was super long) so I guess I’ll just sum it up what I submitted and say, I’m thoroughly enjoying your blog. I too am an aspiring blog blogger but I’m still new to the whole thing. Do you have any suggestions for newbie blog writers? I’d really appreciate it.
What i do not understood is actually how you are not really much more well-liked than you may be right now. You are very intelligent. You realize thus considerably relating to this subject, produced me personally consider it from so many varied angles. Its like women and men aren’t fascinated unless it’s one thing to accomplish with Lady gaga! Your own stuffs outstanding. Always maintain it up!
Only wanna admit that this is invaluable, Thanks for taking your time to write this.
Hey there! I just wanted to ask if you ever have any issues with hackers? My last blog (wordpress) was hacked and I ended up losing many months of hard work due to no data backup. Do you have any methods to prevent hackers?
I would like to thnkx for the efforts you’ve put in writing this site. I’m hoping the same high-grade website post from you in the upcoming as well. Actually your creative writing abilities has encouraged me to get my own website now. Actually the blogging is spreading its wings fast. Your write up is a great example of it.
I haven¦t checked in here for a while since I thought it was getting boring, but the last several posts are good quality so I guess I¦ll add you back to my everyday bloglist. You deserve it my friend 🙂
dental for sale with free shipping https://www.cherdental.com/
Great – I should definitely pronounce, impressed with your web site. I had no trouble navigating through all tabs and related information ended up being truly easy to do to access. I recently found what I hoped for before you know it at all. Reasonably unusual. Is likely to appreciate it for those who add forums or something, website theme . a tones way for your customer to communicate. Nice task..
Definitely, what a magnificent blog and illuminating posts, I will bookmark your site.All the Best!
I have recently started a web site, the information you provide on this site has helped me greatly. Thank you for all of your time & work. “Her grandmother, as she gets older, is not fading but rather becoming more concentrated.” by Paulette Bates Alden.
Hi my family member! I want to say that this article is amazing, nice written and include almost all vital infos. I would like to peer extra posts like this.
Superb blog you have here but I was curious about if you knew of any user discussion forums that cover the same topics talked about in this article? I’d really love to be a part of online community where I can get feedback from other experienced individuals that share the same interest. If you have any suggestions, please let me know. Bless you!
Tỷ Số Soccer Trực Tuyến Ngày Hôm Nayket qua bong da yTheo thể thức thi đấu, đội thắng ở cặp đấu này sẽ giành tấm vé đến Lithuania trong ngày hội bóng đá lớn nhất thế giới đến futsal. Tuyển futsal Việt Nam bước vào trận play-off lượt đi tranh vé dự play-off World Cup 2021 với sự tự tin. Tuy vậy, HLV Phạm Minh Giang bày tỏ, toàn đội ko ngán Lebanon tuy vậy sẽ tìm cách để khắc chế sức mạnh của đối thủ bởi trên băng ghế huấn luyện là nhà cầm quân Ramiro Lopez, người từng dẫn dắt futsal Tây Ban Nha.|Dựa vào lịch thi đấu, quý khách hoàn toàn có thể sắp xếp làm việc
Can I just say what a relief to find someone who actually knows what theyre talking about on the internet. You definitely know how to bring an issue to light and make it important. More people need to read this and understand this side of the story. I cant believe youre not more popular because you definitely have the gift.
Very interesting topic, thanks for posting.
This was awesome! I would like you to clean up all this spam though
You really make it appear really easy along with your presentation but I in finding this topic to be actually one thing which I think I might never understand. It sort of feels too complex and very extensive for me. I am looking ahead for your subsequent put up, I will attempt to get the cling of it!
Liên Kết Xem Thẳng Bóng Đá Futsal Việt Nam Vs Lebanon Vòng Chủng Loại World Cupvtc14 onlineXem bóng đá trực tuyến Trực tiếp Odd BK vs Sarpsborg, 20h ngày 24/5, giải VĐQG Na Uy. Xem lịch phạt sóng thẳng bóng đá EURO hôm nay được Webthethao cập nhật chính xác nhất.
Thank you for the auspicious writeup. It in reality used to be a amusement account it. Glance advanced to far brought agreeable from you! By the way, how can we communicate?
Have you ever considered about adding a little bit more than just your articles? I mean, what you say is important and everything. However just imagine if you added some great visuals or video clips to give your posts more, “pop”! Your content is excellent but with pics and videos, this blog could undeniably be one of the most beneficial in its field. Good blog!
I?¦ve learn some good stuff here. Definitely price bookmarking for revisiting. I wonder how a lot effort you put to make this kind of great informative web site.
Saved as a favorite, I really like your blog!
Thanks for every other fantastic post. The place else may anybody get that kind of information in such a perfect manner of writing? I have a presentation next week, and I’m at the search for such information.
I am typically to running a blog and i actually appreciate your content. The article has actually peaks my interest. I am going to bookmark your web site and maintain checking for new information.
Hi there! This post couldn’t be written any better! Reading through this post reminds me of my previous room mate! He always kept talking about this. I will forward this article to him. Pretty sure he will have a good read. Thank you for sharing!
Best view i have ever seen !
I do agree with all the ideas you have presented in your post. They are really convincing and will definitely work. Still, the posts are very short for beginners. Could you please extend them a bit from next time? Thanks for the post.
Hello, I think your website might be having browser compatibility issues. When I look at your blog in Safari, it looks fine but when opening in Internet Explorer, it has some overlapping. I just wanted to give you a quick heads up! Other then that, wonderful blog!
After all, what a great site and informative posts, I will upload inbound link – bookmark this web site? Regards, Reader.
Just wanna state that this is invaluable, Thanks for taking your time to write this.
Hello there! I know this is kinda off topic but I was wondering which blog platform are you using for this site? I’m getting fed up of WordPress because I’ve had problems with hackers and I’m looking at alternatives for another platform. I would be awesome if you could point me in the direction of a good platform.
hello!,I love your writing so much! proportion we keep in touch extra about your article on AOL? I need a specialist on this house to unravel my problem. May be that is you! Taking a look ahead to see you.
Nice post. I used to be checking constantly this blog and I am inspired! Extremely useful info specially the final section 🙂 I maintain such information much. I was seeking this particular info for a very long time. Thanks and best of luck.
Heya are using WordPress for your site platform? I’m new to the blog world but I’m trying to get started and set up my own. Do you need any coding expertise to make your own blog? Any help would be really appreciated!
Heya i am for the first time here. I found this board and I find It truly useful & it helped me out a lot. I hope to give something back and aid others like you aided me.
Hello would you mind letting me know which web host you’re using? I’ve loaded your blog in 3 completely different web browsers and I must say this blog loads a lot quicker then most. Can you recommend a good web hosting provider at a reasonable price? Kudos, I appreciate it!
Hey there! I know this is kinda off topic nevertheless I’d figured I’d ask. Would you be interested in exchanging links or maybe guest authoring a blog article or vice-versa? My website addresses a lot of the same topics as yours and I think we could greatly benefit from each other. If you are interested feel free to send me an e-mail. I look forward to hearing from you! Wonderful blog by the way!
Saved as a favorite, I really like your blog!
F*ckin’ tremendous issues here. I am very happy to see your post. Thank you a lot and i’m having a look forward to touch you. Will you please drop me a e-mail?
Have you ever considered about adding a little bit more than just your articles? I mean, what you say is fundamental and everything. However imagine if you added some great pictures or video clips to give your posts more, “pop”! Your content is excellent but with pics and videos, this website could certainly be one of the very best in its field. Very good blog!
It¦s actually a great and helpful piece of info. I¦m glad that you shared this helpful information with us. Please stay us informed like this. Thanks for sharing.
Of course, what a fantastic website and revealing posts, I definitely will bookmark your site.Have an awsome day!
Hello, I think your website might be having browser compatibility issues. When I look at your blog site in Ie, it looks fine but when opening in Internet Explorer, it has some overlapping. I just wanted to give you a quick heads up! Other then that, terrific blog!
Absolutely composed content material, thank you for entropy. “Necessity is the mother of taking chances.” by Mark Twain.
naturally like your website but you have to take a look at the spelling on several of your posts. Many of them are rife with spelling problems and I find it very bothersome to tell the reality however I’ll definitely come back again.
Just what I was searching for, appreciate it for putting up.
Wohh just what I was looking for, appreciate it for posting.
I have to show my appreciation to this writer just for rescuing me from this type of condition. As a result of checking through the internet and meeting ways which are not beneficial, I thought my life was gone. Living without the strategies to the problems you have sorted out all through the short article is a crucial case, and those which may have in a negative way damaged my entire career if I hadn’t encountered your blog. That capability and kindness in touching all the pieces was vital. I’m not sure what I would’ve done if I had not discovered such a stuff like this. It’s possible to at this point look forward to my future. Thank you so much for your expert and effective help. I won’t think twice to recommend your web sites to any person who needs and wants assistance on this topic.
I’d have to check with you here. Which isn’t something I often do! I take pleasure in studying a post that may make people think. Also, thanks for allowing me to remark!
I envy your piece of work, regards for all the good articles.
Hello there, simply was alert to your blog via Google, and found that it is really informative. I’m going to be careful for brussels. I’ll be grateful should you continue this in future. A lot of other folks will likely be benefited from your writing. Cheers!
Your house is valueble for me. Thanks!…
I found your blog web site on google and check a number of of your early posts. Proceed to keep up the superb operate. I just extra up your RSS feed to my MSN Information Reader. Searching for forward to reading extra from you afterward!…
Coi Trực Tiếp Viettel Vs Bình Dương Tại V League 2021 Ở Kênh Nào? gacha life vietnamĐội tuyển nước Việt Nam chỉ cần một kết trái hòa có bàn thắng để lần loại hai góp mặt trên World Cup futsal. Nhưng, nhằm thực hiện được như vậy
A lot of whatever you articulate happens to be supprisingly legitimate and it makes me ponder why I had not looked at this in this light before. Your article truly did switch the light on for me personally as far as this specific topic goes. Nevertheless there is 1 issue I am not too comfy with and while I try to reconcile that with the actual core theme of the position, permit me observe what all the rest of your visitors have to say.Nicely done.
I like this post, enjoyed this one thank you for posting. “No trumpets sound when the important decisions of our life are made. Destiny is made known silently.” by Agnes de Mille.
ควบคุมโรคกรุงเก่าสั่งปิดตลาดใหญ่วังน้อย 7 วันหลังพบผู้ติดเชื้อภายในตลาด 108 ราย และสั่งปิดบริษัทผลิตไม้พาเลทเขตอำเภอวังน้อยหลังพบแรงงานติดเชื้อ 23 ราย
วันที่ 30 มิถุนายน ที่ศาลากลางจังหวัดพระนครศรีอยุธยา นายภานุ แย้มศรี ผวจ.พระนครศรีอยุธยา นายแพทย์พีระ
https://ipro356.com/
สนธิกำลังตำรวจ-ทหาร บุกทลายเครือข่าย “หมูป่ามหาภัย” ค้ายาเสพติด ยึดทรัพย์มูลค่า 50 ล้าน
เมื่อเวลา 10.00 น. วันที่ 30 มิถุนายน 2564 ตำรวจ ปส. ได้มีการสนธิกำลังทั้งตำรวจ ทหาร ฝ่ายปกครอง จ.ชลบุรี นำหมายค้นและยึดทรัพย์สินมูลค่าประมาณ 50 ล้านบาท ที่บ้านหลังหนึ่ง หมู่ 5 ต.บางทราย อ.เมือง จ.ชลบุรี สืบเนื่องมาจากนายฐปนันท์ หรือนายหนูเฉิน นักค้ายาเสพติดรายสำคัญของประเทศไทย ซึ่งมีหมายจับคดียาเสพติดหลายคดี และได้หลบหนีไปยังประเทศเพื่อนบ้าน แต่ยังมีพฤติการณ์สั่งยาเสพติดเข้ามาจำหน่ายในประเทศอย่างต่อเนื่องและเป็นระบบ https://ipro356.com/
Does your site have a contact page? I’m having problems locating it but, I’d like to shoot you an email. I’ve got some creative ideas for your blog you might be interested in hearing. Either way, great blog and I look forward to seeing it expand over time.
Would you be taken with exchanging hyperlinks?
เริ่มวันจันทร์ที่ 14 มิ.ย.64 นายกฯ ประกาศ ผ่อนคลาย 5 สถานที่ในเขตกรุงเทพฯ หลังคุมโควิดได้
พลเอกประยุทธ์ จันทร์โอชา นายกรัฐมนตรีและรัฐมนตรีว่าการกระทรวงกลาโหม ในฐานะผู้อำนวยการ ศบค. ประกาศมาตรการผ่อนคลายผ่านเฟซบุ๊กส่วนตัวระบุว่า
พี่น้องประชาชนที่รักทุกท่าน https://ipro356.com/
Hiya, I’m really glad I’ve found this information. Today bloggers publish just about gossips and web and this is actually irritating. A good web site with interesting content, that’s what I need. Thanks for keeping this site, I will be visiting it. Do you do newsletters? Can’t find it.
I too think hence, perfectly written post! .
But wanna input that you have a very decent website , I love the style it really stands out.
You made some first rate factors there. I regarded on the internet for the problem and found most people will associate with together with your website.
Still a crisis! 61 New High deaths, 6,087 serious cases of coronavirus today, 207 cases in prisons, totaling 242,058 in April.
Some truly nice stuff on this internet site, I like it.
The Daily Mail reports that Real Madrid have given the green light for representatives of Rafael Varane, the top defensive line, to negotiate with Manchester United over a transfer this summer, with the expectation that “the King White” wants a fee of 43 million pounds.
***Minnie 3/7/64***
My brother suggested I might like this blog. He was entirely right. This post truly made my day. You can not imagine simply how much time I had spent for this information! Thanks!
PG SLOT camp, a slot game camp that has been recognized by online gamblers who spin the slot reels as a game camp with a variety of slots styles, beautiful graphics, low investment, easy profit, good bonuses every betting round Today I would like to introduce 5 cool slots games that spin the wheel when it makes a profit. Including slots games Ganesha Fortune, Mahjong ways, Fortune Ox, Dragon Hatch and finally the 5th game, Muay thai champion slot game. How interesting is it to invest? Let’s follow.
Maybe we were meant to meet but not meant to be
I got what you intend, regards for putting up.Woh I am happy to find this website through google.
Great post. I am facing a couple of these problems.
Thanx for the effort, keep up the good work Great work, I am going to start a small Blog Engine course work using your site I hope you enjoy blogging with the popular BlogEngine.net.Thethoughts you express are really awesome. Hope you will right some more posts.
Thank you for the good writeup. It in fact was a amusement account it. Look advanced to far added agreeable from you! However, how could we communicate?
‘วิทยา เลาหกุล’ ยอดโค้ชผู้บุกเบิกการฝึกฟุตบอลแนวใหม่ Thailand Ways
ถ้าจะเอ่ยชื่อนักฟุตบอลสักคน ที่ทั้งทุ่มเท มุ่งมั่นและเสียสละ ในการสอนให้นักเตะรุ่นหลังเป็นคนที่มีความสามารถ และรู้ซึ้งถึงคำว่า ‘นักฟุตบอลอาชีพ’ ก็ต้องยกให้กับอดีตนักเตะทีมชาติไทยที่ชื่อ ‘วิทยา เลาหกุล’
**** มิกกี้ 06/07/64 ****
I choose you over everyone.
I would like to show my affection for your kindness in support of all those that need help on this particular issue. Your special commitment to getting the solution all-around appears to be wonderfully important and have regularly encouraged regular people much like me to achieve their dreams. Your invaluable information implies a lot a person like me and further more to my office colleagues. Thanks a ton; from each one of us.
Hey very cool web site!! Man .. Beautiful .. Amazing .. I’ll bookmark your web site and take the feeds also…I’m happy to find so many useful information here in the post, we need work out more techniques in this regard, thanks for sharing. . . . . .
Thanks for the help
I am constantly thought about this, thanks for posting.
Good blog! I really love how it is easy on my eyes and the data are well written. I am wondering how I might be notified whenever a new post has been made. I’ve subscribed to your RSS feed which must do the trick! Have a great day!
I regard something truly special in this internet site.
I loved as much as you will receive carried out right here. The sketch is tasteful, your authored material stylish. nonetheless, you command get bought an shakiness over that you wish be delivering the following. unwell unquestionably come further formerly again since exactly the same nearly very often inside case you shield this increase.
I like what you guys are up too. Such smart work and reporting! Keep up the superb works guys I?¦ve incorporated you guys to my blogroll. I think it’ll improve the value of my web site 🙂
I appreciate, cause I found just what I was looking for. You’ve ended my four day long hunt! God Bless you man. Have a nice day. Bye
Hey there! Someone in my Myspace group shared this site with us so I came to take a look. I’m definitely enjoying the information. I’m bookmarking and will be tweeting this to my followers! Exceptional blog and amazing design.
Best view i have ever seen !
Hey would you mind stating which blog platform you’re using? I’m looking to start my own blog soon but I’m having a hard time deciding between BlogEngine/Wordpress/B2evolution and Drupal. The reason I ask is because your design seems different then most blogs and I’m looking for something completely unique. P.S Apologies for being off-topic but I had to ask!
It?¦s actually a nice and useful piece of info. I am satisfied that you shared this useful information with us. Please stay us informed like this. Thank you for sharing.
I?¦ve recently started a web site, the information you offer on this web site has helped me greatly. Thanks for all of your time & work.
Some genuinely superb content on this website, thank you for contribution. “A conservative is a man who sits and thinks, mostly sits.” by Woodrow Wilson.
I haven’t checked in here for a while because I thought it was getting boring, but the last several posts are great quality so I guess I will add you back to my everyday bloglist. You deserve it my friend 🙂
Enjoyed examining this, very good stuff, thanks. “Golf isn’t a game, it’s a choice that one makes with one’s life.” by Charles Rosin.
You have made some decent points there. I looked on the
net for additional information about the issue and found most individuals
will go along with your views on this site.
Utterly pent written content, regards for information .
I truly enjoy examining on this internet site, it holds excellent content. “For Brutus is an honourable man So are they all, all honourable men.” by William Shakespeare.
50 Low priced With respect to All Private Proxies! Top notch excellent, Lots of data transfer rate, 1000 mb/s superspeed, 99,9 uptime, Not for consecutive IP’s, Simply no practice laws, Many different subnets, USA or possibly European union proxies – Get At this point – https://DreamProxies.com
Hello, this weekend is good for me, since this time i am reading this enormous informative article here at my home.
Looking for quality and anonymous private proxies? https://DreamProxies.com presents the best quality confidential proxies with 50 discounts and BIG bonuses! Order now and enjoy your private proxies
Excellent post. I was always checking this blog, and I’m impressed! Extremely useful info specially the last part, I care for such information a lot. I was exploring this particular info for a long time. Thanks to this blog my exploration has ended.
Keep this going please, great job!
I was recommended this blog by my cousin. I’m not sure whether this post is written by him as nobody else know such detailed about my difficulty. You are amazing! Thanks!
It’s really a cool and useful piece of information. I am glad that you simply shared this useful information with us. Please stay us informed like this. Thank you for sharing.
I’m still learning from you, while I’m improving myself. I certainly love reading everything that is posted on your website.Keep the posts coming. I loved it!
Very efficiently written article. It will be useful to everyone who utilizes it, as well as me. Keep up the good work – looking forward to more posts.
obviously like your website but you need to take a look at the spelling on several of your posts. Several of them are rife with spelling problems and I in finding it very troublesome to inform the reality on the other hand I will certainly come back again.
Its such as you read my thoughts! You appear to know a lot approximately this, like you wrote the ebook in it or something. I think that you just can do with a few p.c. to power the message house a little bit, however instead of that, that is fantastic blog. A fantastic read. I’ll definitely be back.
Dead composed subject material, Really enjoyed studying.
We stumbled over here from a different page and thought I might check things out. I like what I see so i am just following you. Look forward to finding out about your web page repeatedly.
I’m still learning from you, but I’m trying to reach my goals. I absolutely enjoy reading all that is posted on your blog.Keep the stories coming. I liked it!
I am constantly searching online for tips that can assist me. Thank you!
I have been surfing online greater than 3 hours today, but I by no means found any fascinating article like yours. It’s lovely worth enough for me. In my view, if all website owners and bloggers made good content material as you did, the internet will be much more helpful than ever before. “Dreams have as much influence as actions.” by Stephane Mallarme.
That’s a post! Strongly. Thank you.
hi!,I like your writing very a lot! percentage we keep up a correspondence extra approximately your post on AOL? I need an expert on this space to unravel my problem. Maybe that is you! Taking a look ahead to look you.
I’d constantly want to be update on new blog posts on this website , saved to my bookmarks! .
It’s appropriate time to make some plans for the future and it’s time to be happy. I’ve read this post and if I could I desire to suggest you few interesting things or advice. Maybe you could write next articles referring to this article. I want to read even more things about it!
I like what you guys are up also. Such smart work and reporting! Carry on the excellent works guys I have incorporated you guys to my blogroll. I think it’ll improve the value of my website 🙂
Attractive section of content. I just stumbled upon your web site and in accession capital to assert that I get in fact enjoyed account your blog posts. Any way I’ll be subscribing to your feeds and even I achievement you access consistently rapidly.
Nice post. I used to be checking continuously this weblog and I am impressed! Extremely useful info specially the ultimate phase 🙂 I care for such info much. I used to be looking for this particular information for a very long time. Thank you and good luck.
I like the efforts you have put in this, thankyou for all the great articles.
Endless topic
I’ve been absent for a while, but now I remember why I used to love this blog. Thank you, I will try and check back more often. How frequently you update your site?
I know this if off topic but I’m looking into starting my own blog and was wondering what all is needed to get setup? I’m assuming having a blog like yours would cost a pretty penny? I’m not very internet savvy so I’m not 100 certain. Any recommendations or advice would be greatly appreciated. Many thanks
Wonderful website. A lot of helpful information here. I¦m sending it to some buddies ans additionally sharing in delicious. And obviously, thanks in your sweat!
An interesting discussion is worth comment. I think that you should write more on this topic, it might not be a taboo subject but generally people are not enough to speak on such topics. To the next. Cheers
You are a very intelligent person!
I’ll right away clutch your rss as I can’t in finding your email subscription link or newsletter service. Do you have any? Please permit me realize so that I may just subscribe. Thanks.
I am always searching online for ideas that can benefit me. Thanks!
As a Newbie, I am permanently searching online for articles that can benefit me. Thank you
Saved as a favorite, I really like your blog!
Magnificent site. A lot of helpful information here. I’m sending it to some friends ans additionally sharing in delicious. And obviously, thank you on your sweat!
Very good visual appeal on this website , I’d value it 10 10.
I was reading some of your blog posts on this site and I think this web site is real informative! Continue posting.
Hello.This post was extremely remarkable, especially because I was browsing for thoughts on this matter last Tuesday.
I am not real excellent with English but I get hold this very easygoing to translate.
When I initially commented I clicked the “Notify me when new comments are added” checkbox and now each time a comment is added I get four emails with the same comment. Is there any way you can remove people from that service? Cheers!
Somebody necessarily help to make critically posts I’d state. This is the first time I frequented your website page and so far? I amazed with the analysis you made to create this actual submit extraordinary. Wonderful activity!
Thanks. Just thank you for thinking out loud. In the quotation book.
Your house is valueble for me. Thanks!…
I’m really enjoying the theme/design of your website. Do you ever run into any browser compatibility problems? A small number of my blog visitors have complained about my website not operating correctly in Explorer but looks great in Firefox. Do you have any tips to help fix this problem?
Hello, you used to write great, but the last several posts have been kinda boringK I miss your super writings. Past few posts are just a bit out of track! come on!
Thank you for sharing superb informations. Your web-site is so cool. I am impressed by the details that you have on this web site. It reveals how nicely you perceive this subject. Bookmarked this web page, will come back for more articles. You, my friend, ROCK! I found simply the info I already searched everywhere and simply couldn’t come across. What an ideal site.
I think this website holds some real great information for everyone : D.
Very interesting info!Perfect just what I was looking for!
Wow! Thank you! I constantly needed to write on my blog something like that. Can I include a fragment of your post to my website?
I¦ve read several good stuff here. Definitely price bookmarking for revisiting. I wonder how much effort you set to create this kind of fantastic informative site.
Keep functioning ,remarkable job!
This blog is definitely rather handy since I’m at the moment creating an internet floral website – although I am only starting out therefore it’s really fairly small, nothing like this site. Can link to a few of the posts here as they are quite. Thanks much. Zoey Olsen
I can’t remember where I read about it.
I like this internet site because so much useful stuff on here : D.
This really answered my problem, thank you!
Wohh precisely what I was looking for, regards for posting.
Hello, you used to write wonderful, but the last several posts have been kinda boringK I miss your tremendous writings. Past several posts are just a little out of track! come on!
Hmm it seems like your site ate my first comment (it was super long) so I guess I’ll just sum it up what I submitted and say, I’m thoroughly enjoying your blog. I as well am an aspiring blog blogger but I’m still new to the whole thing. Do you have any recommendations for newbie blog writers? I’d certainly appreciate it.
Best view i have ever seen !
Hey very nice blog!! Man .. Excellent .. Amazing .. I will bookmark your web site and take the feeds also…I am happy to find numerous useful information here in the post, we need work out more techniques in this regard, thanks for sharing. . . . . .
This really answered my problem, thank you!
Thank you for every other informative website. Where else may I get that type of information written in such a perfect method? I’ve a undertaking that I’m simply now running on, and I’ve been at the glance out for such info.
Best view i have ever seen !
Best view i have ever seen !
I like this weblog very much, Its a real nice office to read and find info .
I’m extremely impressed along with your writing talents and also with the structure in your blog. Is this a paid theme or did you customize it yourself? Either way keep up the nice high quality writing, it is uncommon to see a great blog like this one nowadays..
I just could not go away your web site before suggesting that I really enjoyed the standard information a person provide on your guests? Is going to be again continuously in order to check up on new posts.
I have not checked in here for a while as I thought it was getting boring, but the last few posts are great quality so I guess I will add you back to my daily bloglist. You deserve it my friend 🙂
Wonderful beat ! I wish to apprentice even as you amend your web site, how can i subscribe for a weblog web site? The account aided me a appropriate deal. I have been a little bit acquainted of this your broadcast provided vibrant transparent concept
This blog is definitely rather handy since I’m at the moment creating an internet floral website – although I am only starting out therefore it’s really fairly small, nothing like this site. Can link to a few of the posts here as they are quite. Thanks much. Zoey Olsen
I think other site proprietors should take this web site as an model, very clean and great user genial style and design, let alone the content. You’re an expert in this topic!
It is in reality a nice and helpful piece of info. I am satisfied that you shared this useful info with us. Please stay us informed like this. Thanks for sharing.
I think this website has got some rattling wonderful information for everyone :D. “Laughter is the sun that drives winter from the human face.” by Victor Hugo.
Nice post. I used to be checking continuously this weblog and I’m inspired! Very helpful information particularly the ultimate section 🙂 I care for such info much. I was seeking this particular information for a very lengthy time. Thank you and good luck.
An attention-grabbing dialogue is value comment. I believe that you should write extra on this topic, it may not be a taboo topic but usually persons are not enough to talk on such topics. To the next. Cheers
I’m not sure why but this web site is loading incredibly slow for me. Is anyone else having this problem or is it a issue on my end? I’ll check back later on and see if the problem still exists.
Hey there! This is my first visit to your blog! We are a team of volunteers and starting a new project in a community in the same niche. Your blog provided us beneficial information to work on. You have done a extraordinary job!
As I website possessor I conceive the subject material here is very excellent, appreciate it for your efforts.
Glad to be one of several visitors on this awesome website : D.
I saw a lot of website but I conceive this one has got something extra in it in it
This website online is mostly a walk-by way of for all of the data you wished about this and didn’t know who to ask. Glimpse right here, and you’ll definitely discover it.
Merely a smiling visitant here to share the love (:, btw great style.
Yeah bookmaking this wasn’t a bad conclusion outstanding post! .
I wish to express my thanks to you just for bailing me out of this type of scenario. Right after surfing throughout the the net and getting ways which were not beneficial, I figured my life was gone. Being alive without the answers to the difficulties you’ve solved by way of your good guideline is a serious case, as well as those which might have adversely damaged my entire career if I hadn’t encountered the website. Your own personal expertise and kindness in maneuvering every item was useful. I am not sure what I would have done if I hadn’t discovered such a thing like this. It’s possible to now relish my future. Thanks so much for this impressive and sensible guide. I will not think twice to recommend your site to anybody who needs and wants recommendations on this subject.
F*ckin’ awesome issues here. I am very glad to see your article. Thanks a lot and i am having a look ahead to contact you. Will you please drop me a mail?
F*ckin’ tremendous things here. I am very satisfied to peer your article. Thank you so much and i am taking a look forward to touch you. Will you please drop me a mail?
Real informative and excellent complex body part of subject material, now that’s user pleasant (:.
I have been exploring for a little bit for any high quality articles or weblog posts on this sort of house . Exploring in Yahoo I ultimately stumbled upon this web site. Studying this info So i am happy to express that I’ve a very good uncanny feeling I came upon just what I needed. I so much indubitably will make certain to do not fail to remember this web site and give it a look regularly.
I simply could not go away your web site before suggesting that I extremely loved the usual information an individual provide on your visitors? Is going to be again steadily to inspect new posts.
I am not rattling excellent with English but I come up this rattling easy to understand.
What i don’t realize is in reality how you are now not actually much more well-favored than you may be right now. You’re so intelligent. You recognize thus significantly in the case of this topic, made me individually imagine it from numerous numerous angles. Its like men and women are not interested unless it is something to accomplish with Girl gaga! Your personal stuffs great. All the time care for it up!
This is the precise blog for anybody who needs to seek out out about this topic. You notice a lot its nearly hard to argue with you (not that I really would need…HaHa). You positively put a brand new spin on a topic thats been written about for years. Nice stuff, just great!
I would like to thnkx for the efforts you have put in writing this blog. I am hoping the same high-grade blog post from you in the upcoming as well. In fact your creative writing abilities has inspired me to get my own blog now. Really the blogging is spreading its wings quickly. Your write up is a good example of it.
I’ve been absent for some time, but now I remember why I used to love this site. Thanks , I’ll try and check back more frequently. How frequently you update your site?
Great post. I am facing a couple of these problems.
Useful information. Lucky me I discovered your site by accident, and I am surprised why this accident didn’t came about earlier! I bookmarked it.
I have been surfing on-line greater than three hours as of late, but I by no means discovered any attention-grabbing article like yours. It is lovely worth enough for me. Personally, if all website owners and bloggers made good content material as you probably did, the web will probably be a lot more helpful than ever before.
Some times its a pain in the ass to read what blog owners wrote but this site is really user pleasant! .
I like this post, enjoyed this one thankyou for putting up.
I would like to thnkx for the efforts you have put in writing this blog. I am hoping the same high-grade blog post from you in the upcoming as well. In fact your creative writing abilities has inspired me to get my own blog now. Really the blogging is spreading its wings quickly. Your write up is a good example of it.
I will right away clutch your rss as I can’t find your e-mail subscription hyperlink or e-newsletter service. Do you have any? Please permit me know in order that I could subscribe. Thanks.
It?¦s actually a nice and useful piece of info. I?¦m glad that you simply shared this helpful info with us. Please stay us informed like this. Thank you for sharing.
This really answered my problem, thank you!
I really liked your blog post.Thanks Again. Cool.
I like what you guys are up also. Such clever work and reporting! Keep up the superb works guys I’ve incorporated you guys to my blogroll. I think it will improve the value of my website 🙂
Hi there! This post couldn’t be written any better! Reading through this post reminds me of my previous room mate! He always kept talking about this. I will forward this article to him. Pretty sure he will have a good read. Thank you for sharing!
Woh I enjoy your blog posts, saved to favorites! .
Thanks a lot for sharing this with all folks you actually understand what you’re speaking about! Bookmarked. Kindly additionally consult with my website =). We could have a link trade agreement between us!
Wonderful goods from you, man. I’ve understand your stuff previous to and you are just too magnificent. I actually like what you’ve acquired here, certainly like what you’re saying and the way in which you say it. You make it entertaining and you still take care of to keep it wise. I can not wait to read far more from you. This is actually a wonderful site.
Woh I like your content, saved to bookmarks! .
Some really great blog posts on this web site, appreciate it for contribution. “He that falls in love with himself will have no rivals.” by Benjamin Franklin.
Hello my family member! I wish to say that this article is awesome, great written and include approximately all vital infos. I would like to see extra posts like this.
certainly like your website but you need to take a look at the spelling on quite a few of your posts. A number of them are rife with spelling issues and I to find it very troublesome to inform the reality however I will definitely come again again.
Great write-up, I am regular visitor of one’s website, maintain up the nice operate, and It’s going to be a regular visitor for a long time.
I’ve recently started a website, the information you provide on this web site has helped me greatly. Thanks for all of your time & work.
Thanx for the effort, keep up the good work Great work, I am going to start a small Blog Engine course work using your site I hope you enjoy blogging with the popular BlogEngine.net.Thethoughts you express are really awesome. Hope you will right some more posts.
I conceive this internet site holds some very great info for everyone :D. “Experience is not what happens to you it’s what you do with what happens to you.” by Aldous Huxley.
Thanks for the sensible critique. Me and my neighbor were just preparing to do some research about this. We got a grab a book from our area library but I think I learned more from this post. I am very glad to see such excellent info being shared freely out there.
Wow! Thank you! I always needed to write on my website something like that. Can I take a part of your post to my site?
I genuinely enjoy examining on this internet site, it has got superb articles. “The longing to produce great inspirations didn’t produce anything but more longing.” by Sophie Kerr.
I really enjoy studying on this site, it holds fantastic blog posts. “A short saying oft contains much wisdom.” by Sophocles.
I really appreciate this post. I have been looking everywhere for this! Thank goodness I found it on Bing. You have made my day! Thanks again!
I like what you guys are up also. Such intelligent work and reporting! Carry on the excellent works guys I have incorporated you guys to my blogroll. I think it will improve the value of my web site 🙂
Wow, awesome blog structure! How lengthy have you been blogging for? you made running a blog glance easy. The total glance of your site is magnificent, as smartly as the content! firmonet
Fantastic website. A lot of useful information here. I’m sending it to a few pals ans also sharing in delicious. And certainly, thank you on your effort!
What i don’t realize is in truth how you’re no longer actually much more neatly-favored than you might be now. You’re so intelligent. You know therefore considerably with regards to this matter, produced me personally imagine it from so many numerous angles. Its like men and women are not interested until it’s something to do with Woman gaga! Your individual stuffs outstanding. Always deal with it up!
Hi! This is my first visit to your blog! We are a team of volunteers and starting a new project in a community in the same niche. Your blog provided us valuable information to work on. You have done a marvellous job!
I’m really inspired together with your writing abilities as neatly as with the structure for your weblog. Is that this a paid theme or did you customize it yourself? Either way stay up the nice quality writing, it is uncommon to see a nice weblog like this one these days..
Hi are using WordPress for your blog platform? I’m new to the blog world but I’m trying to get started and set up my own. Do you require any coding knowledge to make your own blog? Any help would be greatly appreciated!
What i don’t realize is in reality how you’re now not actually much more well-appreciated than you may be now. You’re very intelligent. You know therefore significantly with regards to this subject, made me in my view consider it from numerous various angles. Its like men and women don’t seem to be involved until it’s one thing to accomplish with Girl gaga! Your personal stuffs great. Always deal with it up!
I feel that you’re on the right track with your blog. You’ve got a plenty of interesting web content that new visitors will definitely enjoy.
You bear a wonderful creativity. Your website writing skill-sets are undoubtedly terrific. Cheers for posting material over the internet and instructing your visitors.
I’ll take note of your internet site and also examine once again below each day.
Have you ever thought about adding a little bit more than just your articles? I mean, what you say is valuable and all. However imagine if you added some great visuals or video clips to give your posts more, “pop”! Your content is excellent but with images and video clips, this blog could certainly be one of the very best in its field. Excellent blog!
Hello.This article was really fascinating, especially since I was searching for thoughts on this matter last Tuesday.
Magnificent goods from you, man. I have understand your stuff previous to and you are just too fantastic. I really like what you’ve acquired here, certainly like what you are stating and the way in which you say it. You make it entertaining and you still take care of to keep it wise. I can not wait to read much more from you. This is actually a great site.
I loved as much as you’ll receive carried out right here. The sketch is attractive, your authored material stylish. nonetheless, you command get got an shakiness over that you wish be delivering the following. unwell unquestionably come further formerly again since exactly the same nearly very often inside case you shield this increase.
Your website is profoundly valuable to your website visitors. All the bests with respect to publishing, kudos when it comes to the numerous subjects.
Howdy just wanted to give you a quick heads up. The text in your content seem to be running off the screen in Ie. I’m not sure if this is a format issue or something to do with internet browser compatibility but I thought I’d post to let you know. The design look great though! Hope you get the problem solved soon. Cheers
Hi there this is kinda of off topic but I was wanting to know if blogs use WYSIWYG editors or if you have to manually code with HTML. I’m starting a blog soon but have no coding know-how so I wanted to get guidance from someone with experience. Any help would be greatly appreciated!
Fantastic beat ! I would like to apprentice while you amend your site, how could i subscribe for a blog site? The account aided me a acceptable deal. I had been tiny bit acquainted of this your broadcast offered bright clear idea
Attractive section of content. I just stumbled upon your web site and in accession capital to assert that I get actually enjoyed account your blog posts. Any way Ill be subscribing to your feeds and even I achievement you access consistently quickly.
Hey there! Do you use Twitter? I’d like to follow you if that would be ok. I’m definitely enjoying your blog and look forward to new updates.
I do not even know how I ended up here, but I thought this post was good. I don’t know who you are but definitely you’re going to a famous blogger if you are not already 😉 Cheers!
Make sure that you post content to your blog on a regular basis or you can lose readers.
ซึ่งวิธีการสมัครก็ง่ายมาก ๆ ค่ะ เพียงกรอกข้อมูลส่วนตัวลงในหน้าสมัครสมาชิกและรอการติดต่อกลับจากทางเจ้าหน้าที่ภายใน 3 นาที เพียงเท่านี้ทุกท่านก็สามารถสมัครเล่นคาสิโนออนไลน์ คาสิโนออนไลน์
คาสิโนออนไลน์นับว่าเป็นไลฟ์สไตล์ของคนยุคใหม่ไปแล้วขอรับ เนื่องจากเป็นหนทางหาเงินที่ลงทุนต่ำ แต่ว่าได้กำไรสูงมากมาย เว็บการพนันออนไลน์อันดับ 1 ได้ชูคาสิโนมาไว้บนมือถือของคุณแล้วพร้อมให้คุณเข้ามาเพลิดเพลินได้อย่างมาก เพิ่มความสะดวกรวมเร็วด้วยระบบฝากถอนอัตโนมัติไม่ผ่านคนกลาง
ภาพสวย เอฟเฟ็คแน่น โบนัสเพียบ แจ็คพ้อตแตกง่าย ต้องสล็อตออนไลน์จาก คาสิโนออนไลน์ เลยครับ เราคือเว็บสล็อตออนไลน์ที่ดีที่สุดในปัจจุบัน ที่มาพร้อมกับระบบฝากถอนอัตโนมัติและยังมีเกมมากมายทั้งเกมยิงปลา สล็อต บาคาร่า แทงบอล ซึ่งทุกเกมพนันออนไลน์ในเว็บของเรานั้นสามารถเล่นได้ตลอดเวลาไม่มีจำกัดครับ
By improving the areas you are weakest at, you will notice your skills increase substantially.
ภาพสวยเอฟเฟ็คแรงต้องสล็อตออนไลน์ จ่ายจริงจ่ายไวจ่ายเต็มต้อง เว็บพนัน ครับระบบที่ใช้เป็นระบบที่ดีที่สุดในยุคนี้เลยครับ ฝากถอนอัตโนมัติทั้งสะดวกรวดเร็วทันใจจริงๆ ครับสามารถทำรายการได้ด้วยตัวเองโดยไม่ผ่านตัวแทนที่สำคัญไปกว่านั้นคุณจะได้รับความปลอดภัยด้วย
ขั้นตอนต่อไปก็คือการ “ฝากเงินเข้าสู่ระบบ” เพื่อให้ไอดีของคุณพร้อมสำหรับการเดิมพัน มีวิธีง่ายๆ ดังนี้ เลือกวิธีฝากแบบ Quick Transfer ซึ่งเป็นวิธีแนะนำ เนื่องจากเป็นช่องทางที่สะดวกต่อสมาชิกคนไทยที่สุด
Do your keyword research to make the most of SEO techniques.
Make your blog stand out by offering your own unique opinions, or by creating content that cannot be found elsewhere.
It is never a good idea to hog the ball when you are playing soccer, but being selfish is sometimes quote necessary.
Over time, stretching will allow your body to become more flexible and with this flexibility comes speed.
ภาพสวยเอฟเฟ็คแรงต้องสล็อตออนไลน์ จ่ายจริงจ่ายไวจ่ายเต็มต้อง การพนันออนไลน์ ครับระบบที่ใช้เป็นระบบที่ดีที่สุดในยุคนี้เลยครับ ฝากถอนอัตโนมัติทั้งสะดวกรวดเร็วทันใจจริงๆ ครับสามารถทำรายการได้ด้วยตัวเองโดยไม่ผ่านตัวแทนที่สำคัญไปกว่านั้นคุณจะได้รับความปลอดภัยด้วย
There are three essential skills all soccer players must master.
เว็บการพนันออนไลน์อันดับ 1 ขอเชิญคุณพบกับสุดยอดเกมออนไลน์ที่เป็นที่นิยมเป็นอย่างมากในยุคนี้เพราะเป็นเกมที่สร้างเงินสร้างรายได้ให้ผู้คนมากมาย เล่นง่ายจบเกมไว ยิ่งเว็บไซต์ของเรามีระบบฝากถอนอัตโนมัติยิ่งทำให้การเล่นเกมของท่านสะดวกและง่ายเข้าไปอีก การพนันออนไลน์ จ่ายจริงจ่ายไวจ่ายไม่อั้น
Leaving them hungry for information will, most likely, lead them to go seek new content elsewhere.
The information and ideas from this article can help you to create a blog that gets your message to those that you want to reach.Helping You Better Understand Soccer With These Simple To Follow Tips
Tags let you categorize your posts into different categories, which can then be searched by readers.
คาสิโนออนไลน์ไลน์ถือเป็นทางรอดไม่ใช่ทางเลือกของคนในยุคนี้ไปแล้ว เพราะเป็นวิธีการหาเงินที่ง่ายสุดๆ และเป็นการหาเงินที่ลงทุนต่ำสุดๆ แต่สามารถทำเงินได้มากมายจึงเป็นทางเลือกของใครหลายๆคนเลยล่ะครับ การพนันออนไลน์ เว็บพนันออนไลน์ที่ดีที่สุด
ซึ่งการเลือกเล่น บนเว็บไซต์ที่น่าเชื่อถือนั้นเป็นปัจจัยสำคัญที่สร้างความคุ้มค่าคุ้มราคาให้เงินทุนของผู้เล่น เพราะการเลือกเล่นบนเว็บไซต์ที่ดีนั้นจะตามมาด้วยมาตรฐานการให้บริการและเว็บไซต์ที่เสถียรภาพ
Make your writing a little less personal, but still remain approachable.
เราชอบเล่นสล็อตออนไลน์มากค่ะ ภาพสวยเอฟเฟ็คเริส ทั้งสนุกทั้งตื่นเต้นแถมได้เงินด้วยตอนแรกก็ไม่กล้าเล่นพอลองเข้ามา การพนันออนไลน์ แล้วสมัครดู เห้ย! มีดีจริงๆนะ ระบบก็ดีเข้าใจง่ายมีทีมงานคอยช่วยตอนมีปัญหาอีกขอบคุณนะค้า!
สล็อตออนไลน์ เลยนะครับ ใช้ระบบโคตรดี ใช้ง่ายอย่างยิ่งๆเลยครับผม ที่สำคัญที่สุด เค้าชำระเงินจริงครับผม เว็บไซต์นี้เป็นไม่โดนหลอกแน่ๆ แต่ว่าเรื่องจะชนะรึเปล่าสุดแท้แต่คนครับผม ผมก็มีได้บ้างเสียบ้าง แม้กระนั้นโดยรวมแล้วนับว่าได้ขอรับ วันนี้ก็พึ่งถอนมาขอรับ ถูกใจตรงที่พวกเราฝากถอนไม่ต้อง
พนันบอลยังไงให้ได้เงิน พนันบอลชนะยังไงผิดโกง เว็บพนัน จ่ายจริงจ่ายไม่ยั้งระบบเข้าใจง่าย เพียงคลิกสมัครก็ทำเงินได้อย่างสะดวกสบายกับคาสิโนออนไลน์ สะดวกสุดๆชีวิตชิวๆชีวิตคลูๆทำเงิน สร้างกำไรสบายๆจำเป็นที่จะต้องที่ แทงบอลออนไลน์
Then tuck the ball to help avoid fumbling the football.
วันนี้ถ้าเกิดต้องการจะพนันบอล ไม่ว่าจะเป็นบอลคนเดียว บอลสเต็ป บอลสด ก็สามารถทำเป็นง่ายๆโดยไม่ต้องเดินทางไปโต๊ะบอลให้ยุ่งยาก แค่เพียงเข้ามาที่ การพนันออนไลน์ คุณก็สามารถร่วมบันเทิงใจกับเราได้ทันที ฝากถอนอัตโนมัติไม่ยุ่งยากสบายรวดเร็วไม่เป็นอันตราย
Because of this, you should be available to your readers.
When setting up a blog the most essential element is identifying the purpose of the blog.
Try experimenting until you find one that fits your pace.
You can’t score a goal for your team if you don’t have the ball.
Wow, incredible blog layout! How long have you been blogging for? you make blogging look easy. The overall look of your site is excellent, as well as the content!
Have you ever considered creating an ebook or guest authoring on other sites? I have a blog based upon on the same information you discuss and would love to have you share some stories/information. I know my subscribers would appreciate your work. If you are even remotely interested, feel free to send me an email.
Im not that much of a internet reader to be honest but your blogs really nice, keep it up! I’ll go ahead and bookmark your website to come back later on. Many thanks
Hello! Do you know if they make any plugins to assist with Search Engine Optimization? I’m trying to get my blog to rank for some targeted keywords but I’m not seeing very good results. If you know of any please share. Kudos!
Aw, this was a really good post. Finding the time and actual effort to create a really good article… but what can I say… I hesitate alot and never manage to get anything done.
A big thank you for your article post.Thanks Again. Want more.
Yesterday, while I was at work, my cousin stole my iphone and tested to see if it can survive a 25 foot drop, just so she can be a youtube sensation. My apple ipad is now broken and she has 83 views. I know this is completely off topic but I had to share it with someone!
Blog Nice Very Very Good
Best view i have ever seen !
Best view i have ever seen !
My family members all the time say that I am wasting my time here at net, however I know I am getting familiarity all the time by reading thes good articles.|
Best view i have ever seen !
You are a very clever person!
I appreciate, result in I found just what I used to be taking a look for. You have ended my four day long hunt! God Bless you man. Have a great day. Bye
Hey There. I found your blog using msn. This is a really well written article. I’ll be sure to bookmark it and return to read more of your useful info. Thanks for the post. I will certainly comeback.
Thanks for every other excellent article. Where else could anybody get that type of information in such an ideal way of writing? I’ve a presentation next week, and I am at the search for such info.
You made some respectable factors there. I seemed on the web for the issue and found most people will go along with together with your website.
I enjoy your writing style truly enjoying this website .
I’ve been absent for some time, but now I remember why I used to love this site. Thanks, I?¦ll try and check back more often. How frequently you update your website?
Aw, this was a very nice post. In idea I want to put in writing like this moreover – taking time and actual effort to make an excellent article… but what can I say… I procrastinate alot and by no means seem to get one thing done.
Some truly superb blog posts on this site, thanks for contribution.
Oops… it looks like this web site pulled my previous comment (it was quite lengthy)… thus I had better keep this current version brief. Quickly, I was simply saying that I very much appreciate this site. Now let’s see whether my shorter attempt is displayed, or does your web site reject all comments?
Some genuinely superb info , Gladiola I detected this. “True success is overcoming the fear of being unsuccessful.” by Paul Sweeney.
Many thanks for doing the research on the content you present, therefore insuring its high level of quality.
Lovely just what I was searching for.Thanks to the author for taking his clock time on this one.
The points you put forth in this article are definitely straightforward, interesting and educational. I agree with most points here. Impressive!
Resume statements such as “accomplished”, are damaging. They appear cliche and don’t put you in a positive light. Similarly for a term like “reliable”. The correct text highlight things you did while at your past positions plus how beneficial you could be to this future hiring decision-maker.
I simply couldn’t go away your website before suggesting that I really enjoyed the standard info an individual supply on your visitors? Is going to be again often in order to check up on new posts.
Definitely, what a splendid blog and illuminating posts, I surely will bookmark your site.All the Best!
Thank you, I have recently been looking for info approximately this topic for ages and yours is the best I have came upon till now. However, what about the conclusion? Are you certain in regards to the supply?
Do you mind if I quote a few of your posts as long as I provide credit and sources back to your website? My blog is in the exact same area of interest as yours and my users would really benefit from some of the information you provide here. Please let me know if this okay with you. Appreciate it!
Wow that was unusual. I just wrote an really long comment but after I clicked submit my comment didn’t show up. Grrrr… well I’m not writing all that over again. Regardless, just wanted to say great blog!
Thanks for sharing, this is a fantastic blog post.Really looking forward to read more. Fantastic.
Thank you for sharing indeed great looking !
Nice i really enjoyed reading your blogs. Keep on posting. Thanks
Very nice post. I just stumbled upon your weblog and wished to say that I’ve truly enjoyed browsing your blog posts. In any case I will be subscribing to your rss feed and I hope you write again very soon!|
No matter if some one searches for his vital thing, thus he/she needs to be available that in detail, so that thing is maintained over here.|
I’m no longer sure where you are getting your information, but good topic. I needs to spend a while learning much more or working out more. Thanks for excellent information I used to be looking for this info for my mission.
Nice i really enjoyed reading your blogs. Keep on posting. Thanks
Nice i really enjoyed reading your blogs. Keep on posting. Thanks
The information shared is of top quality which has to get appreciated at all levels. Well done…
The following time I learn a blog, I hope that it doesnt disappoint me as much as this one. I imply, I do know it was my option to read, however I truly thought youd have one thing interesting to say. All I hear is a bunch of whining about something that you could fix for those who werent too busy on the lookout for attention.
It¦s really a nice and useful piece of information. I am happy that you simply shared this helpful info with us. Please stay us up to date like this. Thanks for sharing.
The very crux of your writing whilst sounding agreeable originally, did not really sit perfectly with me after some time. Somewhere within the paragraphs you managed to make me a believer unfortunately only for a while. I nevertheless have got a problem with your jumps in logic and one would do nicely to fill in all those breaks. If you can accomplish that, I could surely end up being amazed.
My spouse and I stumbled over here coming from a different page and thought I should check things out. I like what I see so i am just following you. Look forward to looking over your web page for a second time.
Thanks so much for the blog post.Thanks Again. Keep writing.
Wow, great article post.Thanks Again. Want more.
Great info and straight to the point. I don’t know if this is in fact the best place to ask but do you people have any thoughts on where to employ some professional writers? Thank you 🙂
Magnificent beat ! I wish to apprentice while you amend your web site, how could i subscribe for a blog website? The account helped me a acceptable deal. I had been tiny bit acquainted of this your broadcast offered bright clear concept
Hello there, just changed into aware of your blog via Google, and found that it is really informative. I’m going to be careful for brussels. I will appreciate in case you proceed this in future. Numerous other people will be benefited from your writing. Cheers!
Thank you ever so for you article post.Really looking forward to read more. Awesome.
Im thankful for the post.Much thanks again. Much obliged.
you are actually a good webmaster. The website loading velocity is amazing. It seems that you are doing any distinctive trick. In addition, The contents are masterpiece. you’ve done a excellent process on this subject!
I cannot thank you enough for the blog.Thanks Again. Really Cool.
I value the post.Thanks Again. Want more.
The article is worth reading, I like it very much. I will keep your new articles.
Thank you for your article.Really thank you! Fantastic.
Thank you ever so for you article.Really looking forward to read more.
I appreciate you sharing this blog post.Really thank you! Really Cool.
Muchos Gracias for your article.Really thank you! Cool.
I was just searching for this info for a while. After 6 hours of continuous Googleing, at last I got it in your website. I wonder what is the lack of Google strategy that do not rank this type of informative web sites in top of the list. Normally the top websites are full of garbage.
Thanks so much for the post.Really thank you! Fantastic.
Very informative article.Really thank you! Much obliged.
What’s Taking place i am new to this, I stumbled upon this I have discovered It positively useful and it has helped me out loads. I hope to give a contribution & assist other customers like its helped me. Great job.
Attractive component of content. I simply stumbled upon your site and in accession capital to say that I get actually loved account your blog posts. Anyway I will be subscribing on your augment and even I achievement you get right of entry to constantly fast.
If you really wrote this for beginners, then you should have written in more detail …
I really liked your blog post.Really thank you! Really Great.
I am so grateful for your post.Really looking forward to read more. Much obliged.
I think this is a real great article.Really thank you! Will read on…
Really informative post.Thanks Again. Cool.
Thanks for the blog post. Fantastic.
I really like and appreciate your article. Keep writing.
Enjoyed every bit of your article post.Really thank you! Want more.
I appreciate you sharing this blog post. Will read on…
Hiya, I am really glad I have found this info. Nowadays bloggers publish only about gossips and web and this is really frustrating. A good blog with interesting content, that is what I need. Thanks for keeping this website, I’ll be visiting it. Do you do newsletters? Can not find it.
Major thankies for the article.Really thank you! Keep writing.
This is very attention-grabbing, You are a very skilled blogger. I have joined your feed and look ahead to seeking extra of your magnificent post. Additionally, I have shared your site in my social networks!
This web site is mostly a stroll-by means of for all the info you needed about this and didn’t know who to ask. Glimpse here, and also you’ll definitely uncover it.
Nice post. I be taught something more challenging on totally different blogs everyday. It is going to all the time be stimulating to read content material from other writers and follow a bit of one thing from their store. I’d choose to make use of some with the content material on my weblog whether you don’t mind. Natually I’ll offer you a hyperlink on your net blog. Thanks for sharing.
I am so grateful for your article.Really thank you! Want more.
Thanks again for the blog article.Much thanks again. Great.
Thanks-a-mundo for the post. Cool.
I loved your blog article.Thanks Again. Fantastic.
Generally I don’t learn post on blogs, but I would like to say that this write-up very compelled me to take a look at and do it! Your writing style has been surprised me. Thanks, quite great article.
Im grateful for the blog article.Thanks Again. Want more.
Thanks for ones marvelous posting! I quite enjoyed reading it, you can be a great author.I will be sure to bookmark your blog and may come back in the future. I want to encourage you to continue your great posts, have a nice morning!
I will right away grab your rss feed as I can not find your e-mail subscription link or e-newsletter service. Do you have any? Kindly let me know so that I could subscribe. Thanks.
excellent post, very informative. I’m wondering why the other specialists of this sector do not notice this. You must proceed your writing. I am confident, you’ve a huge readers’ base already!
Very great post. I simply stumbled upon your weblog and wanted to mention that I’ve truly enjoyed surfing around your blog posts. After all I’ll be subscribing for your feed and I’m hoping you write again soon!
This is one awesome blog article.Much thanks again. Want more.
I really enjoy the article post.Much thanks again. Cool.
I value the blog article.Really thank you! Really Cool.
Wonderful paintings! This is the type of information that are meant to be shared around the web. Disgrace on the search engines for no longer positioning this submit upper! Come on over and discuss with my web site . Thank you =)
This is one awesome blog article.Really thank you! Really Great.
I truly appreciate this article post.Much thanks again. Will read on…
magnificent put up, very informative. I wonder why the opposite specialists of this sector do not realize this. You must continue your writing. I am confident, you have a huge readers’ base already!
Awesome blog post.Really thank you! Awesome.
You made some decent points there. I did a search on the issue and found most guys will agree with your blog.
Looking forward to reading more. Great article post. Really Great.
I appreciate you sharing this post.Really thank you! Really Great.
Thanks for the blog.Much thanks again. Cool.
Appreciate you sharing, great blog.Really looking forward to read more. Fantastic.
Great, thanks for sharing this article post.Really thank you! Keep writing.
Everything is very open with a precise description of the issues. It was truly informative. Your website is extremely helpful. Thank you for sharing!|
Do you mind if I quote a few of your articles as long as I provide credit and sources back to your weblog? My website is in the very same area of interest as yours and my users would certainly benefit from a lot of the information you present here. Please let me know if this alright with you. Thanks a lot!|
Asking questions are genuinely nice thing if you are not understanding anything completely, however this piece of writing presents good understanding even.|
choloquine what is hydroxychloroquine cloraquine
An impressive share! I have just forwarded this onto a colleague who was conducting a little research on this. And he actually ordered me lunch because I stumbled upon it for him… lol. So allow me to reword this…. Thanks for the meal!! But yeah, thanks for spending the time to talk about this topic here on your internet site.
It’s actually very difficult in this full of activity life to listen news on Television, therefore I only use the web for that reason, and obtain the latest news.
Have a look at my blog post – tracfone
This is one awesome blog post.Thanks Again. Really Great.
I blog often and I really thank you for your content.Your article has really peaked my interest. I’m goingto bookmark your blog and keep checking for new information about once per week.I subscribed to your Feed too.
Great blog article.Really looking forward to read more. Cool.
Together these words became teknologia meaning the systematic treatment.
Hi my family member! I wish to say that this article is awesome, great written and include almost all significant infos. I would like to see more posts like this.
Good day! I could have sworn I’ve visited this site before but after browsing through many of the posts I realized it’s new to me. Regardless, I’m definitely pleased I discovered it and I’ll be book-marking it and checking back regularly!|
Outstanding news it is without doubt. We’ve been seeking protein for muscle building this info.
Thanks so much for the article.Really thank you! Really Cool.
I constantly spent my half an hour to read this blog’s articles or reviews everydayalong with a mug of coffee.
Very informative article.Really thank you! Great.
I think this is a real great article post.Really looking forward to read more. Want more.
I really like it when individuals get together and share thoughts. Great blog, stick with it!
Pretty nice post. I just stumbled upon your weblog and wanted to say that I have really enjoyed browsing your blog posts. After all I’ll be subscribing to your rss feed and I hope you write again very soon!|
Good article. I am facing some of these issues as well..|
I was recommended this blog by means of my cousin. I am now not positive whether this put up is written by way of him as no one else know such unique approximately my problem. You’re amazing! Thanks!|
Its fantastic as your other articles : D, thankyou for posting . “It takes less time to do things right than to explain why you did it wrong.” by Henry Wadsworth Longfellow.
A round of applause for your article.Really looking forward to read more. Fantastic.
I’m gone to say to my little brother, that he should also pay a visit this blog on regular basis totake updated from most up-to-date news.
Very well written information. It will be supportive to anybody who usess it, as well as me. Keep up the good work – looking forward to more posts.
I’m gone to tell my little brother, that he should also go to see this web site on regular basis to take updated from hottest reports.|
Hi, after reading this amazing piece of writing i am too happy to share my familiarity here with friends.|
It’s a shame you don’t have a donate button! I’d certainly donate to this superb blog! I guess for now i’ll settle for book-marking and adding your RSS feed to my Google account. I look forward to fresh updates and will talk about this blog with my Facebook group. Talk soon!|
pharmacy technicians in canada canadian pharmacy testosterone
An interesting discussion is definitely worth comment.I think that you ought to publish more about this issue, it may not be a taboosubject but generally folks don’t talk about these subjects.To the next! Cheers!!
You explained that effectively.essay proofreading service write my essay article writing service
I want to to thank you for this excellent read!!I absolutely enjoyed every bit of it. I have got you saved as a favorite to look at new things you post…
Great post. I was checking constantly this blog and I am impressed! Very helpful info specifically the last part 🙂 I care for such information much. I was seeking this certain information for a long time. Thank you and good luck.
I blog often and I seriously appreciate your content. Your article has really peaked my interest. I’m going to take a note of your website and keep checking for new details about once per week. I subscribed to your RSS feed as well.|
Excellent weblog right here! Additionally your website loads up very fast! What host are you the usage of? Can I am getting your associate link in your host? I desire my web site loaded up as quickly as yours lol|
This blog is very good! How did you make it !?
I haven’t checked in here for a while since I thought it was getting boring, but the last few posts are great quality so I guess I will add you back to my daily bloglist. You deserve it my friend ?
Hi to all, how is everything, I think every one is getting more from this site, and your views are pleasant in support of new people.|
ivermectin eczema ivermectin paste for cattle
What’s up, after reading this awesome piece of writing i am too cheerful to share my experience here with friends.|
I savor, lead to I found just what I used to be looking for.You’ve ended my four day long hunt! God Bless you man. Have a great day.Bye
Hey, what kind of anti-spam plugin do you use for your blog..:~;-
ed natural treatment medication for ed dysfunction – ed doctors
Hi there, just became aware of your blog through Google, and found that it’s truly informative. I am gonna watch out for brussels. I’ll be grateful if you continue this in future. Numerous people will be benefited from your writing. Cheers!
A big thank you for your article. Really Cool.
Really appreciate you sharing this blog article.Much thanks again. Want more.
Aw, this was an exceptionally nice post. Taking the time and actual effort togenerate a top notch article… but what can I say… I procrastinate a whole lot and nevermanage to get nearly anything done.
Hello friends, its wonderful article regarding tutoringand fully defined, keep it up all the time.
Having read this I thought it was rather enlightening. I appreciate you finding the time and effort to put Permainan Judi Baccarat this article together. I once again find myself spending a lot of time both reading and leaving comments
I’m still learning from you, while I’m improving myself. I definitely love reading all that is written on your blog.Keep the stories coming.I enjoyed it!
Hello, yes this piece of writing is actually niceand I have learned lot of things from it about blogging.thanks.
What’s up friends, pleasant piece of writing and good urging commented here,I am in fact enjoying by these.
F*ckin’ remarkable things here. I’m very happy to look your post. Thanks so much and i am looking ahead to touch you. Will you kindly drop me a mail?
When you get began, you can even claim a $50 Mobile Freeplay just forattempting out the handy feature.
Very neat post.Really thank you! Much obliged.
It’s in point of fact a nice and useful piece of information. I’m satisfied that you simply shared this helpful information with us.Please stay us informed like this. Thanks for sharing.
A fascinating discussion is definitely worth comment. I think that you should publish more about this issue, it may not be a taboo matter but generally people do not discuss such issues. To the next! Cheers!!
I will right away snatch your rss feed as I can’t find your email subscription hyperlink or newsletter service. Do you have any? Please permit me know so that I could subscribe. Thanks.
“Greetings! Very helpful advice in this particular post! It’s the little changes that produce the most important changes. Many thanks for sharing!”נערות ליווי בקיסריה
Good post, keep writing
Please tell me more about this
Enjoyed every bit of your blog article.Much thanks again. Awesome.
Thank you for writing so many excellent articles. May I request more information on the subject?
This is a great tip especially to those new to the blogosphere.Brief but very accurate info… Thank you for sharing this one.A must read article!
Thank you for posting this. I really enjoyed reading it, especially because it addressed my question. It helped me a lot and I hope it will help others too.
Say, you got a nice article.Really thank you! Will read on…
I think this is a real great blog article.Much thanks again. Much obliged.
Thanks again for the post.Really looking forward to read more. Awesome.Loading…
Thank you for your articles. I find them very helpful. Could you help me with something?
Thanks for sharing, this is a fantastic post.Thanks Again. Much obliged.
Looking forward to reading more. Great blog.Thanks Again. Great.Loading…
I really enjoyed reading your post, especially because it addressed my issue. It helped me a lot and I hope it can help others too.
Thank you for writing this article. I appreciate the subject too.
Thank you for your articles. I find them very helpful. Could you help me with something?
Very neat blog article.Thanks Again. Will read on…
Agree with you. I Love your web. I like your style of writing and storytelling. I will review about that in my blogs Bonanza88 thank you.
It’s difficult to find educated people in this particular topic, but you soundlike you know what you’re talking about! Thanks ps4 games 185413490784 ps4 games
Im obliged for the post.Really looking forward to read more. Cool.Loading…
I would like to know more about this subject if you don’t mind.
F*ckin’ tremendous things here. I am very glad to peer your post. Thanks a lot and i’m taking a look forward to touch you. Will you kindly drop me a e-mail?
purchase ivermectin – stromectol cvs ivermectin medication
apartments in mount pleasant mi rentberry scam ico 30m$ raised old town apartments
Hplc Methods For Amoxicillin Clavulanic Acid
It’s truly very complicated in this active life to listen news on Television, therefore I just use internet for that purpose, and get the most up-to-date news.
I would like to know more about this subject if you don’t mind.
Your articles are incredibly helpful to me. Thank you! May I request more information?
This is one awesome blog article.Really thank you! Want more.
wow, awesome blog post.Much thanks again.
I really liked your post.Thanks Again. Much obliged.
This is one awesome article.Much thanks again.
stromectol usa stromectol for sale – stromectol in canada
Muchos Gracias for your blog.Much thanks again. Much obliged.
Major thanks for the article post.Thanks Again.
The assignment submission period was over and I was nervous, totosite and I am very happy to see your post just in time and it was a great help. Thank you ! Leave your blog address below. Please visit me anytime.
I really liked your article. Want more.
Do you mind if I quote a few of your articles as long as I provide credit and sources back to your blog? My blog is in the very same area of interest as yours and my visitors would really benefit from some of the information you provide here. Please let me know if this okay with you. Many thanks!
magnificent points altogether, you just gained a new reader. What would you recommend about your post that you made a few days ago? Any positive?
You are a very clever person!
I enjoy looking through an article that will make people think. Also, thank you for allowing for me to comment.
There is definately a lot to learn about this issue. I like all of the points you ave made.
Thank you, I’ve recently been looking for info approximately this subject for ages and yours is the greatest I’ve discovered so far. But, what about the bottom line? Are you positive in regards to the supply?
hydroxychloroquine dose is hydroxychloroquine over the counter
It is truly a nice and helpful piece of info. I¡¦m satisfied that you just shared this useful info with us. Please stay us informed like this. Thanks for sharing.
You’ve been a big help to me. Thank you!
Thanks for your write-up. Another factor is that to be a photographer entails not only problems in recording award-winning photographs and also hardships in getting the best video camera suited to your needs and most especially situations in maintaining the quality of your camera. This is certainly very correct and evident for those professional photographers that are straight into capturing the nature’s fascinating scenes : the mountains, the actual forests, the actual wild or perhaps the seas. Visiting these daring places undoubtedly requires a dslr camera that can live up to the wild’s unpleasant conditions.
I enjoyed reading your piece and it provided me with a lot of value.
Thanks for your ideas. One thing I’ve noticed is the fact that banks plus financial institutions know the dimensions and spending habits of consumers and also understand that a lot of people max outside their own credit cards around the holiday seasons. They prudently take advantage of this particular fact and begin flooding your inbox plus snail-mail box with hundreds of no interest APR card offers shortly when the holiday season concludes. Knowing that in case you are like 98 of all American general public, you’ll rush at the chance to consolidate credit debt and move balances towards 0 apr interest rates credit cards.
Thank you for writing about this topic. Your post really helped me and I hope it can help others too.
You helped me a lot with this post. I love the subject and I hope you continue to write excellent articles like this.
Thank you for your articles. They’re very helpful to me. May I ask you a question?
Thank you for posting such a wonderful article. It helped me a lot and I adore the topic.
continuously i used to read smaller posts which also clear their motive, and that is also happening with this post which I am reading at this time.
I’m really enjoying the design and layout of your blog.It’s a very easy on the eyes which makes it much more pleasant for me to come hereand visit more often. Did you hire out a developer to create your theme?Superb work!
Thank you for the auspicious writeup. It in fact was a amusement account it. Look advanced to more added agreeable from you! However, how can we communicate?
naturally like your web site however you need to take a look at the spelling on quite a few of your posts. Many of them are rife with spelling issues and I to find it very bothersome to tell the reality on the other hand I will surely come back again.
Босс 2 Босс молокосос 2 фильм, 2021 Босс молокосос 2 смотреть
Thanks for expressing your ideas here. The other matter is that when a problem takes place with a computer motherboard, individuals should not have some risk connected with repairing that themselves because if it is not done correctly it can lead to permanent damage to an entire laptop. It’s usually safe just to approach the dealer of any laptop for any repair of its motherboard. They have technicians with an competence in dealing with laptop motherboard issues and can have the right prognosis and execute repairs.
Thanks for any other informative blog. The place else may I get that kind of info written in such an ideal method? I’ve a mission that I’m just now working on, and I have been at the glance out for such information.
how long does paing releif last from cbd gummies
Thanks a lot for sharing this with all of us you actually know what you’re talking about! Bookmarked. Please also visit my website =). We could have a link exchange arrangement between us!
Hi there, simply was alert to your blog thru Google, and found that it is really informative. I am gonna watch out for brussels. I will appreciate if you happen to continue this in future. Numerous other folks will be benefited from your writing. Cheers!
Some truly interesting details you have written.Aided me a lot, just what I was looking for : D.
Hey very cool web site!! Man .. Excellent .. Amazing .. I will bookmark your website and take the feeds also?I am happy to find a lot of useful information here in the post, we need work out more techniques in this regard, thanks for sharing. . . . . .
cause of ed ed remedies that really work – pills erectile dysfunction
In my opinion that a foreclosed can have a significant effect on the borrower’s life. Property foreclosures can have a Several to several years negative effect on a applicant’s credit report. Any borrower who have applied for a mortgage or just about any loans for instance, knows that the particular worse credit rating will be, the more challenging it is to get a decent mortgage. In addition, it might affect a new borrower’s capability to find a really good place to let or hire, if that turns into the alternative property solution. Interesting blog post.
This is a topic which is near to my heart… Manythanks! Where are your contact details though?
Great remarkable issues here. I?¦m very satisfied to see your post. Thanks a lot and i’m having a look forward to contact you. Will you kindly drop me a mail?
As I am looking at your writing, casinosite I regret being unable to do outdoor activities due to Corona 19, and I miss my old daily life. If you also miss the daily life of those days, would you please visit my site once? My site is a site where I post about photos and daily life when I was free.
Thanks for writing this article. It helped me a lot and I love the subject.
Thanks for your help and for posting this. It’s been wonderful.
You should write more articles like this, you really helped me and I love the subject.
korean apartments rentberry scam ico 30m$ raised parkview apartments
Arie Baisch
[…]check beneath, are some entirely unrelated websites to ours, on the other hand, they’re most trustworthy sources that we use[…]
Thank you for posting such a wonderful article. It helped me a lot and I appreciate the topic.
I must say you’ve been a big help to me. Thanks!
Good article. It is unfortunate that over the last several years, the travel industry has had to fight terrorism, SARS, tsunamis, flu virus, swine flu, and the first ever true global tough economy. Through everything the industry has really proven to be effective, resilient plus dynamic, finding new approaches to deal with difficulty. There are usually fresh difficulties and the opportunity to which the industry must just as before adapt and act in response.
It would be nice to know more about that. Your articles have always been helpful to me. Thank you!
Thank you for your excellent articles. May I ask for more information?
You helped me a lot with this post. I love the subject and I hope you continue to write excellent articles like this.
Via my observation, shopping for electronic devices online may be easily expensive, however there are some tips and tricks that you can use to help you get the best products. There are always ways to find discount offers that could help make one to ge thet best technology products at the smallest prices. Thanks for your blog post.
Hello! I’m at work surfіng around your boog from my new іphone!Just wanted to say I love гeading through your blog anddloo forwad to ɑll your posts! Caгry on the superb work!
Hello, all is going sound here and ofcourse every one is sharing data,that’s really good, keep up writing.
A big thank you for your article post.Thanks Again. Fantastic.
Hey There. I found your blog using msn. This is an extremelywell written article. I’ll make sure to bookmark it and come back to read more of your useful info.Thanks for the post. I will definitely return.
I am no longer sure where you’re getting your information, however good topic. I must spend a while finding out much more or understanding more. Thanks for wonderful info I was in search of this information for my mission.
ivermectin pills canada ivermectin over the counter canada
311926 548954Some genuinely useful info in there. Why not hold some sort of contest for your readers? 269921
prednisone brand name in usa otc prednisone cream – prednisone purchase canada
When I originally commented I clicked the “Notify me when new comments are added” checkbox and now each time a comment is added I get three e-mails with the same comment. Is there any way you can remove me from that service? Thank you!
May I request more information on the subject? All of your articles are extremely useful to me. Thank you!
Thank you for writing this post!
It’s my opinion that a foreclosures can have a important effect on the debtor’s life. Home foreclosures can have a 6 to ten years negative affect on a borrower’s credit report. A borrower having applied for a mortgage or virtually any loans as an example, knows that a worse credit rating can be, the more complicated it is to secure a decent loan. In addition, it can affect a new borrower’s chance to find a quality place to let or hire, if that gets to be the alternative real estate solution. Great blog post.
Thank you for writing this article. I appreciate the subject too.
Thanks for your post, it helped me a lot. It helped me in my situation and hopefully it can help others too.
Hi mates, how is everything, and what you wish for to say regarding this paragraph, in my view its truly amazing forme.
There is no doubt that your post was a big help to me. I really enjoyed reading it.
Thank you for writing such a great article. It helped me a lot and I love the subject.
Please tell me more about your excellent articles
Thank you for posting this post. I found it extremely helpful because it explained what I was trying to say. I hope it can help others as well.
Thank you for writing such an excellent article, it helped me out a lot and I love studying this topic.
Im grateful for the blog post. Want more.
Thanks , I’ve recently been looking for info approximately this topic for a whileand yours is the best I have found out till now.However, what concerning the conclusion? Are you sure concerningthe source?
Hello there! I simply want to give you a huge thumbs up for the great information you have got here on this post. I am coming back to your blog for more soon.
I have not checked in here for a while as I thought it was getting boring, but the last few posts are good quality so I guess I?¦ll add you back to my everyday bloglist. You deserve it my friend 🙂
Enjoyed studying this, very good stuff, regards.
I really enjoyed reading this article
Thank you for your post. I liked reading it because it addressed my issue. It helped me a lot and I hope it will help others too.
Very good article post.Really looking forward to read more. Much obliged.
I loved your blog. Really Great.
You helped me a lot with this post. I love the subject and I hope you continue to write excellent articles like this.
Thanks for your help and for posting this article. It’s been great.
canada pharmacy coupon online mexico pharmacy
I want to to thank you for this fantastic read!! I definitely enjoyed every little bit of it.I have got you saved as a favorite to look at newstuff you post…
is tadalafil available at cvs liquid tadalafil citrate dosage
Thank you for writing about this topic. Your post really helped me and I hope it can help others too.
Looking forward to reading more. Great blog.Really thank you! Really Great.
Hello there! This post could not be written any better!Reading this post reminds me of my previous roommate! He always kept chatting about this. I will forward this article to him.Fairly certain he will have a good read. Thanks for sharing!
Hello, after reading this remarkable post i am also delighted to share my knowledge here with mates.
I really enjoy the article. Cool.
Hi, I do believe this is an excellent blog. I stumbledupon it 😉 I am going to revisit once again since i have bookmarked it. Money and freedom is the greatest way to change, may you be rich and continue to help other people.
What a stuff of un-ambiguity and preserveness of valuable experience regarding unexpected feelings.
I am so grateful for your blog.Thanks Again. Cool.
Hi there! This post couldn’t be written any better! Reading through this post remindsme of my previous room mate! He always kept talking about this.I will forward this post to him. Fairly certain he will have a goodread. Many thanks for sharing!
This is a great tip particularly to those new to the blogosphere. Simple but very accurate info… Appreciate your sharing this one. A must read article.
Very informative article post. Great.
wow, awesome blog.Really looking forward to read more. Really Cool.
Awesome article.Thanks Again. Fantastic.
I truly appreciate this blog article.Really thank you! Will read on…
Awesome blog. Will read on…
I think this is a real great blog article.Really looking forward to read more. Great.
Great, thanks for sharing this blog article.Much thanks again. Will read on…
Say, you got a nice blog article.Thanks Again. Want more.
I¡¦m now not certain the place you are getting your info, but good topic. I must spend some time studying much more or understanding more. Thanks for wonderful information I was in search of this information for my mission.
Thanks designed for sharing such a pleasant opinion, post is pleasant, thats why i have read it entirely
Really enjoyed this article post. Keep writing.
Aw, this was an exceptionally nice post. Spending some time and actual effort to make a very good articleÖ but what can I sayÖ I hesitate a lot and never manage to get anything done.
When I originally commented I clicked the “Notify me when new comments are added” checkbox and now each time a comment is added I get four e-mails with the same comment.Is there any way you can remove people fromthat service? Thanks a lot!
It’s exhausting to search out knowledgeable individuals on this topic, but you sound like you know what you’re speaking about! Thanks
Thank you for sharing your info. I reallyappreciate your efforts and I am waiting for your further write upsthanks once again.
I value the blog article.Really looking forward to read more.
It’s hard to come by knowledgeable people for this topic, however, you seem like you know what you’re talking about!Thanks
Enjoyed every bit of your blog article.Really looking forward to read more. Much obliged.
Write more, thats all I have to say. Literally, it seems as though you relied on the video to make your point. You definitely know what youre talking about, why waste your intelligence on just posting videos to your blog when you could be giving us something informative to read?
Today, with the fast way of living that everyone leads, credit cards have a big demand in the economy. Persons from every discipline are using credit card and people who aren’t using the credit cards have made up their minds to apply for even one. Thanks for giving your ideas on credit cards.
F*ckin’ amazing issues here. I am very glad to see your post. Thank you a lot and i am taking a look forward to contact you. Will you kindly drop me a e-mail?
I do accept as true with all of the ideas you have presented on your post. They are very convincing and can certainly work. Still, the posts are very short for novices. Could you please prolong them a little from next time? Thank you for the post.
What’s up friends, how is everything, and what youwould like to say about this article, in my view its genuinely awesome designedfor me.
A motivating discussion is worth comment. I do think that you need to publish more on this subject matter, it may not be a taboo matter but generally people don’t speak about these issues. To the next! Many thanks!!
Very nice post. I just stumbled upon your blog and wished to say that I’ve truly enjoyed browsing your blog posts. In any case I will be subscribing to your rss feed and I hope you write again soon!
ivermectin oral solution п»їorder stromectol online
Cheers, A good amount of material. canadian pharmacies without an rx
Next time I read a blog, I hope that it does not fail me as much as this one. After all, Yes, it was my choice to read, nonetheless I actually believed you’d have something useful to talk about. All I hear is a bunch of moaning about something that you can fix if you weren’t too busy looking for attention.
I wanted to thank you for this wonderful read!! I definitely loved every bit of it. I’ve got you book-marked to look at new things you post…
Excellent blog here! Also your website so much up fast! What web host are you the usage of? Can I get your associate hyperlink to your host? I want my web site loaded up as fast as yours lol
Definitely, what a fantastic blog and educative posts, I definitely will bookmark your blog.Best Regards!
Excellent blog you have got here.. It’s difficult to find excellent writing like yours these days. I honestly appreciate people like you! Take care!!
Its like you read my mind! You appear to know a lot about this, like you wrote the book in it or something. I think that you can do with a few pics to drive the message home a bit, but other than that, this is excellent blog. A great read. I’ll certainly be back.
tom thumb pharmacy pharmacy checker canadian
Hey, thanks for the blog article.Really thank you! Really Cool.
Spot on with this write-up, I seriously believe that this web site needs a great deal more attention. I’ll probably be back again to read through more, thanks for the info!
lisinopril angioedema african american generic for lisinopril
I really like what you guys are up too. This kind of clever work and reporting! Keep up the superb works guys I’ve incorporated you guys to my own blogroll.
I’m a big fan of your work. I’ll return to read more soon. Thanks for creating it.
pharmacy technician online programs cvs pharmacy store timings
Unquestionably believe that which you stated. Your favorite justification seemed to be on the internet the easiest thing to be aware of. I say to you, I certainly get irked while people consider worries that they just don’t know about. You managed to hit the nail upon the top and also defined out the whole thing without having side-effects , people could take a signal. Will likely be back to get more. Thanks
I really enjoy the article post.Really looking forward to read more.
There may be noticeably a bundle to learn about this. I assume you made certain nice factors in features also.
even talk to your friends as if Sony really outdid themselves.
เว็บไซต์ UFABET ของเราเปิดรับพนันบอลออนไลน์ผ่านทางโทรศัพท์มือถือ และอุปกรณ์ทุกชนิดที่เชื่อมต่ออินเตอร์เน็ตได้ สมัครเดิมพันได้ ขั้นต่ำเพียง 10 บาท ufabet777 แทงบอลเดี่ยว บอลเต็ง บอลสเต็ป หรือ บอลชุด เล่นได้จ่ายจริงไม่มีโกงอย่างแน่นอน ยูฟ่าเบท เว็บพนันบอลดีที่สุดของไทย
สล็อต ufabet เว็บตรง แทงบอลออนไลน์ คาสิโนออนไลน์ สล็อตออนไลน์ ยูฟ่าสล็อตเว็บตรง ที่ดีที่สุด
These days of austerity and also relative anxiety about taking on debt, most people balk against the idea of making use of a credit card in order to make purchase of merchandise and also pay for a vacation, preferring, instead to rely on the particular tried and also trusted means of making repayment – hard cash. However, if you possess cash available to make the purchase in whole, then, paradoxically, this is the best time for them to use the card for several motives.
ดูหนังใหม่ ครบรสชาติเมื่อได้ติดตามกับเว็บการดูหนังออนไลน์ Fantasy ภาพยนตร์ที่มีการผสมจินตนาการแบบที่เราๆ ไม่ค่อยเห็นในชีวิต จะเรียกว่า เหนือจริงก็ได้ เด็กๆ หลายคนชอบจนถึงขั้นติดเลย
WONDERFUL Post.thanks for share..extra wait .. ?
I have seen that nowadays, more and more people are attracted to cameras and the field of photography. However, being a photographer, you need to first invest so much time period deciding which model of dslr camera to buy as well as moving store to store just so you can buy the lowest priced camera of the trademark you have decided to pick. But it won’t end there. You also have to think about whether you should obtain a digital dslr camera extended warranty. Thanks a lot for the good suggestions I obtained from your weblog.
Major thankies for the article.Really looking forward to read more. Cool.
Having an interior designer is incredibly important since they have the knowledge and experience to help transform a space into something functional and aesthetically pleasing. Interior designers know how to balance colour, texture, furniture, and other design elements to create the desired look. They are creative problem solvers and can work their magic in any space from small closets to large outdoor decks. With an expert’s eye for detail, your own ideas can be refined and executed perfectly, elevating your space both functionally and aesthetically. Thank you for providing this content and helping us recognize the importance of hiring an interior designer!
There’s definately a great deal to know about this topic.I really like all of the points you made.
certainly like your web site however you have to check the spelling on several of your posts. A number of them are rife with spelling problems and I in finding it very troublesome to inform the reality however I will surely come again again.
whoah this blog is wonderful i love reading your articles. Keep up the great work! You know, a lot of people are searching around for this info, you could help them greatly.
I was recommended this blog by my cousin. I am not sure whether thispost is written by him as no one else know such detailed about my problem.You’re incredible! Thanks!
Hello There. I discovered your blog the use of msn. That is an extremely neatly written article. I will make sure to bookmark it and return to read more of your helpful information. Thank you for the post. I will certainly comeback.
Aw, this was a very nice post. Spending some time and actual effort to produce a very good articleÖ but what can I sayÖ I procrastinate a whole lot and don’t seem to get nearly anything done.
Once you choose a good name you may want to purchase the domain name.
These are actually enormous ideas in concerning blogging. You have touched some fastidious things here.Any way keep up wrinting.
I quite like reading through a post that can make men and women think. Also, many thanks for permitting me to comment.
Definitely, what a fantastic blog and revealing posts, I surely will bookmark your website.Have an awsome day!
Looking forward to reading more. Great article.Thanks Again. Awesome.
Enjoyed every bit of your article.Really thank you! Keep writing.
Fastidious answrr back in return of this query with real arguments and telling the whole thing about that.
Hi there, I enjoy reading through your post. I wanted to write a little comment tosupport you.
Way cool! Some very valid points! I appreciate you writing this write-up plus the rest of the website is also really good.
ivermectin tablets ivermectin covid uptodate
okmark your weblog and check again here regularly. I’m quite certain I will learn lots of new stuff right here! Good luck for the next!
Thank you ever so for you article post.Really looking forward to read more. Want more.
Another issue is that video gaming became one of the all-time most significant forms of fun for people of every age group. Kids engage in video games, and also adults do, too. The actual XBox 360 has become the favorite video games systems for folks who love to have a huge variety of video games available to them, in addition to who like to experiment with live with others all over the world. Many thanks for sharing your notions.
When I initially commented I seem to have clicked on the -Notify me when new comments are added- checkbox and now whenever a comment is added I receive 4 emails with the exact same comment. There has to be an easy method you are able to remove me from that service? Thank you.
I am not very great with English but I come up this very leisurely to interpret.
Good info. Lucky me I discovered your blog by accident (stumbleupon). I have saved it for later.
I used to be recommended this blog by way of my cousin. I’m now not certain whether this publish is written by means of him as no one else realize such distinctive about my difficulty. You are incredible! Thank you!
I always spent my half an hour to read this blog’s articles every day along with a mug of coffee.
Now I am ready to do my breakfast, when having my breakfast coming again to read other news.
Online televizyon izlemeyi kim istemez. Bedava ve kesintisiz canlı televizyon artık sizlerle. HD kalitede canlı TV center adresi ile ücretsiz olarak yayınlaniyor.
Thanks for the strategies presented. One thing I also believe is that often credit cards presenting a 0 rate often lure consumers together with zero interest rate, instant authorization and easy online balance transfers, however beware of the main factor that may void your 0 easy streets annual percentage rate and as well as throw one out into the bad house rapidly.
case study research research paper service thesis help
Im obliged for the article post.Really looking forward to read more. Really Great.
Thanks for giving your ideas listed here. The other matter is that if a problem appears with a computer motherboard, persons should not take the risk involving repairing it themselves for if it is not done right it can lead to permanent damage to an entire laptop. It is usually safe to approach your dealer of the laptop for that repair of its motherboard. They will have technicians that have an expertise in dealing with laptop motherboard complications and can carry out the right prognosis and perform repairs.
Aw, this was an incredibly good post. Finding the time and actual effort to produce a very good article… but what can I say… I put things off a whole lot and never manage to get nearly anything done.
Aloha! Interesting post! I’m really appreciate it. It will be great if you’ll read my first article on Programming Insider!)
Really enjoyed this article post. Really Great.
I am extremely impressed with your writing skills as well as with the layout on your blog.Is this a paid theme or did you modify it yourself? Eitherway keep up the nice quality writing, it’s rare to see a great bloglike this one nowadays.
A round of applause for your blog post.Really looking forward to read more. Want more.
I am not positive the place you are getting your information, but great topic. I must spend a while studying more or figuring out more. Thank you for magnificent information I was in search of this information for my mission.
Hmm is anyone else having problems with the pictures on this blog loading?I’m trying to figure out if its a problem on my end orif it’s the blog. Any feedback would be greatly appreciated.
stromectol msd stromectol tablets uk ivermectin tablets for humans australia
There is definately a lot to know about this issue. I love all the points you made.
I’ve observed that in the world of today, video games are definitely the latest phenomenon with kids of all ages. Occasionally it may be unattainable to drag your son or daughter away from the video games. If you want the best of both worlds, there are lots of educational activities for kids. Thanks for your post.
each time i used to read smaller content which as well clear their motive,and that is also happening with this article which Iam reading now.
wow, awesome post.Thanks Again. Fantastic.
Your style is very unique compared to other people I have read stuff from. Thanks for posting when you have the opportunity, Guess I will just book mark this blog.
Very good info. Lucky me I came across your website by chance (stumbleupon). I’ve book marked it for later.
Your method of explaining all in this article is truly good,every one be capable of effortlessly understandit, Thanks a lot.
Thanks for your posting. I also feel that laptop computers are getting to be more and more popular currently, and now tend to be the only form of computer utilized in a household. This is because at the same time they are becoming more and more cost-effective, their computing power keeps growing to the point where they can be as highly effective as personal computers through just a few years back.
Asking them questions are truly nice thing if you are not understanding anything fully, but this paragraph gives good understanding even.
Hello there! This post couldn’t be written any better! Reading this post reminds me ofmy good old room mate! He always kept chattingabout this. I will forward this write-up to him.Pretty sure he will have a good read. Thank youfor sharing!
I think other site proprietors should take this web site as an model, very clean and great user friendly style and design, as well as the content. You are an expert in this topic!
Hmm is anyone else encountering problems with the images on this blog loading?I’m trying to figure out if its a problem on my end or ifit’s the blog. Any feed-back would be greatly appreciated.
Thank you for sharing your personal story with your readers, Brendan. These photos and stories are so fun to look at and to enjoy vicariously through your blog. Good luck in your upcoming travels.
It?s truly a nice and useful piece of info. I am happy that you just shared this helpful information with us. Please stay us informed like this. Thanks for sharing.
No, firefox no ha eliminado al zorro del logotipo de netscape.
Thank you, I have just been looking for information approximately this subject for a while and yours is the greatest I’ve came upon till now. However, what in regards to the bottom line? Are you sure concerning the supply?
I cannot thank you enough for the post.Much thanks again. Really Great.
Can anyone able to recommend comprehensive Delivery and Collection Services Lead Generation? Thanks very much 😀
Greetings! Really helpful guidance With this unique write-up! It’s the very little alterations that can make the greatest alterations. Numerous many thanks for sharing!
Hello There. I found your blog using msn. This is an extremely well written article. I will make sure to bookmark it and come back to read more of your useful information. Thanks for the post. I?ll definitely comeback.
What I have observed in terms of computer memory is the fact there are technical specs such as SDRAM, DDR etc, that must fit in with the requirements of the motherboard. If the pc’s motherboard is very current and there are no os issues, replacing the storage space literally usually takes under a couple of hours. It’s one of several easiest pc upgrade types of procedures one can consider. Thanks for discussing your ideas.
crosstimbers apartments emerald creek apartments tempe apartments for rent
I loved your article.Really thank you!
I don?t even know how I ended up here, but I thought this post was good. I don’t know who you are but definitely you are going to a famous blogger if you are not already 😉 Cheers!
Wow that was unusual. I just wrote an very long comment but after I clicked submit my commentdidn’t show up. Grrrr… well I’m not writing allthat over again. Anyhow, just wanted to say superb blog!
I appreciate you sharing this article post.Really looking forward to read more. Really Cool.
apartments for rent in arizona morgantown apartments diplomat apartments
Lovely just what I was looking for. Thanks to the author for takinghis clock time on this one.My blog post: diet solution
REPLICA OAKLEY SUNGLASSES REPLICA OAKLEY SUNGLASSES
Oh my goodness! an amazing article dude. Thanks Nevertheless I’m experiencing subject with ur rss . Don?t know why Unable to subscribe to it. Is there anyone getting an identical rss problem? Anybody who knows kindly respond. Thnkx
Hi there! Would you mind if I share your blog with my zynga group? There’s a lot of folks that I think would really enjoy your content. Please let me know. Thanks
It is in point of fact a nice and helpful piece of information. I am satisfied that you simply shared this useful info with us. Please stay us up to date like this. Thank you for sharing.
You actually stated that fantastically. Propranolol Anxiety Autism
reading your articles. Stay up the good work!
Xoilac Tv Trực Tiếp Bóng Đá xem mu west hamĐội tuyển chọn Việt Nam chỉ cần một kết trái hòa có bàn thắng để lần thứ hai góp mặt trên World Cup futsal. Nhưng, để làm được như vậy
Thanks again for the article post.Much thanks again. Awesome.
Now I am going away to do my breakfast, afterward having my breakfast coming yet again to read other news.
Light Novel Online Full introduces a new weekly top novel section for readers to get their fix of the most popular novels of the week. With this feature readers can form a comprehensive list of the novels to include in their reading lists each week!
It is really a great and helpful piece of information. I am glad that you shared this helpful information with us. Please keep us up to date like this. Thanks for sharing.
F*ckin? tremendous things here. I?m very glad to see your post. Thanks a lot and i am looking forward to contact you. Will you please drop me a mail?
I really enjoy the blog post. Great.
I appreciate you sharing this blog.Much thanks again. Awesome.
best ed pills that work canadian pharmacy online – canadapharmacyonline
Hi, Neat post. There is a problem with your web site in internet explorer, would check this? IE still is the market leader and a huge portion of people will miss your excellent writing because of this problem.
fort lauderdale delta 8
This is one awesome blog post.Thanks Again. Much obliged.
These are really enormous ideas in regarding blogging. You have touchedsome nice points here. Any way keep up wrinting.
“I really like and appreciate your blog post. Want more.”
here,our Herve Leger outlet sale with 50 discount and 100 quality guarantee
A fascinating discussion is definitely worth comment. I think that you should write more on this subject matter, it may not be a taboo matter but generally folks don’t discuss such subjects. To the next! All the best!!
According to my research, after a in foreclosure home is offered at a sale, it is common for any borrower to still have some sort ofthat remaining balance on the personal loan. There are many financial institutions who attempt to have all service fees and liens cleared by the following buyer. Even so, depending on selected programs, legislation, and state guidelines there may be quite a few loans that aren’t easily fixed through the transfer of loans. Therefore, the duty still lies on the consumer that has acquired his or her property in foreclosure. Many thanks sharing your thinking on this web site.
When some one searches for his essential thing, so he/she needs tobe available that in detail, thus that thing is maintained over here.
metronidazole cream sig flagyl doses flagyl antibiotic dose
You can definitely see your expertise in the work you write.The sector hopes for even more passionate writers like you who are notafraid to say how they believe. At all times go after yourheart.
Good post however , I was wondering if you could write a litte more on this topic? I’d be very grateful if you could elaborate a little bit more. Thanks!
Incredible all kinds of great material! dissertationwritingtop.com introduction college essay
omeprazole vs omeprazole magnesium nexium prilosec
reasons for ed: ed medicines – how to treat ed
Hi friends, good article and fastidious arguments commented atthis place, I am in fact enjoying by these.
You can certainly see your expertise within the work you write.The arena hopes for even more passionate writers like youwho aren’t afraid to mention how they believe. Always follow your heart.
Efficiently written information. It will be profitable to anybody who utilizes it, counting me proven supplement
Isu anda dapat anda perkuat dengan kabar sepakbola yang akan menolong tiap pecinta sepakbola akan prediksi perlombaan menarik yang akan membikin mereka lebih motivasi dalam bermain taruhan.
Very informative post.Much thanks again. Keep writing.
Thanks for your article on this web site. From my own personal experience, often times softening upwards a photograph could provide the photography with a dose of an inventive flare. Many times however, that soft cloud isn’t what precisely you had under consideration and can usually spoil a normally good snapshot, especially if you intend on enlarging it.
Great, thanks for sharing this post.Really looking forward to read more. Much obliged.
Major thankies for the blog post.Really thank you! Want more.
I truly appreciate this blog post.Really thank you! Awesome.
These agents are adjusted when evaluating ever changing in pill (8 to 28). Rwvytv spurym
ventolin generic – ventoingo.com ventolin purchase
There’s certainly a lot to learn about this topic.I like all of the points you’ve made.
ed tablets rx online india – new treatments for ed
Howdy! This post couldn’t be written any better! Reading through this post reminds me of my previous room mate! He always kept chatting about this. I will forward this write-up to him. Pretty sure he will have a good read. Many thanks for sharing!
п»їivermectin for sale ivermectin lice oral
One of the best directories in Israel I have been arcadia tel aviv escort
There is evidently a bundle to identify about this. I assume you made certain nice points in features also.
I really enjoy the article. Awesome.
Good day! Do you use Twitter? I’d like tofollow you if that would be ok. I’m absolutely enjoying your blog and look forwardto new posts.
That is a very good tip especially to those new to the blogosphere. Brief but very accurate info… Many thanks for sharing this one. A must read article!
Really enjoyed this blog post.Really thank you! Fantastic.
I loved your article.Thanks Again. Want more.
Thank you for sharing your info. I truly appreciate your efforts and I will be waiting for your next postthanks once again.Here is my blog Alpha Extracts CBD
I truly appreciate this blog.Much thanks again. Fantastic.
flagyl antibiotic keflex usages clindamycin cream
Im obliged for the article.Thanks Again.
Aw, this was a very nice post. In idea I want to put in writing like this moreover ? taking time and precise effort to make a very good article? however what can I say? I procrastinate alot and not at all appear to get something done.
copper falls apartments rentberry scam ico 30m$ raised apartments in st paul mn
Dead indited written content, Really enjoyed lookingthrough.My blog: term treatment process
ivermectin uk coronavirus: ivermectin – ivermectin pills
Hi, I do believe this is a great blog. I stumbledupon it 😉 I will return yet again since i have book marked it. Money and freedom is the greatest way to change, may you be rich and continue to guide other people.
As a Newbie, I am continuously browsing online for articles thatcan benefit me. Thank you
It as enormous that you are getting thoughts from this post as well as from our argument made at this time.
Thanks for shares.
Good information. Lucky me I ran across your blog by accident (stumbleupon). I’ve saved it for later!
Heya i’m for the first time here. I found this board and I find It really useful & it helped me out alot. I hope to give something back and aid others like you helped me.
Well I really enjoyed reading it. This subject offered by you is very useful for correct planning.
Having read this I believed it was extremely enlightening. I appreciate you finding the time and effort to put cara main togel online this content together. I once again find myself personally spending a lot of time both reading and leaving comments
I am an mom and I really like your writing!
I’d must test with you here. Which is not one thing I normally do! I get pleasure from studying a submit that may make individuals think. Also, thanks for allowing me to remark!
scoliosisAmazing! This blog looks exactly like my old one! It’s on a completely different topic but it has pretty much the same layout and design. Superb choice of colors!scoliosis
This paragraph is actually a fastidious one it assists new internet users, who are wishingfor blogging.my blog post i calibet (sg918kiss.com)
Highly energetic post, I enjoyed that a lot.Will there be a part 2?
It’s the best time to make some plans for the future and it is time to be happy. I have read this post and if I could I want to suggest you some interesting things or tips. Perhaps you could write next articles referring to this article. I want to read even more things about it!
A big thank you for your blog.Much thanks again. Much obliged.
What’s up, its fastidious piece of writing regarding media print, we all know media is a fantasticsource of facts.
Thanks for shares.
This is a very good tip especially to those new to the blogosphere. Short but very precise info… Appreciate your sharing this one. A must read post!
I blog often and I really thank you for your information. This article has really peaked my interest.
I am going to take a note of your website and
keep checking for new details about once a week.
I subscribed to your RSS feed as well.
Hey, thanks for the blog post.Really looking forward to read more.
ivermectin for chickens dosage ivermectin toxicity in cats treatment
Aw, this was an incredibly nice post. Finding the time and actual effort to make a great article… but what can I say… I hesitate a lot and never manage to get anything done.
This is one awesome blog.Much thanks again. Keep writing.
Its like you read my thoughts! You appear to understand a lot about this, such as you wrote the book in it or something. I feel that you can do with some to pressure the message home a little bit, however other than that, this is excellent blog. An excellent read. I’ll definitely be back.
Muchos Gracias for your post.Really looking forward to read more. Much obliged.
When someone writes an paragraph he/she keeps the idea of a user in his/her mind that howa user can know it. So that’s why this post is perfect.Thanks!
Hey, thanks for the blog post.Thanks Again. Really Cool.
Rx care pharmacy orlando fl xlnpharmacy.com Diovan
Thanks for shares.
There is certainly a lot to learn about this subject. I really like all of the points you made.
Really informative article post.Much thanks again. Awesome.
Great blog article.Thanks Again. Want more.
Thank you for the good writeup. It in fact was a amusement account it. Look advanced to more added agreeable from you! However, how can we communicate?
lisinopril is used for lisinopril adverse reactions
I cannot thank you enough for the article.Thanks Again. Fantastic.
Say, you got a nice blog post.Really looking forward to read more. Cool.
Hi there! I just wanted to ask if you ever have any problems with hackers?My last blog (wordpress) was hacked and I ended up losing a few monthsof hard work due to no backup. Do you have any solutionsto prevent hackers?
Thanks for share.
Looking forward to reading more. Great post.Really thank you! Fantastic.
Wow! This blog looks just like my old one! It’s on aentirely different subject but it has pretty much the same layout and design. Wonderful choice of colors!
I am not sure where you are getting your info, but good topic. I needs to spend some time learning much more or understanding more. Thanks for wonderful info I was looking for this info for my mission.
Thanks-a-mundo for the blog article.Thanks Again.
I blog often and I truly appreciate your content.야설Feel free to visit my blog :야설
Thank you for shares.
I need to to thank you for this fantastic read!!I absolutely enjoyed every little bit of it.I have got you bookmarked to look at new things you post…
These are really impressive ideas in regarding blogging.You have touched some good factors here. Any way keep up wrinting.
It’s actually very complex in this active life to listen news on Television,thus I simply use internet for that reason, andtake the newest information.
I get pleasure from, lead to I discoveredjust what I was taking a look for. You’ve ended my 4 day lengthy hunt!God Bless you man. Have a great day. Bye
delta 8 cartridge vs delta 10
Really appreciate you sharing this blog article.Much thanks again. Awesome.
Thanks for shares.
Hi to every one, because I am really keen of reading this blog’s post to be updated regularly.It contains fastidious information.Also visit my blog post … muscle tone
Therefore that as why this piece of writing is perfect. Thanks!
3 8 delta grill
Normally I don’t read article on blogs, but I would like to say that this write-up very forced me to try and do so! Your writing style has been amazed me. Thanks, quite nice post.
One thing I want to touch upon is that weightloss system fast can be performed by the right diet and exercise. Ones size not just affects appearance, but also the actual quality of life. Self-esteem, despression symptoms, health risks, and also physical capabilities are damaged in extra weight. It is possible to do everything right and at the same time having a gain. In such a circumstance, a problem may be the perpetrator. While excessive food but not enough body exercise are usually at fault, common medical ailments and key prescriptions could greatly enhance size. Thanks a bunch for your post right here.
I am so grateful for your post.Much thanks again. Really Great.
Thanks for shares.
ivermectin lice – ivermectin online pharmacy ivermectin uk coronavirus
Hi! Do you know if they make any plugins to help with SEO? I’m trying to get my blog to rank for some targeted keywords but I’m not seeing very good gains. If you know of any please share. Appreciate it!
Thanks for any other informative blog. Where else could I get that type of information written in such an idealmeans? I’ve a project that I’m simply nowrunning on, and I’ve been at the look out for such information.
whoah this blog is excellent i really like studying your articles.Keep up the great work! You already know, many persons aresearching round for this info, you could help them greatly.
my perfect resume login writing a cover letter for a job resume with accent
There may be noticeably a bundle to learn about this. I assume you made sure good points in options also.
It’s best to take part in a contest for one of the best blogs on the web. I will advocate this website!
yes lol okay
Major thanks for the article post.Really thank you! Awesome.
I will right away seize your rss as I can not in finding your e-mail subscription hyperlink or e-newsletter service. Do you’ve any? Kindly allow me recognize so that I may subscribe. Thanks.
Really appreciate you sharing this article post.Really looking forward to read more. Much obliged.
I really liked your article post.Really looking forward to read more. Fantastic.
Hello your website is so good.
Awesome post.Really looking forward to read more. Really Cool.
I truly appreciate this article.Really thank you! Really Great.
Mauris eget feugiat eros, vitae convallis massa.
Looking forward to reading more. Great blog.Really thank you! Really Cool.
Very good blog.Thanks Again. Really Great.
Very neat blog.Much thanks again. Great.
Enjoyed every bit of your article post.Really thank you! Cool.
Thank you for your blog article. Great.
Thanks for the auspicious writeup. It in fact was a amusement account it. Look advanced to far added agreeable from you! However, how could we communicate?
I love reading an article that can make men and women think.Also, thank you for allowing me to comment!
I appreciate you sharing this article post. Fantastic.
Can I just say what a reduction to search out somebody who truly knows what theyre talking about on the internet. You definitely know how you can carry a problem to light and make it important. Extra individuals must learn this and understand this aspect of the story. I cant believe youre not more fashionable since you positively have the gift.
Thanks for the blog article.Really looking forward to read more. Much obliged.
escitalopram oxalate patient teaching escitalopram what is a lethal dose
Im thankful for the article post.Much thanks again.
Hello, you used to write excellent, but the last several posts have been kinda boring?I miss your great writings. Past few posts are just a bit out of track!come on!
Major thanks for the post.
Hey! I simply want to give an enormous thumbs up for the good data you have got right here on this post. I shall be coming again to your blog for extra soon.
I will right away seize your rss feed as I can not tofind your e-mail subscription link or newsletter service.Do you have any? Please permit me understand so that I may subscribe.Thanks.
Currently it appears like Drupal is the preferred blogging platform outthere right now. (from what I’ve read) Is that whatyou are using on your blog?Also visit my blog – shihan.com.ru
Thanks so much for the article.Really looking forward to read more. Keep writing.
Any goals scored in subsequent play-off games do not count for betting purposes.
Thanks for sharing, this is a fantastic blog.Much thanks again. Much obliged.
I have not checked in here for some time as I thought it was getting boring, but the last few posts are good quality so I guess I¦ll add you back to my daily bloglist. You deserve it my friend 🙂
tak czyste emocje w ludziach. miło widzieć takichludzi
I like the valuable info you provide in your articles. I will bookmark your blog and check again here frequently.I am quite certain I’ll learn a lot of new stuff right here!Best of luck for the next!
My brother recommended I might like this blog. He was entirely right. This post truly made my day. You cann’t imagine just how much time I had spent for this info! Thanks!
Hi there, everything is going perfectly here and ofcourse every one is sharing data, that’s actually excellent, keepup writing.
Thank you very much.
Really enjoyed this blog post.Really thank you! Awesome.
Very nice post. I just stumbled upon your wwblog and wished to say that I’vetruly enjoyed browszing ypur blog posts. In any case Iwill be subscribing to your feed and I hope you write again very soon!
Hey! Do you use Twitter? I’d like to follow you if that would be okay. I’m undoubtedly enjoying your blog and look forward to new updates.
Oh my goodness! Incredible article dude! Thanks, However Iam experiencing issues with your RSS. I don’t know why I cannot join it.Is there anybody else getting similar RSS issues?Anyone who knows the solution can you kindly respond?Thanks!!
I have read so many posts regarding the blogger lovershowever this post is genuinely a good paragraph,keep it up.
Thanks for shares.
Greetings! Very helpful advice within this post! It’s thelittle changes that make the greatest changes. Many thanks for sharing!
I have read so many articles or reviews concerningthe blogger lovers but this article is really a fastidious article, keep it up.
Fantastic goods from you, man. I’ve understand your stuff previous to and you are just extremely fantastic. I really like what you have acquired here, certainly like what you’re saying and the way in which you say it. You make it enjoyable and you still take care of to keep it sensible. I cant wait to read much more from you. This is really a tremendous website.
Major thankies for the article.Really thank you! Will read on…
Good blog you have got here.. Itís difficult to find high quality writing like yours nowadays. I honestly appreciate individuals like you! Take care!!
It’s an remarkable article in support of all the online users; they will take benefit from it I am sure.
Great, thanks for sharing this article.Much thanks again. Much obliged.
Really appreciate you sharing this article. Really Cool.
Thanks for share.
Thanks. I appreciate it! armodafinil vs modafinil
It is truly a nice and useful piece of info. I am happy that you simply shared this useful information with us. Please keep us up to date like this. Thanks for sharing.
quetiapine for insomnia is seroquel a controlled substance
I am not sure where you are getting your info, but goodtopic. I needs to spend some time learning much more orunderstanding more. Thanks for magnificent information I was looking forthis info for my mission.
Very interesting information!Perfect just what I was looking for! Fear not that thy life shall come to an end, but rather fear that it shall never have a beginning. by John Henry Cardinal Newman.
This is a good tip especially to those fresh to the blogosphere. Simple but very precise informationÖ Thank you for sharing this one. A must read article!
Nice post. I was checking continuously this blog and I’m impressed! Very helpful info specially the last part 🙂 I care for such information much. I was looking for this particular information for a very long time. Thank you and good luck.
medication for ed dysfunction lipitor for sale atorvastatin lipitor
Right now it seems like Drupal is the top blogging platform out there rightnow. (from what I’ve read) Is that what you are using on your blog?
Another important area is that if you are an older person, travel insurance pertaining to pensioners is something you ought to really consider. The more mature you are, the more at risk you will be for allowing something bad happen to you while in another country. If you are not really covered by many comprehensive insurance cover, you could have several serious problems. Thanks for revealing your hints on this blog.
Major thankies for the article.Really looking forward to read more. Keep writing.
I haven抰 checked in here for some time as I thought it was getting boring, but the last few posts are great quality so I guess I will add you back to my daily bloglist. You deserve it my friend 🙂
erectile dysfunction natural remedies legitimate canadian pharmaceuticals online – top ed pills
Muchos Gracias for your post.Thanks Again. Will read on…
Excellent post. I was checking constantly this
Extremely useful information specially the last part
care for such info much. I was seeking this particular information for a very long
time. Thank you
hydroxychloroquine de 6silver fixed joint receive
An intriguing discussion is worth comment. I believe that you ought to write more on this issue, it might not be a taboo subject but typically people do not speak about these issues. To the next! Best wishes!!
Thanks-a-mundo for the article. Want more.
trimethoprim antibiotic trimoxazole tablets ip
I value the article post. Will read on…
Three years celebrex and cancer The government gave him land to expand his business and now he’s probably the largest private sector employer in Enugu state
ivermectin 50 stromectol usa – order stromectol
I like the manner you have concluded this post …
hydroxychloroquine coronavirus chloroquine dosage hydroxide chloroquine
One more thing. In my opinion that there are several travel insurance websites of respectable companies that permit you to enter holiday details and acquire you the rates. You can also purchase the international holiday insurance policy on-line by using the credit card. Everything you need to do is usually to enter your own travel information and you can begin to see the plans side-by-side. Only find the package that suits your budget and needs after which use your bank credit card to buy it. Travel insurance on the web is a good way to begin looking for a respected company with regard to international travel insurance. Thanks for discussing your ideas.
lithium and hydrochlorothiazide lisinopril davis pdf
It’s impressive that you are getting thoughts from this post aswell as from our argument made here.
I’m a blog crazed person and i love to read cool blog like yours.*:,::
Ходячие мертвецы 1,2,3,4,5,6,7,8,9,10,11 сезон Ходячие мертвецы 11 сезон Ходячие мертвецы. The Walking Dead. 11 сезон 11 серия.
I’m not positive where you are getting your info,but great topic. I must spend some time studying much more orunderstanding more. Thank you for fantastic info I was searching for this info for my mission.
amoxicillin for fish amoxicillin dosage for strep throat amoxicillin interactions
Best view i have ever seen !
Nice post. I was checking constantly this blog and I am impressed! Very helpful information specially the last part 🙂 I care for such info a lot. I was seeking this particular info for a long time. Thank you and good luck.
I really liked your post.Thanks Again. Want more.
Spot on with this write-up, I actually think this web site wants way more consideration. I’ll in all probability be again to read way more, thanks for that info.
Major thankies for the article post.Really thank you! Awesome.
This really answered my drawback, thanks!
This post gives clear idea in support of the new viewers of blogging, that trulyhow to do blogging.
Greetings! Quite useful information With this unique short article! It’s the very little modifications that make the most vital adjustments. Many thanks for sharing!
Very descriptive blog, I enjoyed that bit.Will there be a part 2?
F*ckin awesome things here. Im very glad to see your post. Thanks a lot and i’m looking forward to contact you. Will you kindly drop me a mail?
Really appreciate you sharing this blog article.Much thanks again. Much obliged.
Good day! I simply would like to give you a big thumbs up for your great information you’ve got here on this post. I am coming back to your blog for more soon.
I wanted to thank you for this very good read!! I absolutely loved every bit of it. I have you bookmarked to check out new stuff you post…
Awesome blog article.Really looking forward to read more. Really Cool.
It’s an awesome piece of writing in support of all the internetusers; they will obtain advantage from it Iam sure.
Thanks for the article. Awesome.
fantastic issues altogether, you just won a logonew reader. What could you suggest about your publish that you just made afew days ago? Any certain?
Thanks for sharing, this is a fantastic post.Really thank you! Much obliged.
I am not really fantastic with English but I find this real leisurely to read .
Paragraph writing is also a fun, if you be acquainted with afterwardyou can write if not it is difficult to write.
Best view i have ever seen !
can i bring delta 8 thc on a plane
Chirurgie Tunisie
[…]we prefer to honor several other online sites on the internet, even if they arent linked to us, by linking to them. Below are some webpages really worth checking out[…]
I love the manner you have actually ended this post …
A round of applause for your article post.Really thank you! Great.
Hi there mates, its fantastic piece of writing about teachingand completely explained, keep it up all the time.
National Chi Nan University
[…]very handful of web-sites that transpire to become comprehensive beneath, from our point of view are undoubtedly effectively really worth checking out[…]
I needed to thank you for this excellent read!! I certainly loved every bit of it. I have got you saved as a favorite to check out new stuff you postÖ
minocin capsules clindamycin genericnoroxin generic
wonderful issues altogether, you simply gained a new reader. What would you suggest about your post that you just made some days in the past? Any positive?
compared. If you’re a true internet, you can watch movies,
Great post. Really Cool.
There is certainly a lot to know about this subject. I love all of the points you have made.
Im thankful for the post.Thanks Again. Keep writing.
Hi! I’m a British Single Mom living in Los Angeles, I found your article to be soooo Usefull!
Thanks for one’s marvelous posting! I truly enjoyed reading it, you can be a great author.I will remember to bookmark your blog and may come back later on. I want to encourage you continue your great posts, have a nice morning!
Hey There. I found your blog using msn. This is an extremely well written article.I’ll make sure to bookmark it and return to read more of your useful information. Thanks for thepost. I’ll certainly return.
Heya i’m for the first time here. I found this board andI find It truly useful & it helped me out a lot.I hope to give something back and aid others like you helped me.
Very informative blog post.Really thank you! Great.
Thank you for your article post. Want more.
Enjoyed every bit of your blog post.Really thank you! Great.
Appreciation for seriously staying thoughtful and also for choosing on certain great guides most of the people really want to be aware of.
ed trial pack – ways to treat erectile dysfunction dysfunction erectile
I appreciate you sharing this blog.Much thanks again. Much obliged.
I signed up to your blog RSS. Will you post more about this subject?
Thanks for the article post.Really thank you! Really Great.
I think this is a real great post.Really thank you! Keep writing.
Hi, after reading this amazing post i am alsocheerful to share my familiarity here with friends.
I enjoy reading a post that will make people think. Also, thanks for allowing for me to comment!
the proper style for an argumentative essay isconclusion essayessay introduction
I will immediately seize your rss feed as Ican’t in finding your e-mail subscription hyperlink or newsletter service.Do you’ve any? Kindly allow me understand so that I may subscribe.Thanks.
I抣l right away snatch your rss as I can not find your e-mail subscription link or newsletter service. Do you’ve any? Kindly permit me know in order that I could subscribe. Thanks.
Enjoyed every bit of your blog article. Much obliged.
I cannot thank you enough for the blog.Really thank you! Awesome.
fake rolex watches has been working for developing the greatest the different parts of the watch..
Thanks again for the article post.Thanks Again. Fantastic.
Looking forward to reading more. Great article post. Much obliged.
Usually I do not read article on blogs, however I wish to say that this write-up very compelled me to take a look at and do it! Your writing taste has been surprised me. Thanks, quite nice article.
Hi there, this weekend is fastidious in support of me,because this moment i am reading this enormous educational articlehere at my house.
bluumlab delta 8
I like the valuable info you provide in your articles. I’ll bookmark your blog and check again here frequently. I’m quite sure I will learn lots of new stuff right here! Good luck for the next!
You really make it seem so easy with your presentation but I find this topic to be actually something which I think I would never understand. It seems too complicated and extremely broad for me. I am looking forward for your next post, I will try to get the hang of it!
can dogs have delta 8 thc
I like the helpful information you provide in your articles. I?ll bookmark your blog and check again here frequently. I am quite sure I?ll learn lots of new stuff right here! Good luck for the next!
Im obliged for the post.Really thank you! Awesome.
red erectile dysfunction pill: pills for erectile dysfunction best ed pills
modafinil side effects modafinil weight loss
Wow, great blog.Much thanks again. Will read on…
Usually I do not learn post on blogs, however I wish to say that this write-up very pressured me to take a look at and do so! Your writing style has been surprised me. Thank you, very great article.
Thank you for your blog article.Really thank you! Cool.
Thanks , I have recently been searching for info about this topic for ages and yours is the best I’vefound out till now. But, what concerning the bottom line? Are you sure concerning the supply?
Good day! I could have sworn I’ve been to this blog before but after reading through some of the post I realized it’s new to me. Anyways, I’m definitely glad I found it and I’ll be book-marking and checking back often!
Really enjoyed this post.Really looking forward to read more. Much obliged.
bed bugs bites says:This is a topic close to my heart cheers, where are your contact details though?Reply 11/17/2021 at 3:52 pm
Very neat blog.Really thank you! Want more.
meloxicam medication daily meloxicam vs ibuprofen kidney meloxicam vs ibuprofen dogs
Hey, thanks for the article post. Keep writing.
Is anyone here in a position to recommend Thongs for Men? Cheers xox
These are really great ideas in about blogging.You have touched some good things here. Any way keep up wrinting.
Really enjoyed this post.Much thanks again. Keep writing.
Hello, yup this post is genuinely fastidious and I have learned lot of things from it regarding blogging.thanks.
Say, you got a nice blog article.
There’s certainly a lot to learn about this topic. I like all of the points you’ve made.
Lovely just what I was looking for.Thanks to the author for taking his time on this one.
weaning off duloxetine cymbalta side effects how long do they last
I cannot thank you enough for the article post. Much obliged.
Enjoyed every bit of your blog post.Thanks Again. Fantastic.
erectafil 20 side effects tadalafil brands maxim peptide tadalafil review
Awesome things here. I’m very happy to peer yourarticle. Thank you so much and I am taking a look ahead to contact you.Will you please drop me a mail?
I really enjoy the post.Thanks Again. Want more.
Great, thanks for sharing this article.Really thank you! Awesome.
Thanks for a marvelous posting! I quite enjoyed readingit, you happen to be a great author. I will make sure to bookmark your blog and willcome back someday. I want to encourage one to continue your great writing, have a niceday!
I have seen a lot of useful things on your site about pc’s. However, I’ve got the thoughts and opinions that netbooks are still not nearly powerful adequately to be a good selection if you typically do projects that require plenty of power, for instance video modifying. But for world-wide-web surfing, microsoft word processing, and quite a few other frequent computer work they are okay, provided you cannot mind the little screen size. Thank you sharing your ideas.
I’ll right away take hold of your rss feed as I can not to find your email subscription hyperlink or e-newsletter service. Do you’ve any? Please allow me recognise so that I may subscribe. Thanks.
Fantastic post.
Hello! I could have sworn I’ve been to this blog before but after browsing through some of the post I realized it’s new to me. Anyways, I’m definitely happy I found it and I’ll be book-marking and checking back frequently!
That is a great tip particularly to those fresh to the blogosphere. Simple but very precise info Appreciate your sharing this one. A must read article!
Awesome blog.Much thanks again.
Truly a good deal of superb material!hire essay writer good thesis statement help with writing a thesis
I do consider all the ideas you have presented in your post. They are really convincing and can certainly work. Still, the posts are too brief for newbies. Could you please prolong them a bit from subsequent time? Thanks for the post.
Very good blog article.Really thank you! Really Cool.
I like the valuable info you provide in your articles. I will bookmark your blog and check again here frequently. I am moderately sure I will learn many new stuff proper right here! Good luck for the next!
omnicef pdr azithromycin sun cephalexin pharmacology
Enjoyed looking through this, very good stuff, thankyou.
Thanks for the blog article.Much thanks again. Will read on…
There’s noticeably a bundle to know about this. I assume you made certain nice factors in features also.
medicine erectile dysfunction generic ed pills – over the counter erectile dysfunction pills
I read this paragraph fully regarding the resemblance of most up-to-date and previous technologies, it’s remarkable article.
Woh I enjoy your posts, saved to fav!Here is my blog post :: Ignite CBD Oil Reviews
Thanks for the blog.Much thanks again. Fantastic.
is plaquenil an immunosuppressant plaquenil reviews
Major thankies for the article post.Much thanks again. Awesome.
You have remarked very interesting points! ps nice site.
Wow! This can be one particular of the most useful blogs We’ve ever arrive across on this subject. Basically Great. I’m also an expert in this topic therefore I can understand your effort.
Thanks for another fantastic post. The place else may anyone get that type of information in such a perfect method of writing? I have a presentation next week, and I am on the look for such info.
I read this article fully regarding the comparison of latest and preceding technologies, it’s awesome article.
I really liked your blog article. Cool.
I do agree with all of the ideas you’ve offered on your post. They’re really convincing and can certainly work. Nonetheless, the posts are too brief for newbies. May you please extend them a bit from next time? Thanks for the post.
Pretty! This has been a really wonderful article. Thank you for supplying this info.
It’s laborious to search out knowledgeable folks on this subject, however you sound like you know what you’re speaking about! Thanks
This is one awesome article.Really looking forward to read more. Really Great.
Looking forward to reading more. Great article. Cool.
It’s hard to find knowledgeable people for this topic, but you sound like you know what you’re talkingabout! Thanks
Hi, I do believe this is an excellent blog. I stumbledupon it 😉 I will return yet again since I book-marked it. Money and freedom is the greatest way to change, may you be rich and continue to guide other people.
Hey, thanks for the blog post.Really thank you! Really Cool.
I really like your writing style, fantastic info , appreciate it for putting up : D.
Someone essentially help to make significantly posts I might state. This is the very first time I frequented your website page and to this point? I amazed with the analysis you made to create this actual publish extraordinary. Excellent activity!
What’s up, its fastidious paragraph on the topic of mediaprint, we all understand media is a impressive source of data.
What a data of un-ambiguity and preserveness of precious experience regardxing unpredictedemotions.Ꮇy homepag :: jasa seo judi
Thanks for shares
Fantastic article.Thanks Again. Awesome.
You made some first rate points there. I looked on the web for the problem and located most people will associate with along with your website.
Wonderful story, reckoned we could combine a few unrelated information, nonetheless actually really worth taking a search, whoa did a single find out about Mid East has got additional problerms too
Good day! I could have sworn I’ve been to this blog before butafter browsing through some of the post I realized it’s new to me.Nonetheless, I’m definitely happy I found it andI’ll be book-marking and checking back often!
I do accept as true with all the ideas you have introduced in your post. They’re very convincing and will certainly work. Nonetheless, the posts are very quick for starters. Could you please extend them a bit from next time? Thanks for the post.
Really enjoyed this blog article.Really thank you! Want more.
I don’t even understand how I ended up right here, however I assumed this postwas great. I don’t recognize who you might be however definitely youare going to a well-known blogger if you aren’t already.Cheers!
purchase clomid online clomid – online clomid
Loved this blog post. I’ll return to see more sometime. Have an excellent day.
After study a few of the weblog posts in your website now, and I really like your method of blogging. I bookmarked it to my bookmark website listing and shall be checking again soon. Pls check out my site as nicely and let me know what you think.
I wanted to thank you for this wonderful read!! I definitely loved every bit of it. I have got you book marked to look at new things you postÖ
This is one awesome blog article.Really thank you! Want more.
Hello! Do you know if they make any plugins to assist with Search Engine Optimization? I’m trying toget my blog to rank for some targeted keywords but I’mnot seeing very good gains. If you know of any please share.Thanks!
Thanks for another wonderful post. The place else could anybody get that kind of information in such aperfect way of writing? I have a presentation next week, andI am on the look for such info.
Dr. Robert Frank
[…]here are some links to internet sites that we link to because we assume they are really worth visiting[…]
Thanks for share
Regards, Valuable stuff!how to succeed in college essay college essays academic ghostwriting services
Thanks for any other informative blog. The place else may I get that type of info written in such an ideal manner? I have a challenge that I’m just now working on, and I have been on the look out for such information.
La narrativa de john lennon \”Hey Bulldog\” Bow-Wow
There is visibly a package to know about this. I presume you made sure nice points in functions likewise.
Hi, this weekend is pleasant in favor of me, for thereason that this point in time i am reading this great educational article here at my home.
hair clip kit Theodore Rooney hairstyles jude Reese Emerson hair joy Shayla Moreno
I am now not positive the place you are getting your information, however great topic. I must spend some time studying more or understanding more. Thanks for fantastic info I used to be looking for this info for my mission.
State management sciences
[…]that is the finish of this post. Right here you will locate some web sites that we assume youll enjoy, just click the links over[…]
Thanks a lot for the article.Much thanks again. Really Great.
ยอมรับว่ากระแสพนันออนไลน์แรงมาก ทีแรกๆผมไม่กล้าเล่นนะครับ หากแม้ตั้งใจจริงๆถึงพวกเราไม่เล่นพนันออนไลน์พวกเราก็ไปเล่นแบบอื่นอยู่ดี สู้เล่นแบบไม่เสี่ยงดียิ่งกว่า พอเพียงมาทดลองเล่นก็ไม่ได้น่าสยองเหมือนอย่างที่คิดครับ แถมผมได้กำไรมาเยอะแยะเลย อิอิ
What can you do with economics and political science
[…]please check out the internet sites we stick to, such as this one particular, because it represents our picks from the web[…]
nolvadex pct nolvadex – tamoxifen medication
Thanks for share.
You made the point. good quotes for college essays writing services dissertation topic
كم نسبة القبول في كلية الصيدلة
[…]always a massive fan of linking to bloggers that I really like but do not get a great deal of link appreciate from[…]
I blog quite often and I really appreciate your content. The article has truly peaked my interest. I’m going to take a note of your blog and keep checking for new details about once per week. I opted in for your Feed too.
There is apparently a bunch to realize about this. I assume you made certain good points in features also.
Can I just say what a relief to find somebody who actually knows what theyre talking about on the internet. You positively know tips on how to deliver an issue to gentle and make it important. More folks must read this and perceive this facet of the story. I cant imagine youre no more in style since you undoubtedly have the gift.
Hardness Tester
[…]one of our guests a short while ago advised the following website[…]
Hi, i feel that i saw you visited my site thus i came to ?go back the desire?.I’m trying to to find things to improve my web site!I guess its adequate to make use of a few of your ideas!!
I am no longer sure where you are getting your info, but great topic.I must spend a while studying much more or understanding more.Thanks for fantastic info I was looking forthis information for my mission.
Orthodontics
[…]Wonderful story, reckoned we could combine a couple of unrelated data, nonetheless really really worth taking a appear, whoa did one learn about Mid East has got far more problerms too […]
Very good written article. It will be helpful to anybody who employess it, including me. Keep up the good work – looking forward to more posts.
This is a topic that as close to my heart Best wishes! Exactly where are your contact details though?
This is one awesome blog article.Much thanks again.
تخصصات طب الأسنان بعد البكالوريوس
[…]we prefer to honor many other world wide web websites around the internet, even when they arent linked to us, by linking to them. Under are some webpages really worth checking out[…]
Thank you.
Thank you for your blog.Much thanks again. Really Great.
ما هي تخصصات كلية الهندسة
[…]one of our guests not long ago encouraged the following website[…]
I’d should check with you here. Which is not one thing I usually do! I get pleasure from reading a post that may make folks think. Additionally, thanks for permitting me to comment!
إعداد مهندسين شباب مؤهلين للعمل
[…]we came across a cool site which you could get pleasure from. Take a appear in the event you want[…]
ivermectin fungal infection ivermectin side effects in humans
I cannot thank you enough for the blog post.Really looking forward to read more. Want more.
engineering curriculum
[…]the time to study or visit the content or sites we’ve linked to below the[…]
Having read this I believed it was ingratiating informative I appreciate you taking the time and energy to put this content together.
الانسحاب والإضافة
[…]we prefer to honor a lot of other web websites on the web, even though they arent linked to us, by linking to them. Under are some webpages worth checking out[…]
We are the Worlds Largest Cannabis Seedbank with over 100,000 marijuana seed strains in stock.
Computer Science Education
[…]Every when in a although we decide on blogs that we study. Listed beneath would be the most recent websites that we choose […]
Bachelor’s Degree in Software Engineering
[…]below youll uncover the link to some websites that we feel you ought to visit[…]
I am so grateful for your article.Really looking forward to read more. Really Cool.
Hello, all the time i used to check blog posts here in the early hoursin the morning, as i enjoy to find out more and more.
Thanks-a-mundo for the blog.Much thanks again. Want more.
Faculty of Economics and Political Science
[…]although sites we backlink to beneath are considerably not related to ours, we really feel they’re actually really worth a go via, so possess a look[…]
Say, you got a nice blog.Really looking forward to read more. Fantastic.
I would also like to add that when you do not already have got an insurance policy or else you do not remain in any group insurance, chances are you’ll well reap the benefits of seeking the aid of a health broker. Self-employed or individuals with medical conditions typically seek the help of any health insurance dealer. Thanks for your post.
دورات زراعة الأسنان
[…]Here is a good Blog You might Discover Interesting that we Encourage You[…]
Microbiology and Immunology
[…]Sites of interest we have a link to[…]
I blog often and I seriously thank you for your information. This great article has really peaked my interest. I am going to take a note of your blog and keep checking for new details about once a week. I subscribed to your Feed too.
كلية طب الأسنان
[…]we came across a cool web site that you just could enjoy. Take a appear when you want[…]
Pharmacy Practice and Clinical Pharmacy
[…]check beneath, are some completely unrelated sites to ours, even so, they may be most trustworthy sources that we use[…]
متطلبات كشف الدرجات لجامعة المستقبل
[…]Wonderful story, reckoned we could combine a few unrelated data, nevertheless definitely really worth taking a look, whoa did a single study about Mid East has got additional problerms too […]
One thing I’d like to say is the fact before buying more laptop memory, consider the machine directly into which it could well be installed. Should the machine is usually running Windows XP, for instance, the particular memory limit is 3.25GB. Applying a lot more than this would easily constitute any waste. Make sure that one’s mother board can handle an upgrade volume, as well. Good blog post.
Thanks for shares
تحويل قبول الطلاب إلى جامعة المستقبل
[…]please stop by the sites we follow, including this 1, as it represents our picks in the web[…]
accutane side effects accutane side effects
Hi, this weekend is nice for me, as this point in time i am reading this great educational article here at my house.
Aw, this was a very nice post. Finding the time and actual effort to produce a really good articleÖ but what can I sayÖ I procrastinate a lot and never manage to get nearly anything done.
Really appreciate you sharing this blog article.Really looking forward to read more. Cool.
ForsythSoftware.com provides rapid quick-starts for Salesforce.com CRM. Be it Sales Cloud, Service Cloud or Marketing Cloud, get quality support from our certified professionals. Contact us at [email protected] and ask for a no obligation system evaluation today.
Thanks for shares
quetiapine for insomnia is seroquel a controlled substance
Really appreciate you sharing this article post. Keep writing.
I have reazd so many content about the blogger lovers but this paragraph is genuinely agpod paragraph, keep it up.
order myambutol nitrofurantoin capsulesorder ceftin
I think you have noted some very interesting details, appreciate it for the post. Shaylynn Willard Conover Agathe Clim Bissell
Thanks for another informative blog. Where else could I get that type of info written in such an ideal way? I’ve a project that I am just now working on, and I have been on the look out for such information.
It is best to participate in a contest for one of the best blogs on the web. I will suggest this website!
I really enjoy the post.Thanks Again. Cool.
Thanks for your content. One other thing is that if you are advertising your property alone, one of the issues you need to be mindful of upfront is how to deal with house inspection records. As a FSBO home owner, the key to successfully transferring your property in addition to saving money upon real estate agent commission rates is information. The more you know, the smoother your property sales effort might be. One area where by this is particularly crucial is reports.
You should participate in a contest for among the finest blogs on the web. I will advocate this website!
I really liked your blog. Awesome.
Somebody essentially assist to make severely posts I might state. This is the very first time I frequented your website page and up to now? I amazed with the research you made to make this particular publish incredible. Magnificent job!
Muchos Gracias for your article post.Much thanks again. Awesome.
Great article post.Really looking forward to read more. Fantastic.
I truly appreciate this article post.Thanks Again. Cool.
The MRI excised. slot machines Rwwepx oqacde
Thanks a lot for the post.Really thank you! Cool.
Hi there! Would you mind if I share your blog with my facebook group? There’s a lot of people that I think would really appreciate your content. Please let me know. Thank you
yes sir
wow, awesome article.Much thanks again. Great.
Aw, this was an incredibly nice post. Finding the time and actual effort to create a top notch article… but what can I say… I put things off a whole lot and never manage to get nearly anything done.
each time i used to read smaller articles which aswell clear their motive, and that is also happening with this post which I am reading at thisplace.
I?d must check with you here. Which is not something I normally do! I get pleasure from studying a publish that can make people think. Additionally, thanks for allowing me to remark!
valtrex online pharmacy india purchase valtrex – over the counter valtrex
HAVE A FREE CONSULTATION NOW
Best Google News Blog
I do agree with all the concepts you’ve presented for your post. They’re really convincing and will definitely work. Nonetheless, the posts are too brief for beginners. Could you please extend them a little from next time? Thank you for the post.
I don?t even know how I ended up here, but I thought this post was great. I don’t know who you are but definitely you’re going to a famous blogger if you are not already 😉 Cheers!
Thanks for the various tips shared on this website. I have observed that many insurance agencies offer buyers generous special discounts if they opt to insure many cars with them. A significant quantity of households own several automobiles these days, particularly those with more aged teenage young children still residing at home, as well as savings with policies can certainly soon mount up. So it pays to look for a good deal.
Shit website
Looking forward to reading more. Great blog.Really looking forward to read more. Fantastic.
Thanks for the concepts you have discussed here. In addition, I believe there are many factors that will keep your insurance premium down. One is, to consider buying cars that are inside the good set of car insurance companies. Cars which can be expensive are usually more at risk of being robbed. Aside from that insurance is also in accordance with the value of your car or truck, so the more expensive it is, then higher this premium you only pay.
Someone essentially help to make seriously articles I would state. This is the very first time I frequented your web page and thus far? I amazed with the research you made to create this particular publish amazing. Fantastic job!
Thank you for your blog article.Really thank you! Keep writing.
Demek paramı alır banlarsınız beni
In accordance with my observation, after a foreclosed home is bought at a sale, it is common for that borrower to be able to still have the remaining unpaid debt on the mortgage. There are many loan providers who attempt to have all expenses and liens paid off by the next buyer. However, depending on certain programs, polices, and state laws there may be many loans which aren’t easily resolved through the switch of loans. Therefore, the responsibility still falls on the lender that has got his or her property foreclosed on. Thank you sharing your ideas on this blog.
Yet another issue is that video games are normally serious in nature with the primary focus on understanding rather than entertainment. Although, there’s an entertainment factor to keep your kids engaged, just about every game is usually designed to work towards a specific group of skills or area, such as numbers or science. Thanks for your article.
ivermectin coronavirus ivermectin over counter
Appreciate you sharing, great blog article.Thanks Again.
Thanks for your tips. One thing I’ve noticed is banks and also financial institutions know the spending behaviors of consumers while also understand that many people max out their real credit cards around the trips. They properly take advantage of this real fact and commence flooding the inbox in addition to snail-mail box together with hundreds of 0 APR credit cards offers just after the holiday season finishes. Knowing that when you are like 98 of all American public, you’ll get at the one opportunity to consolidate personal credit card debt and switch balances for 0 interest rate credit cards.
Say, you got a nice blog.Really thank you! Really Cool.
Howdy! I’m at work browsing your blog from my new iphone! Just wanted to say I love reading your blog and look forward to all your posts! Carry on the fantastic work!
Xoilac Tv Thẳng đá Bóng cá mực hầm mậtĐội tuyển nước Việt Nam chỉ cần thiết một kết trái hòa có bàn thắng để lần loại hai góp mặt tại World Cup futsal. Nhưng, nhằm thực hiện được điều này
I appreciate you sharing this blog article.Much thanks again. Fantastic.
Dead indited subject matter, Really enjoyedreading through.
whoah this blog is magnificent i like studying your articles. Stay up the good paintings! You already know, lots of people are searching around for this information, you could help them greatly.
Диапазон частот: от 0,15 до 30 МГц
Major thankies for the article post.Much thanks again. Will read on…
what time of day should i take amlodipine why is amlodipine banned in canada
This actually answered my drawback, thank you!
Best flight i have ever seen !
I appreciate, cause I found exactly what I was looking for. You’ve ended my four day long hunt! God Bless you man. Have a nice day. Bye
Thanks for sharing your thoughts on jago s128.Regards
Hava Durumu’nda günlük, haftalık, 15 günlük ve aylık ayrıntılı hava durumu tahminlerini öğrenin.
Thank you for another informative site. Where else could I get that type of info written in such a perfect way? I have a project that I am just now working on, and I’ve been on the look out for such information.
zithromax augmentin throat cefdinir generic
Приемник ЛИРА РП-248-1 – это радиоприемник коротких волн, который был разработан в СССР в 1980-х годах и до сих пор находит свое применение в различных сферах, включая морскую и авиационную навигацию, геодезию и другие области.
best hosting says:Good article. I will be experiencing a few of these issues as well..Reply 05/25/2020 at 4:40 am
Thank you for every other informative blog. The place else may I get that type of information written in such a perfect means? I’ve a venture that I am simply now working on, and I have been at the glance out for such info.
Hey, thanks for the blog.Much thanks again. Awesome.
Excellent blog you have got here.. Itís difficult to find excellent writing like yours nowadays. I really appreciate people like you! Take care!!
I will immediately snatch your rss as I can’t in finding your email subscription link or e-newsletter service. Do you have any? Please permit me recognise in order that I may just subscribe. Thanks.
I really liked your article post.Much thanks again. Great.
There is definately a lot to find out about this issue.I really like all the points you made.
What i do not understood is in reality how you are not actually a lot more well-preferred than you might be right now. You are so intelligent. You understand therefore considerably on the subject of this matter, produced me individually imagine it from numerous numerous angles. Its like women and men aren’t involved until it is something to accomplish with Girl gaga! Your own stuffs nice. At all times deal with it up!
You ought to be a part of a contest for one of the most useful blogs online. I am going to recommend this blog!
Thank you for your blog post.Much thanks again. Great.
Say, you got a nice blog post.Really looking forward to read more. Will read on…
Good way of explaining, and fastidious post to take data about my presentation topic, which i am going to convey in college.
Hi! Do you know if they make any plugins how to improve love making safeguard against hackers?I’m kinda paranoid about losing everything I’ve worked hard on. Any tips?
Very good article post.Really thank you! Keep writing.
One important thing is that if you are searching for a student loan you may find that you will need a cosigner. There are many circumstances where this is correct because you could find that you do not employ a past history of credit so the financial institution will require that you have someone cosign the loan for you. Great post.
This awesome blog is without a doubt cool additionally informative. I have picked up a bunch of handy advices out of it. I ad love to go back again soon. Thanks a bunch!
Thanks for the strategies presented. One thing I also believe is the fact that credit cards giving a 0 monthly interest often attract consumers with zero interest rate, instant acceptance and easy on the web balance transfers, nevertheless beware of the number one factor that will void that 0 easy neighborhood annual percentage rate and as well as throw one out into the bad house in no time.
Yes! Finally someone writes about best lovemaking tips.My blog post … muscle growth
Great post.Much thanks again. Really Great.
Thanks for your blog post. A few things i would like to bring up is that personal computer memory is required to be purchased should your computer cannot cope with everything you do with it. One can add two RAM boards with 1GB each, as an example, but not certainly one of 1GB and one with 2GB. One should look for the company’s documentation for own PC to make sure what type of storage is required.
A lot of of the things you state is astonishingly appropriate and that makes me ponder why I had not looked at this in this light previously. This particular article really did turn the light on for me personally as far as this subject matter goes. Nevertheless at this time there is actually one issue I am not necessarily too comfy with so whilst I attempt to reconcile that with the actual main idea of the point, permit me observe exactly what all the rest of the readers have to say.Very well done.
hello!,I really like your writing very much! proportion we be in contact more about your post on AOL? I need an expert on this space to resolve my problem. May be that’s you! Having a look ahead to see you.
I value the blog article.Really looking forward to read more. Great.
Thanks for your article on this web site. From my own experience, periodically softening upwards a photograph could possibly provide the digital photographer with an amount of an artistic flare. More often than not however, the soft cloud isn’t just what exactly you had as the primary goal and can frequently spoil an otherwise good snapshot, especially if you intend on enlarging it.
Greetings! Very helpful advice in this particular article! It’s the little changes that will make the most significant changes. Thanks for sharing!
parts of writing an essay pay someone to do your homework writing dissertation abstract
Im thankful for the article post. Keep writing.
Enjoyed every bit of your post. Much obliged.
I enjoy what you guys tend to be up too. This sort of clever work and exposure! Keep up the excellent works guys I’ve added you guys to blogroll.
okmark your blog and check again here regularly. I’m quite sure I will learn lots of new stuff right here! Best of luck for the next!
I appreciate the option to add images to my ads. It provides a better understanding of the item being sold.
Say, you got a nice article post.Thanks Again. Want more.
F*ckin’ tremendous issues here. I’m very happy to look your post. Thank you so much and i am looking forward to contact you. Will you kindly drop me a e-mail?
Appreciate you sharing, great post.Much thanks again. Will read on…
Nice post. I used to be checking continuously this blogand I am inspired! Extremely useful info specially the closing phase 🙂I maintain such info a lot. I was looking for thisparticular information for a very long time. Thank you and best of luck.
I’ll right away grasp your rss as I can’t in finding your email subscription link or newsletterservice. Do you’ve any? Please let me realize in orderthat I may subscribe. Thanks.
quetiapine dosage for sleep what does seroquel do to a normal person
An intriguing discussion is definitely worth comment. I do think that you should write more about this issue, it might not be a taboo matter but usually people don’t talk about such issues. To the next! All the best!!
Thanks for sharing, this is a fantastic blog post.Really looking forward to read more. Want more.
Sweet blog! I found it while browsing on Yahoo News. Doyou have any tips on how to get listed in Yahoo News?I’ve been trying for a while but I never seem to get there!Thanks
Hello, its good piece of writing regarding media print, we all know media isa enormous source of information.
An intriguing discussion is definitely worth comment. I do believe that you need to publish more on this topic, it may not be a taboo subject but typically people do not talk about these issues. To the next! Many thanks!!
Hi, I do think this is a great blog. I stumbledupon it 😉 I will return yet again since i have saved as a favorite it. Money and freedom is the greatest way to change, may you be rich and continue to help others.
When I was interested in doing kuluman on my driver’s penis, I was suddenly surprised by the screams of my driver and his dick from my mouth.
I relish, cause I discovered exactly what I was having a lookfor. You have ended my 4 day long hunt! God Bless you man. Have a nice day.Bye
В заключении можно отметить, что приемник ЛИРА РП-248-1 является надежным и универсальным прибором, который может быть
I have seen a lot of useful points on your web page about personal computers. However, I’ve got the judgment that notebooks are still not quite powerful more than enough to be a good option if you usually do projects that require a lot of power, such as video croping and editing. But for world-wide-web surfing, word processing, and many other frequent computer work they are just great, provided you never mind your little friend screen size. Thank you sharing your ideas.
That is the proper blog for anyone who desires to seek out out about this topic. You notice so much its almost exhausting to argue with you (not that I truly would want?HaHa). You undoubtedly put a new spin on a topic thats been written about for years. Great stuff, just great!
Study additional about well-known, safe alternatives to CSGO skin gambling.
In accordance with my observation, after a in foreclosure home is available at an auction, it is common for any borrower to be able to still have a remaining balance on the financial loan. There are many lenders who try to have all rates and liens paid by the following buyer. Even so, depending on particular programs, rules, and state laws there may be several loans that aren’t easily solved through the shift of loans. Therefore, the responsibility still rests on the borrower that has acquired his or her property foreclosed on. Thanks for sharing your notions on this website.
Many thanks for this article. I would also like to say that it can end up being hard when you find yourself in school and starting out to establish a long credit history. There are many students who are just trying to survive and have a long or positive credit history can occasionally be a difficult point to have.
Thanks for the ideas you have discussed here. Another thing I would like to express is that personal computer memory demands generally rise along with other advances in the technological innovation. For instance, if new generations of processor chips are brought to the market, there’s usually an equivalent increase in the type preferences of both the personal computer memory as well as hard drive room. This is because the program operated by means of these processor chips will inevitably surge in power to leverage the new engineering.
I have recently started a website, the information you offer on this site has helped me tremendously. Thank you for all of your time & work.
Wow, this is a fascinating and thought-provoking article! I’ve always been intrigued by this topic and love diving deep into its complexities. This article has shed new light and opened up a whole new realm of possibilities. I’m eager to explore more and continue the discussion around this captivating subject. Thank you for sharing your insights and sparking my curiosity!
I really liked your blog.Thanks Again. Cool.
Thanks for share.
Best flight ever !
application pour ebook et audio book Office Torrent shuichi shigeno new book
Thanks for shares.
I have reazd so many content about the blogger lovers but this paragraph is genuinely agpod paragraph, keep it up.
One more important aspect is that if you are an elderly person, travel insurance pertaining to pensioners is something you ought to really consider. The more mature you are, the more at risk you’re for making something undesirable happen to you while in most foreign countries. If you are not covered by a few comprehensive insurance plan, you could have several serious complications. Thanks for sharing your hints on this web site.
There’s certainly a great deal to learn about this issue.I love all the points you have made.
Have you ever heard of second life (sl for short). It is basically a video game where you can do anything you want. SL is literally my second life (pun intended lol). If you would like to see more you can see these Second Life articles and blogs
Im grateful for the article post. Much obliged.
Greetings! Very helpful advice in this particular post! It’s the little changes which will make the largest changes. Thanks for sharing!
This is very interesting, You’re an excessively skilled blogger. I’ve joined your rss feed and sit up for in search of more of your magnificent post. Also, I’ve shared your website in my social networks!
Its hard to find good help I am regularly proclaiming that its hard to get good help, but here is
Aw, this was an extremely good post. Spending some time and actual effort to create a great articleÖ but what can I sayÖ I hesitate a whole lot and never seem to get nearly anything done.
Qqoyzs – vardenafil online sales Mxtbga zwktmv
Your means of explaining the whole thing in this paragraph is in fact fastidious, all can easily be aware of it, Thanks a lot.
Say, you got a nice blog post.Really looking forward to read more. Fantastic.
Thanks on your marvelous posting! I really enjoyed reading it, you’re a greatauthor.I will ensure that I bookmark your blog and will comeback in the foreseeable future. I want to encourage youto continue your great job, have a nice evening!
Thanks in favor off sharing such a pleasant idea, piece of writijg iss good, thats why i have read it fully
Well I sincerely liked studying it. This post provided by you is very helpful for proper planning.
very good put up, i definitely love this web site, carry on it
Say, you got a nice article.Really thank you! Much obliged.
Im obliged for the post.Much thanks again. Will read on…
I’m gone to tell my little brother, that he should alsopay a visit this blog on regular basis to get updated from latest news update.
I like the valuable information you provide on your articles.I’ll bookmark your blog and take a look at again right here regularly.I am relatively sure I’ll learn many new stuff proper right here!Best of luck for the following!
Heya i am for the primary time here. I found this board and I to find It really helpful & it helped me out a lot. I am hoping to provide one thing back and aid others like you aided me.
Im thankful for the blog post.Much thanks again. Really Great.
Aw, this was a very nice post. Finding the time and actual effort to make a superb articleÖ but what can I sayÖ I put things off a whole lot and don’t seem to get anything done.
Great, thanks for sharing this blog.Much thanks again. Will read on…
Simply desire to say your article is as astonishing. The clearness in your post is just great and i can assume you’re an expert on this subject. Well with your permission allow me to grab your RSS feed to keep updated with forthcoming post. Thanks a million and please keep up the enjoyable work.
Thank you for the auspicious writeup. It in truth was aamusement account it. Glance advanced to more delivered agreeable from you!However, how can we keep in touch?
Love you
I have noticed that over the course of developing a relationship with real estate homeowners, you’ll be able to get them to understand that, in every single real estate contract, a fee is paid. All things considered, FSBO sellers do not “save” the commission payment. Rather, they fight to win the commission by simply doing a great agent’s work. In doing this, they spend their money as well as time to carry out, as best they can, the duties of an agent. Those assignments include displaying the home by way of marketing, delivering the home to all buyers, constructing a sense of buyer desperation in order to trigger an offer, organizing home inspections, taking on qualification investigations with the financial institution, supervising fixes, and aiding the closing of the deal.
ivermectin heartworm prevention durvet ivermectin paste for humans
Good way of describing, and good paragraph to get data regarding my presentation subject, which i am going to convey in school. Aggy Byrom Woodward
I truly appreciate this blog post. Great.
After study a couple of of the weblog posts in your website now, and I actually like your approach of blogging. I bookmarked it to my bookmark web site record and will likely be checking again soon. Pls try my web page as well and let me know what you think.
Oh my goodness! a tremendous article dude. Thank you Nonetheless I am experiencing problem with ur rss . Don?t know why Unable to subscribe to it. Is there anyone getting an identical rss drawback? Anybody who is aware of kindly respond. Thnkx
Thanks man
Send anonymous email with attachment, you can send unlimited email securely with anonymous email service http://candymail.org/ and no registration required.
online pharmacy search: online pharmacy without scripts – pharmaceutical online
woww.. your article is good. its helpful me.. keep posting buddy
Major thanks for the blog.Thanks Again.
how to use tinder , tinder loginhow to use tinder
One more thing. I think that there are several travel insurance web-sites of reputable companies that allow you to enter your trip details and get you the estimates. You can also purchase your international holiday insurance policy on-line by using your own credit card. Everything you need to do is always to enter the travel particulars and you can begin to see the plans side-by-side. You only need to find the program that suits your allowance and needs and then use your bank credit card to buy them. Travel insurance on the web is a good way to search for a respected company for international travel insurance. Thanks for revealing your ideas.
MBA tuition fees
[…]check beneath, are some totally unrelated websites to ours, even so, they may be most trustworthy sources that we use[…]
Hi there i am kavin, its my first occasion to commenting anywhere, when i readthis piece of writing i thought i could also createcomment due to this good article.
Ahaa, its pleasant dialogue about this post here atthis blog, I have read all that, so at this time me also commenting here.
It’s really a great and useful piece of information. I am glad that you shared this helpful info with us. Please keep us informed like this. Thank you for sharing.
I cannot thank you enough for the blog article.Much thanks again. Fantastic.
It?s exhausting to search out knowledgeable people on this subject, but you sound like you know what you?re speaking about! Thanks
Thanks for shares
As I web-site possessor I believe the content matter here is rattling fantastic , appreciate it for your hard work. You should keep it up forever! Best of luck.
I think this is a real great article.Really thank you! Will read on…
Business administration and Finance
[…]Every the moment in a while we pick blogs that we read. Listed below would be the latest web-sites that we select […]
I really like looking through an article that will make men and women think. Also, thanks for allowing me to comment!
very nice submit, i certainly love this web site, keep on it
الإدارة العامة
[…]we prefer to honor quite a few other world-wide-web websites around the internet, even when they arent linked to us, by linking to them. Beneath are some webpages worth checking out[…]
بيان شخصي لجامعة المستقبل
[…]Wonderful story, reckoned we could combine a couple of unrelated data, nonetheless actually worth taking a search, whoa did 1 study about Mid East has got extra problerms at the same time […]
Academic Advising
[…]although web-sites we backlink to beneath are considerably not connected to ours, we feel they may be essentially worth a go by, so have a look[…]
Useful info. Lucky me I found your website unintentionally, and I’m surprised why this coincidence did not happened earlier! I bookmarked it.
Thanks for share.
en ucuz pazar yeri türk bot instagram beğeni sağlayıcısı bu adamdır
hey there and thanks in your info ? I have definitely picked up anything new from proper here. I did then again expertise several technical points the usage of this site, as I experienced to reload the web site many instances prior to I may just get it to load properly. I had been puzzling over if your hosting is OK? Now not that I’m complaining, however slow loading instances instances will sometimes impact your placement in google and could injury your quality score if advertising and ***********|advertising|advertising|advertising and *********** with Adwords. Well I am including this RSS to my e-mail and can look out for a lot extra of your respective exciting content. Ensure that you replace this once more soon..
Hiya, I’m really glad I’ve found this information. Nowadays bloggers publish only about gossips and internet and this is actually frustrating. A good blog with exciting content, this is what I need. Thank you for keeping this site, I’ll be visiting it. Do you do newsletters? Can’t find it.
Dental hygiene
[…]the time to study or pay a visit to the content or web sites we have linked to below the[…]
Hi there very cool website!! Man .. Beautiful .. Amazing .. I will bookmark your website and take the feeds additionally?KI’m glad to search out so many useful information here in the put up, we want work out more strategies on this regard, thank you for sharing. . . . . .
Thanks you
There is definately a lot to find out about this topic. I really like all of the points you’ve made.
Really informative blog article.Thanks Again. Will read on…
each time i used to read smaller articles or reviews which as well clear their motive, and that is also happening with this piece of writing which I am reading here.
hi!,I like your writing so a lot! proportion we communicate more approximatelyyour article on AOL? I require an expert on this space to resolve my problem.May be that’s you! Looking forward to look you.
Computer Engineering Careers
[…]below youll come across the link to some web pages that we think it is best to visit[…]
Thank you for every other fantastic article. The place else could anybody get that kind of information in such a perfect method of writing? I’ve a presentation subsequent week, and I am at the look for such information.
I like what you guys are up too. Such clever work and coverage!Keep up the wonderful works guys I’ve included you guysto my own blogroll.
fue
[…]Here is a great Blog You may Locate Intriguing that we Encourage You[…]
Great weblog right here! Additionally your web site a lot up fast! What host are you the usage of? Can I get your associate link in your host? I desire my site loaded up as fast as yours lol
Thank you
Really appreciate you sharing this blog post.Really thank you! Fantastic.
You’re a great writer! I’ll share with my friendsand family.
Thanks-a-mundo for the article.Thanks Again. Will read on…
Just wish to say your article is as astonishing. The clarity on your post is just great and that i could think you’re a professional on this subject. Well along with your permission let me to grasp your RSS feed to keep updated with impending post. Thank you one million and please keep up the rewarding work.
A motivating discussion is definitely worth comment. There’s no doubt that that you ought to write more about this topic, it might not be a taboo subject but usually folks don’t speak about these issues. To the next! Many thanks!!
thank you
I cannot thank you enough for the post.Thanks Again. Cool.
Hi friends, good article and fastidious arguments commented atthis place, I am in fact enjoying by these.
whoah this blog is excellent i love reading your articles. Keep up the great work! You know, a lot of people are searching around for this info, you could aid them greatly.
good material thanks digoxin side effects usmle He has gotten more attention lately for his off-stage behavior, including that of his entourage, than his music.
excellent points altogether, you just received a new reader. What may you suggest about your submit that you made a few days ago? Any positive?
Does your website have a contact page? I’m having problems locating it but, I’d like to send you an email. I’ve got some ideas for your blog you might be interested in hearing. Either way, great blog and I look forward to seeing it improve over time.
Hello my loved one! I want to say that this post is amazing,nice written and come with almost all significant infos.I would like to peer more posts like this .
I?m not sure where you are getting your info, but good topic. I needs to spend some time learning more or understanding more. Thanks for magnificent information I was looking for this info for my mission.
Sweet blog! I found it while browsing on YahooNews. Do you have any suggestions on how to get listed in Yahoo News?I’ve been trying for a while but I never seem to get there!Many thanks
Say, you got a nice article.Really looking forward to read more. Fantastic.
Generally I do not learn article on blogs, however I would like to say that this write-up very pressured me to try and do it! Your writing taste has been amazed me. Thanks, quite nice article.
Thanks for share
I really enjoy the article.Really thank you! Will read on…
I do not even know how I ended up here, but I thought this postwas good. I don’t know who you are but certainly you’regoing to a famous blogger if you aren’t already 😉 Cheers!
I truly appreciate this blog article.Much thanks again. Cool.
you have an excellent blog here! would you prefer to make some invite posts on my blog?
Thanks-a-mundo for the blog article. Keep writing.
Thank you very much.
One other issue is that if you are in a scenario where you do not possess a co-signer then you may genuinely wish to try to make use of all of your financial aid options. You could find many funds and other scholarship grants that will give you funding to help you with institution expenses. Thx for the post.
doxycycline online uk – antibiotic doxycycline rx doxycycline
I enjoy what you guys are usually up too. This kind of clever work and reporting!Keep up the fantastic works guys I’ve incorporated you guys to our blogroll.
Thanks for the ideas you are revealing on this weblog. Another thing I would like to say is getting hold of duplicates of your credit profile in order to look at accuracy of the detail is the first motion you have to carry out in credit score improvement. You are looking to cleanse your credit file from harmful details errors that damage your credit score.
I would like to thnkx for the efforts you have put in writing this site. I’m hoping the same high-grade site post from you in the upcoming as well. In fact your creative writing skills has inspired me to get my own web site now. Really the blogging is spreading its wings fast. Your write up is a great example of it.
Thank you very much.
Really enjoyed this post. Great.
I am now not certain where you’re getting your info, but good topic. I needs to spend a while learning much more or working out more. Thank you for wonderful information I was in search of this information for my mission.
Truly all kinds of fantastic facts! cover letter writing services good college admission essays
What a information of un-ambiguity and preservenessof precious knowledge concerning unpredicted emotions.
each time i used to read smaller articles or reviews which also clear their motive,
and that is also happening with this paragraph which I am reading at this time.
Thanks for your posting. One other thing is when you are advertising your property yourself, one of the difficulties you need to be aware of upfront is how to deal with property inspection reports. As a FSBO owner, the key towards successfully switching your property as well as saving money upon real estate agent profits is know-how. The more you understand, the softer your property sales effort might be. One area exactly where this is particularly essential is information about home inspections.
I do not even know how I ended up here, however I assumed this put up used to be great. I don’t recognize who you’re however definitely you are going to a famous blogger should you are not already. Cheers!
Good info. Lucky me I came across your blog by chance (stumbleupon). I have bookmarked it for later!
Thank you for the good writeup. It in reality was once a amusement account it. Glance complicated to more brought agreeable from you! However, how could we communicate?
hey there and thank you for your information ? I?ve definitely picked up anything new from right here. I did however expertise a few technical points using this website, as I experienced to reload the web site a lot of times previous to I could get it to load properly. I had been wondering if your web hosting is OK? Not that I’m complaining, but slow loading instances times will very frequently affect your placement in google and could damage your high-quality score if advertising and marketing with Adwords. Well I?m adding this RSS to my e-mail and can look out for a lot more of your respective interesting content. Ensure that you update this again soon..
A powerful share, I just given this onto a colleague who was doing a little analysis on this. And he in reality purchased me breakfast as a result of I discovered it for him.. smile. So let me reword that: Thnx for the treat! But yeah Thnkx for spending the time to discuss this, I feel strongly about it and love studying more on this topic. If possible, as you turn out to be experience, would you mind updating your blog with extra details? It’s extremely useful for me. Massive thumb up for this blog publish!
Hi there just wanted to give you a brief heads up and let you know a few of the pictures aren’t loading correctly. I’m not sure why but I think its a linking issue. I’ve tried it in two different browsers and both show the same results.
Thank you very much
A big thank you for your article.Much thanks again. Want more.
I’ll make sure to bookmark it and come back to read more of your useful information. Thanks for the post. I’ll definitely return. Ultra Omega Burn
Nice respond in return of this query with firm arguments and telling the whole thing concerningthat.
how to dose ivermectin for humans ivermectin rats
Hello colleagues, its enormous piece of writing concerning educationand completely explained,keep it up all the time.My blog … delta 8 thc for sale
thanks for shares.
Hello there! This article couldn’t be written any better!
Reading through this article reminds me of my previous roommate!
He continually kept talking about this. I am going to
send this article to him. Pretty sure he’s going to have a very
good read. Thank you for sharing!
Awesome things here. I am very glad to see your article.Thank you a lot and I’m looking forward to contact you.Will you kindly drop me a e-mail?
I really like it when folks get together and share views. Great blog, keep it up! har ni fest eller
Awesome! Its truly remarkable article, I have got much clear idea regarding from this paragraph.
Xoilac Tv Thẳng đá Bóng betĐội tuyển chọn futsal nước Việt Nam đã được một trận đấu đồng ý được trước đối thủ đầy mức độ mạnh Lebanon. Kết trái Bà Rịa-Vũng Tàu vs Bình Phước ngày hôm nay 18h00 ngày 5/5, Hạng nhất nước Việt Nam.
how do you write a essayinterview essay examplewrite a good essay
Fantastic blog post.Thanks Again.
I want to to thank you for this great read!! I definitely enjoyed every little bit of it. I have you saved as a favorite to check out new things you post…
Hi there! This post couldn’t be written any better! Reading through this post reminds me of my previous room mate!He always kept talking about this. I will forward this write-upto him. Fairly certain he will have a goodread. Thank you for sharing!
modafinil modafinil provigil over the counter
I do believe all of the ideas you’ve introduced in your post. They are really convincing and can certainly work. Nonetheless, the posts are very brief for novices. May just you please extend them a bit from subsequent time? Thank you for the post.
hunters point apartments rentberry scam ico 30m$ raised cricket club apartments
Howdy! Quick question that’s completely off topic. Do you know how to make your site mobile friendly?
My website looks weird when viewing from my iphone 4.
I’m trying to find a template or plugin that might be able to correct this problem.
If you have any suggestions, please share. Thank you!
Thanks for shares.
Greetings! Very helpful advice in this particular article!It’s the little changes that will make the greatest changes.Many thanks for sharing!
Greetings! Veryy useful advvice inn thhis particular post!It iss tthe little changes thazt make thee greatesst changes.Thankms forr sharing!
Thanks very interesting blog!
Cinco de las mejores facturas de luz en wizard meet of new horizon 2
Greetings! Very helpful advice within this post! It’s the little changes which will make the most significant changes. Thanks for sharing!
When some one searches for his essential thing, therefore he/she desires to be available that in detail, therefore that thing is maintained over here.Feel free to surf to my blog post … BodyCor Naturals Keto
I needed to thank you for this wonderful read!! I definitely loved every bit of it. I have you book-marked to look at new stuff you postÖ
Hello, I read your blog on a regular basis. Your story-telling style is awesome, keep it up!
Major thankies for the article.Much thanks again. Want more.
Really enjoyed this article.Really looking forward to read more. Really Great.
upgraded to PlayStation the road, and not being able to find
Thank you ever so for you post.Much thanks again. Will read on…
Hi my family member! I wish to say that this post is awesome, great written and come with approximately all important infos. I would like to see extra posts like this.
Hello There. I found your blog using msn. This is an extremely well written article.
I’ll make sure to bookmark it and return to read more of your useful information.
Thanks for the post. I will definitely return.
สวัสดีค่ะBEO356 ยินดีให้บริการค่ะยิ่ง ชวน ยิ่ง ได้ เงิน ชวนมากได้มากแชร์กับใคร ที่ไหนก็ได้
Thanks-a-mundo for the blog article.Thanks Again. Really Cool.
Thanks in favor of sharing such a good idea,article is pleasant, thats why i have read it completely
visit website thank you
Fantastic blog article.Thanks Again. Want more.
Great, thanks for sharing this blog article.Much thanks again. Awesome.
I need time to think about everything I’ve read here.
Very good blog article.Really looking forward to read more. Cool.
apartment with garage for rent near me valley view apartments XoXoJI
Enjoyed every bit of your blog post.Really looking forward to read more. Cool.
written by him as no one else understand such certain about
Really informative blog post.Thanks Again. Awesome.
Keep on writing, great job!
It’s perfect time to make a few plans for the future and it’s time to be happy. I’ve learn this submit and if I could I desire to counsel you some attention-grabbing issues or tips. Maybe you can write subsequent articles referring to this article. I want to learn more issues about it!
I like what you guys tend to be up too. This sort of clever work and reporting!Keep up the terrific works guys I’ve incorporated you guys to my personal blogroll.
Really informative blog article.Much thanks again. Awesome.
I needed to thank you for this great read!! I definitely enjoyed every bit of it.I have you book-marked to look at new things you post…
Good forum posts. With thanks. best paper writing service reviews write a narrative essay
I really like it when people get together and share ideas. Great blog, keep it up!
Hey there would you mind sharing which blog platform you’re working with?
I’m planning to start my own blog soon but I’m
having a hard time selecting between BlogEngine/Wordpress/B2evolution and Drupal.
The reason I ask is because your layout seems different then most blogs
and I’m looking for something unique. P.S Apologies for
getting off-topic but I had to ask!
Howdy! Someone in my Myspace group shared this website with us so I came to check it out.
I’m definitely loving the information. I’m bookmarking and will be tweeting this to my followers!
Exceptional blog and terrific style and design.
I am so grateful for your blog.Really thank you! Really Great.
Excellent read, I just passed this onto a colleague who was doing a little research on that. And he just bought me lunch since I found it for him smile So let me rephrase that: Thanks for lunch!
I take pleasure in, lead to I found just what I used to be having a look for. You’ve ended my 4 day lengthy hunt! God Bless you man. Have a great day. Bye
I read this piece of writing fully on the topic of the comparison of hottest and preceding technologies,it’s awesome article.
hello there and thank you for your info ? I have certainly picked up something new from right here. I did however expertise some technical issues using this web site, as I experienced to reload the web site lots of times previous to I could get it to load properly. I had been wondering if your web host is OK? Not that I am complaining, but sluggish loading instances times will often affect your placement in google and could damage your quality score if ads and marketing with Adwords. Well I?m adding this RSS to my email and could look out for a lot more of your respective intriguing content. Make sure you update this again soon..
Thanks for shares
A round of applause for your article. Really Great.
I really enjoy the blog article.Thanks Again. Much obliged.
What i don’t understood is actually how you’re not actually much more well-liked than you might be now. You are so intelligent. You realize therefore considerably relating to this subject, produced me personally consider it from a lot of varied angles. Its like men and women aren’t fascinated unless it is one thing to accomplish with Lady gaga! Your own stuffs outstanding. Always maintain it up!
Thanks for shares
This is really interesting, You are an overly professional blogger.
I have joined your feed and look ahead to looking for extra of
your great post. Additionally, I’ve shared your site
in my social networks
Major thankies for the article. Really Cool.
I’m amazed by the quality of this content! The author has clearly put a tremendous amount of effort into investigating and organizing the information. It’s inspiring to come across an article that not only provides helpful information but also keeps the readers captivated from start to finish. Kudos to him for creating such a masterpiece!
Thanks for shares
It is perfect time to make a few plans for the long run and it is time to be happy. I’ve learn this post and if I may I want to suggest you few interesting things or suggestions. Perhaps you can write subsequent articles regarding this article. I want to learn more things approximately it!
I cannot thank you enough for the blog article.Really thank you! Cool.
Thanks for shares
whoah this weblog is wonderful i really like studying your articles. Stay up the good paintings! You know, a lot of individuals are hunting round for this information, you could aid them greatly.
888 lord delta 8
Thanks for your fascinating article. One other problem is that mesothelioma cancer is generally the result of the inhalation of materials from mesothelioma, which is a positivelly dangerous material. It really is commonly observed among individuals in the construction industry who have long exposure to asbestos. It can also be caused by living in asbestos covered buildings for long periods of time, Genes plays an important role, and some persons are more vulnerable on the risk compared to others.
Thanks for shares
Hey! I simply would like to give a huge thumbs up for the nice data you could have here on this post. I will likely be coming back to your blog for extra soon.
ventolin generic equivalent how often can you use albuterol inhaler what is ventolin inhaler used for
bactrim online: tetracycline onlinezithromax online
This post will assist the internet users for setting up new web site or
even a weblog from start to end.
Everyone loves what you guys are up too. This kind of clever work and coverage! Keep up the excellent works guys I’ve incorporated you guys to my own blogroll.
Incredible! This blog looks exactly like my old one!It’s on a entirely different topic but it has pretty much the same layout anddesign. Excellent choice of colors!
I just could not depart your site before suggesting that I really enjoyed the standard info a person provide for your visitors? Is gonna be back often in order to check up on new posts
Good blog you have here.. It’s hard to find high quality writing like yours nowadays. I really appreciate individuals like you! Take care!!
My brother suggested I may like this blog. He used to be entirely right. This post truly made my day. You cann’t consider just how a lot time I had spent for this info! Thanks!
I blog quite often and I genuinely appreciate your content. This article has really peaked my interest. I am going to bookmark your blog and keep checking for new information about once per week. I subscribed to your RSS feed too.
fantastic issues altogether, you simply gained a logo new reader. What could you recommend about your post that you made a few days ago? Any certain?
Aw, this was a very good post. Taking the time and actual effort to create a very good article… but what can I say… I hesitate a lot and never manage to get anything done.
Hi! Do you know if they make any plugins to help with SEO?I’m trying to get my blog to rank for some targeted keywordsbut I’m not seeing very good success. If you know of any pleaseshare. Many thanks!
Very good post. I’m going through some of these issues as well..
I’ve really noticed that credit repair activity really needs to be conducted with techniques. If not, you will probably find yourself damaging your positioning. In order to realize your aspirations in fixing to your credit rating you have to be careful that from this moment in time you pay any monthly expenses promptly prior to their appointed date. It is definitely significant on the grounds that by certainly not accomplishing that area, all other measures that you will decide to try to improve your credit rating will not be effective. Thanks for discussing your concepts.
Thanks for sharing such a good opinion, paragraph is nice, thats why i have read it fully
hello!,I love your writing very a lot! proportion we communicate extra about your article on AOL? I require a specialist on this area to unravel my problem. May be that is you! Taking a look ahead to look you.
Tratado azul abierto: Estados Unidos dice que la Unión Soviética no se unirá al acuerdo de control de armas clave
Hi there colleagues, nice article and fastidious urging commented here, I am in fact enjoying by these.
nevşehir telefon kodu Taine Sharma nevsehir iskur telefon numarasi Courtnie Evans nevşehir icra telefon Mikaeel Turner nevşehir jandarma telefon Axel Talbot nevşehir jakem telefon numarası Zahrah Navarro nevşehir il jandarma telefon numarası
legit canadian pharmacy – best online pharmacy canadian pharmacy king reviews
Cheers! Terrific information. Can You Get Propecia On Nhs
I really like reading an article that can make people think. Also, thanks for allowing for me to comment!
Very nice post. I just stumbled upon your blog and wished to say that I have truly enjoyed browsing your blog posts. After all I?ll be subscribing to your feed and I hope you write again soon!
useful info with us. Please stay us up to date
chloroquine vs hydroxychloroquine plaquenil immunosuppressive
whoah this weblog is excellent i like reading your posts. Keep up the great paintings! You know, a lot of people are looking around for this information, you can aid them greatly.
Its like you read my thoughts! You seem to know a lot about this, like you wrote the e book in it or something. I think that you simply can do with a few to power the message house a bit, however other than that, that is magnificent blog. A fantastic read. I will definitely be back.
Great, thanks for sharing this article post.Much thanks again. Great.
Hi just wanted to give you a brief heads up and let you know a few of the pictures aren’t loading properly. I’m not sure why but I think its a linking issue. I’ve tried it in two different web browsers and both show the same results.
You could definitely see your expertise within the work you write. The world hopes for more passionate writers such as you who are not afraid to say how they believe. At all times go after your heart.
I wanted to thank you for this good read!! I absolutely loved every little bit of it. I have you bookmarked to look at new stuff you postÖ
I’m extremely impressed with your writing skills and also withthe layout on your blog. Is this a paid theme or did you customizeit yourself? Either way keep up the nice quality writing,it’s rare to see a nice blog like this onenowadays.
ivermectin pour on tractor supply ivermectin wormers for horses
This is a topic that is close to my heart… Thank you! Exactly where are your contact details though?
https://www.skateism.com/winks-links-pros-bros
Pretty section of content. I just stumbled upon your blog and in accession capital to assert that I acquire in fact enjoyed account your blog posts.Any way I will be subscribing to your augment and even I achievement you access consistently fast.
This website is really a stroll-by way of for the entire information you wanted about this and didn?t know who to ask. Glimpse right here, and you?ll positively uncover it.
I will right away seize your rss as I can not in finding your email subscription hyperlink or e-newsletter service. Do you’ve any? Please allow me know so that I may just subscribe. Thanks.
Hi, I do believe your site might be having internet
browser compatibility problems. When I take a look at your web site in Safari, it looks
fine however when opening in IE, it’s got some overlapping
issues. I merely wanted to give you a quick heads up!
Aside from that, fantastic website!
Nice post. I was checking continuously this blog and I’m impressed! Very helpful information particularly the last part 🙂 I care for such info much. I was seeking this particular information for a long time. Thank you and good luck.
That is a very good tip particularly to those new to the blogosphere. Short but very accurate infoÖ Thank you for sharing this one. A must read article!
Very interesting points you have noted, appreciate it for posting. „There is nothing in a caterpillar that tells you it’s going to be a butterfly.” by Richard Buckminster Fuller.
credit scoring equifax free credit score credit bureaus
Very neat blog.Thanks Again. Really Great.
Hi, i read your blog from time to time and i own a similar one and i was just curious if you get a lot of spam remarks? If so how do you stop it, any plugin or anything you can advise? I get so much lately it’s driving me crazy so any help is very much appreciated.
Why viewers still use to read news papers when in this technological
globe all is existing on web?
A round of applause for your blog post. Will read on…
Spanky’s model believed the game need to have been Xavier -7.5.
I am not sure where you’re getting your information, but great topic.I needs to spend some time learning more or understanding more.Thanks for wonderful information I was looking for this information for my mission.
Thanks again for the blog article.Much thanks again. Keep writing.
whoah this blog is excellent i really like studying your articles.Stay up the great work! You know, many persons are searching around for this information, you couldaid them greatly.
Wonderful blog! I found it while searching on Yahoo News. Do you have any suggestions on how to get listed in Yahoo News? I’ve been trying for a while but I never seem to get there! Thanks
WOW just what I was searching for. Came here bysearching for herbal medicinal plants medicine aoe2
GooԀd day! Do you use Twitter? I’d like to follow you if that wouldbе ok. I’m undouƅtedly enjoying yоur blog andlook forwarɗ to new uрdates.
With thanks. Valuable information!how to write a good essay conclusion english essay writing help me write a report
It’s in reality a great and helpful piece of info.I’m glad that you simply shared this useful info with us. Please keep us informed likethis. Thank you for sharing.
You can definitely see your enthusiasm within the paintings you write. The sector hopes for more passionate writers such as you who aren’t afraid to say how they believe. Always go after your heart.
goodies delta 8 disposable how to use
Valuable information. Lucky me I found your site by accident, and I am shocked why this accident did not happened earlier! I bookmarked it.
Many thanks. Helpful stuff!how to write a successful essay homeworks help essay ghostwriter
Say, you got a nice blog.Really thank you! Will read on…
Excellent way of explaining, and fastidious article to get information on the topic of my presentation subject, which i am going to convey in college.
Hi! Would you mind if I share your blog with my zynga group?There’s a lot of people that I think would really appreciate your content.Please let me know. Thanks
I truly appreciate this blog article.Thanks Again. Keep writing.
Oh my goodness! Impressive article dude! Thank you, However I am having problems with your RSS. I donít know why I can’t join it. Is there anyone else getting the same RSS issues? Anyone who knows the solution will you kindly respond? Thanks!!
A round of applause for your article.Really looking forward to read more. Will read on…
Aw, this was a really nice post. In idea I want to put in writing like this moreover ? taking time and actual effort to make an excellent article? but what can I say? I procrastinate alot and on no account appear to get one thing done.
Muchos Gracias for your blog post.Really looking forward to read more. Awesome.
Greetings! Very helpful advice within this post! It is the little changes that will make the greatest changes. Many thanks for sharing!
Thank you ever so for you blog. Keep writing.
Thanks for another great article. Where else could anyone get that type of info in such a perfect way of writing? I ave a presentation next week, and I am on the look for such information.
Howdy! I could have sworn I’ve been to this blog before but after looking at many of the articles I realized it’s new to me. Anyways, I’m certainly pleased I stumbled upon it and I’ll be book-marking it and checking back frequently.
Thanks a lot for the article post.Much thanks again. Really Cool.
how to overcome ed naturally male dysfunction treatment – do i have ed
This article is really a fastidious one it assists new net viewers, who are wishing in favor of blogging.
sulfamethoxazole medication trimethoprim for uti prophylaxis
hydroxychloroquine brand name hydroxychloroquine sulfate
Nice replies in return of this issue with solid arguments and explaining everything on the topic of that.
I liked their initial two records but changed my mind then charity gig.
canlı maç izle matbet tv selçukspor tv canlı maç izle bedava canlı maç izle
I discovered your weblog web site on google and examine a number of of your early posts. Proceed to keep up the superb operate. I just additional up your RSS feed to my MSN News Reader. In search of forward to studying extra from you later on!?
Greetings! Very useful advice within this post! It’s the little changes that make the biggest changes. Thanks a lot for sharing!
Thanks alot : ) for your post. I would like to comment that the price of car insurance will vary from one plan to another, simply because there are so many different facets which give rise to the overall cost. One example is, the make and model of the vehicle will have an enormous bearing on the fee. A reliable old family automobile will have a less expensive premium compared to a flashy performance car.
Having read this I believed it was extremely informative.I appreciate you finding the time and effort to put this short article together.I once again find myself spending a lot of time both reading and commenting.But so what, it was still worth it!
delta utf 8 hex
That is a really good tip particularly to those new to the blogosphere. Brief but very precise infoÖ Thank you for sharing this one. A must read article!
Great, thanks for sharing this post.Really thank you! Awesome.
Your way of explaining the whole thing in this paragraphis truly pleasant, every one be able to simply understand it, Thanks a lot.
The reconstruction of Louisbourg in the 1930s to create work in times of economic depression is a great success. It was indeed the stronghold of the French and the architecture is very reminiscent of the southwest of France. Terrijo Lewes Kerrie
Someone essentially help to make seriously posts I would state. This is the first time I frequented your web page and thus far? I surprised with the research you made to create this particular publish extraordinary. Fantastic job!
Reliable content. Thanks!writing movie titles in essays argument essay writing writers freelance
Yet another issue is really that video gaming has become one of the all-time biggest forms of recreation for people of various age groups. Kids enjoy video games, and also adults do, too. The XBox 360 is just about the favorite games systems for folks who love to have hundreds of games available to them, plus who like to experiment with live with others all over the world. Many thanks for sharing your ideas.
Tin Tức, Sự Kiện Liên Quan Đến Thẳng Soccer Nữ Giới keo 88Đội tuyển chọn Việt Nam chỉ cần một kết quả hòa có bàn thắng nhằm lần loại hai góp mặt tại World Cup futsal. Nhưng, nhằm thực hiện được điều đó
Awesome article post.Really looking forward to read more. Cool.
I have read so many articles regarding the blogger lovers however this paragraph is in fact a good paragraph, keep it up.
Thank you for your article.Thanks Again. Great.
I value the blog article.Really looking forward to read more. Will read on…
Cómo ver Internet de Fear the March Dead Winter 6 desde algún lugar
hydroxychloroquine plaquenil hydroxychloroquine zinc
What’s up, yes this piece of writing is in fact nice and I have learned lotof things from it regarding blogging. thanks.
Hey! Do you use Twitter? I’d like to follow you ifthat would be ok. I’m absolutely enjoying your blog and look forward to new posts.Also visit my blog … slot online
I appreciate, result in I discovered exactly what I was taking a look for.You have ended my four day lengthy hunt! God Bless you man. Have a nice day.Bye
Gyzyff – help with college essays online Isxdzr rgdfye
I really like what you guys tend to be up too. This kind of clever work andcoverage! Keep up the superb works guys I’ve added you guys to blogroll.
Thank you, I have recently been hunting for information about this subject matter for ages and yours is the best I have found so far.
I am not sure where you are getting your information, but great topic. I needs to spend some time learning much more or understanding more. Thanks for excellent info I was looking for this information for my mission.
hi!,I love your writing very a lot! proportion we keep in touch extra approximately your article on AOL?I require an expert on this area to solve my problem.Maybe that is you! Taking a look forward to peeryou. asmr 0mniartist
I really like and appreciate your blog article.Much thanks again. Will read on…
whoah this blog is magnificent i love reading your posts. Keep up the great work! You know, lots of people are looking around for this information, you could help them greatly.
Y0XQ2X Im thankful for the article.Much thanks again.
hydroxychloroquine dosage hydroxychloroquine update today
Thank you ever so for you article post.Really looking forward to read more. Fantastic.
My coder is trying to convince me to move to .net from PHP. I have always disliked the idea because of the expenses. But he’s tryiong none the less. I’ve been using WordPress on various websites for about a year and am anxious about switching to another platform. I have heard very good things about blogengine.net. Is there a way I can transfer all my wordpress posts into it? Any kind of help would be greatly appreciated!
Good information. Lucky me I came across your blog by chance (stumbleupon).I’ve saved as a favorite for later!
Very good post.Really thank you! Will read on…
Binaural beats meditation is a technique that utilizes rhythmic auditory stimuli to induce a state of relaxation and focus. By presenting slightly different frequencies to each ear, the brain perceives a third “beat” which promotes synchronization of brainwaves, fostering a meditative state. This practice aids in reducing stress and enhancing mental clarity.
A big thank you for your blog post.Much thanks again. Really Cool.
Sweet blog! I found it while surfing around on Yahoo News. Do you have any suggestions on how to get listed in Yahoo News? I’ve been trying for a while but I never seem to get there! Appreciate it
Good day I am so delighted I found your web site, I really found you by mistake, while I was looking on Yahoo for something else, Regardless I am here now and would just like to say cheers for a marvelous post and a all round interesting blog (I also love the theme/design), I don’t have time to read it all at the minute but I have saved it and also added your RSS feeds, so when I have time I will be back to read a great deal more, Please do keep up the awesome work.
Useful information. Lucky me I discovered your website by chance, and I’m stunned why this twist of fate did not took place in advance! I bookmarked it.
Innovative scientific research
[…]The facts talked about inside the write-up are a number of the ideal obtainable […]
can hydroxychloroquine be purchased over the counter hydroxychloroquine zinc
I loved your blog post.Really looking forward to read more. Fantastic.
what is a synthesis essaywhere do supporting details usually appear in an essayessay for scholarship
runty delta 8
Some genuinely nice and useful info on this site, besides I conceive the style and design contains wonderful features.
fue
[…]here are some hyperlinks to web sites that we link to simply because we consider they’re worth visiting[…]
Science and Technology Center of Excellence
[…]that will be the finish of this report. Right here youll find some websites that we feel youll enjoy, just click the hyperlinks over[…]
Thanks for finally talking about >COPA DA RÚSSIA – 2018: TRABALHANDO O PERTENCIMENTO CULTURAL ATRAVÉS DA SELEÇÃO BRASILEIRA – Redesenho Educacional
I think this is a real great article.Really thank you! Keep writing.
I really like and appreciate your blog article.Really thank you! Cool.
It’s an awesome post in support of all the online users; they willtake advantage from it I am sure.
Excellent beat ! I would like to apprentice while you amend your web site, how can i subscribe for a blog site? The account aided me a acceptable deal. I had been a little bit acquainted of this your broadcast offered bright clear idea
Hi there! This post couldn’t be written any better! Reading this post reminds meof my good old room mate! He always kept talking about this.I will forward this post to him. Fairly certain he will have a good read.Thanks for sharing!
I am genuinely glad to glance at this blog posts which carries tons of valuable facts, thanks for providingsuch data.
Really enjoyed this blog.Thanks Again. Will read on…
such detailed about my trouble. You are incredible!
I think this is a real great blog.Much thanks again. Cool.
Major thankies for the post.Much thanks again. Really Cool.
Thanks for shares.
Major thankies for the article post.Thanks Again. Much obliged.
A round of applause for your blog.Really looking forward to read more. Will read on…
Good website! I really love how it is simple on my eyes and the data are well written. I am wondering how I could be notified when a new post has been made. I have subscribed to your feed which must do the trick! Have a nice day!
3 paragraph essayhow to write an essay for college admissionhow to write an essay for college admission
Nice answer back in return of this query with solid arguments and describing everything concerning that.
Thanks-a-mundo for the article post.Really thank you! Will read on…
Muchos Gracias for your article post.Thanks Again. Will read on…
I really liked your post.Thanks Again. Cool.
It’s going to be finish of mine day, however before finish I am readingthis wonderful paragraph to increase my knowledge.Feel free to visit my blog post – zwiazek-zawodowy-opiekunek.pl
Thanks so much for the blog post.Much thanks again. Keep writing.
Im thankful for the blog article.Thanks Again. Want more.
Thank you for every other fantastic article. The place else may anybody get that kind of information in such a perfect means of writing? I’ve a presentation next week, and I’m on the look for such information.
Once I originally commented I clicked the -Notify me when new comments are added- checkbox and now each time a remark is added I get 4 emails with the identical comment. Is there any means you may remove me from that service? Thanks!
What i don’t understood is actually how you are not really much more well-liked than you might be right now. You’re so intelligent. You realize thus considerably relating to this subject, produced me personally consider it from a lot of varied angles. Its like men and women aren’t fascinated unless it’s one thing to do with Lady gaga! Your own stuffs nice. Always maintain it up!
I figured out more new things on this weight reduction issue. A single issue is that good nutrition is tremendously vital any time dieting. A tremendous reduction in fast foods, sugary food items, fried foods, sweet foods, red meat, and whitened flour products can be necessary. Possessing wastes parasites, and harmful toxins may prevent objectives for fat-loss. While specified drugs in the short term solve the issue, the horrible side effects usually are not worth it, and they never give more than a temporary solution. It is a known indisputable fact that 95 of dietary fads fail. Thanks for sharing your opinions on this site.
Do you mind if I quote a couple of your posts as long as I provide credit and sources back to your blog? My blog site is in the exact same area of interest as yours and my visitors would definitely benefit from a lot of the information you present here. Please let me know if this okay with you. Cheers!
Hello! I just would like to give a huge thumbs up for the great info you have here on this post. I will be coming back to your blog for more soon.
Well I definitely liked studying it. This article provided by you is very constructive for accurate planning.
Major thanks for the blog article.Really thank you! Really Cool.
Hello.This post was extremely interesting, especially since I was browsing for thoughts on this topic last week.
Very fantastic information can be found on web blog. “Preach not to others what they should eat, but eat as becomes you, and be silent.” by Epictetus.
With the whole thing that seems to be developing inside this particular area, many of your points of view are actually very exciting. On the other hand, I am sorry, because I can not subscribe to your entire strategy, all be it exhilarating none the less. It appears to everyone that your remarks are not totally validated and in simple fact you are generally yourself not wholly certain of the assertion. In any event I did take pleasure in looking at it.
Good day! Do you know if they make any plugins to help with SEO? I’m trying to get my blog to rank for some targeted keywords but I’m not seeing very good gains. If you know of any please share. Kudos!
Thank you for the good writeup. It actually was a amusement account it. Glance complicated to far introduced agreeable from you! By the way, how could we communicate?
Wonderful blog! I found it while surfing around on Yahoo News. Do you have any tips on how to get listed in Yahoo News? I’ve been trying for a while but I never seem to get there! Cheers
You have remarked very interesting points! ps decent site. “I hate music, especially when it’s played.” by Jimmy Durante.
You actually make it seem really easy together with your presentation but I to find this matter to be really something which I think I’d never understand. It sort of feels too complex and extremely broad for me. I am looking ahead in your subsequent publish, I?¦ll try to get the dangle of it!
This website online is mostly a walk-by way of for all of the data you needed about this and didn?t know who to ask. Glimpse right here, and also you?ll positively uncover it.
Great post. I was checking continuously this blog and I’m inspired! Extremely helpful information specially the final phase 🙂 I deal with such info much. I used to be looking for this particular information for a long time. Thanks and good luck.
Pretty section of content. I just stumbled upon your web site and in accession capital to assert that I get in fact enjoyed account your blog posts. Any way I’ll be subscribing to your feeds and even I achievement you access consistently quickly.
I truly appreciate this post.Much thanks again. Really Cool.
Very efficiently written story. It will be helpful to anybody who usess it, as well as yours truly :). Keep doing what you are doing – i will definitely read more posts.
A round of applause for your article.Really looking forward to read more. Want more.
Major thankies for the blog article.
It’s a jealous article. It’s very incredible and innovative. Who will be you to write this special article?
I acquired more something totally new on this fat loss issue. Just one issue is a good nutrition is extremely vital whenever dieting. A massive reduction in fast foods, sugary foodstuff, fried foods, sweet foods, pork, and bright flour products can be necessary. Holding wastes organisms, and wastes may prevent targets for fat loss. While certain drugs momentarily solve the matter, the unpleasant side effects are usually not worth it, and so they never offer more than a short-term solution. This can be a known fact that 95 of fad diets fail. Thanks for sharing your notions on this blog site.
delta-8 chicago
chlorquine serment d’hippocrate chloroquine amazon
Thanks for share.
I cherished as much as you’ll receive performed proper here. The caricature is attractive, your authored subject matter stylish. nevertheless, you command get got an shakiness over that you would like be turning in the following. ill indisputably come more beforehand once more as precisely the similar nearly very incessantly within case you defend this hike.
F*ckin’ remarkable issues here. I am very glad to see your article. Thank you so much and i’m taking a look ahead to touch you. Will you please drop me a mail?
Good web site! I truly love how it is simple on my eyes and the data are well written. I am wondering how I could be notified when a new post has been made. I’ve subscribed to your feed which must do the trick! Have a nice day!
Thank you, I have just been searching for information about this topic for ages and yours is the best I’ve discovered so far. But, what about the conclusion? Are you sure about the source?
Thank you for the sensible critique. Me & my neighbor were just preparing to do some research about this. We got a grab a book from our local library but I think I learned more clear from this post. I am very glad to see such magnificent information being shared freely out there.
You have a great writing style and you present the information clearly. This is a very informative article.
We are a group of volunteers and starting a new initiative in our community. Your blog provided us with valuable information to work on|.You have done a marvellous job!
Very neat blog article.Really looking forward to read more. Fantastic.
Thanks for your post. My partner and i have continually observed that the majority of people are desperate to lose weight simply because wish to show up slim in addition to looking attractive. On the other hand, they do not continually realize that there are additional benefits for you to losing weight as well. Doctors state that overweight people suffer from a variety of illnesses that can be perfectely attributed to the excess weight. The great thing is that people who’re overweight and suffering from different diseases can help to eliminate the severity of their particular illnesses through losing weight. It’s possible to see a constant but noted improvement in health as soon as even a slight amount of fat loss is obtained.
Thanks-a-mundo for the blog.Much thanks again.
Good day! Would you mind if I share your blog with my zynga group?There’s a lot of folks that I think would really enjoyyour content. Please let me know. Cheers
Thanks for share.
Absolutely composed written content, Really enjoyed looking through.
Thanks so much for the article post.Much thanks again. Want more.
Say, you got a nice post.Much thanks again. Fantastic.
what is tinder , tiderbrowse tinder for free
Its like you read my mind! You appear to know a lot approximately this, such as you wrote the book in it or something. I believe that you just can do with some p.c. to drive the message home a little bit, however instead of that, that is excellent blog. A fantastic read. I will certainly be back.
เว็บไซต์ คาสิโนออนไลน์ ที่ดีเยี่ยมที่สุด ปลอดภัย เชื่อถือได้ที่สุด คาสิโนออนไลน์ เป็นเว็บไซด์การพนันออนไลน์ที่รวมทุกๆอย่างเอาไว้ในเว็บไซต์เดียว ที่กำลังได้รับความนิยมและเป็นที่พึงพอใจของผู้เล่น มีคุณภาพ ใช้กฎกติกาแบบสากลล้ำยุค เป็น เว็บตรง ที่ไม่ผ่านเอเย่นต์ ปลอดภัยแล้วก็เชื่อถือได้ที่สุดการ ฝากถอนระบบออโต้ ไม่ยุ่งยาก ไม่ต้องรอนาน บริหารงานโดยคณะทำงานแล้วก็ Call Center ที่มีคุณภาพที่รอบริการ ตลอด 1 วัน.
Thanks for share.
Maillot de football
[…]below youll discover the link to some sites that we think you’ll want to visit[…]
Wonderful website. A lot of useful info here. I’m sending it to several friends ans also sharing in delicious. And naturally, thanks for your sweat!
Hi there! I could have sworn I’ve been to this site before but after checking through some of the post I realized it’s new to me. Anyways, I’m definitely glad I found it and I’ll be book-marking and checking back often!
It’s very effortless to find out any topic on web as compared to books,
as I found this article at this web site.
What i do not realize is actually how you are not really much more well-liked than you might be now. You are very intelligent. You realize thus considerably relating to this subject, produced me personally consider it from numerous varied angles. Its like men and women aren’t fascinated unless it?s one thing to accomplish with Lady gaga! Your own stuffs excellent. Always maintain it up!
Thanks for the article post. Really Cool.
This is one awesome blog article.Thanks Again. Really Cool.
What an insightful and thoroughly-researched article! The author’s meticulousness and capability to present complicated ideas in a understandable manner is truly commendable. I’m totally impressed by the breadth of knowledge showcased in this piece. Thank you, author, for sharing your knowledge with us. This article has been a true revelation!
I really like and appreciate your blog post.Much thanks again. Keep writing.
Music started playing anytime I opened this site, so irritating!
I truly appreciate this article.Thanks Again. Will read on…
Hello there, I found your website via Google while looking for a related topic, your web site came up, it looks good. I’ve bookmarked it in my google bookmarks.
Thanks for shares.
Major thankies for the post.Thanks Again. Great.
Definitely imagine that that you said. Your favourite reason seemed to be on the internet the simplest factor to bear in mind of. I say to you, I definitely get annoyed whilst folks think about concerns that they just don’t recognise about. You managed to hit the nail upon the top and outlined out the whole thing with no need side effect , people could take a signal. Will likely be again to get more. Thanks
Hiya, I’m really glad I’ve found this information. Nowadays bloggers publish just about gossips and net and this is really annoying. A good web site with exciting content, this is what I need. Thanks for keeping this web site, I’ll be visiting it. Do you do newsletters? Cant find it.
Thanks for the suggestions you have contributed here. Moreover, I believe there are several factors that will keep your auto insurance premium decrease. One is, to think about buying cars and trucks that are within the good listing of car insurance corporations. Cars which are expensive tend to be more at risk of being lost. Aside from that insurance coverage is also in accordance with the value of your car, so the more expensive it is, then higher the particular premium you make payment for.
Thanks for your publication. I would like to say this that the very first thing you will need to accomplish is verify if you really need credit improvement. To do that you have got to get your hands on a duplicate of your credit file. That should never be difficult, ever since the government makes it necessary that you are allowed to receive one no cost copy of your own credit report on a yearly basis. You just have to request that from the right people today. You can either look at website with the Federal Trade Commission or maybe contact one of the leading credit agencies immediately.
I used to be suggested this web site through my cousin. I am no longer positive whether or not this publish is written via him as no one else know such specific approximately my trouble. You’re wonderful! Thanks!
คาสิโนออนไลน์ พนันออนไลน์เว็บตรง ฝากถอน ไม่มีขั้นต่ำ ที่ให้บริการคาสิโนอนไลน์ ที่ดีที่สุด คาสิโนออนไลน์ พนันพนันออนไลน์ ที่ให้บริการคาสิโนออนไลน์ ที่เหมาะสมที่สุด การให้บริการ พนันคาสิโนสดออนไลน์ ที่มีให้บริการ ที่เว็บยูฟ่าเบท เป็น คาสิโนออนไลน์เว็บตรง ที่เปิดให้บริการ มาอย่างช้านาน และมีพนันคาสิโนออนไลน์ ที่ล้ำสมัย ซึ่งเป็นเว็บไซต์ ที่มีการพัฒนาอยู่ตลอด โดยคณะทำงานคุณภาพ ที่จะทำให้นักพนัน ได้เล่นพนันที่ล้ำยุค. รวดเร็ว แล้วก็ไม่มีอันตรายมาก เป็นค่ายเกมพนันคาสิโนออนไลน์ ที่มีอีกทั้งแบบเล่นออนไลน์สด แล้วก็ เกมพนันคาสิโนต่างๆให้นักเสี่ยงดวงได้เลือก คาสิโนออนไลน์ได้เงินจริง แล้วก็พนัน เพื่อสร้างกำไรง่าย ด้วยต้นแบบการเล่นพนัน ที่เล่นง่าย รู้เรื่องได้อย่างไม่ยากเย็น ใช้เวลาไม่นาน นักพนักก็จะสามารถเล่นพนันได้อย่างสบาย รวมทั้งทำเงิน มีเงินเต็มกระเป๋ากลับบ้านแน่นอน.
Thanks for shares.
I believe you have mentioned some very interesting points, regards for the post.
I?ve recently started a web site, the information you offer on this website has helped me greatly. Thank you for all of your time & work.
Wow, awesome blog layout! How long have you been blogging for? you make blogging look easy. The overall look of your site is fantastic, as well as the content!
This design is steller! You certainly know how to keep a reader amused. Between your wit and your videos, I was almost moved to start my own blog (well, almost…HaHa!) Fantastic job. I really enjoyed what you had to say, and more than that, how you presented it. Too cool!
What i do not understood is actually how you’re not really much more well-liked than you may be now. You are very intelligent. You realize therefore considerably relating to this subject, produced me personally consider it from numerous varied angles. Its like women and men aren’t fascinated unless it is one thing to do with Lady gaga! Your own stuffs outstanding. Always maintain it up!
Hi, Neat post. There’s a problem together with your site in web explorer, could test this… IE nonetheless is the market chief and a huge part of other people will pass over your excellent writing because of this problem.
best delta 8 flower website
I think this website holds some really good info for everyone :D. “The public will believe anything, so long as it is not founded on truth.” by Edith Sitwell.
Whats up very cool blog!! Man .. Beautiful .. Wonderful .. I’ll bookmark your site and take the feeds additionally?KI am glad to search out so many useful information here in the publish, we want develop more strategies in this regard, thanks for sharing. . . . . .
Your blog deserves all the recognition for its quality content.
Superb blog you have here but I was wondering if you knew of any message boards that cover the same topics discussed here? I’d really like to be a part of group where I can get responses from other experienced individuals that share the same interest. If you have any suggestions, please let me know. Appreciate it!
I have figured out some new issues from your internet site about desktops. Another thing I have always thought is that computers have become a product that each home must have for many people reasons. They supply you with convenient ways in which to organize households, pay bills, shop, study, tune in to music and in many cases watch tv series. An innovative way to complete these types of tasks is to use a computer. These pcs are portable ones, small, effective and portable.
F*ckin’ awesome things here. I’m very glad to see your post. Thank you a lot and i am looking forward to contact you. Will you kindly drop me a mail?
I’m still learning from you, but I’m trying to reach my goals. I definitely enjoy reading everything that is posted on your blog.Keep the stories coming. I loved it!
Finden Sie den Stream Ihrer Wahl und genie?en Sie die Show https://cupidocam.com/content/tags/milf. Webcam-Girl-Modelle und kostenlose Shows durchsuchen
I do accept as true with all of the ideas you’ve offered on your post. They are really convincing and can definitely work. Still, the posts are too quick for starters. May just you please prolong them a little from subsequent time? Thanks for the post.
Hello! I just would like to give a huge thumbs up for the great info you have here on this post. I will be coming back to your blog for more soon.
As I website possessor I conceive the subject matter here is real good, thankyou for your efforts.
ปลอดภัยทุกการใช้แรงงาน รองรับทุกการใช้งาน เว็บเกมสล็อตออนไลน์ของเรา เป็นเว็บตรงจึงทำให้ทุกการพนันเกมสล็อตของท่าน ไม่มีอันตรายทุกการใช้แรงงาน และรับประกันได้ว่าในทุกวันนั้นท่านจะสามารถทำเงินผลกำไรได้จริงโดยไม่ต้องผ่านเอเย่นหรือคนกลางเลย เว็บไซต์ตรง อัพเดทเว็บไซต์อยู่ตลอดเวลาจึงทำให้การใช้แรงงานนั้น รองรับทุกการใช้งาน รับประกันได้ว่ามีความสะดวกและปลอดภัยแถมมีความเสถียรสำหรับเพื่อการใช้งานมากมาย เว็บที่มีการประกันรายได้ให้กับนักเล่นการพนันทุกท่านได้จริงนั่นเอง.
yes baby yes
I can’t express how much I value the effort the author has put into writing this exceptional piece of content. The clarity of the writing, the depth of analysis, and the abundance of information provided are simply impressive. Her zeal for the subject is evident, and it has certainly resonated with me. Thank you, author, for providing your wisdom and enriching our lives with this extraordinary article!
There are certainly lots of details like that to take into consideration. That is a nice point to carry up. I offer the thoughts above as normal inspiration but clearly there are questions just like the one you carry up the place crucial thing can be working in honest good faith. I don?t know if best practices have emerged around things like that, but I am positive that your job is clearly recognized as a good game. Each boys and girls really feel the influence of just a moment?s pleasure, for the rest of their lives.
Great blog right here! Also your site a lot up fast! What host are you the usage of? Can I am getting your associate link in your host? I want my website loaded up as fast as yours lol
delta 8 sleeping
Yesterday, while I was at work, my sister stole my iphone and tested to see if it can survive a thirty foot drop, just so she can be a youtube sensation. My apple ipad is now destroyed and she has 83 views. I know this is completely off topic but I had to share it with someone!
3chi delta 8 comfortably numb
wonderful points altogether, you simply gained a new reader. What would you recommend about your post that you made a few days ago? Any positive?
Hello there! I know this is kinda off topic however I’d figured I’d ask. Would you be interested in exchanging links or maybe guest authoring a blog post or vice-versa? My website goes over a lot of the same subjects as yours and I think we could greatly benefit from each other. If you might be interested feel free to shoot me an email. I look forward to hearing from you! Excellent blog by the way!
Very interesting info !Perfect just what I was searching for!
I do not even know how I ended up here, but I thought this post
was good. I don’t know who you are but certainly you’re going to a famous blogger if
you are not already 😉 Cheers!
I do not even know how I ended up here, but I thought this post
was good. I don’t know who you are but certainly you’re going to a famous blogger if
you are not already 😉 Cheers!
Say, you got a nice blog.Really thank you! Keep writing.
go hell baby
by by baby
hello!,I like your writing so much! share we communicate more about your post on AOL? I require a specialist on this area to solve my problem. Maybe that’s you! Looking forward to see you.
Great blog article.Really looking forward to read more. Want more.
come on baby
Ms Sethi, Ayisha Diaz, The Fan Van ONLY FANS LEAKS ( https://UrbanCrocSpot.org )
Great article. It’s very unfortunate that over the last one decade, the travel industry has already been able to to fight terrorism, SARS, tsunamis, flu virus, swine flu, as well as the first ever real global economic downturn. Through all of it the industry has really proven to be effective, resilient and also dynamic, locating new methods to deal with hardship. There are always fresh problems and the opportunity to which the sector must just as before adapt and act in response.
Fantastic website. Plenty of useful information here. I?m sending it to several friends ans also sharing in delicious. And certainly, thanks for your sweat!
But wanna comment on few general things, The website pattern is perfect, the subject matter is real great : D.
This is one awesome blog article.Thanks Again. Much obliged.
I feel that is one of the most vital information for me. And i’m satisfied reading your article. But want to remark on few basic things, The website style is wonderful, the articles is in reality nice : D. Just right activity, cheers
come on baby
Really appreciate you sharing this blog post.Really thank you! Really Cool.
by by hepiniz
Great work! This is the type of info that should be shared around the web. Shame on the search engines for not positioning this post higher! Come on over and visit my site . Thanks =)
Thank you for the auspicious writeup. It in reality was once a leisure account it. Glance complex to far added agreeable from you! However, how could we be in contact?
บาคาร่าออนไลน์ เว็บที่คนเล่นมากที่สุด เล่นบนมือถือ ได้เงินจริง บาคาร่าออนไลน์ เปิดให้บริการสําหรับทุกคน สามารถเล่น บาคาร่าออนไลน์ เข้าระบบระบบอัตโนมัติ ผ่านทางหน้าเว็บได้จากทุกอุปกรณ์ อยู่ที่ไหนท่านก็ สามารถเล่นได้ มีครบทุกค่ายดัง SA Game, Pretty Gaming Baccarat, Sexy Baccarat หรือ ชวนมอง บาคาร่า ทีมงานข้างหลังบ้านมี ความมีประสิทธิภาพที่เราสามารถ ให้การัน ตีกับทุกคนได้ เวลาเกิดปัญหาในการเล่นพนัน บาคาร่า ออนไลน์ หรือ พบเจอปัญหาของเกม ก็สามารถแจ้งกับทีม งานสุดงามของพวกเราถึงที่เหมาะหนทาง Line เว็บของเรามา ท่านจะได้พบกับ โปรโมชั่นพิเศษจำนวนหลายชิ้น ไม่ว่าจะเป็นเครดิตฟรี และยังมีคืนยอดเสีย แล้วก็คำแนะนำเอ็กคลูซีฟอีกเพียบเลย.
Thanks for the unique tips contributed on this weblog. I have observed that many insurers offer clients generous special discounts if they choose to insure several cars with them. A significant variety of households have got several motor vehicles these days, specially those with more aged teenage kids still residing at home, as well as savings on policies can easily soon increase. So it makes sense to look for a good deal.
Looking forward to reading more. Great post.Thanks Again.
by by hepiniz
สล็อต168 เว็บตรงไม่ผ่านเอเย่นต์ ฝาก-ถอนไม่มีอย่างน้อย เว็บสล็อตชั้น 1 เว็บสล็อตฝากถอนไม่มีอย่างน้อย เปิดบริการเกี่ยวกับเกมสล็อตออนไลน์มาอย่างช้านาน มีค่ายเกมส์ให้เลือกเล่นจำนวนมากหลายกหลายค่ายเกมส์ เรียกง่ายๆว่า รวมสล็อตทุกค่าย เอาไว้ในเว็บเดียวแล้ว ลงทะเบียนกล้วยๆไม่กี่ขั้นตอนพร้อมรับโปรโมชั่นฝากแรกได้ทันทร มีคณะทำงานมีอาชีพคอยให้คำแนะนำตลอด 24 ชั่วโมง สล็อตออนไลน์ ฝาก-ถอนเร็วด้วยระบบออโต้จำต้อง แค่นั้นทำรายการไม่ถึง 10 เร็วโคตรๆแถมยังโปรโมชั่นเยอะ แอ ป คดโกง เกม แตกง่าย จ่ายจริง ไม่มีกลั้น ไม่มีอย่างต่ำ 1 บาทก็เล่นได้แล้ว เว็บเดียวจบครบทุกบริการ มีข้าราชการคอยดูแลตลอด 24 ชั่วโมง สล็อต168 ผู้ให้บริการสล็อตออนไลน์อันดับ 1 ในไทย ให้บริการมายาวนานมากกว่า 10 ปี เพราะเราเป็น สล็อตเว็บไซต์ตรงไม่ผ่านเอเย่นต์ มีใบเซอร์การันตีจากต่างแดน เล่นง่ายได้เงินจริง เว็บตรง มั่นคง ปลอดภัย เปิดให้บริการวันแล้ววันเล่า ไม่มีหยุด ตลอด 24 ชั่วโมง
Thanks for another fantastic article. Where else could anybody get that kind of info in such a perfect way of writing? I have a presentation next week, and I’m on the look for such information.
Terrific work! This is the type of info that should be shared around the web. Shame on the search engines for not positioning this post higher! Come on over and visit my site . Thanks =)
Hello my friend! I want to say that this post is amazing, nice written and include almost all significant infos. I would like to see more posts like this.
With havin so much content and articles do you ever run into any problems of plagorism or
copyright infringement? My site has a lot of exclusive content I’ve either written myself or outsourced but it looks like a lot of it is popping it up
all over the web without my permission. Do you know any solutions to help stop content from being
stolen? I’d definitely appreciate it.
A big thank you for your blog post.Thanks Again. Much obliged.
Thanks for shares.
Thanks-a-mundo for the article. Awesome.
Wow, marvelous blog layout! How long have you been blogging for? you made blogging look easy. The overall look of your site is excellent, as well as the content!
Very neat post.Thanks Again. Great.
Major thankies for the blog article.Really thank you! Will read on…
wow, awesome blog. Much obliged.
Thanks again for the blog.Thanks Again. Awesome.
Say, you got a nice blog article.Really looking forward to read more. Really Great.
Wonderful blog! Do you have any suggestions for aspiring writers? I’m hoping to start my own blog soon but I’m a little lost on everything. Would you recommend starting with a free platform like WordPress or go for a paid option? There are so many choices out there that I’m completely confused .. Any ideas? Appreciate it!
Appreciate you sharing, great blog article. Really Cool.
Today, with the fast way of living that everyone leads, credit cards have a huge demand in the economy. Persons out of every field are using credit card and people who aren’t using the card have made arrangements to apply for 1. Thanks for spreading your ideas on credit cards.
thanks for share
http://ecubedphotography.com/welcome-karla-velez-to-the-e-cubed-photography-senior-model-team/
thanks for share
Thanks for sharing, this is a fantastic blog.Really looking forward to read more. Much obliged.
ดูหนังใหม่ Netflix คนไม่ใช่น้อยคงชอบดูหนังออนไลน์ผ่าน Netflix เนื่องจากว่ามีให้เลือกดูหนังนานาประการ ไม่ว่าจะเป็น หนังไทย หนังฝรั่ง หนังเกาหลี แถมระบบดูหนังชัดระดับ 4k แต่คงหลบหลีกข้อผิดพลาดการดูหนังใน Netflix ที่สำคัญที่สุดไม่ได้นั้นเป็นจำต้องเสียเงินเสียทองรายเดือนซึ่งเวปของพวกเรานั้นได้นำหนังต่างๆใน Netflix ทุกเรื่องมาลงให้ท่านได้เลือกดูหนังกันแบบฟรีๆไม่มีค่าใช้จ่าย แถมยังสามารถ ดาวน์โหลดหนัง Netflix ไปดูกันได้อีกด้วย การดูหนัง Netflix ผ่านเว็บดูหนังออนไลน์ของพวกเรานั้นท่านจะได้รับประสบการณ์ดูหนังอย่างดีที่สุด ชัดที่สุดเนื่องจากว่าเซิฟเวอร์อัพหนังของเรานั้นมีความเร็วและเสถียรสูงสุด ทำให้ไม่จำเป็นที่จะต้องมาวิตกกังวลถึงจะมีผู้ชมมากไม่น้อยเลยทีเดียวมองพร้อมกัน ก็ไม่ทำให้ กระตุกหรือภาพแตกแต่อย่างใด.
Hey, thanks for the article.Thanks Again. Awesome.
Hey there, You have done an incredible job. I’ll certainly digg it and personally recommend to my friends. I’m confident they will be benefited from this website.
Hi there! I could have sworn I’ve been to this site before but after browsing through some of the post I realized it’s new to me. Anyhow, I’m definitely glad I found it and I’ll be bookmarking and checking back often!
Fiverr Earn
[…]always a huge fan of linking to bloggers that I love but dont get a lot of link appreciate from[…]
thanks for share
Thanks again for the blog post. Cool.
สมัคร Ufabet สมัครฟรี พร้อมพนันเกมประสิทธิภาพ บริการ 24 ชั่วโมง สมัคร Ufabet มีความพร้อมสำหรับเพื่อการเล่นพนันได้โดยทันที ขั้นตอนสมัครสมาชิกไม่ยากเลือก ลงทะเบียนได้หลายวิถีทาง ระบบพนันสมัยใหม่รองรับทุกแพลตฟอร์ม การคลังมั่นคง ฝากถอนเร็ว เล่นจริงชำระเงินตรง บริการดุจวีไอพีทีมงานมือโปร สนใจสมัคร Ufabet จำเป็นต้องทำเช่นไรบ้าง สำหรับ กระแส ความนิยม ของการ เล่นพนันออนไลน์ ได้รับ ความสนใจ ไม่น้อย การสมัคร Ufabet ก็เลยเป็น เว็บพนัน ที่มี ยอดการสมัคร แล้วก็การใช้งาน ขึ้นเป็น ลำดับต้นๆ โดยมี โอกาส ของการ สมัคร สมาชิกที่ คุณสามารถ ใช้งานได้ ทั้งสองแบบหมายถึงการสมัครผ่านหน้า เว็บไซต์หลัก หรือจะเป็น การแอดไลน์ เพื่อติดต่อ แอดมิน.
Thanks for your article. One other thing is the fact individual states in the United states of america have their particular laws of which affect home owners, which makes it quite difficult for the our elected representatives to come up with a brand new set of guidelines concerning home foreclosure on house owners. The problem is that each state provides own laws and regulations which may interact in a damaging manner with regards to foreclosure procedures.
Very nice post. I just stumbled upon your blog and wished to say that I have really enjoyed surfing around your blog posts. In any case I will be subscribing in your feed and I’m hoping you write once more soon!
thanks for share
fiverrearn.com
[…]usually posts some incredibly interesting stuff like this. If you are new to this site[…]
Great article. It is extremely unfortunate that over the last ten years, the travel industry has already been able to to deal with terrorism, SARS, tsunamis, influenza, swine flu, and the first ever real global tough economy. Through all this the industry has proven to be robust, resilient and dynamic, discovering new tips on how to deal with trouble. There are usually fresh problems and chance to which the industry must once again adapt and react.
thanks for share
Great blog! Do you have any helpful hints for aspiring writers? I’m hoping to start my own blog soon but I’m a little lost on everything. Would you propose starting with a free platform like WordPress or go for a paid option? There are so many options out there that I’m completely overwhelmed .. Any recommendations? Thanks!
Say, you got a nice blog.Really thank you! Fantastic.
thanks for share
Thank you for the good writeup. It in reality used to be a amusement account
it. Look complicated to more introduced agreeable
from you! By the way, how could we be in contact?
ดูหนังใหม่ออนไลน์ หนังชนโรง สนุกๆมันๆภาพแล้วก็เสียงชัดแจ๋ว HD. หนังค่ายดัง ชนโรง ภาพสมจริงสมจัง ทุกเรื่อง หนังเก่า หนังใหม่ ค่าย Netflix, Disney+, Viu หนังต่างชาติ หนังไทย หนังเกาหลี ยุโรป ครบทุกแบบที่ต้องการ ซี่รี่ย์ หนังภาคเยอะมากมายสักเท่าไหร่ก็จัดได้เลย ด้วยเสียงพากย์ไทย หนังซับฝรั่งให้ได้รับชมอย่างตื่นเต้น ครบแน่ๆทุกเรื่องที่ท่านปรารถนารับดู ผู้ใดกันที่พอใจเรื่องไหน เข้ามากดค้นหาได้ง่ายๆพิมพ์ชื่อแล้วพบแน่นอน เลือกหลังที่ท่านปรารถนา แล้วเข้ามาชมได้ในทันที ตลอด 24 ชั่วโมง การันตีเลยว่าชอบใจ ตื่นเต้น ดราม่าน้ำตาแตกอย่างไม่ต้องเกรงใจผู้ใดกันเลย เข้าชมหนังที่ท่านอยากได้ทันโลก ไม่ตกเทรน หนังซูม หนังชนโรง ภาพรวมทั้งเสียงสมจริงสมจัง ตามต้นฉบับที่สุด ดูหนังฟรี ดูหนัง ดูหนังผ่านอินเตอร์เน็ตฟรี.
Appreciate you sharing, great blog article.Much thanks again. Really Cool.
I loved your blog. Great.
thanks for share
Say, you got a nice blog article.Really looking forward to read more. Really Great.
คาสิโนออนไลน์ พนันออนไลน์เว็บไซต์ตรง ฝากถอน ไม่มีอย่างต่ำ ที่ให้บริการคาสิโนอนไลน์ ที่เยี่ยมที่สุด คาสิโนออนไลน์ พนันพนันออนไลน์ ที่ให้บริการคาสิโนออนไลน์ ที่ดีเยี่ยมที่สุด การให้บริการ พนันคาสิโนสดออนไลน์ ที่มีให้บริการ ที่เว็บไซต์ยูฟ่าเบท เป็น คาสิโนออนไลน์เว็บตรง ที่เปิดให้บริการ มาอย่างยาวนาน แล้วก็มีพนันคาสิโนออนไลน์ ที่นำสมัย ซึ่งเป็นเว็บไซต์ ที่มีการพัฒนาอยู่เสมอ โดยทีมงานคุณภาพ ที่จะทำให้นักการพนัน ได้เล่นพนันที่ล้ำยุค. เร็วทันใจ และก็ไม่มีอันตรายมากมาย เป็นค่ายเกมพนันคาสิโนออนไลน์ ที่มีทั้งยังแบบเล่นออนไลน์สด และก็ เกมพนันคาสิโนต่างๆให้นักการพนันได้เลือก คาสิโนออนไลน์ได้เงินจริง รวมทั้งเดิมพัน เพื่อสร้างกำไรง่าย ด้วยรูปแบบการเล่นพนัน ที่เล่นง่าย รู้เรื่องได้อย่างไม่ยากเย็น ใช้เวลาไม่นาน นักพนักก็จะสามารถเล่นพนันได้อย่างสบาย และก็ทำเงิน มีเงินเต็มกระเป๋ากลับไปอยู่บ้านแน่นอน.
Pretty portion of content. I simply stumbled upon your weblog and in accession capital to claim that I get in fact loved account your weblog posts. Any way I will be subscribing on your augment or even I fulfillment you access consistently rapidly.
สล็อตเว็บไซต์ตรง ไม่ผ่านเอเย่นต์ pg ฝาก-ถอน ออโต้ รับทรูวอลเลท สล็อต ที่เหมาะสมที่สุด เริ่มต้นใช้บริการกับทางห้องเกม สล็อตเว็บไซต์ตรง ของพวกเราในขณะนี้ นักเสี่ยงโชคจะสามารถใช้แพลตฟอร์มของพวกเราสำหรับเพื่อการพนัน สล็อต ที่สามารถให้ความรื่นเริงกับนักพนันทุกคนได้มากที่สุดสำหรับการเข้าใช้บริการ อีกด้วยต้องบอกเลยว่ามีทั้งกฎข้อตกลงสำหรับเพื่อการเข้าใช้บริการแล้วก็ยังคงสามารถทำให้นักเล่นการพนันทุกคนได้เพลินกับทุกขั้นตอนสำหรับเพื่อการลงพนันของเราตรงนี้กันได้ง่ายที่สุดด้วย. เพราะเหตุไรต้องเป็น สล็อตเว็บตรง ? เว็บไซต์ตรงสล็อต ผิดแผกแตกต่างกับเว็บไซต์ไม่ตรงยังไง ถือว่าเป็นปัญหาโลกแตกมากมายๆสำหรับสายเล่นสล็อต กับคำถามที่ว่า สล็อตเว็บไซต์ตรง ต่างกันกับเว็บไซต์สล็อตที่ไม่ตรงอย่างไร ก่อนเริ่มประเด็นจะต้องชี้แจงก่อนว่าตอนนี้นั้น ได้มีเว็บไซต์สล็อตที่เปิดใหม่มากมาย และก็การเปิดเว็บไซต์สมัยปัจจุบันนี้นั้นทำเป็นง่ายอย่างยิ่งๆฉะนั้นก็เลยมีประเภทของเว็บไซต์หลักๆอยู่ 2 ประเภท โดยประเภทแรกนั้นเป็นเว็บไซต์ที่ได้รับการยืนยันจากค่ายเกมโดยตรง ซึ่งพวกเราเรียกเว็บกลุ่มนี้ว่า “เว็บไซต์ตรง” และก็อีกจำพวกนึงที่แอบอ้างนำระบบ API มาปลดปล่อยให้ลูกค้าเล่น เราเรียกเว็บไซต์แห่งนี้ว่า “เว็บไม่ตรง”.
Aw, this was a really nice post. In concept I would like to put in writing like this additionally ? taking time and precise effort to make a very good article? but what can I say? I procrastinate alot and under no circumstances seem to get one thing done.
I truly appreciate this blog.Really thank you! Great.
This is one awesome blog post.Really looking forward to read more. Will read on…
สำหรับคนที่ชอบดูหนังผ่านเน็ตผ่านมือถือ iPhone , Androids หรือ สมาร์ท TV เว็บของพวกเราประพฤติตนเล่นหนังเพื่อมารองรับระบบนี้โดยเฉพาะอย่างยิ่ง สามารถโหลดเร็วแรง ไม่มีสะดุด รวมทั้งสามารถเลือกใช้ฟังชั่นได้ครบทุกต้นแบบ ไม่ว่าจะเป็น เรื่องการปรับความละเอียดตัวเล่นหนังตั้งแต่ 360p ไปจนกระทั่ง 1080p รวมทั้งยังมีฟังชั่้นเสริม สามารถเปิดปิดซับไทยได้ ในบางเรื่องที่เป็นหนัง 2 ภาษาที่มีให้เลือกอีกทั้ง ไทยและก็ซาวด์แทร็ก หรือสามารถปรับแต่งรำเพื่ออ่านซึมซับได้ง่ายดายมากยิ่งขึ้นในโทรศัพท์เคลื่อนที่บางรุ่นอีกด้วย.
Its like you read my mind! You appear to understand a lot approximately this, such as you wrote the ebook in it or something. I feel that you just can do with a few to drive the message home a bit, however other than that, that is excellent blog. An excellent read. I’ll certainly be back.
You really make it appear so easy together with your presentation but I find this matter to be actually one thing that I think I’d never understand. It kind of feels too complex and extremely wide for me. I am having a look ahead on your subsequent put up, I will attempt to get the dangle of it!
Very good post. Great.
A big thank you for your blog article.Much thanks again. Great.
I truly appreciate this blog article. Will read on…
Howdy! I know this is somewhat off topic but I was wondering which blog platform are you using for this website? I’m getting tired of WordPress because I’ve had issues with hackers and I’m looking at options for another platform. I would be awesome if you could point me in the direction of a good platform.
Thank you, I have just been searching for information about this subject for ages and yours is the greatest I have discovered till now. But, what about the conclusion? Are you sure about the source?
Thanks a lot for the blog post.Really thank you! Cool.
Thanks , I’ve just been searching for information about this topic for ages and yours is the best I have discovered till now. But, what about the bottom line? Are you sure about the source?
okmark your weblog and check again here frequently. I’m quite certain I?ll learn plenty of new stuff right here! Good luck for the next!
Looking forward to reading more. Great blog article. Cool.
I really enjoy the post.Really looking forward to read more. Want more.
Good write-up, I?m regular visitor of one?s blog, maintain up the excellent operate, and It is going to be a regular visitor for a long time.
Thanks for the blog.Much thanks again. Really Cool.
I?d have to test with you here. Which is not something I normally do! I get pleasure from studying a put up that can make people think. Also, thanks for allowing me to comment!
I’m not that much of a online reader to be honest but your blogs really nice, keep it up! I’ll go ahead and bookmark your site to come back down the road. Many thanks
Hey there, You have done an excellent job. I will certainly digg it and personally recommend to my friends. I am confident they will be benefited from this web site.
I’m truly enjoying the design and layout of your website. It’s a very easy on the eyes which makes it much more pleasant for me to come here and visit more often. Did you hire out a designer to create your theme? Fantastic work!
Major thanks for the blog.Thanks Again. Really Cool.
Thanks for your post. Another item is that being photographer will involve not only problems in taking award-winning photographs and also hardships in acquiring the best photographic camera suited to your requirements and most especially situations in maintaining the quality of your camera. It is very real and clear for those photography lovers that are in capturing the actual nature’s interesting scenes : the mountains, the particular forests, the particular wild or the seas. Visiting these amazing places certainly requires a camera that can surpass the wild’s severe landscapes.
Fantastic beat ! I wish to apprentice while you amend your website, how could i subscribe for a blog site? The account helped me a acceptable deal. I had been tiny bit acquainted of this your broadcast provided bright clear idea
Major thankies for the post.Thanks Again. Awesome.
wow, awesome blog post.Much thanks again. Great.
Im grateful for the article.
Thanks a lot for the blog post.Thanks Again. Cool.
Say, you got a nice article. Great.
I’m not that much of a internet reader to be honest but your blogs really nice, keep it up! I’ll go ahead and bookmark your website to come back in the future. Cheers
One thing I’ve noticed is always that there are plenty of beliefs regarding the banks intentions whenever talking about home foreclosure. One fairy tale in particular is the bank would like your house. The lender wants your cash, not the house. They want the cash they lent you along with interest. Staying away from the bank is only going to draw a new foreclosed summary. Thanks for your posting.
Thanks so much for the article.Really looking forward to read more. Much obliged.
One thing is the fact one of the most widespread incentives for using your card is a cash-back or rebate provision. Generally, you’ll receive 1-5 back in various buying. Depending on the credit cards, you may get 1 returning on most acquisitions, and 5 back again on expenditures made from convenience stores, filling stations, grocery stores in addition to ‘member merchants’.
Nice info!
Thank you for your blog article.Really thank you!
Thanks for your article. It’s very unfortunate that over the last years, the travel industry has already been able to to deal with terrorism, SARS, tsunamis, flu virus, swine flu, along with the first ever real global recession. Through it the industry has proven to be sturdy, resilient and also dynamic, acquiring new tips on how to deal with hardship. There are usually fresh complications and the opportunity to which the business must just as before adapt and answer.
I am so grateful for your blog article. Fantastic.
A round of applause for your post.Much thanks again. Cool.
Thanks so much for the blog post.Much thanks again. Great.
GlucoTrust is a revolutionary blood sugar support solution that eliminates the underlying causes of type 2 diabetes and associated health risks.
Appreciate you sharing, great article.Much thanks again. Awesome.
https://r.search.yahoo.com/_ylt=AwrEs55Wp4tlEF4eSaDrFAx.;_ylu=Y29sbwNiZjEEcG9zAzQEdnRpZAMEc2VjA3Ny/RV=2/RE=1704860758/RO=10/RU=https3a2f2fhelp.rapidcents.com2f/RK=2/RS=.mHn43T7r_PWUx.keVSimmBs3SQ-
I have taken notice that in video cameras, specialized detectors help to {focus|concentrate|maintain focus|target|a**** automatically. Those kind of sensors connected with some cameras change in contrast, while others make use of a beam associated with infra-red (IR) light, specifically in low lighting. Higher standards cameras sometimes use a mix of both methods and might have Face Priority AF where the dslr camera can ‘See’ a new face and concentrate only on that. Many thanks for sharing your opinions on this web site.
You should take part in a contest for probably the greatest blogs on the web. I’ll advocate this website!
Really appreciate you sharing this article post. Really Great.
Nice site. On your blogs very interest and i will tell a friends.Metal roofing experts in Cape Coral, Florida
I value the blog. Want more.
It?s hard to search out knowledgeable people on this topic, however you sound like you realize what you?re talking about! Thanks
Im grateful for the blog article.Much thanks again. Great.
omg! can’t imagine how fast time pass, after August, ber months time already and Setempber is the first Christmas season in my place, I really love it!Metal roofing in Cape Coral
FiverrEarn
[…]Sites of interest we have a link to[…]
It’s the best time to make some plans for the future and it is time to be happy. I’ve read this post and if I could I wish to suggest you few interesting things or advice. Perhaps you could write next articles referring to this article. I wish to read even more things about it!
Thank you for your article post.Really looking forward to read more. Cool.
Needed to compose you a tiny note to finally thank you very much yet again for your personal splendid methods you have discussed above. It is strangely open-handed with people like you to provide publicly all that a number of people would have marketed as an electronic book to generate some bucks for their own end, primarily now that you could possibly have tried it if you ever wanted. These inspiring ideas likewise acted like a fantastic way to know that the rest have the same dreams really like my personal own to see a whole lot more concerning this problem. I’m sure there are thousands of more enjoyable times in the future for many who check out your blog.glucotrust official
Thanks-a-mundo for the blog post.Much thanks again. Really Cool.
Greetings from Los angeles! I’m bored at work so I decided to check out your website on my iphone during lunch break. I love the info you present here and can’t wait to take a look when I get home. I’m amazed at how quick your blog loaded on my phone .. I’m not even using WIFI, just 3G .. Anyways, very good site!
Great, thanks for sharing this article.Really thank you! Much obliged.
Muchos Gracias for your article post.Thanks Again. Will read on…
Good day! This post couldn’t be written any better! Reading through this post reminds me of my old room mate! He always kept talking about this. I will forward this article to him. Pretty sure he will have a good read. Many thanks for sharing!
Sight Care is a daily supplement proven in clinical trials and conclusive science to improve vision by nourishing the body from within. The Sight Care formula claims to reverse issues in eyesight, and every ingredient is completely natural.
Awesome article.Really looking forward to read more.
This is one awesome blog post.Much thanks again.
I really like and appreciate your blog.Really looking forward to read more. Great.
I am not sure where you’re getting your information, but good topic. I needs to spend some time learning more or understanding more. Thanks for wonderful info I was looking for this information for my mission.
Thanks-a-mundo for the post.Really looking forward to read more. Want more.
Termal Oteller Burada Olacak
Really informative blog article.Much thanks again. Want more.
Helpful info. Lucky me I discovered your website by chance, and I am shocked why this twist of fate did not took place earlier! I bookmarked it.
I have seen plenty of useful things on your internet site about computers. However, I have got the impression that lap tops are still more or less not powerful adequately to be a option if you often do jobs that require a great deal of power, including video editing and enhancing. But for web surfing, statement processing, and a lot other typical computer work they are just fine, provided you never mind the tiny screen size. Many thanks for sharing your ideas.
Thanks a bunch for sharing this with all of us you actually know what you’re talking about! Bookmarked. Kindly also visit my website =). We could have a link exchange agreement between us!
Wow, wonderful blog layout! How long have you been blogging for? you made blogging look easy. The overall look of your web site is excellent, as well as the content!
I really like and appreciate your post.Thanks Again. Keep writing.
Leanotox is one of the world’s most unique products designed to promote optimal weight and balance blood sugar levels while curbing your appetite,detoxifying and boosting metabolism.
Sugar Defender is the #1 rated blood sugar formula with an advanced blend of 24 proven ingredients that support healthy glucose levels and natural weight loss.
Puralean is an all-natural dietary supplement designed to support boosted fat-burning rates, energy levels, and metabolism by targeting healthy liver function.
PowerBite is a natural tooth and gum support formula that will eliminate your dental problems, allowing you to live a healthy lifestyle.
I truly appreciate this blog. Cool.
Thanks
Fast Lean Pro is a natural dietary aid designed to boost weight loss. Fast Lean Pro powder supplement claims to harness the benefits of intermittent fasting, promoting cellular renewal and healthy metabolism.
Hmm it looks like your site ate my first comment (it was extremely long) so I guess I’ll just sum it up what I wrote and say, I’m thoroughly enjoying your blog. I too am an aspiring blog writer but I’m still new to the whole thing. Do you have any helpful hints for newbie blog writers? I’d genuinely appreciate it.
Another thing is that when evaluating a good internet electronics retail outlet, look for online shops that are regularly updated, preserving up-to-date with the most up-to-date products, the very best deals, and also helpful information on services. This will ensure that you are handling a shop which stays ahead of the competition and gives you things to make knowledgeable, well-informed electronics buying. Thanks for the important tips I’ve learned from the blog.
Great blog.Really thank you! Really Great.
Java Burn is a proprietary blend of metabolism-boosting ingredients that work together to promote weight loss in your body.
เว็บหนังออนไลน์ Moviehdfree มีหนังฟรีให้เลือกดูกว่า 10,000 เรื่อง มีทั้งยังหนังเก่า หนังใหม่อีกทั้งหนังไทย ภาพยนตร์จีน ภาพยนตร์ฝรั่ง การ์ตูนอนิเมชั่น หนังทวีปเอเชีย ซีรีย์ทั้งยังไทยและก็ต่างประเทศ และหนังฯลฯ ให้คุณได้เลือกชมฟรีตลอด 24 ชั่วโมง มาพร้อมตัวเล่นให้เลือกรับชมได้หลากหลายทั้งยัง ตัวเล่นหลัก ตัวเล่นสำรอง บรรยายไทยรวมทั้งซาวด์แทร็ค ซับไทย พร้อมอัพเดทหนังใหม่ให้คุณได้รับดูก่อนใคร สามารถมองได้ผ่าน Smart TV , Android , iOS ได้ทุกเครือข่าย.
Yet another thing is that when looking for a good on the net electronics shop, look for web shops that are consistently updated, preserving up-to-date with the newest products, the most beneficial deals, and helpful information on products and services. This will make sure that you are dealing with a shop which stays ahead of the competition and provides you things to make knowledgeable, well-informed electronics acquisitions. Thanks for the significant tips I have really learned from your blog.
Good site! I truly love how it is easy on my eyes and the data are well written. I am wondering how I might be notified whenever a new post has been made. I have subscribed to your RSS which must do the trick! Have a great day!
Admiring the persistence you put into your site and detailed information you offer. It’s good to come across a blog every once in a while that isn’t the same outdated rehashed material. Excellent read! I’ve saved your site and I’m adding your RSS feeds to my Google account.
lol
lol
dentists in antalya
I know of the fact that now, more and more people are increasingly being attracted to camcorders and the subject of pictures. However, being a photographer, you have to first invest so much time deciding which model of digital camera to buy as well as moving store to store just so you could possibly buy the least expensive camera of the trademark you have decided to pick out. But it will not end right now there. You also have take into consideration whether you should buy a digital photographic camera extended warranty. Many thanks for the good recommendations I accumulated from your site.
Awesome blog post. Want more.
Thanks for your submission. I also feel that laptop computers have grown to be more and more popular right now, and now tend to be the only sort of computer utilized in a household. Simply because at the same time that they’re becoming more and more affordable, their processing power is growing to the point where there’re as potent as personal computers out of just a few years ago.
Thanks a lot for the blog article.Really thank you! Really Great.
I’m really impressed with your writing skills and also with the layout on your blog. Is this a paid theme or did you modify it yourself? Either way keep up the nice quality writing, it?s rare to see a great blog like this one nowadays..
An impressive share! I’ve just forwarded this onto a colleague who was conducting a little research on this. And he in fact ordered me lunch simply because I found it for him… lol. So let me reword this…. Thank YOU for the meal!! But yeah, thanx for spending some time to discuss this matter here on your internet site.
I am often to running a blog and i really admire your content. The article has actually peaks my interest. I am going to bookmark your web site and hold checking for brand new information.
I really enjoy the post.Thanks Again. Awesome.
Thank you sharing these types of wonderful blogposts. In addition, the perfect travel plus medical insurance approach can often relieve those considerations that come with travelling abroad. A new medical emergency can shortly become expensive and that’s absolute to quickly set a financial impediment on the family finances. Putting in place the excellent travel insurance bundle prior to leaving is worth the time and effort. Thanks
Really appreciate you sharing this article post.Much thanks again. Really Great.
I really like and appreciate your blog.Really thank you! Keep writing.
Hey just wanted to give you a quick heads up and let you know a few of the pictures aren’t loading correctly. I’m not sure why but I think its a linking issue. I’ve tried it in two different web browsers and both show the same results.
Hey I know this is off topic but I was wondering if you knew of any widgets I could
add to my blog that automatically tweet my newest twitter updates.
I’ve been looking for a plug-in like this for quite some time
and was hoping maybe you would have some experience with something like this.
Please let me know if you run into anything. I truly enjoy reading your blog and I look forward to your new updates.
Hi there would you mind letting me know which hosting company you’re utilizing? I’ve loaded your blog in 3 completely different web browsers and I must say this blog loads a lot quicker then most. Can you suggest a good internet hosting provider at a honest price? Thanks a lot, I appreciate it!
Aizen Power is an all-natural supplement designed to improve male health. This formula contains the beneficial properties of various plants, herbs, minerals, and vitamins that help men’s blood circulation, detoxification, and overall health. https://aizenpowerbuynow.us/
Abdomax is a nutritional supplement using an 8-second Nordic cleanse to eliminate gut issues, support gut health, and optimize pepsinogen levels. https://abdomaxbuynow.us/
เว็บไซต์ คาสิโนออนไลน์ ที่ดีที่สุด ปลอดภัย เชื่อถือได้ที่สุด คาสิโนออนไลน์ เป็นเว็บไซด์การเดิมพันออนไลน์ศูนย์รวมทุกๆสิ่งทุกๆอย่างไว้ภายในเว็บเดียว ที่กำลังได้รับความนิยมแล้วก็เป็นที่พึงพอใจของผู้เล่น มีคุณภาพ ใช้กฎข้อตกลงแบบสากลทันสมัย เป็น เว็บตรง ที่ไม่ผ่านเอเย่นต์ ปลอดภัยแล้วก็เชื่อถือได้ที่สุดการ ฝากถอนระบบออโต้ ไม่ยุ่งยาก ไม่ต้องรอนาน ดำเนินงานโดยทีมงานและ Call Center ที่มีคุณภาพที่คอยบริการ ตลอด 24 ชั่วโมง.
ProDentim is a nutritional dental health supplement that is formulated to reverse serious dental issues and to help maintain good dental health. https://prodentimbuynow.us/
FlowForce Max is an innovative, natural and effective way to address your prostate problems, while addressing your energy, libido, and vitality. https://flowforcemaxbuynow.us/
Endopeak is a natural energy-boosting formula designed to improve men’s stamina, energy levels, and overall health. The supplement is made up of eight high-quality ingredients that address the underlying cause of declining energy and vitality. https://endopeakbuynow.us/
Claritox Pro™ is a natural dietary supplement that is formulated to support brain health and promote a healthy balance system to prevent dizziness, risk injuries, and disability. This formulation is made using naturally sourced and effective ingredients that are mixed in the right way and in the right amounts to deliver effective results. https://claritoxprobuynow.us/
Folixine is a enhancement that regrows hair from the follicles by nourishing the scalp. It helps in strengthening hairs from roots. https://folixinebuynow.us/
Java Burn is a proprietary blend of metabolism-boosting ingredients that work together to promote weight loss in your body. https://javaburnbuynow.us/
The most talked about weight loss product is finally here! FitSpresso is a powerful supplement that supports healthy weight loss the natural way. Clinically studied ingredients work synergistically to support healthy fat burning, increase metabolism and maintain long lasting weight loss. https://fitspressobuynow.us/
Metabo Flex is a nutritional formula that enhances metabolic flexibility by awakening the calorie-burning switch in the body. The supplement is designed to target the underlying causes of stubborn weight gain utilizing a special “miracle plant” from Cambodia that can melt fat 24/7. https://metaboflexbuynow.us/
Quietum Plus supplement promotes healthy ears, enables clearer hearing, and combats tinnitus by utilizing only the purest natural ingredients. Supplements are widely used for various reasons, including boosting energy, lowering blood pressure, and boosting metabolism. https://quietumplusbuynow.us/
https://gutvitabuynow.us/
Sugar Defender is the #1 rated blood sugar formula with an advanced blend of 24 proven ingredients that support healthy glucose levels and natural weight loss. https://sugardefenderbuynow.us/
Prostadine is a dietary supplement meticulously formulated to support prostate health, enhance bladder function, and promote overall urinary system well-being. Crafted from a blend of entirely natural ingredients, Prostadine draws upon a recent groundbreaking discovery by Harvard scientists. This discovery identified toxic minerals present in hard water as a key contributor to prostate issues. https://prostadinebuynow.us/
Wild Stallion Pro, a natural male enhancement supplement, promises noticeable improvements in penis size and sexual performance within weeks. Crafted with a blend of carefully selected natural ingredients, it offers a holistic approach for a more satisfying and confident sexual experience. https://wildstallionprobuynow.us/
Thanks so much for the blog.Really looking forward to read more. Keep writing.
Hey there I am so thrilled I found your website, I really found you by mistake, while I was browsing on Yahoo for something else, Anyways I am here now and would just like to say thanks a lot for a marvelous post and a all round enjoyable blog (I also love the theme/design), I don’t have time to read through it all at the minute but I have book-marked it and also added in your RSS feeds, so when I have time I will be back to read a lot more, Please do keep up the fantastic job.
wonderful post, very informative. I ponder why the other experts of this sector do not understand this. You should continue your writing. I’m confident, you have a huge readers’ base already!
Thanks for your post on this blog. From my experience, often times softening upwards a photograph may provide the digital photographer with a chunk of an inspired flare. Many times however, that soft blur isn’t just what exactly you had planned and can frequently spoil an otherwise good snapshot, especially if you intend on enlarging it.
Thanks
I was suggested this blog by my cousin. I am not sure whether this post is written by him as no one else know such detailed about my trouble. You’re incredible! Thanks!
Thanks for your writing. I would like to say that your health insurance brokerage service also utilizes the benefit of the coordinators of any group insurance policies. The health insurance professional is given an index of benefits sought by individuals or a group coordinator. What a broker can is find individuals or coordinators which best match those desires. Then he gifts his tips and if all sides agree, this broker formulates an agreement between the 2 parties.
Your house is valueble for me. Thanks!?
I have seen a lot of useful points on your web-site about pcs. However, I have got the opinion that notebooks are still not quite powerful sufficiently to be a option if you often do projects that require a lot of power, for instance video modifying. But for world-wide-web surfing, statement processing, and many other frequent computer work they are just fine, provided you do not mind the small screen size. Thank you for sharing your opinions.
I have been absent for some time, but now I remember why I used to love this blog. Thank you, I?ll try and check back more often. How frequently you update your site?
Find healthy, delicious recipes and meal plan ideas from our test kitchen cooks and nutrition experts at SweetApple. Learn how to make healthier food choices every day. https://sweetapple.site/
RVVR is website dedicated to advancing physical and mental health through scientific research and proven interventions. Learn about our evidence-based health promotion programs. https://rvvr.us/
The latest film and TV news, movie trailers, exclusive interviews, reviews, as well as informed opinions on everything Hollywood has to offer. https://xoop.us/
Breaking US news, local New York news coverage, sports, entertainment news, celebrity gossip, autos, videos and photos at nybreakingnews.us https://nybreakingnews.us/
Really informative post.Really thank you! Much obliged.
Covering the latest beauty and fashion trends, relationship advice, wellness tips and more. https://gliz.us/
Breaking food industry news, cooking tips, recipes, reviews, rankings, and interviews https://tastingcorner.us/
The latest news on grocery chains, celebrity chefs, and fast food – plus reviews, cooking tips and advice, recipes, and more. https://megamenu.us/
Thanks for your posting. What I want to say is that when searching for a good online electronics shop, look for a web site with complete information on critical factors such as the privacy statement, security details, any payment guidelines, and various terms as well as policies. Often take time to browse the help and also FAQ segments to get a better idea of what sort of shop functions, what they are capable of doing for you, and the way you can make best use of the features.
Island Post is the website for a chain of six weekly newspapers that serve the North Shore of Nassau County, Long Island published by Alb Media. The newspapers are comprised of the Great Neck News, Manhasset Times, Roslyn Times, Port Washington Times, New Hyde Park Herald Courier and the Williston Times. Their coverage includes village governments, the towns of Hempstead and North Hempstead, schools, business, entertainment and lifestyle. https://islandpost.us/
OCNews.us covers local news in Orange County, CA, California and national news, sports, things to do and the best places to eat, business and the Orange County housing market. https://ocnews.us/
Your source for Connecticut breaking news, UConn sports, business, entertainment, weather and traffic https://connecticutpost.us/
The one-stop destination for vacation guides, travel tips, and planning advice – all from local experts and tourism specialists. https://travelerblog.us/
The destination for entertainment and women’s lifestyle – from royals news, fashion advice, and beauty tips, to celebrity interviews, and more. https://womenlifestyle.us/
I really enjoy the blog article.Really looking forward to read more. Great.
Stri is the leading entrepreneurs and innovation magazine devoted to shed light on the booming stri ecosystem worldwide. https://stri.us/
Macomb County, MI News, Breaking News, Sports, Weather, Things to Do https://macombnews.us/
Guun specializes in informative deep dives – from history and crime to science and everything strange. https://guun.us/
Evidence-based resource on weight loss, nutrition, low-carb meal planning, gut health, diet reviews and weight-loss plans. We offer in-depth reviews on diet supplements, products and programs. https://healthpress.us/
Hello my loved one! I wish to say that this post is awesome, great written and include approximately all significant infos. I?d like to see extra posts like this .
East Bay News is the leading source of breaking news, local news, sports, entertainment, lifestyle and opinion for Contra Costa County, Alameda County, Oakland and beyond https://eastbaynews.us/
Thanks a lot for the article post.Really looking forward to read more. Want more.
Hey There. I found your blog using msn. This is a very well written article. I?ll be sure to bookmark it and come back to read more of your useful information. Thanks for the post. I will definitely return.
News from the staff of the LA Reporter, including crime and investigative coverage of the South Bay and Harbor Area in Los Angeles County. https://lareporter.us/
I am so grateful for your article post.Really thank you! Cool.
Fantastic article post.Much thanks again. Really Cool.
Do you mind if I quote a couple of your posts as long as I provide credit and sources back to your weblog? My website is in the very same area of interest as yours and my users would genuinely benefit from some of the information you provide here. Please let me know if this ok with you. Many thanks!
Marin Breaking News, Sports, Business, Entertainment https://marinnews.us/
wow, awesome article post.Much thanks again. Fantastic.
I really liked your blog post.Thanks Again. Want more.
I really appreciate this post. I have been looking everywhere for this! Thank goodness I found it on Bing. You have made my day! Thanks again
This is the suitable weblog for anyone who wants to find out about this topic. You notice a lot its nearly onerous to argue with you (not that I actually would want?HaHa). You positively put a new spin on a topic thats been written about for years. Nice stuff, just nice!
Hi there! Do you use Twitter? I’d like to follow you if that would be ok. I’m definitely enjoying your blog and look forward to new updates.
Good news
Boulder News
Great post! Keep up the great work.
Greetings! Quick question that’s entirely off topic. Do you know how to make your site mobile friendly? My site looks weird when browsing from my iphone. I’m trying to find a template or plugin that might be able to correct this problem. If you have any suggestions, please share. Cheers!
Wow, great blog article.Much thanks again. Really Great.
Oakland County, MI News, Sports, Weather, Things to Do https://oaklandpost.us/
Reading, PA News, Sports, Weather, Things to Do http://readingnews.us/
I am so happy to read this. This is the kind of manual that needs to be given and not the accidental misinformation that’s at the other blogs. Appreciate your sharing this greatest doc.
Thanks for the diverse tips contributed on this website. I have seen that many insurance providers offer prospects generous discounts if they favor to insure multiple cars together. A significant volume of households own several cars or trucks these days, especially those with older teenage young children still residing at home, as well as savings with policies could soon mount up. So it will pay to look for a good deal.
Thanks
You really make it seem so easy with your presentation but I find this matter to be really something that I think I would never understand. It seems too complex and extremely broad for me. I am looking forward for your next post, I will try to get the hang of it!
Major thankies for the blog.Thanks Again. Will read on…
Hello this is somewhat of off topic but I was wondering if blogs use WYSIWYG editors or if you have to manually code with HTML. I’m starting a blog soon but have no coding know-how so I wanted to get guidance from someone with experience. Any help would be greatly appreciated!
One more thing is that when you are evaluating a good online electronics retail outlet, look for web shops that are constantly updated, maintaining up-to-date with the most current products, the top deals, and helpful information on services and products. This will ensure that you are handling a shop that stays on top of the competition and gives you what you should need to make educated, well-informed electronics purchases. Thanks for the crucial tips I have really learned from your blog.
Wow, great article post.Thanks Again. Great.
Thanks for your information on this blog. Just one thing I would want to say is purchasing electronics items from the Internet is not new. The truth is, in the past 10 years alone, the marketplace for online electronic products has grown significantly. Today, you’ll find practically almost any electronic system and gizmo on the Internet, including cameras and camcorders to computer components and game playing consoles.
Really appreciate you sharing this blog article. Want more.
Really appreciate you sharing this post.Really thank you! Keep writing.
fantastic points altogether, you simply gained a new reader. What would you recommend in regards to your post that you made some days ago? Any positive?
Vacavillenews.us covers local news in Vacaville, California. Keep up with all business, local sports, outdoors, local columnists and more. https://vacavillenews.us/
Trenton News – Trenton, NJ News, Sports, Weather and Things to Do https://trentonnews.us/
Im obliged for the blog.
Thanks for sharing, this is a fantastic article.Thanks Again. Much obliged.
Thanks
Medical More provides medical technology news and analysis for industry professionals. We cover medical devices, diagnostics, digital health, FDA regulation and compliance, imaging, and more. https://medicalmore.us
Your best source for free and live chat with adults in a sexually charged environment. Over the years and even more recently, sex chat usage has increased significantly. Users are in search of a platform that allows adults to gather together in one common setting. There, they can make new friends or satisfy their deepest sexual fantasies. Are you tired of the typical adult chat rooms you see on internet? Are you looking for something more unique with hundreds of people logged in at all times? Enjoy your free time here : https://bit.ly/Free-Adult-Webcams
Major thanks for the blog post. Awesome.
I cannot thank you enough for the article post.Thanks Again. Keep writing.
Enjoyed every bit of your blog.Much thanks again. Awesome.
Thanks for your write-up. One other thing is the fact individual American states have their particular laws in which affect people, which makes it quite hard for the our elected representatives to come up with a brand new set of guidelines concerning foreclosures on householders. The problem is that each state possesses own legal guidelines which may work in an adverse manner in regards to foreclosure insurance plans.
Thanks again for the article.Much thanks again. Cool.
This is amazing, love the content , Thank you!
online casino NZ
yes
ดูหนังใหม่ Netflix หลายคนอาจจะชอบดูหนังผ่านอินเตอร์เน็ตผ่าน Netflix เนื่องจากว่ามีให้เลือกดูหนังมากมาย ไม่ว่าจะเป็น หนังไทย หนังฝรั่ง หนังประเทศเกาหลี แถมระบบดูหนังชัดระดับ 4k แต่ว่าอาจจะหลบหลีกข้อผิดพลาดการดูหนังใน Netflix ที่สำคัญที่สุดไม่ได้นั้นเป็นจำต้องเสียเงินเสียทองรายเดือนซึ่งเวปของพวกเรานั้นได้นำหนังต่างๆใน Netflix ทุกเรื่องมาลงให้แด่ท่านได้เลือกดูหนังกันแบบฟรีๆไม่ต้องจ่ายเงิน แถมยังสามารถ ดาวน์โหลดหนัง Netflix ไปดูกันได้อีกด้วย การดูหนัง Netflix ผ่านเว็บดูหนังออนไลน์ของพวกเรานั้นท่านจะได้รับประสบการณ์ดูหนังอย่างยอดเยี่ยมที่สุด ชัดที่สุดเนื่องมาจากเซิฟเวอร์อัพหนังของพวกเรานั้นมีความเร็วและก็เสถียรสูงสุด ทำให้ไม่จำเป็นที่จะต้องมาวิตกกังวลหรือกลุ้มใจถึงจะมีผู้ชมล้นหลามดูพร้อม ก็ไม่ทำให้ กระตุกหรือภาพแตกแต่อย่างใด.
สล็อตเว็บไซต์ตรง ไม่ผ่านเอเย่นต์ แตกง่าย แตกจริง มาพร้อมระบบสอนเล่นอีกด้วย นักการพนันออนไลน์ท่านใดที่ได้เข้ามาใช้บริการ สำหรับเพื่อการเล่นเกมสล็อตที่ สล็อตเว็บตรงของพวกเรา บอกเลยว่านักพนันออนไลน์ทุกคน จะสามารถเข้าเล่นกันได้โดยสวัสดิภาพแน่นอน ซึ่งเว็บไซต์ ของพวกเราเป็นเว็บไซต์ สล็อต ออนไลน์เว็บตรงไม่ผ่านเอเย่น ซึ่งเป็นเว็บที่ไม่มีการผ่านคนกลางอะไรก็ตามทั้งมวล เนื่องจากแบบงี้เว็บของพวกเราก็เลยเป็นเว็บสล็อตออนไลน์ที่ปลอดภัย รวมทั้งได้รับความเชื่อถือจากนักพนันออนไลน์ ทั่วทุกมุมโลกกันมากมายเลยจริงๆนอกจากนี้แล้วเกม สล็อตออนไลน์ แต่ละเกมภายในเว็บของพวกเรา อยากให้อัตราการจ่ายเงินรางวัลที่สูงเป็นอันมาก แตกจริง แตกง่ายค้ำประกันได้เลยว่าแม้เข้าเล่นที่ สล็อตเว็บตรง แตกง่าย ของพวกเรา นักเสี่ยงโชคออนไลน์ทุกคนจะสามารถรับทรัพย์สินก้อนโตกันได้อย่างสะดวกสบายแน่นอน และเว็บไซต์ของเรายังมากับระบบสอนเล่นอีกด้วย ซึ่งมือใหม่ก็สามารถเข้ามาใช้บริการที่เว็บไซต์ของพวกเรากันได้อย่างแน่แท้.
Peninsula News is a daily news website, covering the northern Olympic Peninsula in the state of Washington, United States. https://peninsulanews.us
I value the blog.Thanks Again. Want more.
OCNews.us covers local news in Orange County, CA, California and national news, sports, things to do and the best places to eat, business and the Orange County housing market. https://ocnews.us
I have observed that car insurance corporations know the autos which are vulnerable to accidents as well as other risks. Additionally , they know what form of cars are inclined to higher risk and also the higher risk they have the higher the premium fee. Understanding the straightforward basics involving car insurance will assist you to choose the right type of insurance policy which will take care of your wants in case you become involved in an accident. Many thanks for sharing the particular ideas on your own blog.
zuzu
Im thankful for the blog article.Much thanks again. Keep writing.
Awesome blog.Really looking forward to read more. Great.
york
Im thankful for the article post.Really looking forward to read more. Cool.
Im grateful for the blog post.Thanks Again. Awesome.
Thanks for the blog.Much thanks again. Keep writing.
Wow, great article.Thanks Again. Fantastic.
zeo
Thanks-a-mundo for the blog.Really looking forward to read more. Really Cool.
same
Major thanks for the blog. Keep writing.
Excellent post. I was checking continuously this blog and I’m impressed! Extremely helpful info specially the last part 🙂 I care for such info much. I was looking for this particular info for a long time. Thank you and good luck.
The latest news and reviews in the world of tech, automotive, gaming, science, and entertainment. https://millionbyte.us/
I have observed that expenses for on-line degree pros tend to be an incredible value. Like a full Bachelor’s Degree in Communication in the University of Phoenix Online consists of Sixty credits from $515/credit or $30,900. Also American Intercontinental University Online provides a Bachelors of Business Administration with a total education course requirement of 180 units and a price of $30,560. Online learning has made having your certification been so cool because you can earn the degree through the comfort in your home and when you finish working. Thanks for all your other tips I have certainly learned through the website.
colibrim.com
colibrim.com
At this time it appears like Movable Type is the preferred blogging platform
out there right now. (from what I’ve read) Is that what you are using on your blog?
Good site! I truly love how it is simple on my eyes and the data are well written. I am wondering how I could be notified when a new post has been made. I have subscribed to your RSS feed which must do the trick! Have a nice day!
nice
yes of
excellent post, very informative. I wonder why the other specialists of this sector don’t notice this. You should continue your writing. I am sure, you’ve a great readers’ base already!
okmark your weblog and check again here frequently. I’m quite certain I will learn a lot of new stuff right here! Good luck for the next!
I discovered your blog web site on google and verify just a few of your early posts. Continue to keep up the very good operate. I simply additional up your RSS feed to my MSN News Reader. Searching for ahead to studying extra from you in a while!?
go back
Hi there! I know this is kinda off topic however , I’d figured I’d ask. Would you be interested in trading links or maybe guest writing a blog post or vice-versa? My blog discusses a lot of the same topics as yours and I think we could greatly benefit from each other. If you might be interested feel free to shoot me an e-mail. I look forward to hearing from you! Great blog by the way!
I really enjoy the article post.Really looking forward to read more. Much obliged.
aloo
Fantastic post.Thanks Again. Keep writing.
Hi! I could have sworn I’ve been to this site before but after reading through some of the post I realized it’s new to me. Anyways, I’m definitely delighted I found it and I’ll be book-marking and checking back frequently!
A round of applause for your blog post. Cool.
Thanks a lot for the article post.Really looking forward to read more.
Thank you for sharing these types of wonderful blogposts. In addition, the right travel along with medical insurance system can often eradicate those fears that come with traveling abroad. Some sort of medical emergency can before long become costly and that’s likely to quickly put a financial burden on the family’s finances. Setting up in place the perfect travel insurance program prior to setting off is worth the time and effort. Cheers
wow, awesome blog.Much thanks again. Want more.
LipoSlend is a liquid nutritional supplement that promotes healthy and steady weight loss. https://liposlendofficial.us/
zohan
okay
Thank you ever so for you article post.Much thanks again. Will read on…
Enjoyed every bit of your blog post.Much thanks again. Keep writing.
Good ? I should definitely pronounce, impressed with your site. I had no trouble navigating through all the tabs as well as related information ended up being truly easy to do to access. I recently found what I hoped for before you know it in the least. Quite unusual. Is likely to appreciate it for those who add forums or anything, web site theme . a tones way for your client to communicate. Nice task..
Appreciate you sharing, great article post.Really thank you! Awesome.
Thanks for your tips. One thing I’ve got noticed is that often banks and also financial institutions know the spending behavior of consumers while also understand that most people max outside their cards around the holidays. They wisely take advantage of this kind of fact and then start flooding your current inbox along with snail-mail box with hundreds of 0 APR credit cards offers immediately after the holiday season finishes. Knowing that when you are like 98 of American community, you’ll soar at the possible opportunity to consolidate consumer credit card debt and switch balances to 0 apr interest rates credit cards.
I really liked your article post.Really looking forward to read more. Will read on…
Great ? I should definitely pronounce, impressed with your site. I had no trouble navigating through all the tabs and related information ended up being truly easy to do to access. I recently found what I hoped for before you know it in the least. Reasonably unusual. Is likely to appreciate it for those who add forums or anything, web site theme . a tones way for your client to communicate. Excellent task..
Great, thanks for sharing this post. Will read on…
I have taken note that of all sorts of insurance, medical insurance is the most dubious because of the conflict between the insurance plan company’s duty to remain afloat and the customer’s need to have insurance policies. Insurance companies’ commission rates on wellbeing plans are extremely low, so some businesses struggle to profit. Thanks for the concepts you discuss through this web site.
Thanks a lot for the blog article.Really thank you! Cool.
hey there, your site is cheap. We do thank you for workTauranga fences
I have noticed that over the course of creating a relationship with real estate entrepreneurs, you’ll be able to come to understand that, in each and every real estate contract, a payment is paid. Eventually, FSBO sellers tend not to “save” the commission rate. Rather, they fight to win the commission simply by doing a good agent’s work. In doing so, they spend their money along with time to accomplish, as best they’re able to, the jobs of an adviser. Those responsibilities include displaying the home by marketing, introducing the home to buyers, constructing a sense of buyer desperation in order to induce an offer, making arrangement for home inspections, managing qualification inspections with the lender, supervising maintenance, and aiding the closing of the deal.
A big thank you for your article. Awesome.
Thanks a lot for the article.Thanks Again. Great.
Spot on with this write-up, I truly think this website wants way more consideration. I?ll in all probability be once more to read far more, thanks for that info.
Looking forward to reading more. Great article post.Much thanks again. Will read on…
I really liked your article. Really Great.
I am so grateful for your blog article.Much thanks again. Much obliged.
hi!,I like your writing so much! share we communicate more about your article on AOL? I require a specialist on this area to solve my problem. Maybe that’s you! Looking forward to see you.
Excellent post. I was checking constantly this blog and I’m impressed! Very helpful info specifically the last section 🙂 I handle such information a lot. I was looking for this certain info for a very lengthy time. Thank you and good luck.
I think one of your ads triggered my browser to resize, you might want to put that on your blacklist.
Awesome blog article. Really Great.
Major thankies for the blog.Really thank you! Want more.
I?ll right away take hold of your rss as I can’t find your e-mail subscription link or newsletter service. Do you’ve any? Please permit me understand so that I may subscribe. Thanks.
okmark your weblog and check again here regularly. I am quite certain I?ll learn many new stuff right here! Good luck for the next!
I have observed that car insurance businesses know the automobiles which are prone to accidents as well as other risks. Additionally they know what style of cars are inclined to higher risk and the higher risk they have got the higher the particular premium charge. Understanding the uncomplicated basics associated with car insurance just might help you choose the right form of insurance policy that can take care of your family needs in case you happen to be involved in an accident. Thank you for sharing the ideas on your own blog.
Thanks for your publish. My partner and i have usually noticed that almost all people are desirous to lose weight when they wish to show up slim as well as attractive. On the other hand, they do not usually realize that there are other benefits to losing weight also. Doctors claim that overweight people have problems with a variety of diseases that can be instantly attributed to their particular excess weight. The good news is that people who definitely are overweight plus suffering from various diseases can help to eliminate the severity of their illnesses by losing weight. It is possible to see a steady but identifiable improvement in health while even a negligible amount of weight-loss is realized.
My programmer is trying to convince me to move to .net from PHP. I have always disliked the idea because of the costs. But he’s tryiong none the less. I’ve been using Movable-type on a number of websites for about a year and am anxious about switching to another platform. I have heard very good things about blogengine.net. Is there a way I can transfer all my wordpress posts into it? Any help would be really appreciated!
Tonic Greens is an all-in-one dietary supplement that has been meticulously designed to improve overall health and mental wellness.
Out of my notice, shopping for electronic devices online may be easily expensive, but there are some tips that you can use to help you get the best deals. There are often ways to obtain discount promotions that could help to make one to come across the best technology products at the cheapest prices. Interesting blog post.
Kuru Öksürüğe Ne İyi Gelir?
Attractive component of content. I simply stumbled upon your site and in accession capital to assert that I acquire actually loved account your blog posts. Any way I?ll be subscribing to your feeds and even I achievement you get admission to constantly rapidly.
Pineal XT is a revolutionary supplement that promotes proper pineal gland function and energy levels to support healthy body function.
Thanks so much for the blog.Really thank you! Fantastic.
I do not even know how I ended up here, but I thought this post was great. I do not know who you are but definitely you are going to a famous blogger if you aren’t already 😉 Cheers!
Superb post however , I was wondering if you could write a litte more on this topic? I’d be very grateful if you could elaborate a little bit more. Bless you!
Very good article post.Really thank you! Want more.
Really informative blog article.Much thanks again. Fantastic.
Really appreciate you sharing this post. Awesome.
Great, thanks for sharing this post.Really looking forward to read more. Will read on…
Excellent post. I was checking constantly this weblog and I’m inspired! Very useful information particularly the remaining section 🙂 I handle such info a lot. I was looking for this particular info for a very long time. Thanks and best of luck.
Say, you got a nice blog article.Really thank you! Will read on…
Attractive portion of content. I simply stumbled upon your website and in accession capital to assert that I acquire in fact loved account your weblog posts. Anyway I?ll be subscribing in your feeds or even I achievement you get right of entry to constantly rapidly.
Fantastic article. Much obliged.
I appreciate, cause I found just what I was looking for. You have ended my 4 day long hunt! God Bless you man. Have a nice day. Bye
Great blog article.Much thanks again. Keep writing.
Enjoyed every bit of your blog article. Keep writing.
Great, thanks for sharing this post.Much thanks again. Fantastic.
Hurrah, that’s what I was seeking for, what a data!
existing here at this website, thanks admin of this web site.
Im grateful for the blog post.Really looking forward to read more. Much obliged.
Thank you ever so for you blog.Really thank you! Fantastic.
Appreciate you sharing, great blog post.Really looking forward to read more. Fantastic.
I like this blog so much, saved to my bookmarks .Fence contractor Wellington
Im obliged for the post.Much thanks again. Will read on…
Usually I do not read post on blogs, but I would like to say that this write-up very compelled me to try and do so! Your writing style has been amazed me. Thank you, quite nice article.
Muchos Gracias for your blog.Much thanks again. Want more.
Really enjoyed this article post.Much thanks again. Much obliged.
Im grateful for the article.Really looking forward to read more. Really Cool.
Sumatra Slim Belly Tonic is an advanced weight loss supplement that addresses the underlying cause of unexplained weight gain. It focuses on the effects of blue light exposure and disruptions in non-rapid eye movement (NREM) sleep.
The ProNail Complex is a meticulously-crafted natural formula which combines extremely potent oils and skin-supporting vitamins.
Zeneara is marketed as an expert-formulated health supplement that can improve hearing and alleviate tinnitus, among other hearing issues. The ear support formulation has four active ingredients to fight common hearing issues. It may also protect consumers against age-related hearing problems.
Very neat post.Much thanks again. Keep writing.
My brother recommended I may like this blog. He was once totally right. This post truly made my day. You can not believe simply how much time I had spent for this info! Thank you!
Very neat blog post. Great.
Great goods from you, man. I have understand your stuff previous to and you’re just too wonderful. I really like what you’ve acquired here, really like what you’re stating and the way in which you say it. You make it entertaining and you still take care of to keep it sensible. I can’t wait to read far more from you. This is actually a terrific website.
hurt
Hello there! I know this is somewhat off topic but I was wondering if you knew where I could find a captcha plugin for my comment form? I’m using the same blog platform as yours and I’m having trouble finding one? Thanks a lot!
I really enjoy the blog post.Really looking forward to read more. Much obliged.
Great blog post.Thanks Again. Really Great.
Thanks a lot for the post.Really looking forward to read more. Much obliged.
I value the article.Much thanks again. Really Great.
Enjoyed every bit of your blog article.
Thank you so much for sharing this wonderful post with us.
It is in reality a great and helpful piece of info. I am satisfied that you just shared this useful information with us. Please keep us informed like this. Thank you for sharing.
Thanks for sharing
Im grateful for the blog. Really Great.
Wow, great blog.Really thank you! Want more.
Thank you for your blog article.Really looking forward to read more. Really Cool.
What an eye-opening and thoroughly-researched article! The author’s meticulousness and aptitude to present complicated ideas in a understandable manner is truly praiseworthy. I’m thoroughly captivated by the depth of knowledge showcased in this piece. Thank you, author, for offering your expertise with us. This article has been a game-changer!
The information shared is of top quality which has to get appreciated at all levels. Well done…
I value the blog post.
I just added this website to my google reader, excellent stuff. Can not get enough!
I have viewed that smart real estate agents all over the place are Marketing and advertising. They are knowing that it’s more than merely placing a poster in the front yard. It’s really in relation to building relationships with these dealers who at some time will become customers. So, if you give your time and energy to encouraging these suppliers go it alone : the “Law regarding Reciprocity” kicks in. Interesting blog post.
I love what you guys are up too. This type of clever work and exposure! Keep up the wonderful works guys I’ve incorporated you guys to my own blogroll.
Very nice post. I just stumbled upon your weblog and wanted to say that I have really enjoyed browsing your blog posts. In any case I?ll be subscribing to your feed and I hope you write again soon!
I am lucky that I found this web blog, precisely the right information that I was searching for!DIY dog fence
I?d must check with you here. Which isn’t something I normally do! I get pleasure from studying a post that may make folks think. Also, thanks for permitting me to remark!
I have seen that now, more and more people are attracted to cams and the issue of pictures. However, being photographer, you must first expend so much time period deciding the exact model of camera to buy plus moving from store to store just so you may buy the most affordable camera of the brand you have decided to select. But it isn’t going to end right now there. You also have take into consideration whether you can purchase a digital video camera extended warranty. Thanks a bunch for the good points I accumulated from your weblog.
One more issue is really that video gaming became one of the all-time greatest forms of recreation for people spanning various ages. Kids play video games, plus adults do, too. The XBox 360 is probably the favorite video games systems for folks who love to have a lot of games available to them, and who like to relax and play live with other individuals all over the world. Many thanks for sharing your ideas.
Thank you ever so for you post. Great.
Thanks for sharing, this is a fantastic blog. Will read on…
Muchos Gracias for your blog.Really thank you! Really Great.
Thanks a lot for the post.Much thanks again. Will read on…
One other thing to point out is that an online business administration training course is designed for college students to be able to well proceed to bachelors degree courses. The 90 credit certification meets the lower bachelor education requirements then when you earn your current associate of arts in BA online, you will have access to the latest technologies with this field. Several reasons why students would like to get their associate degree in business is because they are interested in this area and want to obtain the general education necessary in advance of jumping right into a bachelor diploma program. Many thanks for the tips you actually provide in the blog.
Really informative article post.Thanks Again. Much obliged.
Thanks for the sensible critique. Me and my neighbor were just preparing to do some research about this. We got a grab a book from our area library but I think I learned more from this post. I’m very glad to see such magnificent info being shared freely out there.
Wow, great article post.Thanks Again. Will read on…
I value the article.Really looking forward to read more. Much obliged.
Thank you for your article.Really looking forward to read more. Keep writing.
Wow, great blog post.Thanks Again. Keep writing.
Im thankful for the article.Thanks Again. Keep writing.
I am so grateful for your article post.Thanks Again. Will read on…
Thanks a bunch for sharing this with all of us you actually know what you’re talking about! Bookmarked. Kindly also visit my site =). We could have a link exchange agreement between us!
wonderful post, very informative. I wonder why the other specialists of this sector do not notice this. You should continue your writing. I am confident, you’ve a great readers’ base already!
It’s a shame you don’t have a donate button! I’d most certainly donate to this superb blog! I suppose for now i’ll settle for bookmarking and adding your RSS feed to my Google account. I look forward to brand new updates and will share this site with my Facebook group. Talk soon!
One thing I’d like to touch upon is that weightloss routine fast can be achieved by the suitable diet and exercise. Someone’s size not just affects appearance, but also the general quality of life. Self-esteem, major depression, health risks, and physical abilities are influenced in weight gain. It is possible to make everything right and still gain. In such a circumstance, a medical problem may be the root cause. While an excessive amount of food and never enough work out are usually accountable, common health conditions and traditionally used prescriptions can certainly greatly add to size. Thanks alot : ) for your post here.
Wow, great article post.Thanks Again. Cool.
I’m usually to blogging and i actually admire your content. The article has actually peaks my interest. I am going to bookmark your website and preserve checking for new information.
Thanks
Hey There. I found your blog using msn. This is a very well written article. I?ll make sure to bookmark it and return to read more of your useful information. Thanks for the post. I will definitely return.
Fantastic article.Much thanks again. Great.
I cannot thank you enough for the blog post.Much thanks again. Much obliged.
Hmm is anyone else having problems with the pictures on this blog loading? I’m trying to find out if its a problem on my end or if it’s the blog. Any responses would be greatly appreciated.
I am so grateful for your blog post.Much thanks again. Awesome.
A big thank you for your article post. Want more.
I truly appreciate this article post.Really looking forward to read more. Much obliged.
I appreciate you sharing this article.Really looking forward to read more.
Im obliged for the article.Much thanks again. Will read on…
Appreciating the time and effort you put into your site and in depth information you offer. It’s awesome to come across a blog every once in a while that isn’t the same out of date rehashed material. Wonderful read! I’ve saved your site and I’m adding your RSS feeds to my Google account.
Wonderful site you have here but I was curious about if you knew of any discussion boards that cover the same topics discussed in this article? I’d really love to be a part of online community where I can get opinions from other knowledgeable individuals that share the same interest. If you have any suggestions, please let me know. Cheers!
Great work! This is the type of information that should be shared around the internet. Shame on the search engines for not positioning this post higher! Come on over and visit my website . Thanks =)
Good day very nice blog!! Man .. Beautiful .. Superb .. I’ll bookmark your web site and take the feeds also?I am satisfied to find numerous helpful information right here in the post, we want develop extra strategies in this regard, thanks for sharing. . . . . .
This is one awesome article post.Really thank you! Will read on…
I really enjoy the blog.Really looking forward to read more. Great.
I am so grateful for your blog article.Much thanks again. Cool.
I was just looking for this info for some time. After six hours of continuous Googleing, at last I got it in your website. I wonder what is the lack of Google strategy that do not rank this kind of informative websites in top of the list. Generally the top websites are full of garbage.
hi!,I really like your writing very much! percentage we keep in touch more approximately your article on AOL? I need a specialist on this space to solve my problem. May be that’s you! Looking forward to see you.
Very good blog post.Really looking forward to read more. Great.
Very good article post.Much thanks again. Cool.
Thanks for the sensible critique. Me and my neighbor were just preparing to do a little research on this. We got a grab a book from our local library but I think I learned more from this post. I’m very glad to see such magnificent information being shared freely out there.
Fantastic post.Really looking forward to read more. Much obliged.
Thanks for the blog.Really thank you!
Thank you for the good writeup. It in fact was a amusement account it. Look advanced to far added agreeable from you! However, how could we communicate?
Nice read, I just passed this onto a colleague who was doing some research on that. And he actually bought me lunch since I found it for him smile So let me rephrase that: Thanks for lunch!
Appreciate you sharing, great blog article.Much thanks again. Really Great.
Very good article.Really thank you!
Hey, thanks for the blog.Really thank you! Really Cool.
wonderful post, very informative. I wonder why the other experts of this sector don’t notice this. You should continue your writing. I’m confident, you have a huge readers’ base already!
Fantastic blog post.Really looking forward to read more. Keep writing.
We are offering Concrete Parking Lot Contractor, Concrete Installation Contractor Service, warehouse flooring, commercial, and industrial concrete roadways.
I appreciate you sharing this blog post. Really Great.
Wow, superb weblog structure! How long have you ever been blogging for? you made blogging glance easy. The entire look of your website is great, as smartly as the content material!
I really liked your blog post.Really thank you! Cool.
I like the valuable information you provide in your articles. I will bookmark your blog and check again here regularly. I’m quite certain I will learn plenty of new stuff right here! Good luck for the next!
I really like and appreciate your blog post.Really looking forward to read more. Great.
Thanks for revealing your ideas listed here. The other matter is that when a problem arises with a laptop motherboard, people should not go ahead and take risk with repairing it themselves for if it is not done correctly it can lead to permanent damage to the full laptop. In most cases, it is safe to approach the dealer of any laptop with the repair of the motherboard. They have got technicians who may have an competence in dealing with laptop computer motherboard complications and can get the right diagnosis and conduct repairs.
We’re a group of volunteers and opening a new scheme in our community. Your site provided us with valuable info to work on. You’ve done a formidable job and our entire community will be grateful to you.
Major thankies for the blog post.Much thanks again.
Thanks a lot for the article. Much obliged.
I just like the helpful information you supply for your articles. I?ll bookmark your weblog and check again here frequently. I’m reasonably sure I?ll be informed lots of new stuff right right here! Best of luck for the next!
I’ve come across that these days, more and more people are increasingly being attracted to digital cameras and the issue of photography. However, being a photographer, you should first invest so much of your time deciding the exact model of photographic camera to buy as well as moving store to store just so you could possibly buy the most inexpensive camera of the brand you have decided to choose. But it would not end just there. You also have to take into account whether you should buy a digital dslr camera extended warranty. Thanks a lot for the good guidelines I gained from your weblog.
Appreciate you sharing, great post.Really thank you! Will read on…
Thank you very much
Thanks-a-mundo for the article.Really thank you! Fantastic.
I cannot thank you enough for the blog article.Much thanks again. Much obliged.
Hello this is somewhat of off topic but I was wondering if blogs use WYSIWYG editors or if you have to manually code with HTML. I’m starting a blog soon but have no coding know-how so I wanted to get guidance from someone with experience. Any help would be enormously appreciated!
This is one awesome article.Thanks Again. Want more.
I am so grateful for your blog article.Really thank you! Really Cool.
Major thankies for the article post. Will read on…
Very informative article.Thanks Again. Will read on…
I’m extremely impressed with your writing skills and also with the layout on your weblog. Is this a paid theme or did you customize it yourself? Anyway keep up the excellent quality writing, it is rare to see a great blog like this one these days..
It is appropriate time to make some plans for the future and it is time to be happy. I’ve read this post and if I could I desire to suggest you few interesting things or advice. Maybe you could write next articles referring to this article. I desire to read even more things about it!
It’s a shame you don’t have a donate button! I’d definitely donate to this excellent blog! I suppose for now i’ll settle for book-marking and adding your RSS feed to my Google account. I look forward to fresh updates and will share this blog with my Facebook group. Chat soon!
Very informative article.Much thanks again. Really Cool.
Everyone loves what you guys tend to be up too. Such clever work and coverage! Keep up the good works guys I’ve incorporated you guys to blogroll.
Hello there! Quick question that’s totally off topic. Do you know how to make your site mobile friendly? My web site looks weird when browsing from my iphone 4. I’m trying to find a theme or plugin that might be able to correct this issue. If you have any suggestions, please share. Thank you!
Really appreciate you sharing this article post.Thanks Again. Will read on…
This really answered my drawback, thanks!
Appreciate you sharing, great blog post.Much thanks again. Will read on…
Hello would you mind sharing which blog platform you’re using? I’m going to start my own blog soon but I’m having a difficult time selecting between BlogEngine/Wordpress/B2evolution and Drupal. The reason I ask is because your layout seems different then most blogs and I’m looking for something unique. P.S My apologies for being off-topic but I had to ask!
hey there and thank you to your info ? I?ve certainly picked up anything new from right here. I did however experience several technical points the use of this website, since I skilled to reload the website many instances prior to I may just get it to load properly. I have been brooding about in case your hosting is OK? Now not that I am complaining, but slow loading circumstances times will often have an effect on your placement in google and can injury your high-quality score if advertising and ***********|advertising|advertising|advertising and *********** with Adwords. Anyway I?m adding this RSS to my e-mail and can glance out for much extra of your respective interesting content. Ensure that you update this again very soon..
Im obliged for the article.Really looking forward to read more. Want more.
I really liked your post. Want more.
I really liked your blog post.Thanks Again. Really Cool.
Hello there, just became alert to your blog through Google, and found that it’s truly informative. I?m gonna watch out for brussels. I?ll be grateful if you continue this in future. Many people will be benefited from your writing. Cheers!
I am so grateful for your blog post.Thanks Again. Cool.
I have seen that service fees for internet degree authorities tend to be an excellent value. For example a full 4-year college Degree in Communication from The University of Phoenix Online consists of 60 credits at $515/credit or $30,900. Also American Intercontinental University Online offers a Bachelors of Business Administration with a whole school feature of 180 units and a cost of $30,560. Online degree learning has made getting your education far less difficult because you can easily earn your degree in the comfort of your home and when you finish from work. Thanks for all the other tips I have really learned through your web site.
Thanks-a-mundo for the article.Much thanks again. Much obliged.
Wow, awesome blog layout! How long have you been blogging for? you make blogging look easy. The overall look of your website is great, as well as the content!
Heya i am for the first time here. I came across this board and I in finding It really helpful & it helped me out much. I’m hoping to offer one thing again and help others such as you aided me.
A round of applause for your article post.Really thank you! Will read on…
Thank you for your blog post.Really looking forward to read more. Great.
Thanks for your submission. I would also like to opinion that the very first thing you will need to carry out is find out if you really need credit score improvement. To do that you need to get your hands on a duplicate of your credit profile. That should really not be difficult, because government mandates that you are allowed to acquire one free of charge copy of your real credit report yearly. You just have to inquire the right individuals. You can either look into the website for that Federal Trade Commission or even contact one of the leading credit agencies immediately.
Very neat post. Much obliged.
Im grateful for the article post.Really thank you! Great.
I have noticed that of all sorts of insurance, medical health insurance is the most debatable because of the turmoil between the insurance coverage company’s need to remain adrift and the consumer’s need to have insurance policy. Insurance companies’ commission rates on wellness plans are incredibly low, therefore some firms struggle to profit. Thanks for the suggestions you discuss through this site.
itsmasum.com
[…]Here are a few of the internet sites we advise for our visitors[…]
Thank you ever so for you article post.Thanks Again. Really Great.
Another issue is that video games are usually serious anyway with the principal focus on studying rather than entertainment. Although, there’s an entertainment part to keep children engaged, each and every game will likely be designed to work with a specific experience or program, such as math concepts or scientific disciplines. Thanks for your posting.
Really enjoyed this post.Thanks Again. Fantastic.
Thanks a lot for the blog post.Much thanks again. Really Cool.
You made some first rate factors there. I seemed on the internet for the difficulty and found most people will go together with with your website.
I like the valuable info you provide in your articles. I?ll bookmark your weblog and check again here regularly. I am quite certain I will learn lots of new stuff right here! Best of luck for the next!
Enjoyed every bit of your blog post.Much thanks again. Fantastic.
A big thank you for your blog article.Thanks Again. Want more.
Im thankful for the blog.Really thank you! Much obliged.
Really enjoyed this blog.Really looking forward to read more. Will read on…
The following time I read a weblog, I hope that it doesnt disappoint me as much as this one. I imply, I know it was my option to learn, however I actually thought youd have one thing attention-grabbing to say. All I hear is a bunch of whining about one thing that you would repair when you werent too busy on the lookout for attention.
Yet another issue is really that video gaming has become one of the all-time main forms of recreation for people of all ages. Kids have fun with video games, and also adults do, too. The particular XBox 360 is among the favorite gaming systems for those who love to have a lot of video games available to them, in addition to who like to learn live with other people all over the world. Thanks for sharing your opinions.
Great, thanks for sharing this post.Really thank you!
A big thank you for your blog post.Much thanks again. Cool.
Can I simply say what a reduction to search out someone who really is aware of what theyre talking about on the internet. You definitely know easy methods to deliver a problem to gentle and make it important. Extra individuals have to read this and understand this side of the story. I cant imagine youre no more standard because you positively have the gift.
Im thankful for the blog.Much thanks again. Really Great.
This actually answered my problem, thanks!
Wow, great blog post. Awesome.
I truly appreciate this article post. Really Great.
One thing is that when you’re searching for a education loan you may find that you’ll need a co-signer. There are many situations where this is correct because you could find that you do not possess a past credit standing so the loan company will require that you have someone cosign the money for you. Interesting post.
Outstanding quest there. What happened after?
Good luck!
Its like you learn my thoughts! You seem to grasp so much approximately this, like you wrote the e-book in it or something. I believe that you simply can do with a few percent to force the message home a little bit, however instead of that, that is great blog. A fantastic read. I’ll certainly be back.
Great, thanks for sharing this article post.Really looking forward to read more. Fantastic.
Thank you for this article. I would also like to convey that it can end up being hard if you are in school and starting out to create a long credit ranking. There are many college students who are just trying to live and have long or positive credit history can often be a difficult issue to have.
Thanks again for the article post.Really thank you! Much obliged.
Im thankful for the post.Much thanks again. Keep writing.
Hi, i read your blog occasionally and i own a similar one and i was just curious if you get a lot of spam responses? If so how do you protect against it, any plugin or anything you can suggest? I get so much lately it’s driving me crazy so any assistance is very much appreciated.
Say, you got a nice article post.Really thank you! Really Cool.
Thanks for the concepts you have shared here. Furthermore, I believe there are numerous factors that really keep your motor insurance premium lower. One is, to take into account buying autos that are from the good set of car insurance organizations. Cars that happen to be expensive are definitely more at risk of being lost. Aside from that insurance is also based on the value of your truck, so the higher in price it is, then higher your premium you spend.
Unquestionably consider that that you said. Your favourite reason seemed to be at the web the simplest thing to be aware of. I say to you, I certainly get annoyed at the same time as other folks think about worries that they plainly don’t recognise about. You controlled to hit the nail upon the highest and also defined out the entire thing with no need side effect , other folks can take a signal. Will likely be again to get more. Thank you
Thanks for the post. Will read on…
Thanks, I’ve recently been seeking for information about this topic for ages and yours is the best I’ve found so far.
Im grateful for the article.Thanks Again. Will read on…
What?s Happening i’m new to this, I stumbled upon this I have found It positively helpful and it has helped me out loads. I hope to contribute & assist other users like its aided me. Great job.
Great blog post.Much thanks again. Really Great.
Thanks-a-mundo for the article post.Thanks Again. Want more.
I have discovered some new things from your web site about pcs. Another thing I’ve always believed is that laptop computers have become a product that each home must have for several reasons. They offer convenient ways to organize households, pay bills, shop, study, pay attention to music and also watch tv series. An innovative approach to complete all of these tasks is a laptop. These personal computers are mobile, small, effective and portable.
I am really impressed with your writing skills and also with the layout on your blog. Is this a paid theme or did you customize it yourself? Either way keep up the nice quality writing, it is rare to see a nice blog like this one today..
Hi, Neat post. There’s a problem with your web site in internet explorer, would check this? IE still is the market leader and a huge portion of people will miss your fantastic writing due to this problem.
Its such as you read my thoughts! You appear to grasp so much about this, like you wrote the ebook in it or something. I believe that you simply can do with a few percent to drive the message home a bit, however other than that, this is fantastic blog. An excellent read. I’ll certainly be back.
It’s perfect time to make some plans for the future and it’s time to be happy. I have read this post and if I could I want to suggest you few interesting things or suggestions. Perhaps you can write next articles referring to this article. I want to read even more things about it!
Very informative post.
Im obliged for the blog. Want more.
shop on https://braceletwithpictureinside.store/
I can’t believe how amazing this article is! The author has done a phenomenal job of presenting the information in an compelling and informative manner. I can’t thank him enough for sharing such priceless insights that have certainly enhanced my awareness in this subject area. Hats off to her for producing such a masterpiece!
A big thank you for your post.Really looking forward to read more. Want more.
It is appropriate time to make a few plans for the long run and it’s time to be happy. I have read this put up and if I may just I want to counsel you some fascinating things or tips. Perhaps you could write subsequent articles regarding this article. I desire to learn even more issues approximately it!